Setting up Launch with Gatsby
Gatsby is an open-source React-based framework that provides a hybrid static/server-side rendered model. Using Gatsby data fetching, you can render your content differently based on your application's use case and build APIs using Gatsby Functions.
Launch supports the following features of Gatsby out of the box:
The fastest way to get started with Launch is to clone and deploy a sample Gatsby Starter project. Launch allows you to create a project by importing the website code from GitHub.
Prerequisites
Access to Launch for your organization (Note: Only the Organization Admin/Owner has permissions to create Launch projects)
Steps for Execution
Follow the steps given below to deploy your first Launch project using GitHub:
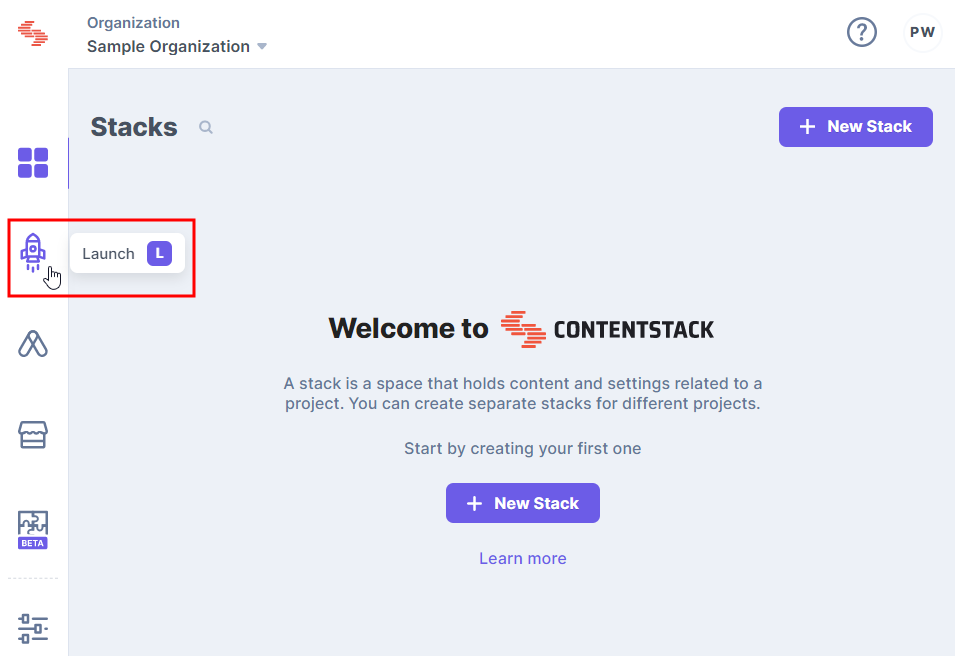
Log into Contentstack and click the Launch icon from the left navigation panel, as shown below:
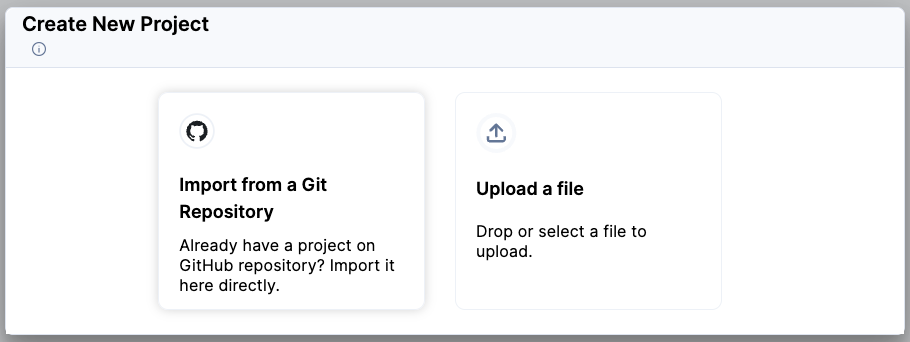
- Click the + New Project button:

In the Create New Project modal, click Import from a Git Repository. (Note: You can also choose to upload a .zip file to create your project.)
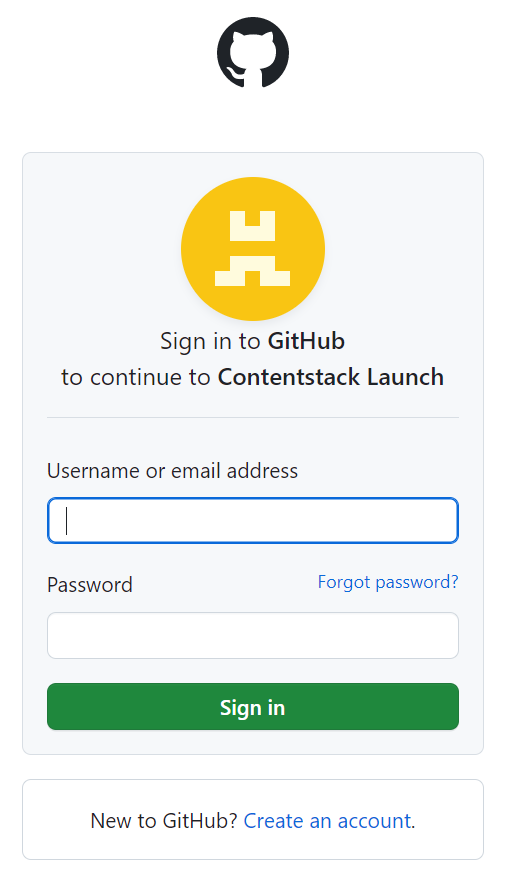
- Click GitHub:
 This will open a modal window to authenticate with your GitHub account.
 - Enter your credentials and log in:
- In the Repository Access section, select All repositories.
Note: If you want to choose specific repositories, pick the Only select repositories option and choose the required repository.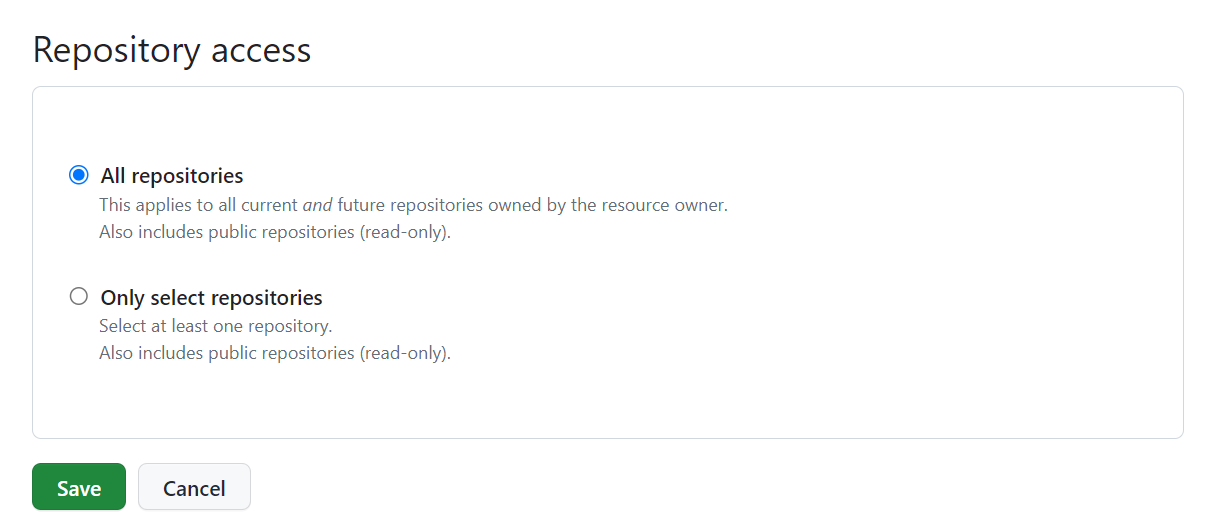
- Click the Save button
Note: If you are accessing GitHub through Contentstack for the first time, you must authorize Contentstack by clicking the “Install & Authorize” button after selecting All repositories.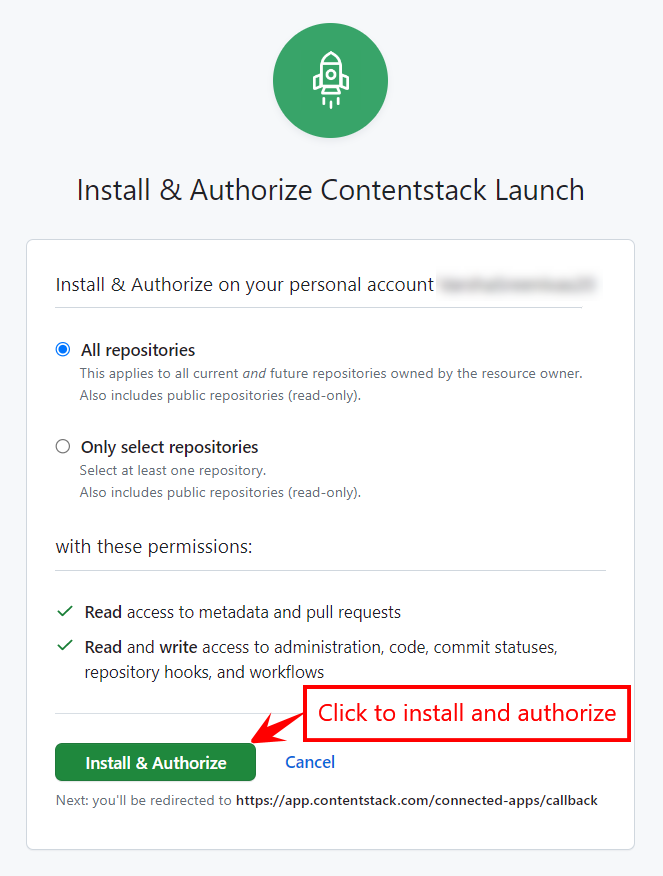
Once you’ve connected your GitHub account, you’ll be redirected back to Launch. In the Create New Project modal, add the following details:
Repository (Mandatory): Select your Git repository. Git Branch (Mandatory): By default, master or main is selected as the branch. You can choose another branch from the dropdown.
Project Name (Mandatory): This is auto-populated when you select the repository, but you can edit it as needed.
Environment Name (Mandatory): The environment name is automatically populated as Default, but can be changed. Note that this is specific to Launch and not directly related to any environments in your stack.
Build and Output Settings (Mandatory): The fields in this section get auto-populated based on the detected framework. (If no framework is detected, you can specify your own Build Command and Output Directory.)
Environment Variables (Optional): Enter the key and value of one or more environment variables. You can also use the “Connect and Import Variables” option to automatically import API-related variables from a specific stack and delivery token.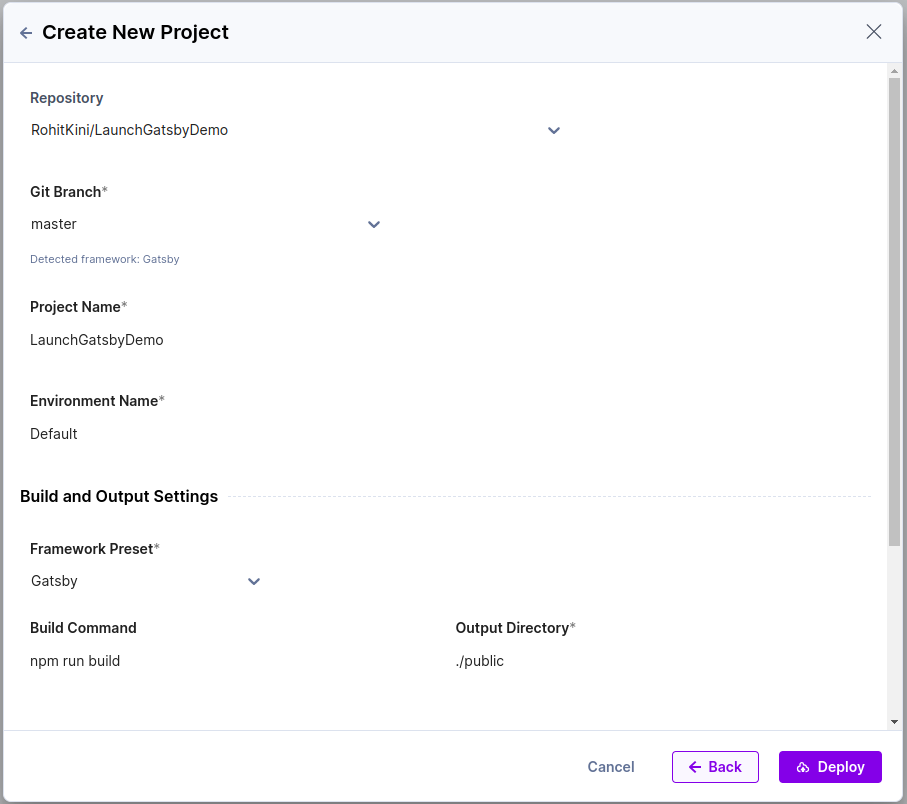
Note: Click Back to revert the changes and re-enter details.Once ready, click Deploy to save and deploy the project.
You’ll see the project’s status update in real time, from Queued to Deploying to Deployed. Note: depending on the size and complexity of your specific application, it may take several minutes to build and deploy your site.
Upon successful deployment, you will see the following screen: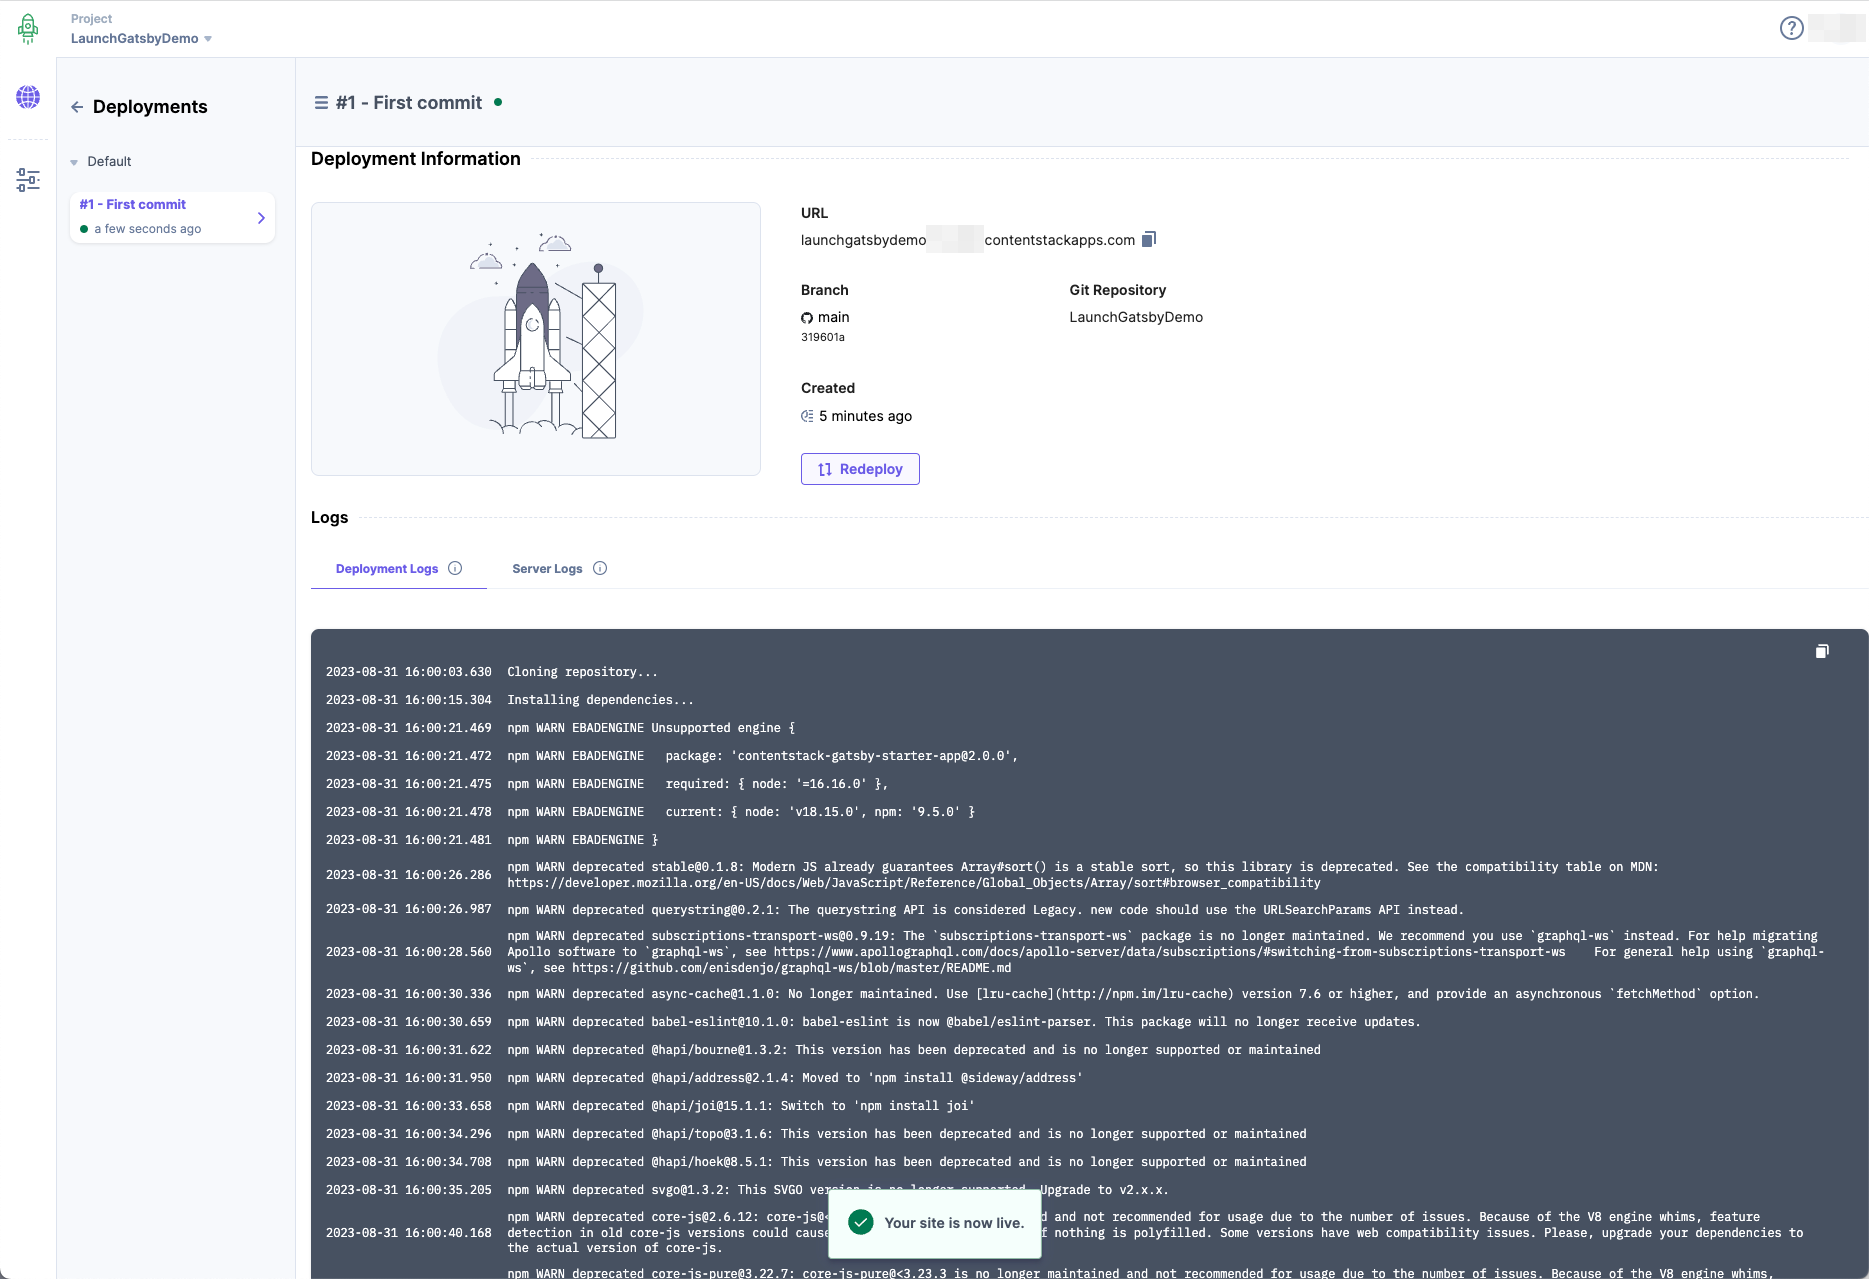
You can preview the deployed website by copying the URL from the URL section under Deployment Information and opening it in a browser.
If you want to deploy the changes from any other commits, you can click the Redeploy button and choose the required commit.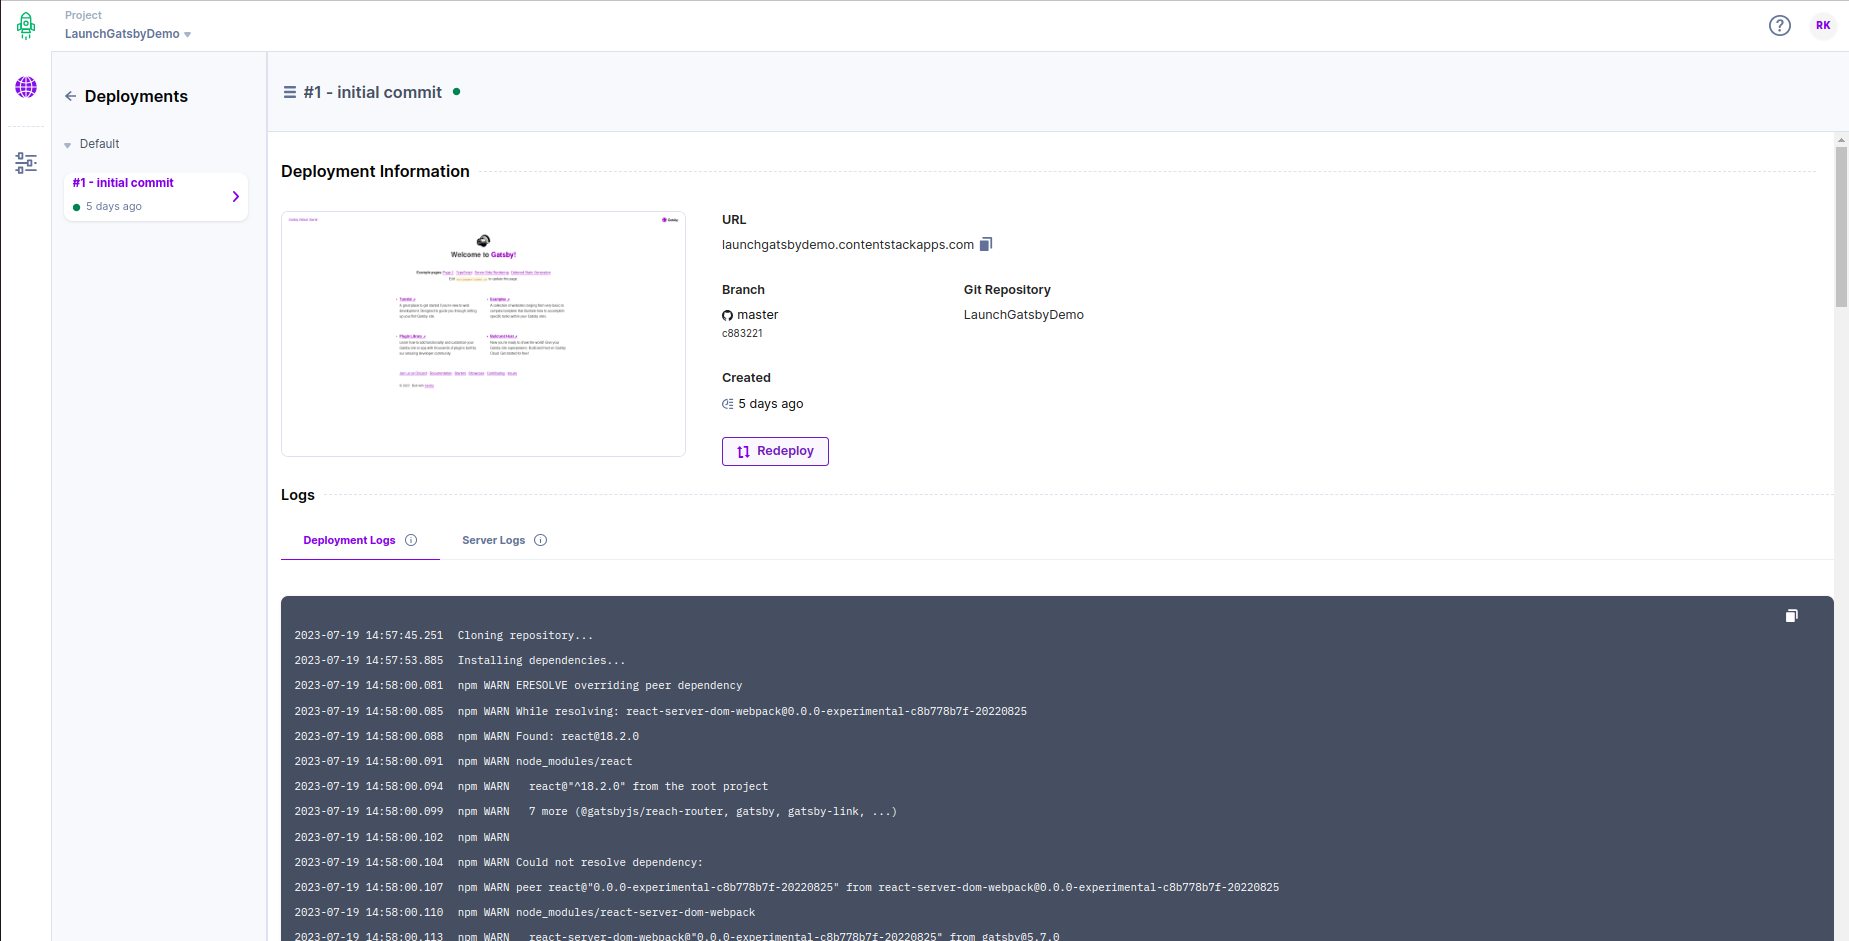
Note: The log details of the current deployment can be found under the Logs section.