Launch Deployments
Deployments
During the deployment phase, your project is built and, if successful, made available through a unique URL.
A deployment is an environment in action. There can be multiple deployments in a single environment, out of which the active deployment uses the latest environment configuration to build the website.
This module provides comprehensive information on your Deployments screen, including:
- Deployment details
- Deployment statuses
- Logs
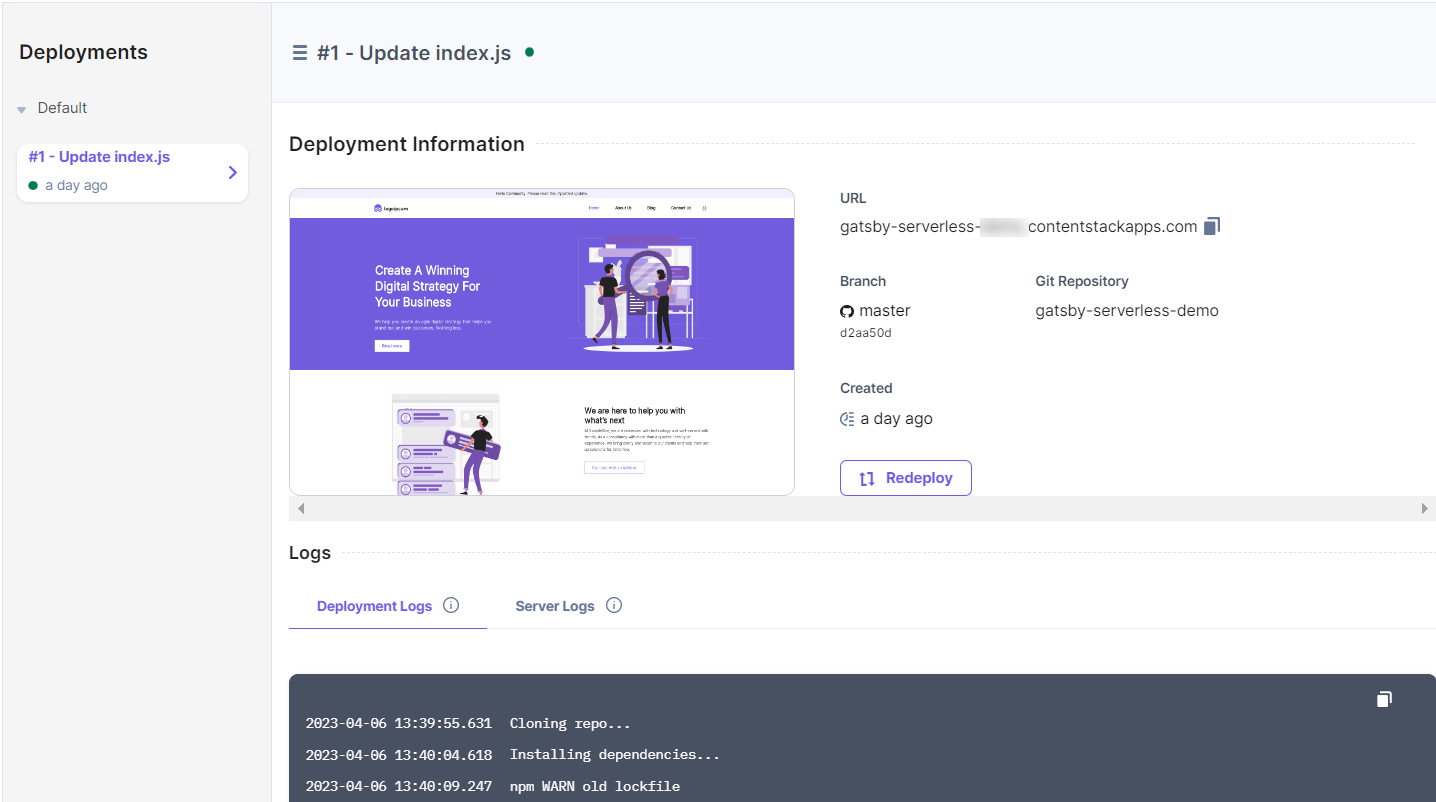
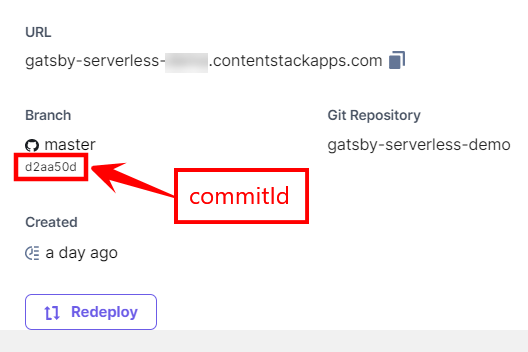
When you import a project from a Git repository, your Deployment Information panel will look like this:
When you import a project by uploading a .zip file, your Deployment Information panel will look like this:
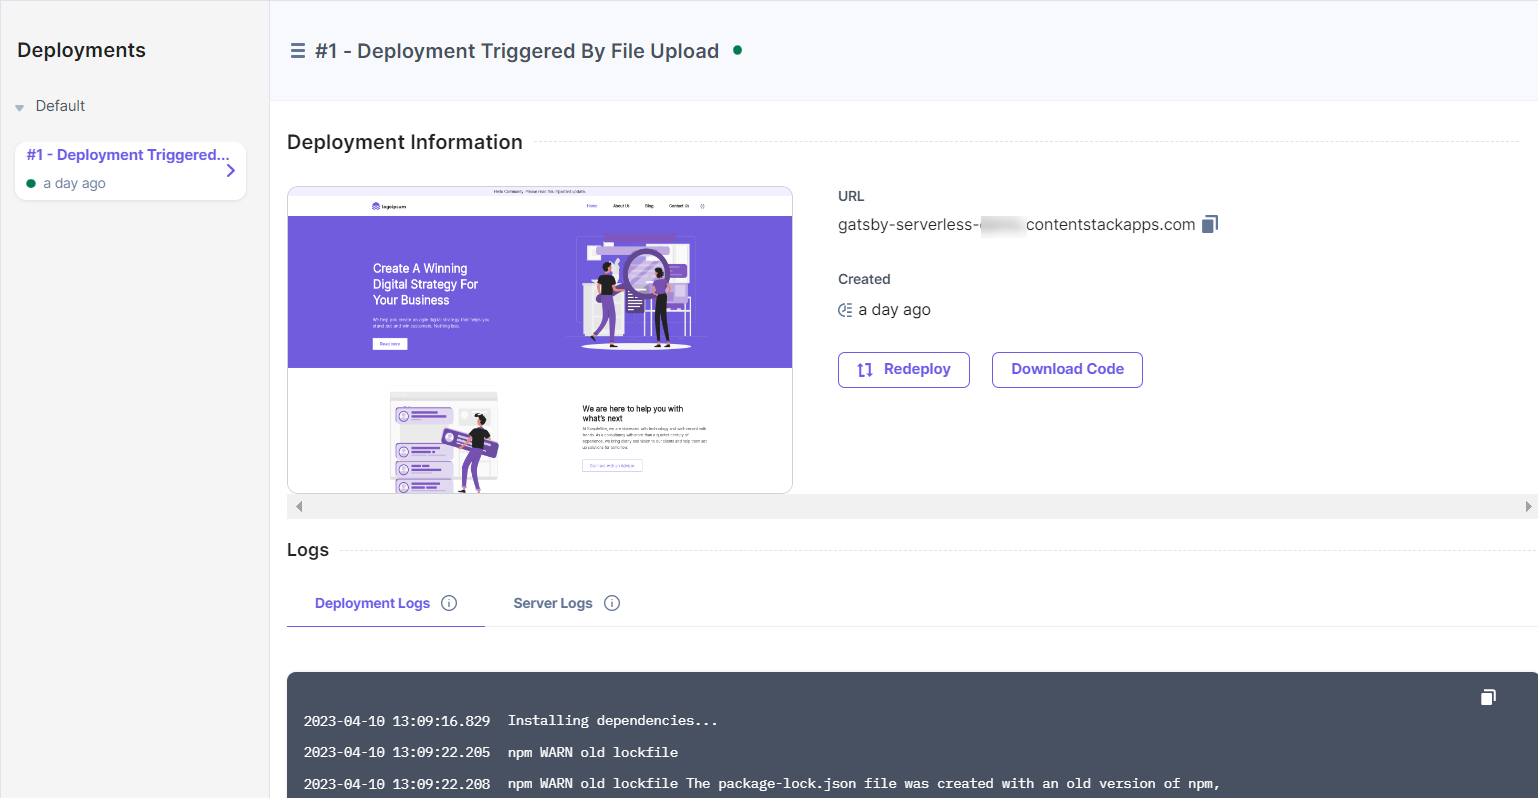
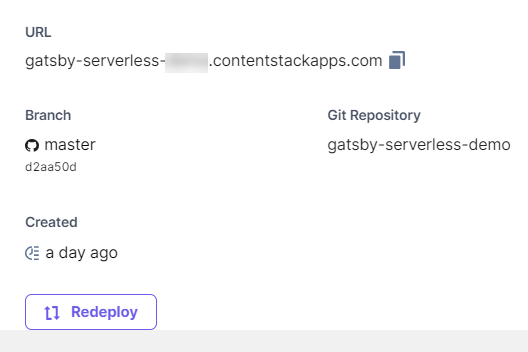
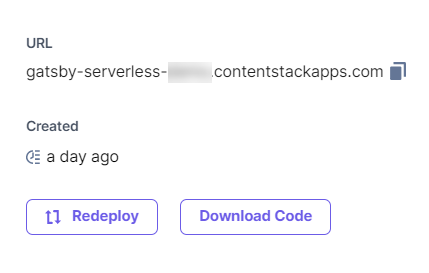
Deployment Information
In the Deployment Information section, you can access essential details regarding your project's deployment.
If you created your project using a Git repository, this panel provides the following information:
-
URL: Once your project is successfully built, you can access it through this public URL.
-
Branch: Indicates the specific branch and commit of the Git repository used to create the environment.
-
Git Repository: Displays the Git repository that was utilized to create your project.
-
Created: Shows the timestamp when the deployment was initiated.
-
Redeploy button: By clicking this button, you can trigger a rebuild of the project. Upon a successful rebuild, the updated version will be accessible via the deployment URL.
If you created your project by uploading a file, the Deployment Information panel provides the following details about your deployment:
-
URL: Once the project has been successfully built, you can access it through this public URL.
-
Created: Indicates the timestamp when the project build was successful.
-
Redeploy button: Clicking this button triggers a rebuild of the project. Upon a successful rebuild, the updated build becomes available at the deployment URL.
-
Download Code button: This feature allows you to download the code used for creating your project in a .zip file format. Please note that the Download Code button is visible only when the deployment status is Active, Deployed, or Error.
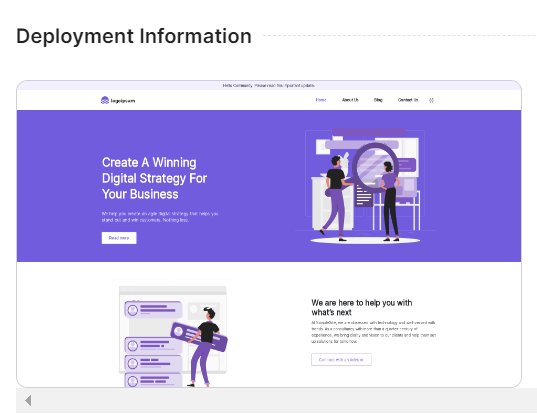
On successful deployment, Launch also generates a preview image of your site that can be viewed on the deployment information panel
Deployment Statuses
The different project deployment statuses used in Launch are:
| Code | Status | What it means? |
|---|---|---|
|
|
Live |
Deployment is successful and is currently active. |
|
|
Deployed |
Previous deployment which was successful. |
|
|
Failed |
Deployment is unsuccessful. |
|
|
Deploying |
Deployment is in progress. |
|
|
Canceled |
Deployment is canceled due to deployment build hours limits. |
|
|
Queued |
Deployment is queued due to an ongoing deployment in the environment, waiting for it to finish. |
|
|
Skipped |
Already queued deployment is skipped to queue a new deployment. |
Redeploys
You have the flexibility to redeploy your site multiple times, generating new deployments. There are several methods to initiate a redeployment:
1. Automatic Redeployment:
- If auto-deploy is enabled for your environment, you can trigger a redeployment by pushing a commit to the corresponding Git branch.
2. Deploy Hook:
- You can initiate a redeployment by calling a deploy hook generated for the environment. This method provides a way to programmatically trigger the redeployment process.
3. Redeploy Button:
- On the deployment information page, you can simply click the "Redeploy" button to start a redeployment manually.
If you choose to redeploy from the deployment details page or utilize a deploy hook, you have the option to specify a commitId, which allows you to redeploy using a specific commit. This provides finer control over the redeployment process.
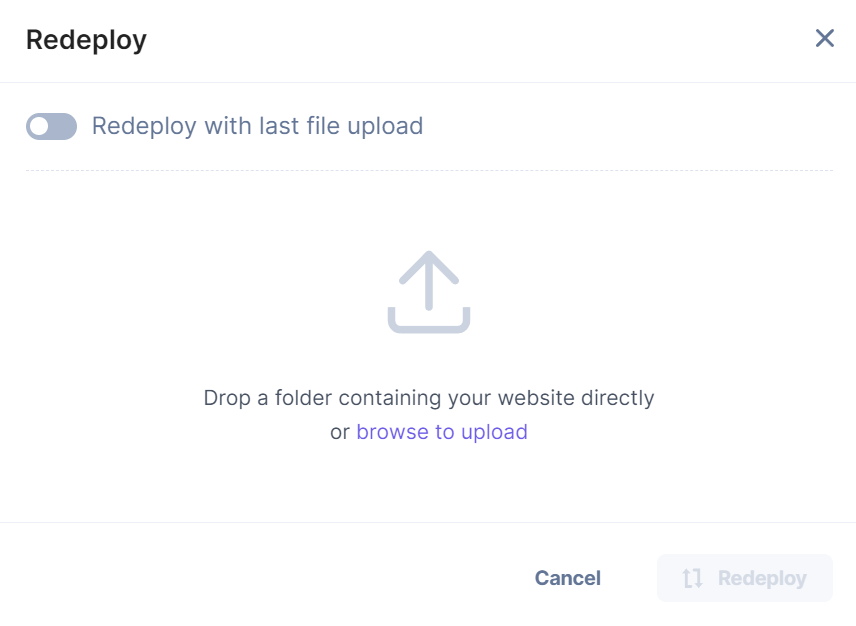
When you import a project by uploading a file, redeploying without a commitId is possible. In this scenario, when you click the "Redeploy" button, you will be presented with the following options to initiate the redeployment:
1. Redeploy with Previously Uploaded File:
- This option allows you to redeploy using the file that was previously uploaded during the project import. You can choose this option if you want to redeploy using the same file without any modifications.
2. Redeploy by Uploading a New File:
- Alternatively, you can select this option if you wish to redeploy by uploading a new file. This option enables you to replace the existing file with a new version for the redeployment.
It's important to note that if you imported the project by uploading a file, you do not need to provide a commitId for the redeployment process.
Note: You cannot redeploy a site while a deployment is in progress.
Deployment Queuing Mechanism for an Environment
In Launch, you can redeploy your project multiple times. But when multiple subsequent deployments are triggered for a given environment, all intermediate deployments will be skipped and only the latest deployment will take effect.
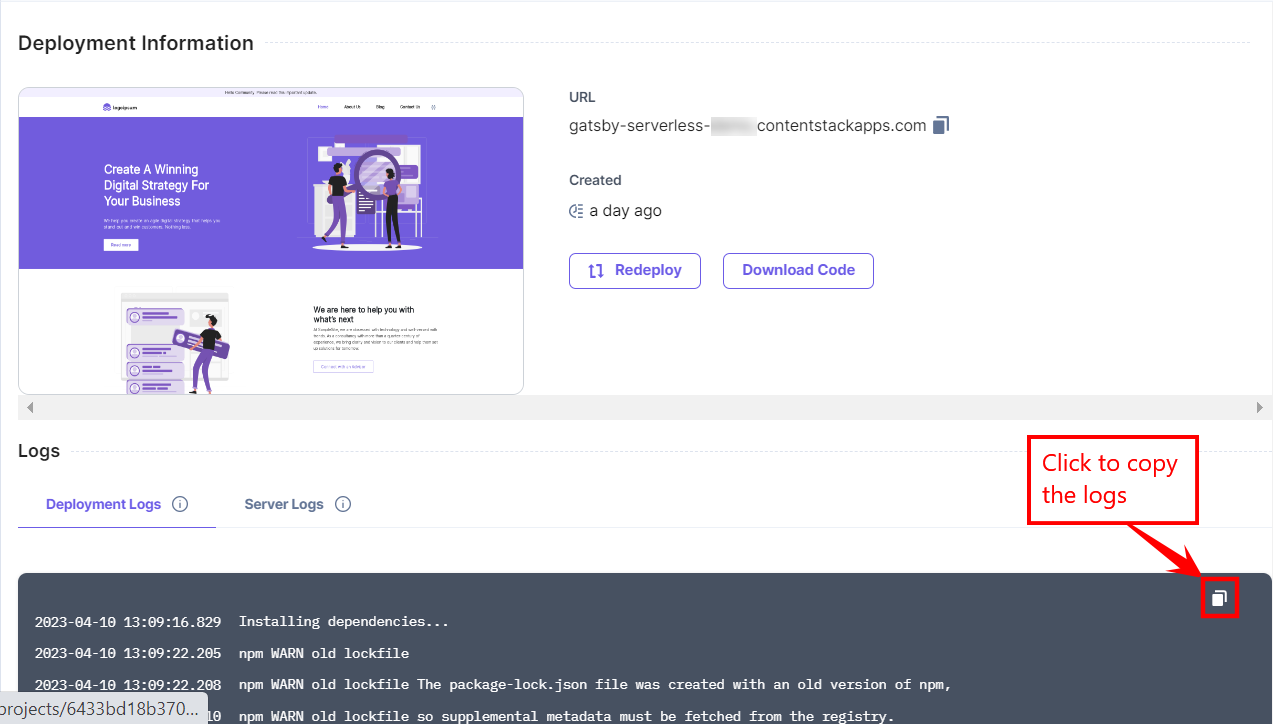
Deployment Logs
You can find deployment logs in the Logs below Deployment Information. You can monitor the logs to get the details of the following deployment stages:
-
Installing the dependencies
-
Build creation
-
Cloud Functions
-
Success/failure of the deployment
You can also copy the log details by clicking the copy icon in the top-right corner of Logs.
Disable Automatic Redeployment
All environments in Launch are configured for automatic redeployment by default. Launch allows you to prevent automatic deployments of any new commits made to the Git repository based projects.
Follow the steps to disable the Auto-Deploy feature to prevent automatic redeployment.
Alternatively, in the Environments screen, hover over the environment where your project is created and then click the Environment Settings icon to go to Environment Settings.
-
Click the project card to open your project from the Launch landing page.
-
In the Environments screen, click the environment where you created the project.
-
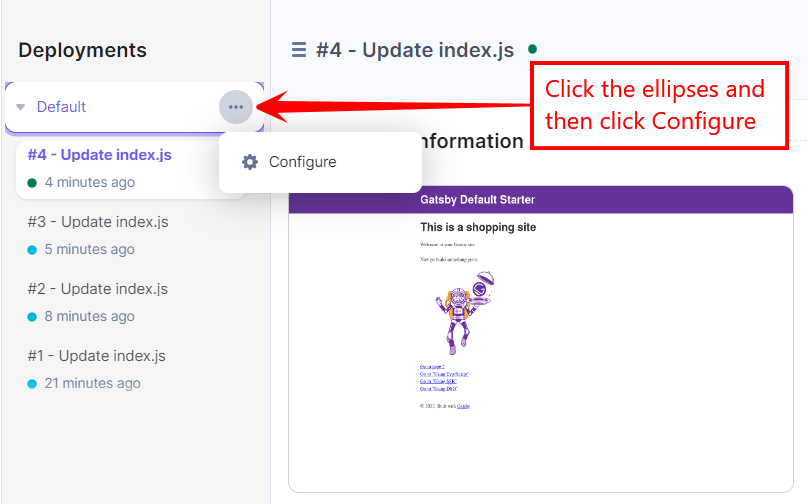
Click the ellipses next to Default and then click Configure.
-
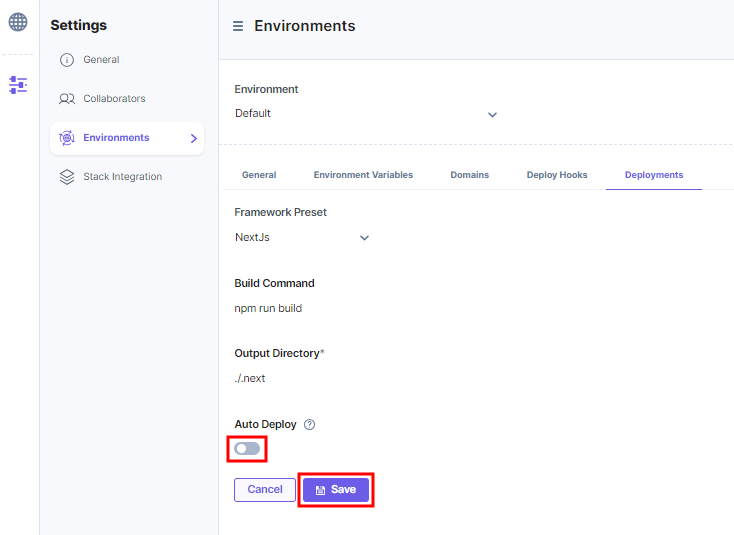
In the Environments section under Settings, click Deployments.

-
Click the Auto Deploy toggle button to disable it, and then click the Save button.
You have successfully disabled the automatic redeployment of your project.