Environment Variables
Environment Variables
Environment Variables are key-value pairs configured outside your source code so that each value can change depending on the Environment.
Your source code can read these values to change behavior during the Build Step or Launch Cloud Function execution.
All values are visible to any user that has access to the Project. It is safe to use both non-sensitive and sensitive data, such as tokens.
Note: Changes to Environment Variables are not applied to previous deployments. They only apply to new deployments.
You can add environment variables while creating a new project or environment, or configure the environment variables later at Environments > Settings > Env. Variables.
Add Environment Variables
-
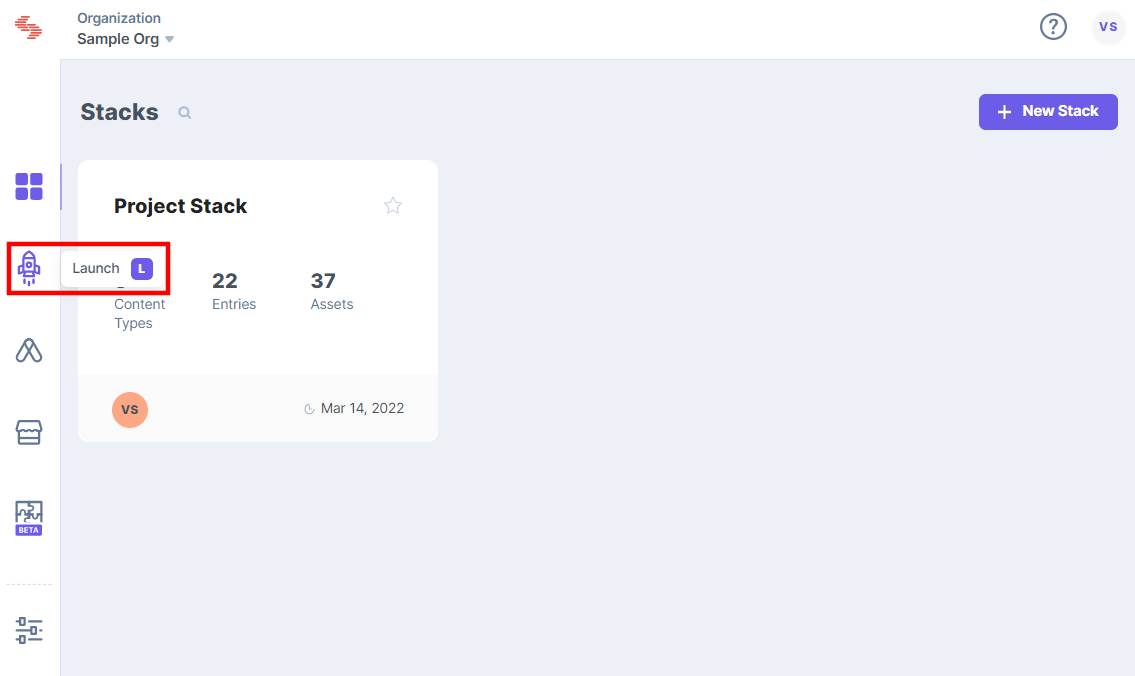
Click the project card to open your project from the Launch landing page.
-
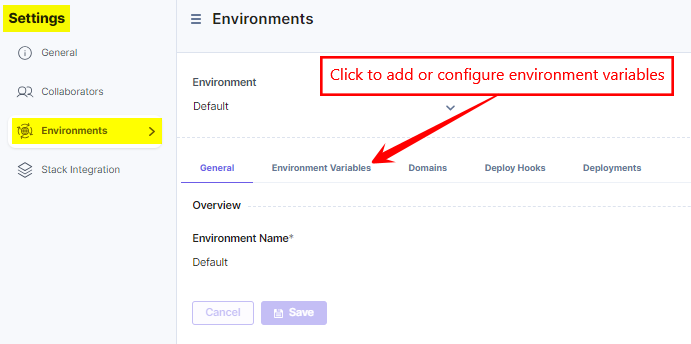
In the Environments screen, click an existing environment or create a new environment. For this tutorial, we will add an environment variable to the ‘Default’ environment for the Contentstack API key.
Hover over the Default environment and click the Settings icon to go to the Settings page. -
In Environments under Settings, click Environment Variables.
-
Under the Key Value Edit tab, enter the environment variable key and value. You can click the + Add Environment Variable button to add additional environment variables.
Note: You can add up to 100 environment variables per environment.
You can also add or edit environment variables in bulk in key-value format, separated by new lines by clicking the Bulk Edit tab.
An environment variable can be added in the key=value format, or an existing variable's key or value can be edited in the bulk edit mode. The updated environment variables will also be reflected in the Key Value Edit tab.The bulk edit mode allows you to paste code blocks with key=value pairs, thereby reducing the effort of individually entering environment variables in the key-value edit mode.
-
Click the Save button.
Note: You must trigger a new deployment after adding/modifying environment variables.
Auto-populate Environment Variables from a Linked Stack
Importing a Starter app or any application with Contentstack SDK requires adding key-value pairs of environment variables like CONTENTSTACK_API_KEY, CONTENTSTACK_DELIVERY_TOKEN, etc. Adding these environment variables manually is a tedious task.
Launch allows you to auto-populate the Environment Variables from your stack, by linking the stack to your project. This allows you to easily use the CMS environment variables while deploying your Launch project.
This step-by-step guide lets you link a stack to your project to auto-populate Environment Variables.
Note: This feature can also be used when creating or configuring an environment.
Prerequisites
-
Access to Launch for your organization
Steps for execution
Follow the steps to link a stack to your project:
-
Click Launch in the left navigation panel, as shown below.
-
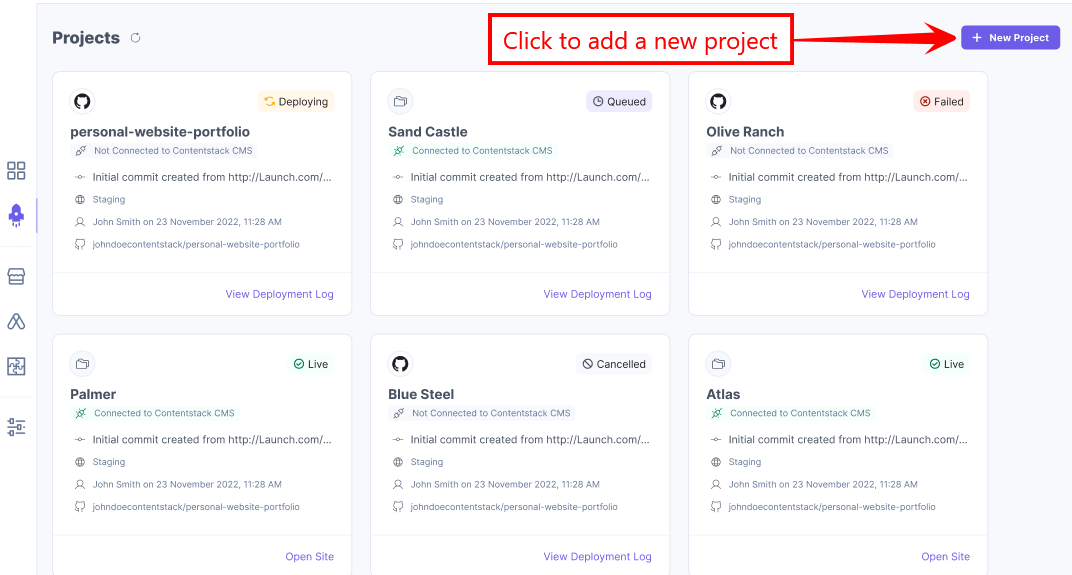
Click the + New Project button.
-
Select Import from a Git Repository or Upload a file as usual from the Create New Project modal.
-
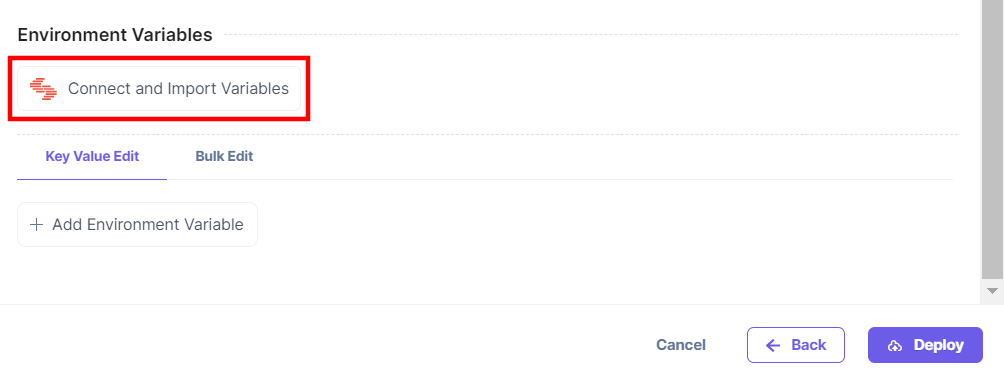
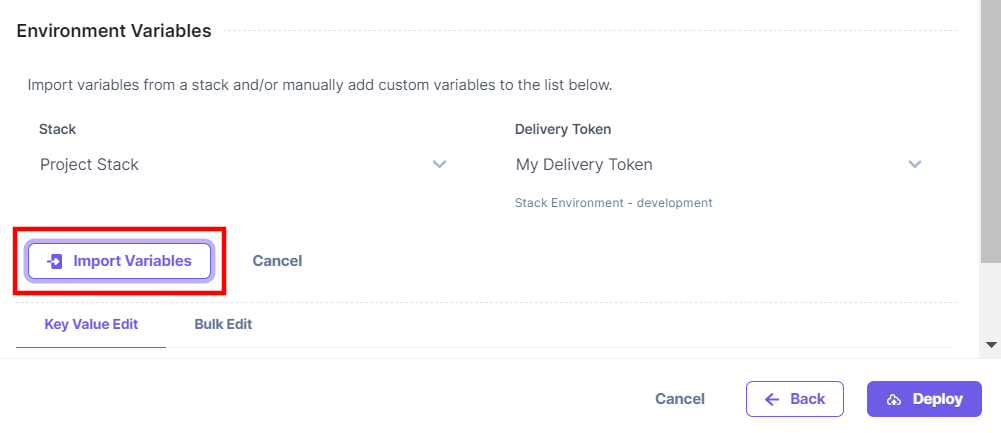
In the Environment Variables section, click the Connect and Import Variables button.
-
Select the Stack which has the Starter app installed and then select the Delivery Token for your stack.

Note: On selecting a delivery token, Launch automatically selects a Stack environment available for the selected token. -
Click the Import Variables button.
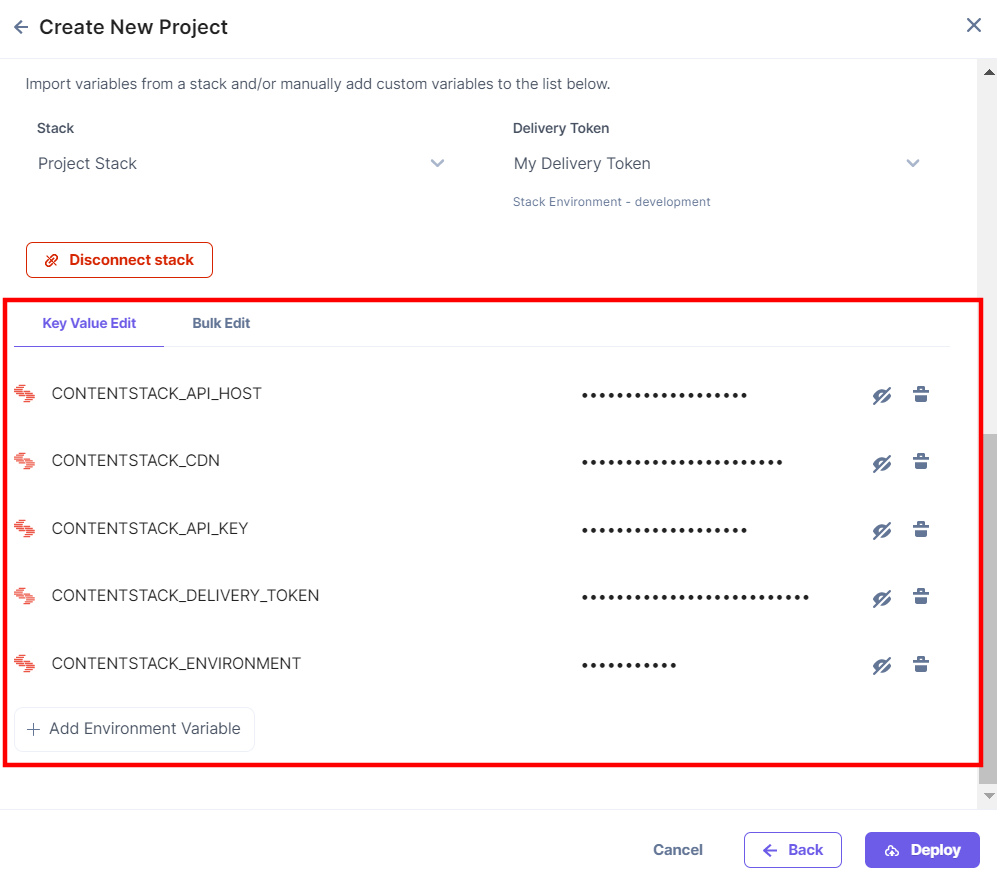
You can see the Environment Variables auto-populated from your selected stack.
-
Click the Deploy button.
-
Your project is now deployed.
View a linked stack
Follow the step to view the linked stack after project creation:
-
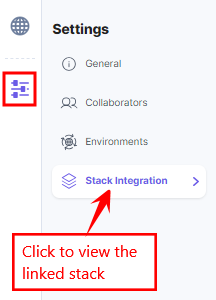
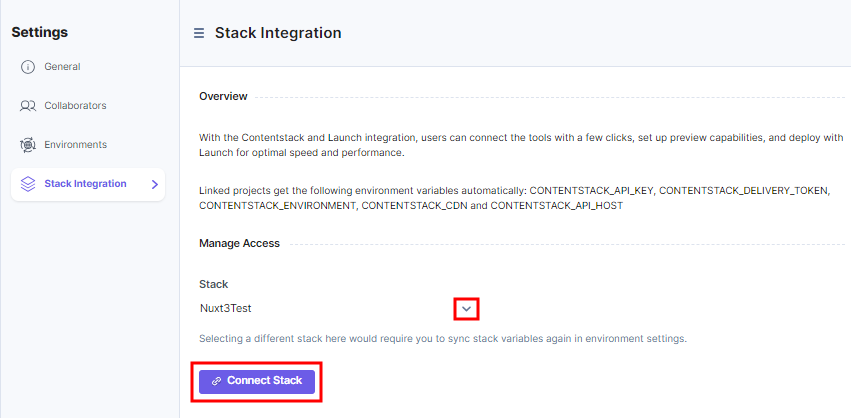
Click the Settings icon in the left panel and then click Stack Integration to view the linked stack.
-
You can see the linked stack.
Update a linked stack
Follow the steps below to update a linked stack:
This will sync your new stack’s Environment Variables to your project.
-
Click the Settings icon in the left panel and then click Stack Integration.
-
Choose a stack from the dropdown and then click Connect Stack button.
-
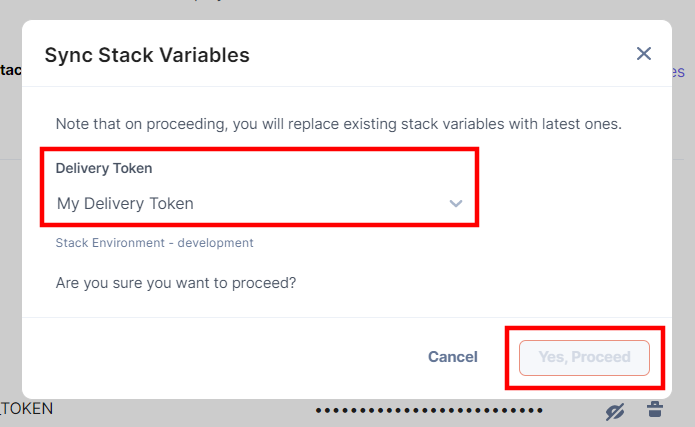
Once you choose a different stack, you must sync the stack variables. To do this, follow the steps below:
-
Click Environments under Settings.
-
Select your environment (Default in this example).
-
Click Environment Variables.
-
Click Sync Stack Variables.
-
A popup displays asking for your confirmation. Select your delivery token and then click the Yes, Proceed button.
-