Launch Environments
Launch Environments
Environments allow you to deploy and host different versions of your project independently.
Launch allows you to set up multiple environments for a project, which you can configure to match your development style. Each environment is deployed and hosted on a unique URL. Auto-deploy is enabled by default for every environment.
A default environment is created with every project import. You can configure the environment as per your needs for further usage.
This document guides you through the process of creating, configuring, and deleting an environment in Launch.
Prerequisites
-
Access to Launch for your organization
Create an Environment
-
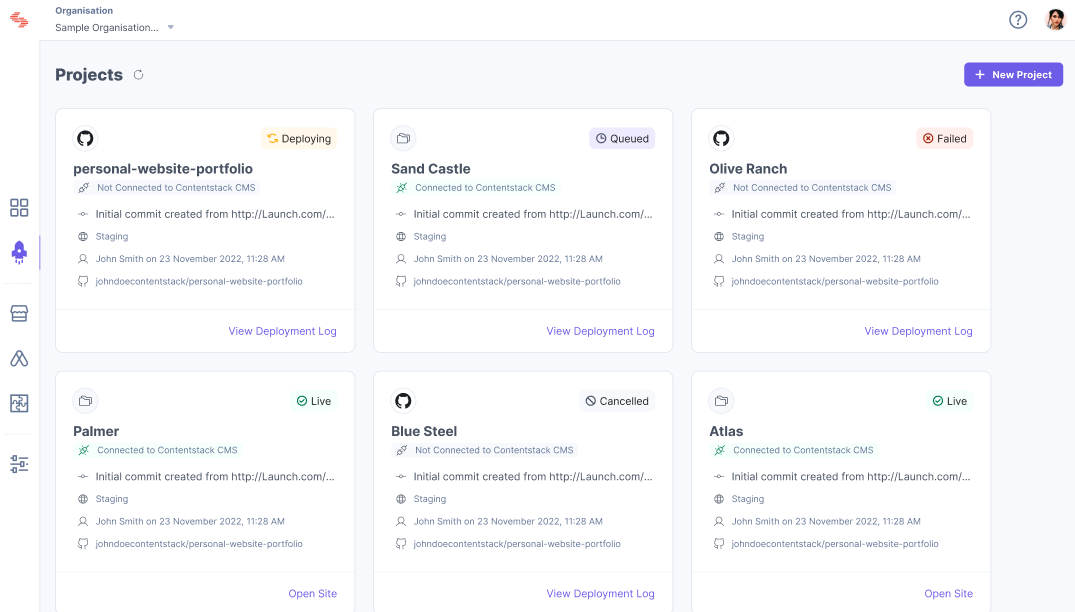
Click the project card to open your project from the Launch landing page.
-
In the Environments screen, click the + New Environment button to add a new environment.

-
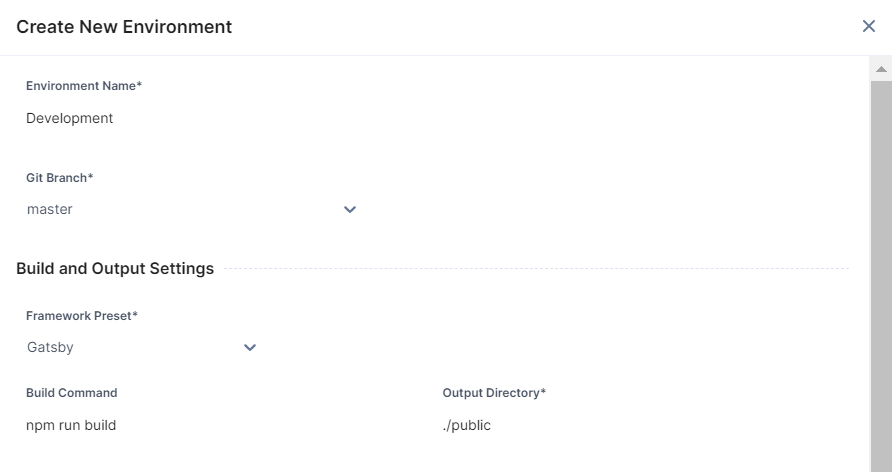
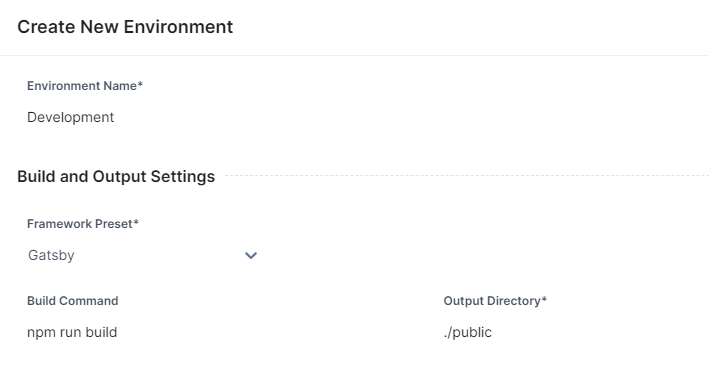
In the Create New Environment modal, fill in the following:
-
If you choose GitHub to deploy your project, follow the steps below:
-
Enter an environment name.
-
Select a branch from the Git Branch dropdown.
-
The fields in the Build and Output Settings section get auto-populated based on the detected framework. You can always change the Framework Preset and the build and output commands as per your requirement.
-
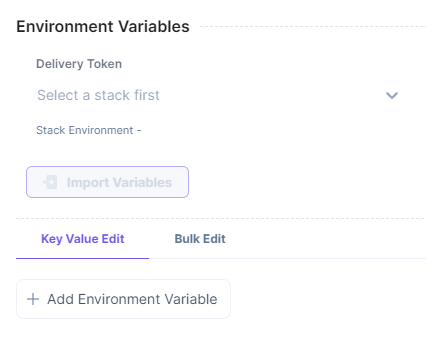
In the Environment Variables field, perform the following:
-
If you want to auto-populate environment variables from a linked stack, select a stack and click the Import Variables button.
-
Click the + Add Environment Variable button to manually add environment variable(s).
-
-
Click the Create button.
You have successfully created an environment.
-
-
If you choose to upload a file to deploy your project, follow the steps below:
-
Enter an environment name.
-
The Upload a file field allows you to browse and upload a new file.
Click browse to upload to upload a project file.
You can also re-upload a different file after uploading a file.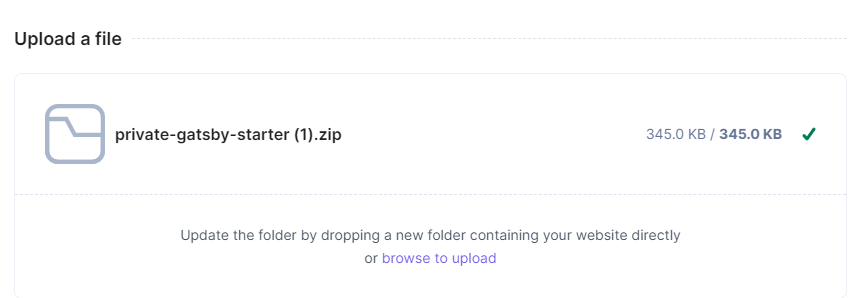
-
The fields in the Build and Output Settings section get auto-populated based on the detected framework in the uploaded file. You can always change the Framework Preset and the build and output commands as per your requirement.
-
In the Environment Variables field, perform the following:
-
If you want to auto-populate environment variables from a linked stack, select a stack and click the Import Variables button.
-
Click the + Add Environment Variable button to manually add environment variable(s).
-
-
Click the Create button.
You have successfully created an environment.
Note: When you import a project by uploading a file, the icon for Branch specification is not displayed in the Environments section.
Configure an environment
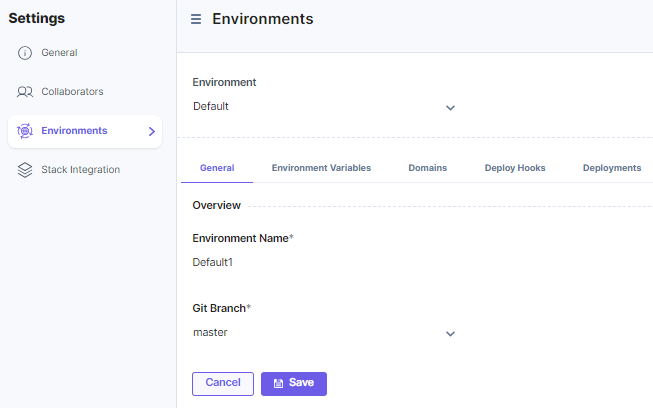
You can change the environment name and branch from Settings.
Note: When you import a project by uploading a file, the Git Branch section in the General settings is not available.
You can configure environments to use deploy hooks, custom domains, and environment variables. You can control the deployment behavior by toggling auto-deployments.
-
In the Environments screen, hover over the environment where your project is created and then click the Environment Settings icon to go to Environment Settings.

-
Edit the environment name and branch.
-
Click the Save button.
Note: The auto-deployment feature is unavailable when you import a project by uploading a file.
Delete an environment
Launch allows you to delete an environment that you no longer require.
Follow the steps below to delete an environment:
-
In the Environments screen, hover over the environment you want to delete and click the Delete Environment button.

-
Enter DELETE and then click the Yes, Delete button.
Alternatively, you can follow the steps below to delete an environment:
A modal is displayed asking for confirmation to delete the environment.
Note: On deleting an environment, its corresponding deployments also get deleted.
-
In the Environments screen, hover over the environment you want to delete and click the Environment Settings icon to go to Environment Settings.

-
Under Advanced in the Environments section, click the Delete Environment button.
You will see a warning message displayed above the button.
-
Enter DELETE and then click the Yes, Delete button.
-
-