Workflow
Contentstack's workflow feature is a powerful tool that enables organizations to manage the content creation and publishing process in a streamlined and efficient way. With workflow, content creation and publishing becomes a collaborative process that involves multiple stakeholders, including writers, editors, and approvers.
The workflow feature allows you to define a series of states that content can go through, from initial creation to final approval and publishing. Each state represents a stage in the content creation process, and can be assigned to different roles or users. For example, you can set up states such as "Draft", "In Review", "Approved", and "Published".
As content moves through the workflow, it can be edited, reviewed, and approved by different users based on their assigned roles. Users can add comments and feedback, and content can be easily tracked and managed throughout the entire process. This ensures that content is thoroughly reviewed and approved before being published, minimizing the risk of errors or inaccuracies.
Contentstack's workflow feature also includes notifications and alerts, which keep everyone involved in the process informed of content changes, updates, and approvals. This helps to keep the process moving smoothly and ensures that everyone is on the same page.
Exercise: Creating a Workflow with a Publish Rule
Here's a step-by-step guide on how to use Contentstack's workflow feature to create a publishing rule for production:
Step 1: Log in to your Contentstack account and select the stack you want to work with.
Step 2: Click on the "Settings" button in the top navigation bar.
Step 3: Click on the "Workflows" tab.
Step 4: Click on the "New Workflow" button.
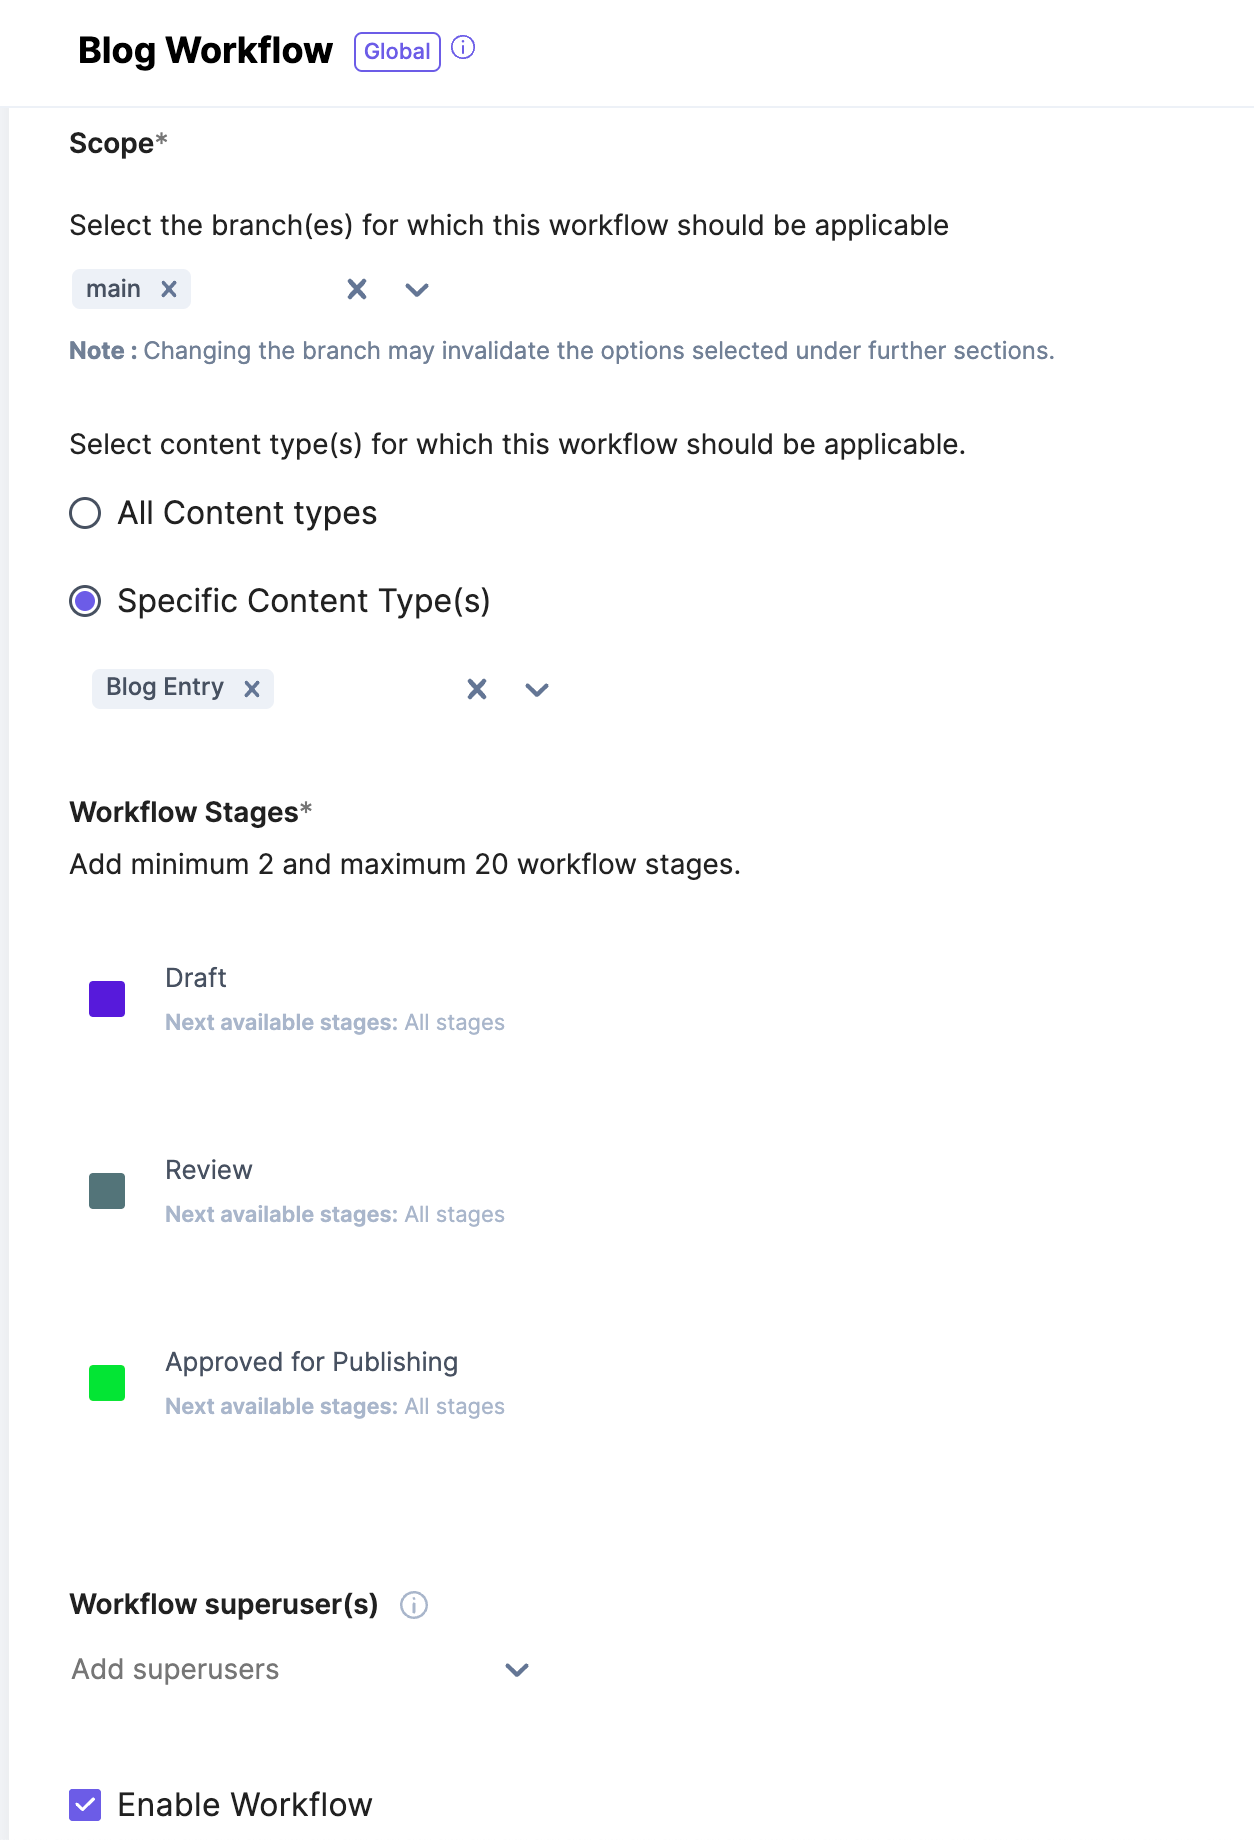
Step 5: Enter the following:
- Name: "Blog Workflow".
- Scope (branches): Main.
- Specific Content Types: Blog Entry
Step 6: Add the states that content will go through before being published. For example, you could add the states "Draft", "In Review", "Approved", and "Published".
Step 7: Click on the "Enable Workflow" checkbox and the "Save" button to create the workflow.
Step 8: Next, you'll need to create a publishing rule that specifies which content should be published to your production environment. Click on the "Publishing Rules" tab.
Step 9: Click on the "New Publishing Rule" button.
Step 10: Enter a name for your publishing rule, such as "Publish to Production".
Step 11: Under "Content type", select the "Blog Entry" Content Type
Step 12: Under "Language", select "All Languages"
Step 13: Under "Environment", select "Production"
Step 14: Under "Rule Conditions", you can set up conditions that must be met before the content is published. For example, you could require that the content has the "Approved" state before it can be published.
Step 15: Click on the "Save" button to save the publishing rule.
Step 16: Now, whenever content is created or updated, it will go through the workflow you created in step 5. If the content meets the conditions you set up in the publishing rule, it will be published to your production environment automatically.
Congratulations! You have successfully created a publishing rule for production using Contentstack's workflow feature. This will help you streamline your content creation and publishing process and ensure that only approved content is published to your production environment.
Example: Using Workflow and Webhooks for Automating Translation
In the context of a Contentstack workflow, a webhook trigger can be used to automate the movement of content through the different stages of the workflow or send to an external service such as a translation agency.
To set up a webhook trigger to use a workflow stage in Contentstack, you would first need to create a workflow and define the stages that content should go through. Once the workflow is set up, you can create a webhook trigger that is triggered when content is created or updated.
In the webhook trigger settings, you can specify the workflow stage that the content should be moved to when the webhook is triggered. For example, you could set up the webhook trigger to move the content from the "Draft" stage to the "In Review" stage when it is created or updated.
Once the webhook trigger is set up, it will automatically move the content through the workflow based on the rules that you have defined. This can help to save time and improve efficiency, as content can be automatically routed to the appropriate stage without requiring manual intervention.
Step 1: Set up your workflow in Contentstack
First, you'll need to set up your workflow in Contentstack to define the stages that content should go through before it is published. For example, you might create stages for "Draft", "In Review", and "Approved".
Step 2: Set up a webhook trigger
Next, you'll need to set up a webhook trigger that is triggered when content is created or updated. In the webhook trigger settings, you can specify the URL of your 3rd-party translation service, along with any required authentication details.
Step 3: Define a workflow stage for translation
In your workflow, you can define a new stage specifically for translation. For example, you might create a stage called "Translation" that is between the "In Review" and "Approved" stages.
Step 4: Set up a webhook action to send content to the translation service
In the workflow stage for translation, you can set up a webhook action that sends the content to the 3rd-party translation service. You can use the webhook trigger that you set up in step 2 to automatically send the content to the translation service when it enters the "Translation" stage.
Step 5: Receive and process the translated content
Once the content has been sent to the translation service, the service will translate the content into the desired language(s). The translation service can then send the translated content back to Contentstack via another webhook trigger.
Step 6: Move the translated content to the next stage in the workflow
When the translated content is received by Contentstack, you can set up another webhook action that automatically moves the content to the next stage in the workflow. For example, you might move the content from the "Translation" stage to the "Approved" stage when it is received.
Overall, using a Contentstack webhook trigger with workflow to send content to a 3rd-party translation service can help to streamline the translation process and ensure that content is translated efficiently and accurately.