Creating the Hero Gallery Page
The Composable Hero Landing Page
Welcome to this tutorial on creating a superhero gallery page using reference fields in NextJS! In this module, we'll walk you through the steps of creating a new content type called "Superhero Gallery Page" and adding heroes to it manually.
We'll start by showing you how to utilize reference fields to display hero content on the landing page with their images and names. This technique is commonly used in product promotions and article index pages, so it's a valuable skill to learn.
Next, we'll guide you through the process of creating a new NextJS component and query to retrieve the Landing Page Entry and Reference field Hero Entries. Our NextJS component will loop through all the heroes in the reference field and display their titles, images, and links to their respective detail pages.
Finally, we'll demonstrate how to create a new Landing Page Entry and publish it to the Development environment to see the results of our work.
By the end of this tutorial, you'll have gained valuable knowledge on how to utilize reference fields in NextJS to create reusable content and enhance the user experience on your website. Let's get started!
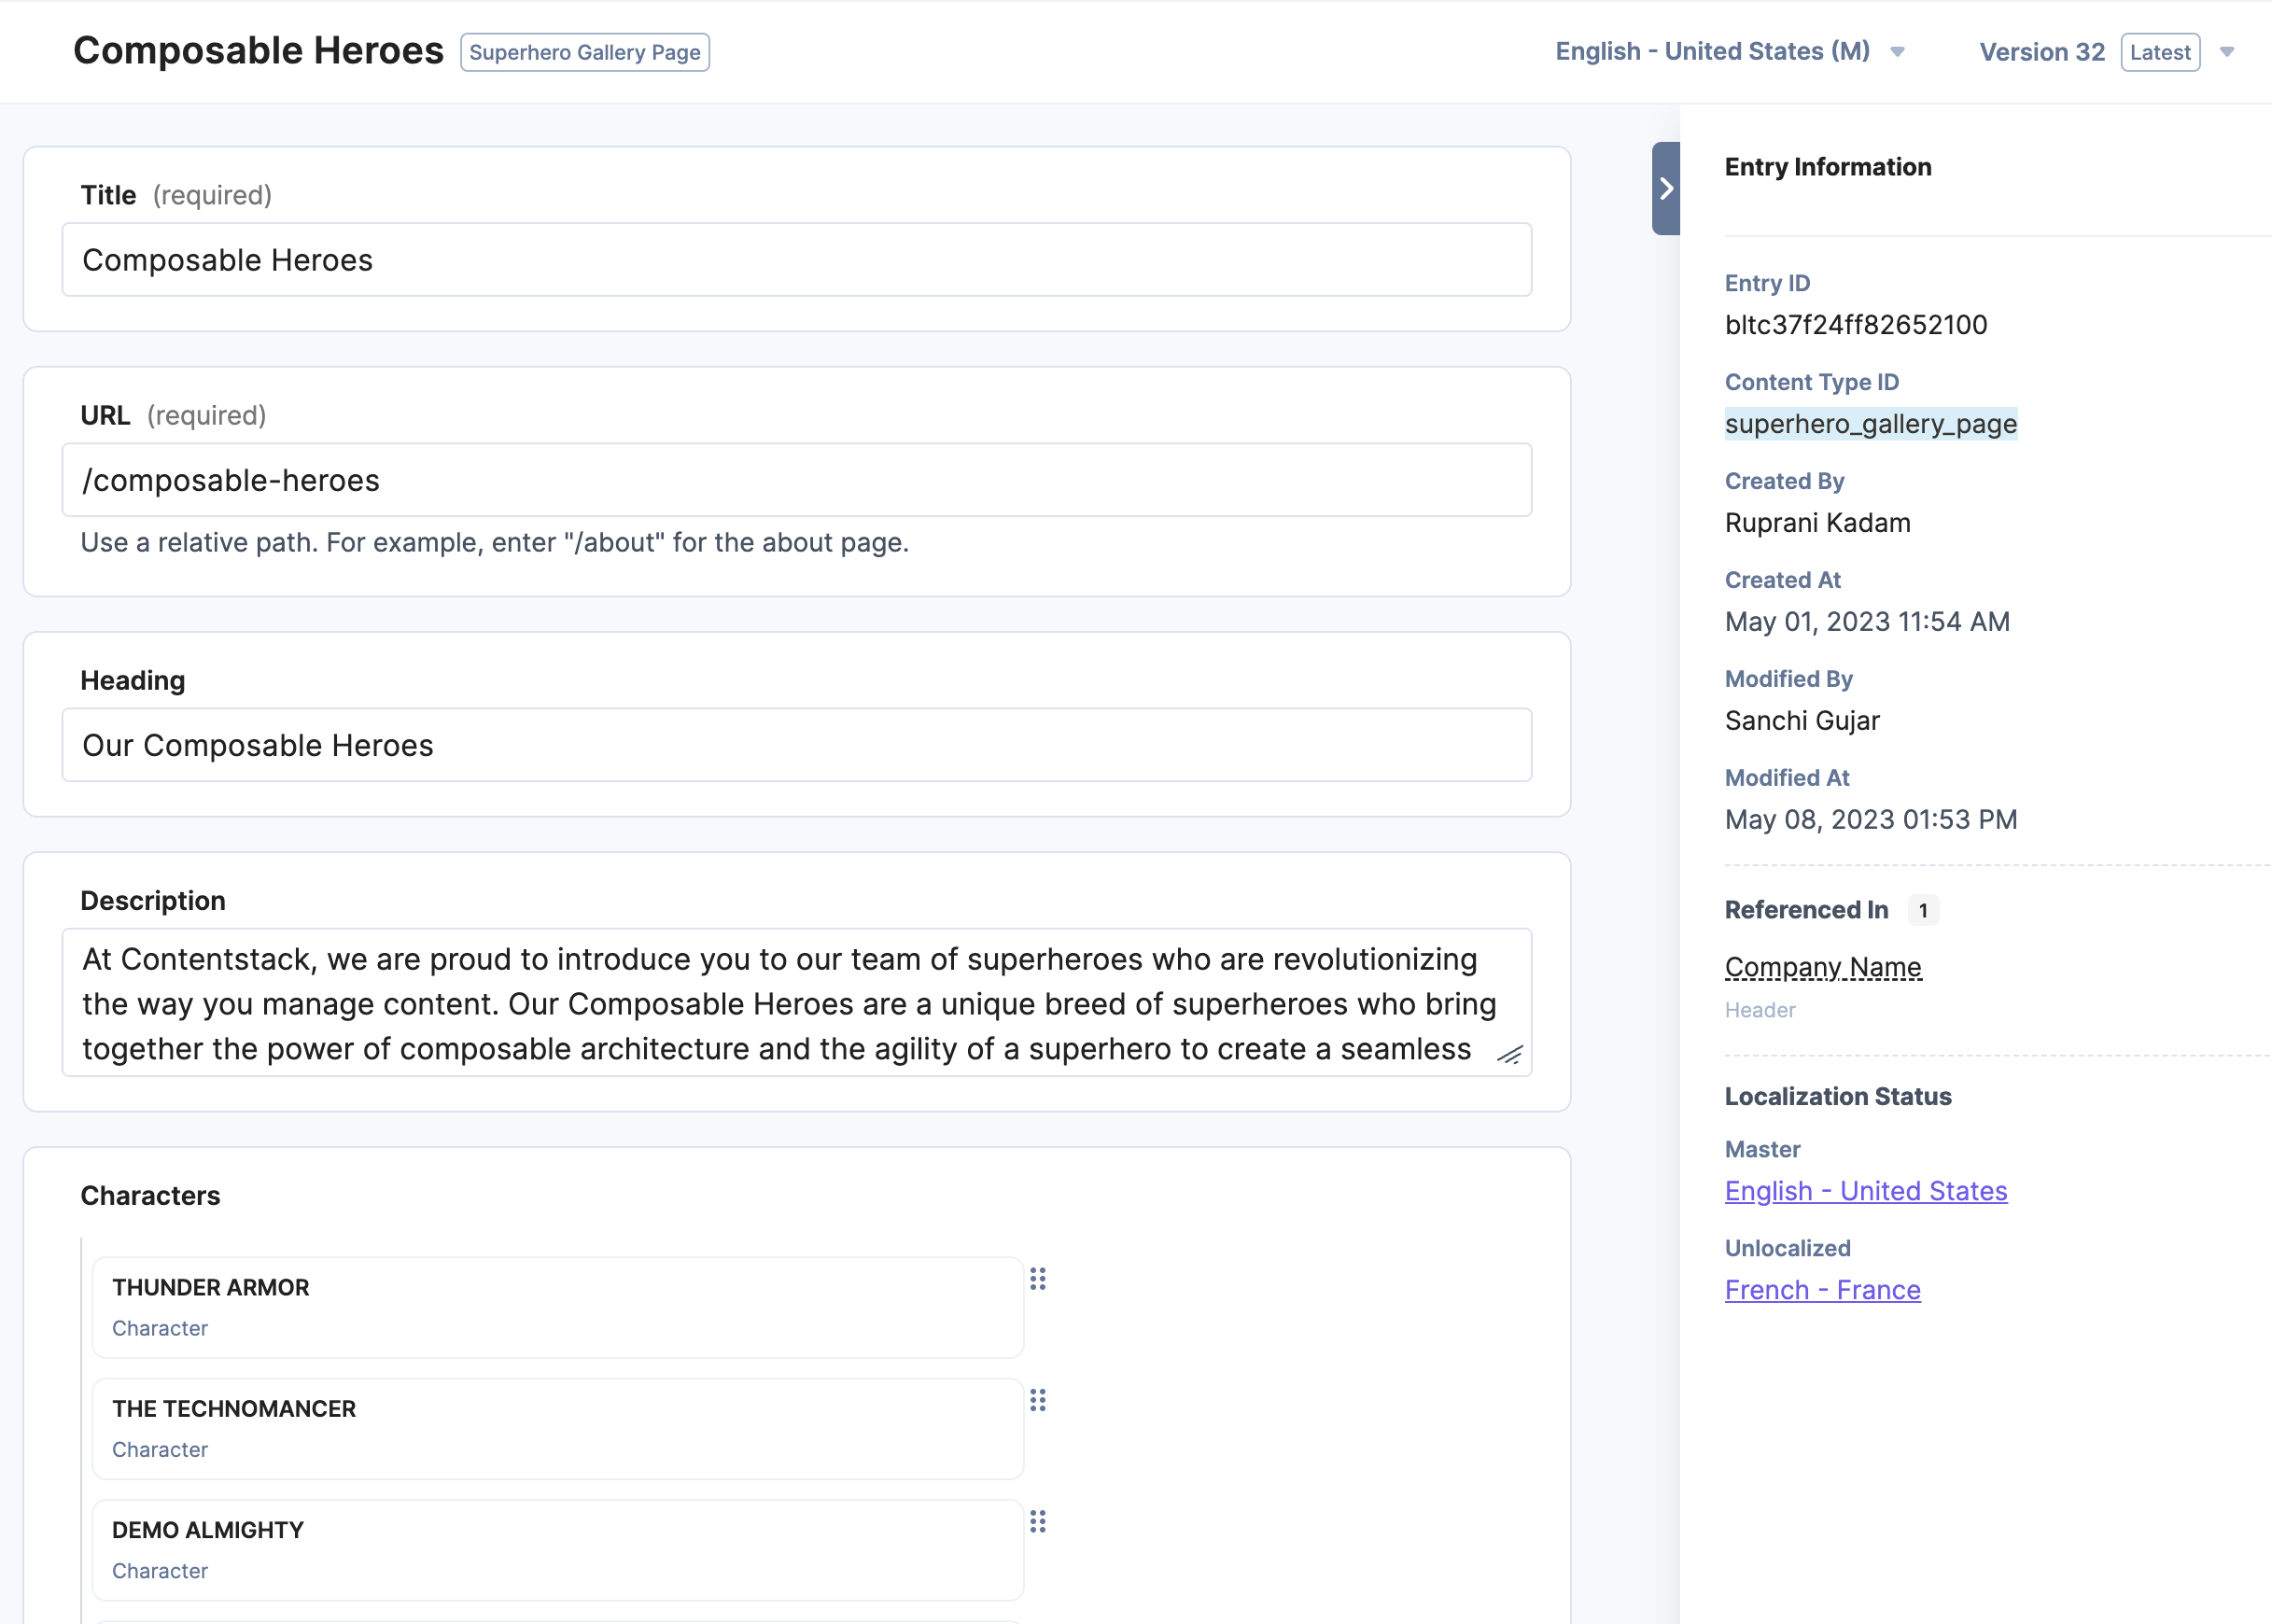
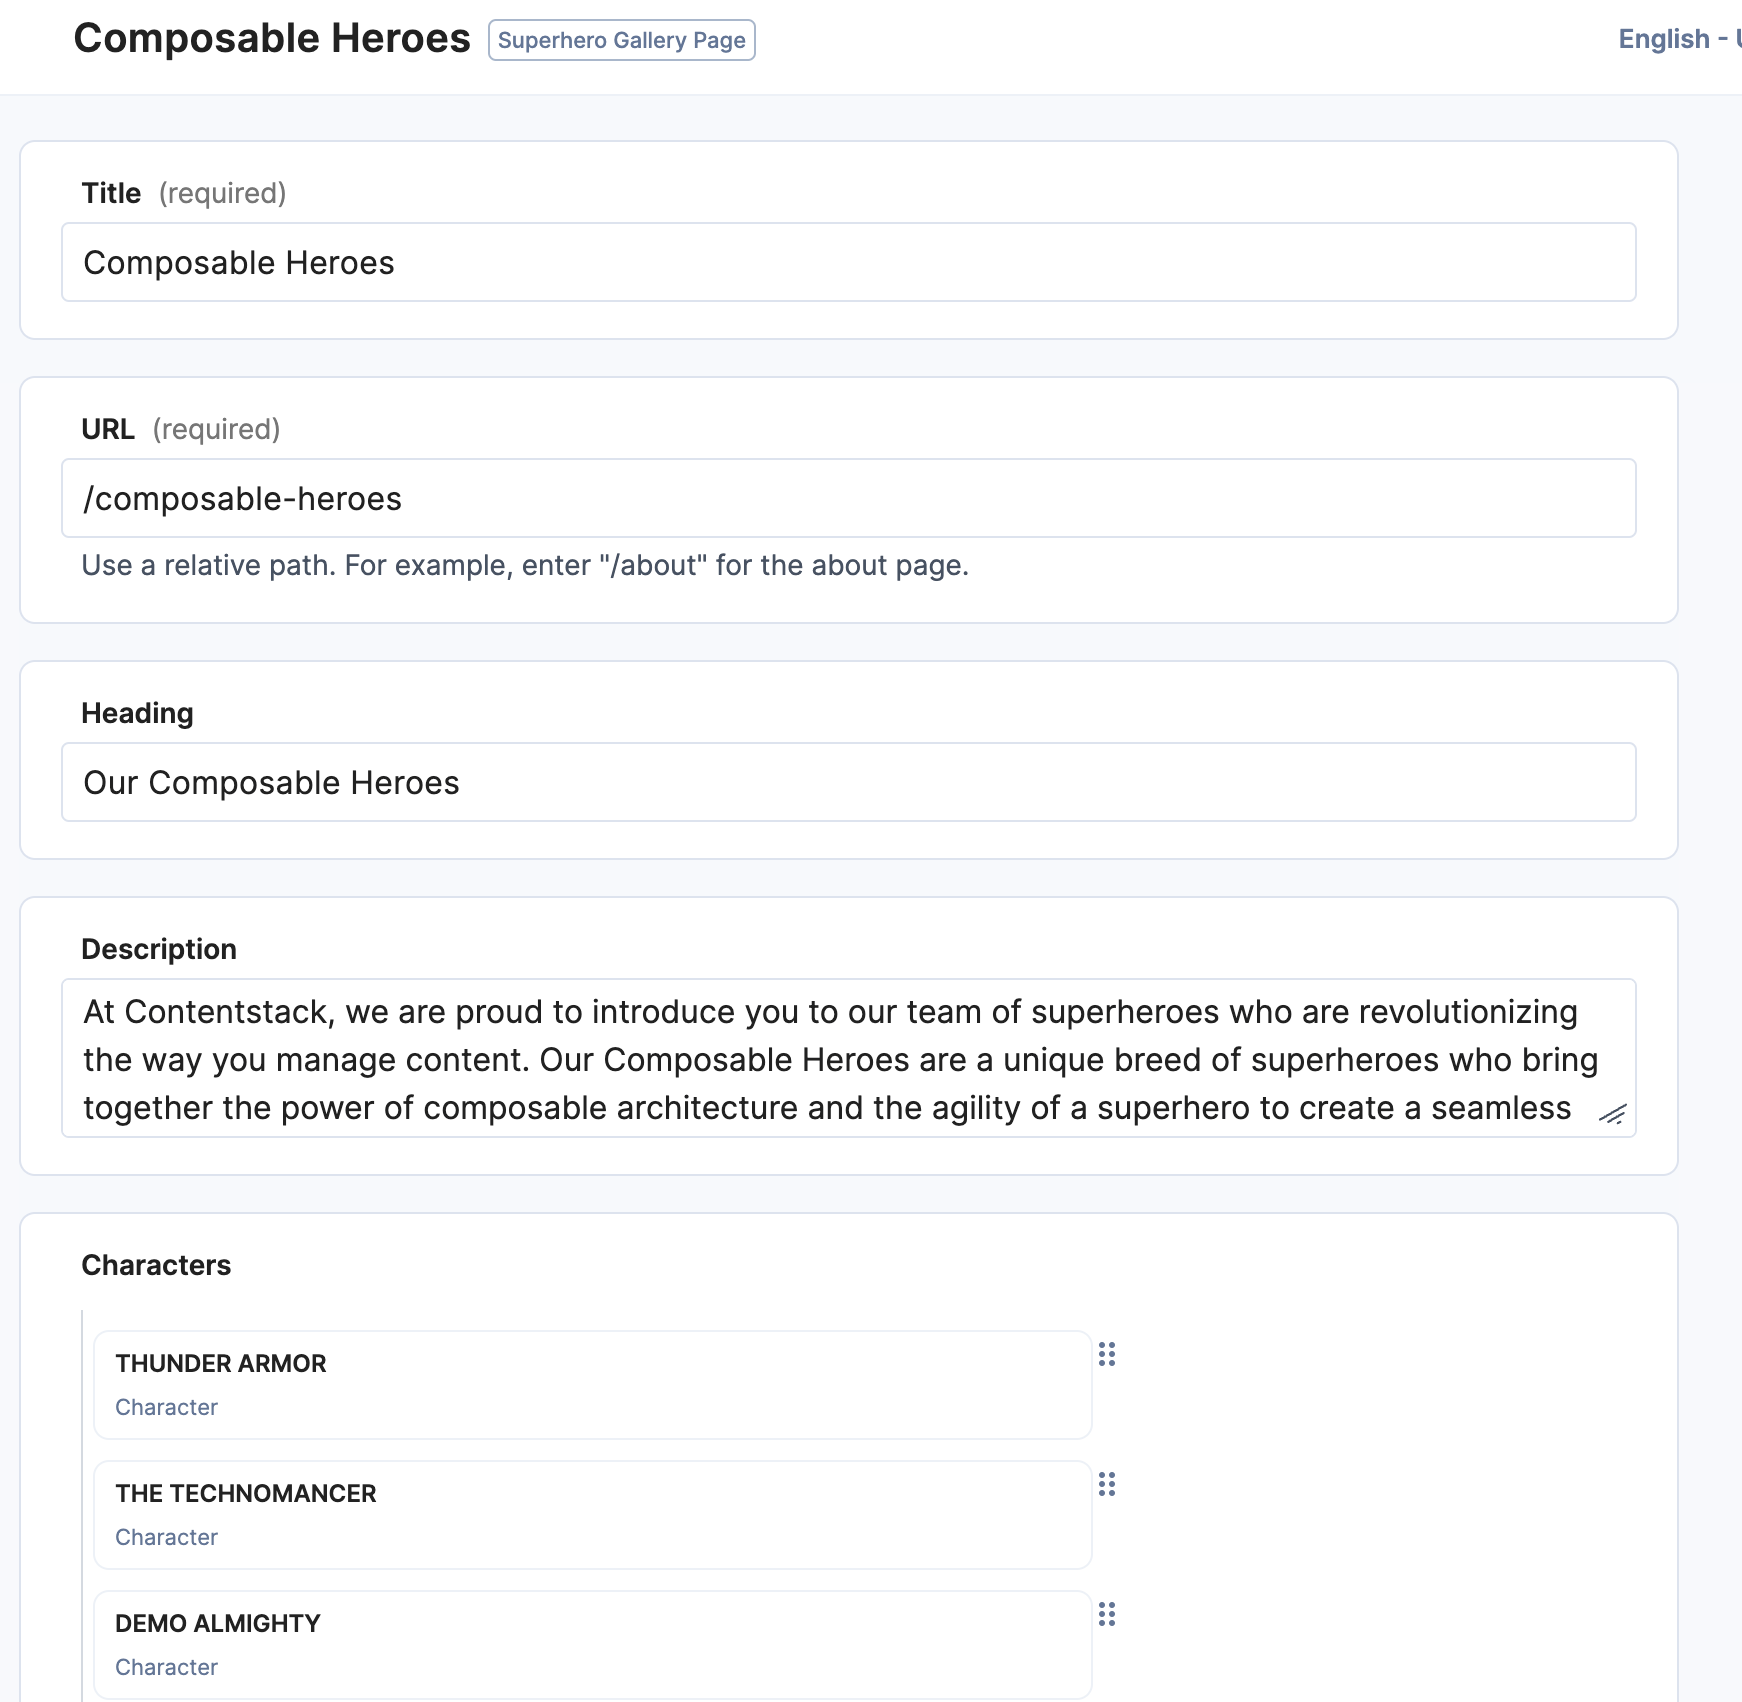
Hero Gallery Page Content Type
Open the Superhero Gallery Page and examine the properties of each field
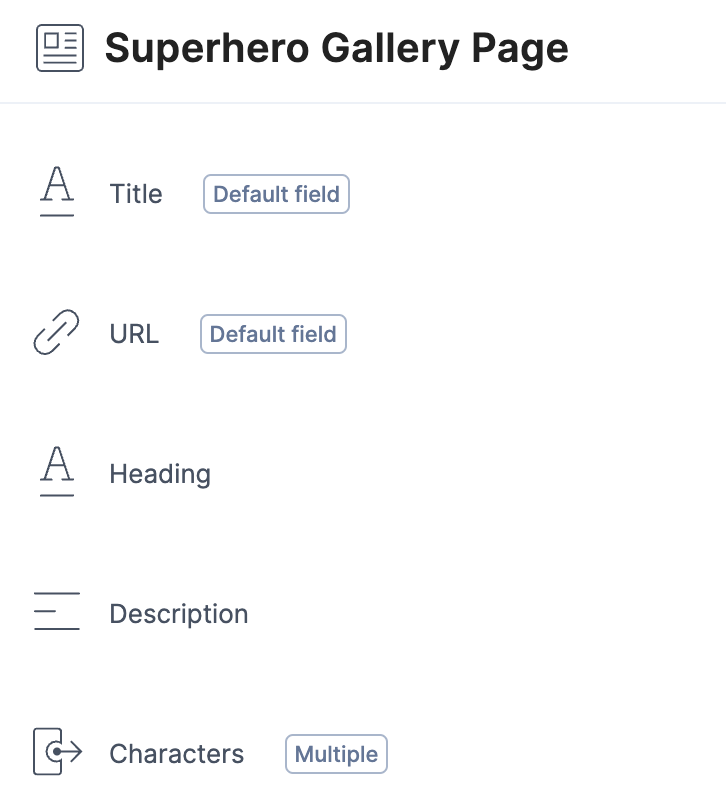
Review the following fields below:
Title - Default Title field
URL - /gallery/:title
Heading - Text field
Description - Multi-line text
Characters - Reference field to the Character Content Type
Part 2: Writing the code to display the list of heroes
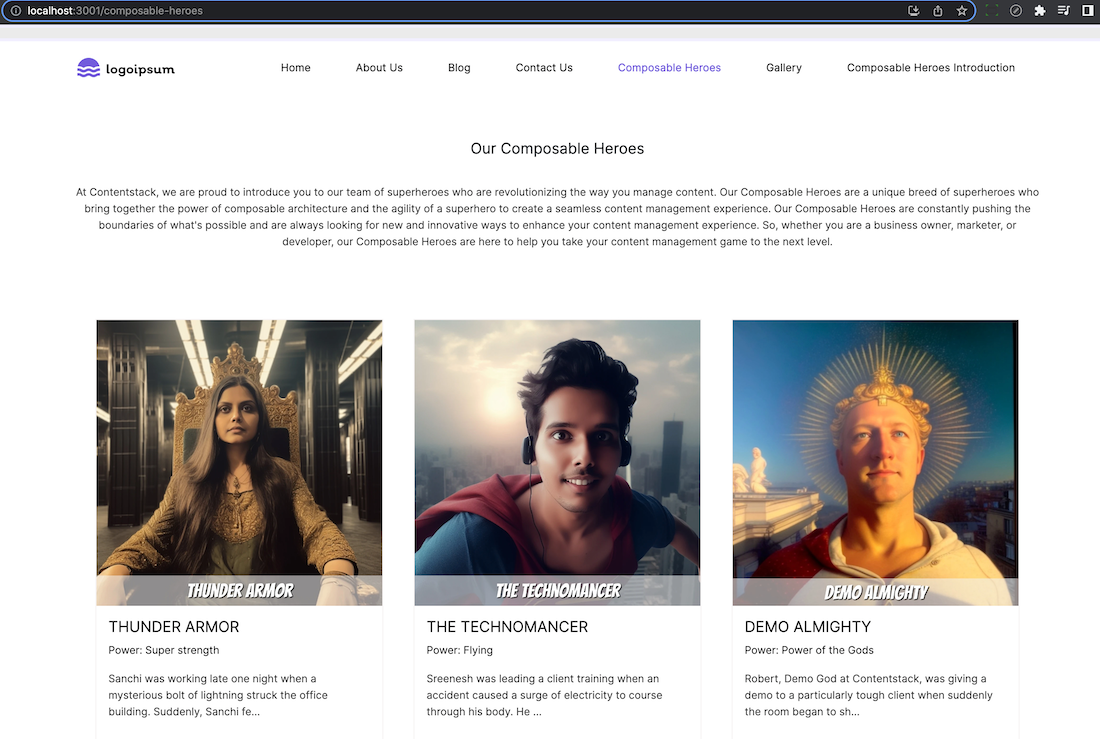
Let's list all the heroes in the reference field on the Gallery page. Users can manually create a list of heroes and our code will loop over all the heroes in the reference field and render the name, image, and link.
Rendering a list of Characters from a Reference Field
1. Create a NextJS Component for the Gallery page and loop through all the heroes in the reference field, rendering the title, image and a link to the detail page. This involves 2 steps, first writing the query function and then rendering the results.
2. Querying Contentstack for the Characters in the Reference Field
In the /helpers/index.js file, review the function to get a list of heroes from the reference field
3. Review the code for the /composable-heroes/index.tsx file.
4. Review the Composable Heroes Gallery Entry
5. From the NextJS application, open the Composable Heroes Gallery Page
2. Introduction to using the Query functions of the Content Delivery API
Contentstack provides certain queries that you can use to fetch filtered results. You can use queries for Entries and Assets API requests. Please review the Content Delivery Query API documentation and examine the RegEx, Limit and Only functions.
For the first part of the exercise, we can use a simple query to find all the entries with the Content Type of Character.
Postman
1. Open Postman and select the Entries/Get Entries call
Update the parameters / variables so that:
content_type_uid = character
environment = development

You should now have a list of the characters published to the development environment. In the next section, we will use the JavaScript SDK to get the same list and pass it to the NextJS App to render.
3. Query using Javascript SDK
In our web application we will mostly use the Javascript Content Delivery SDK. Please have a look at the documentation for the query methods.
Other SDKs can be found on the SDKs documentation page
import Contentstack from 'contentstack';
const Stack = Contentstack.Stack({"api_key": "api_key", "delivery_token": "delivery_token", "environment": "environment"});
const result = await Stack.ContentType('character').Query().toJSON().find();
More information about this is found in the Javascript SDK Docs
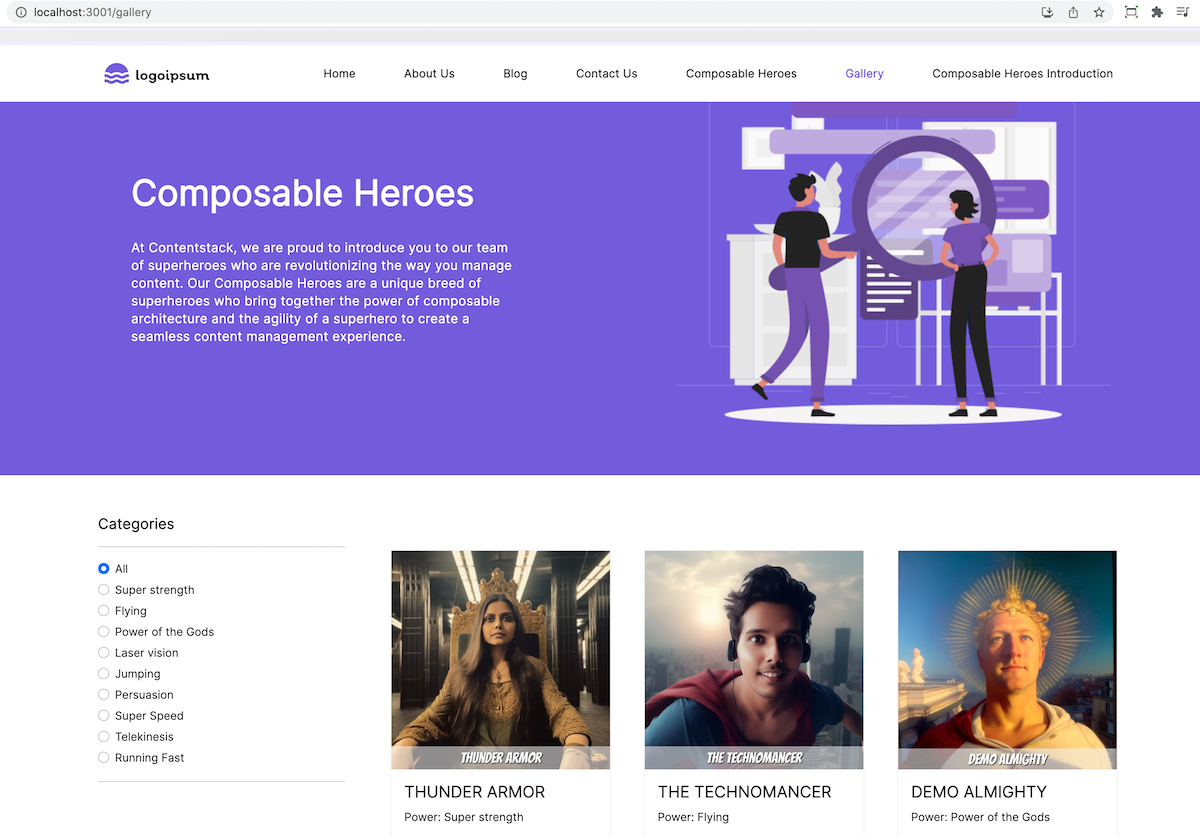
Composable Hero Landing Page
The Composable Hero Landing Page uses Modular Blocks to provide a flexible structure for authors to create content and add as many content blocks to the page as they wish and also to re-order the blocks.
Open the Superhero Landing Page Entry and review the content
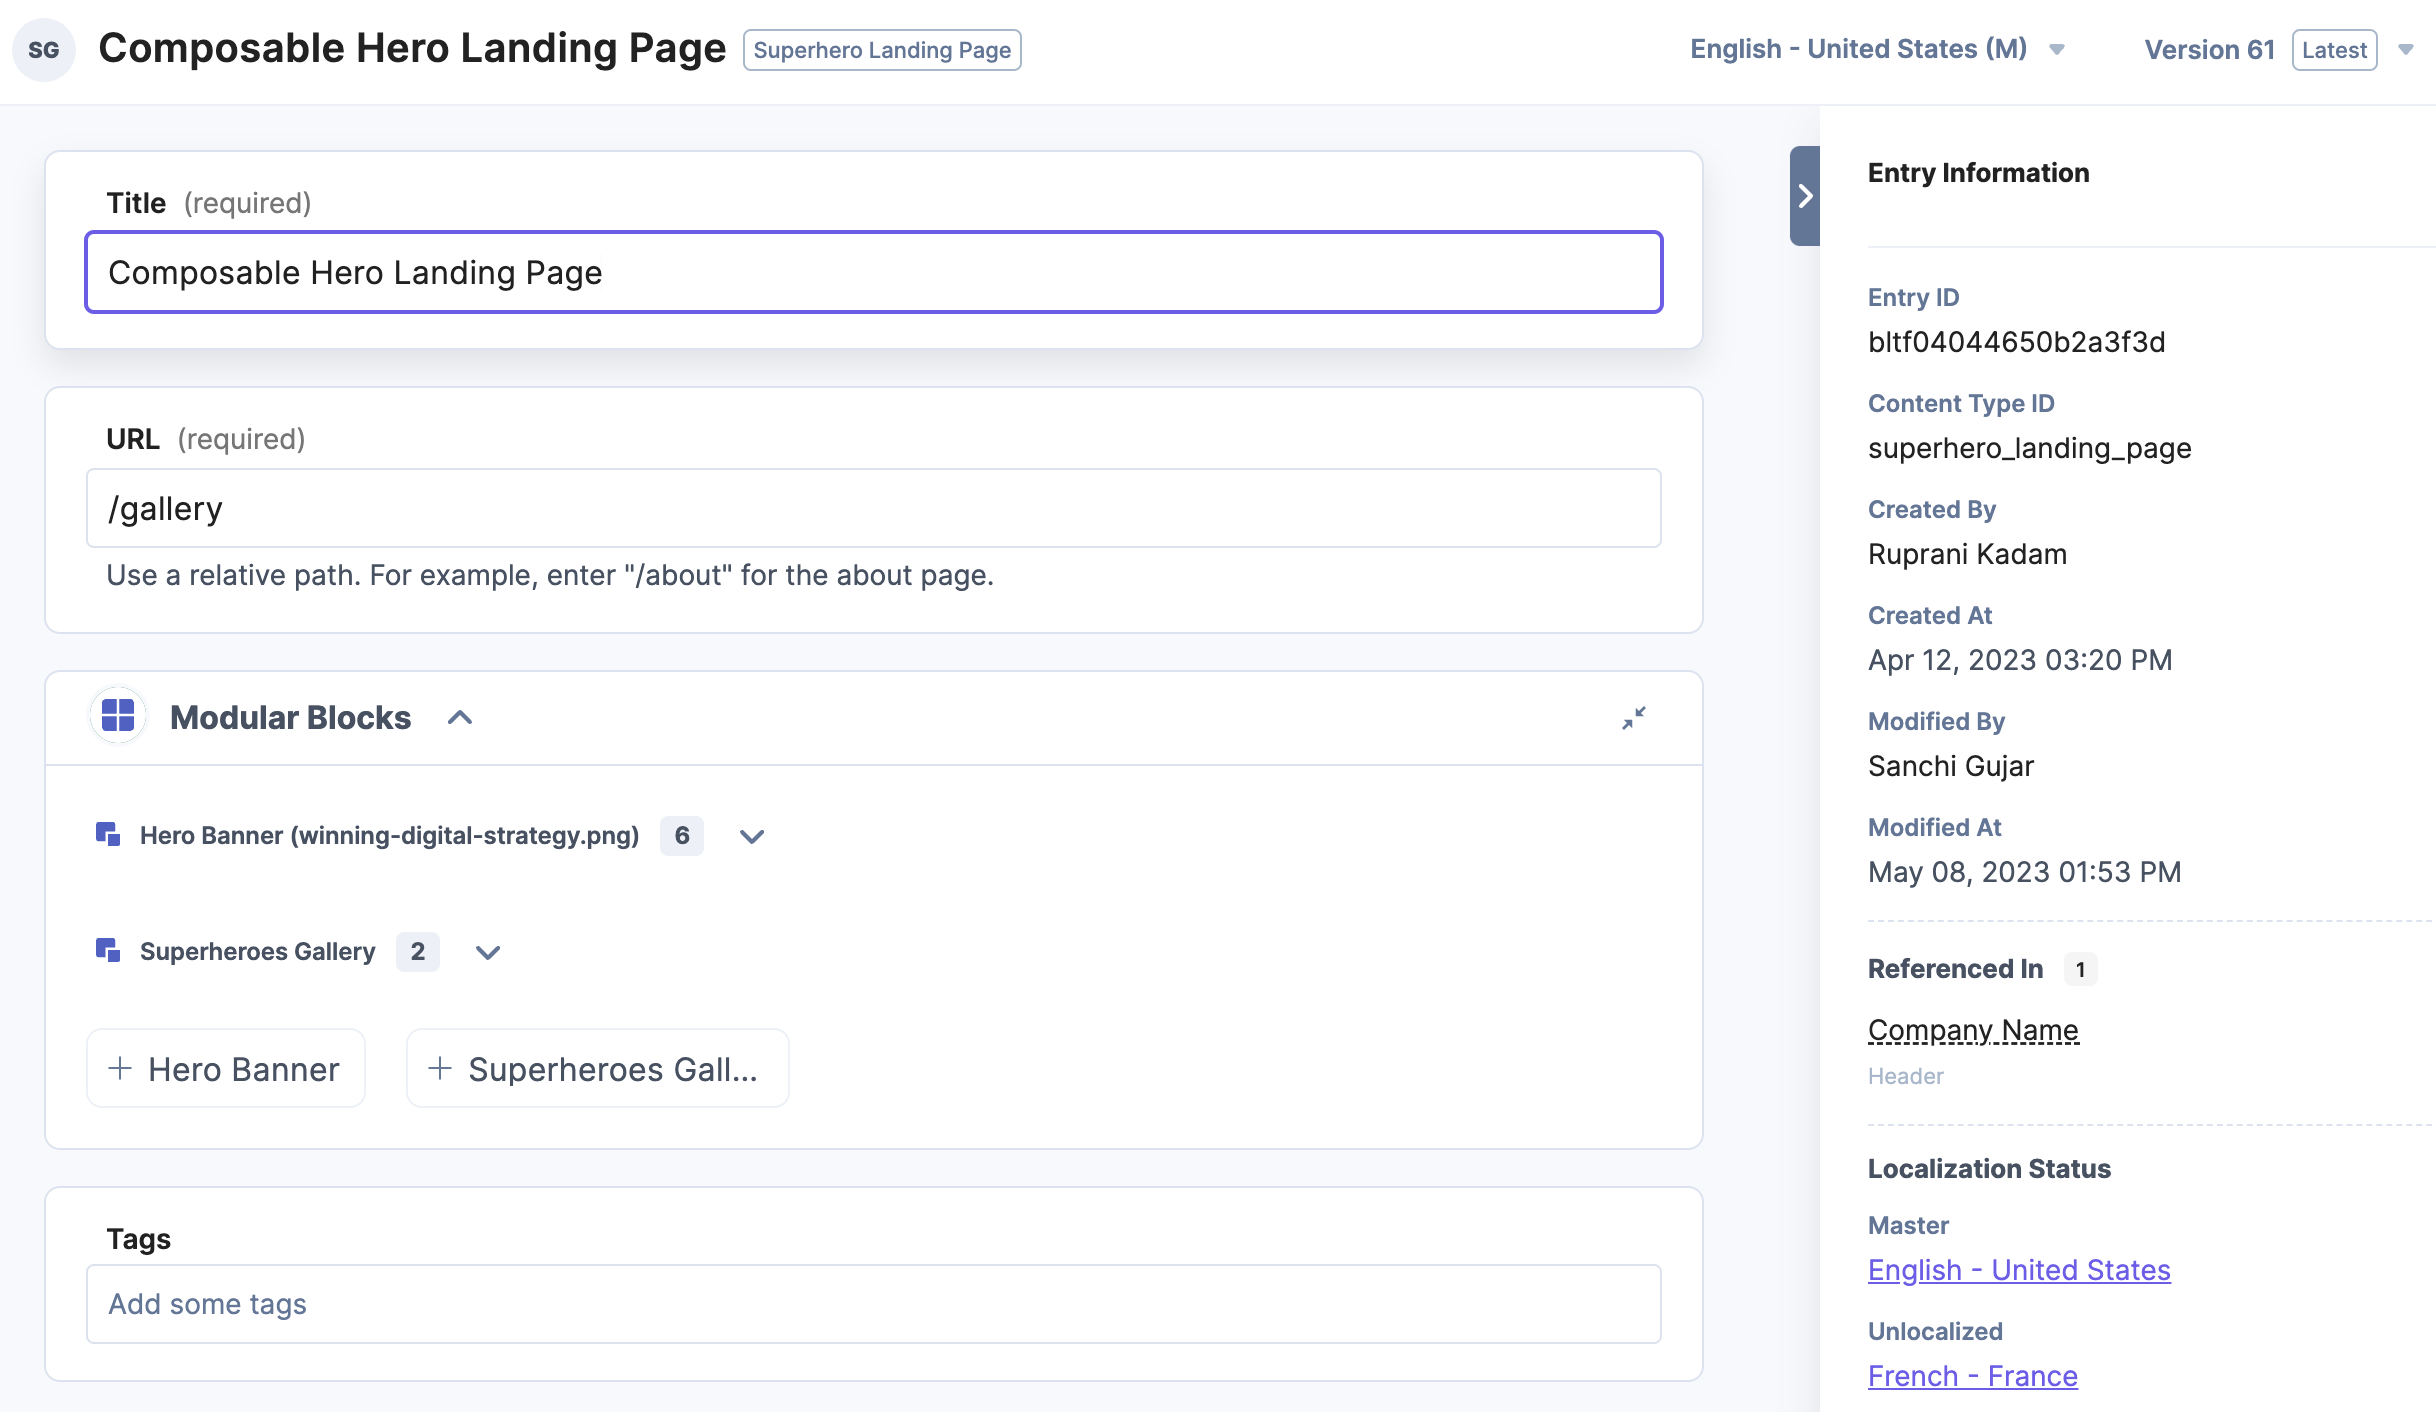
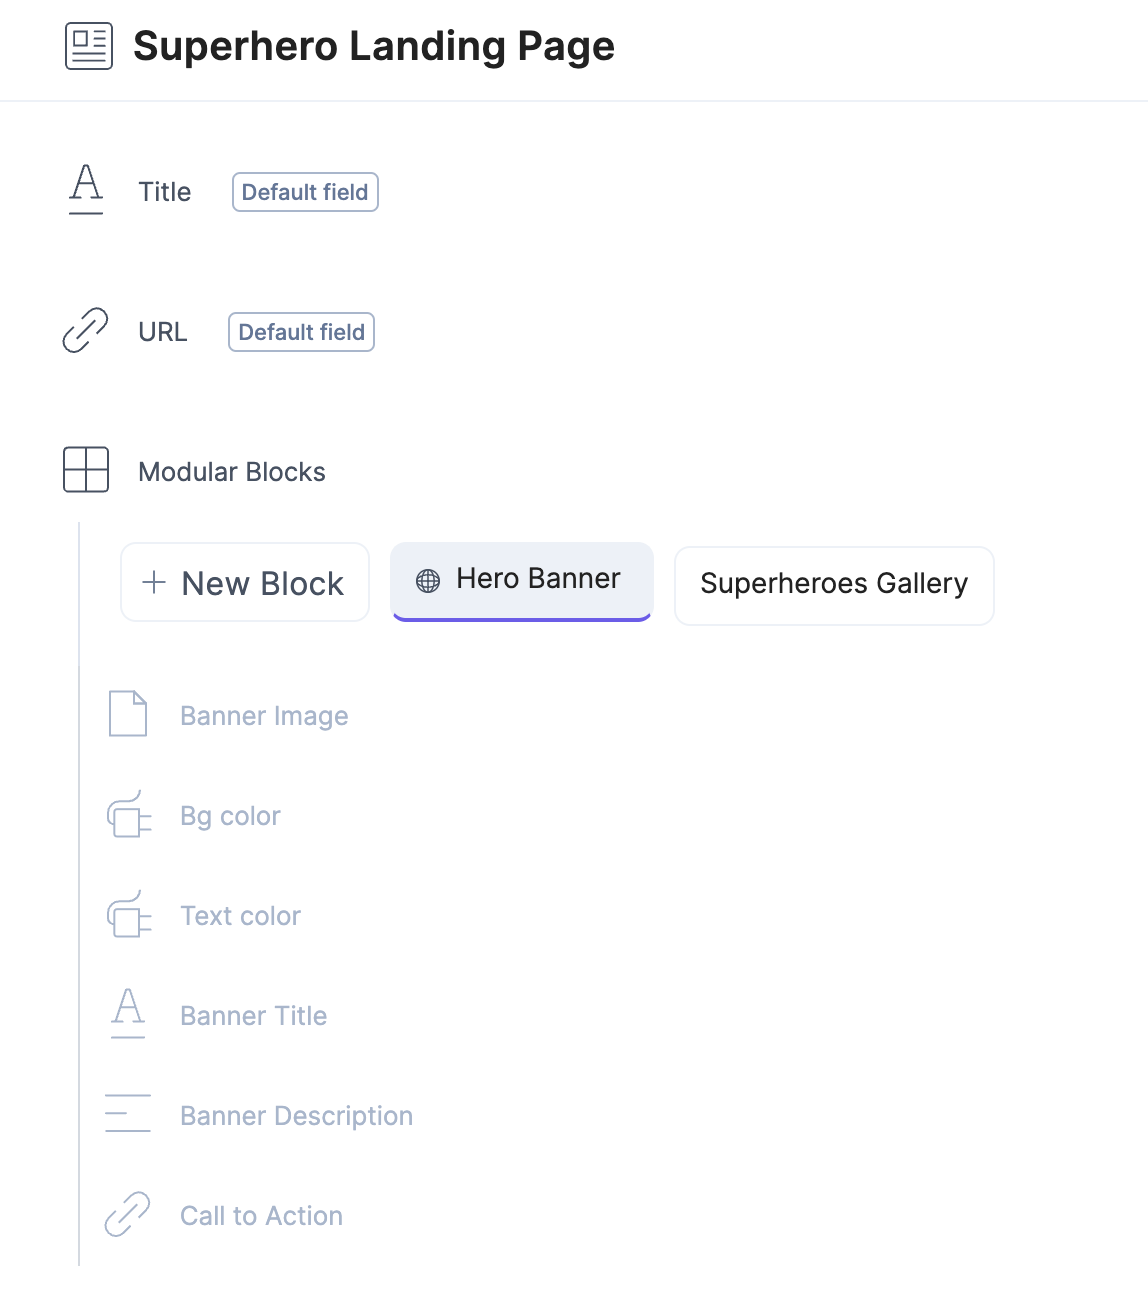
Open the Content Type Definition and examine how the Modular Blocks field is used.
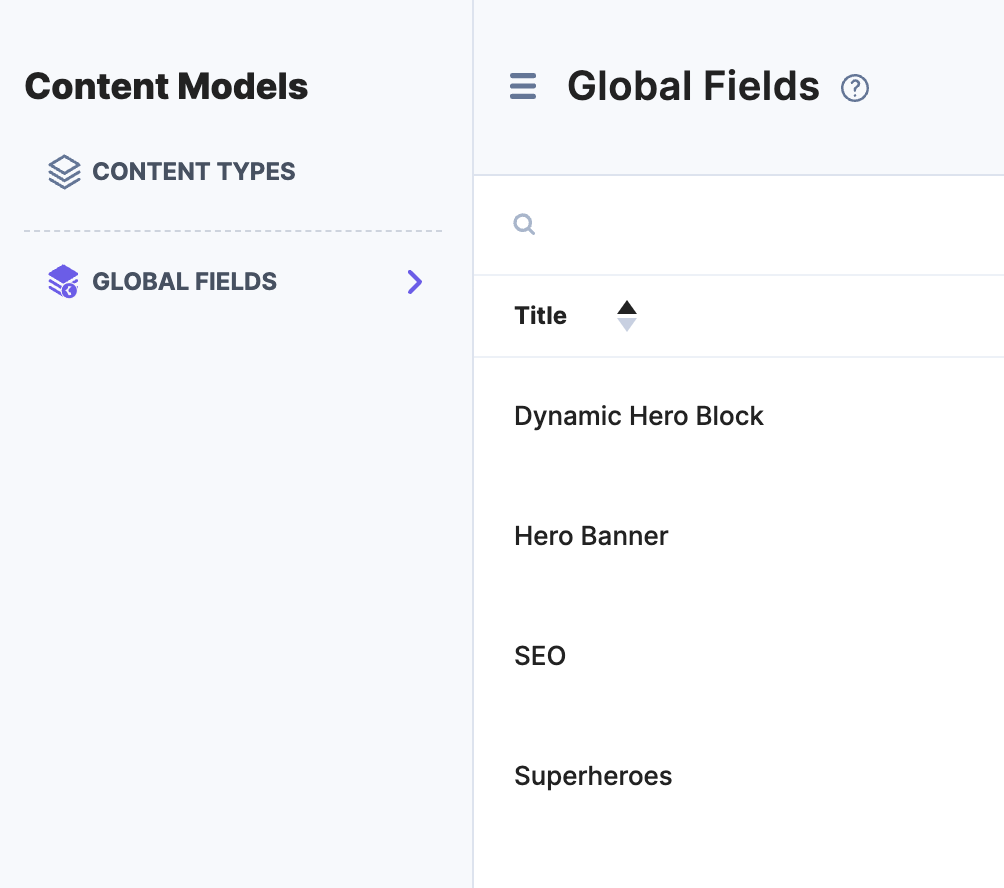
Notice the fields are greyed out - that is because the Modular Block fields are defined using Global Fields. This is a best practice.
Global Field Definitions
Examine the Code used for the Hero Landing Page
The code for the Gallery Entry (Page) loops through all the Modular Blocks on the page and renders each one with its' own NextJS Component.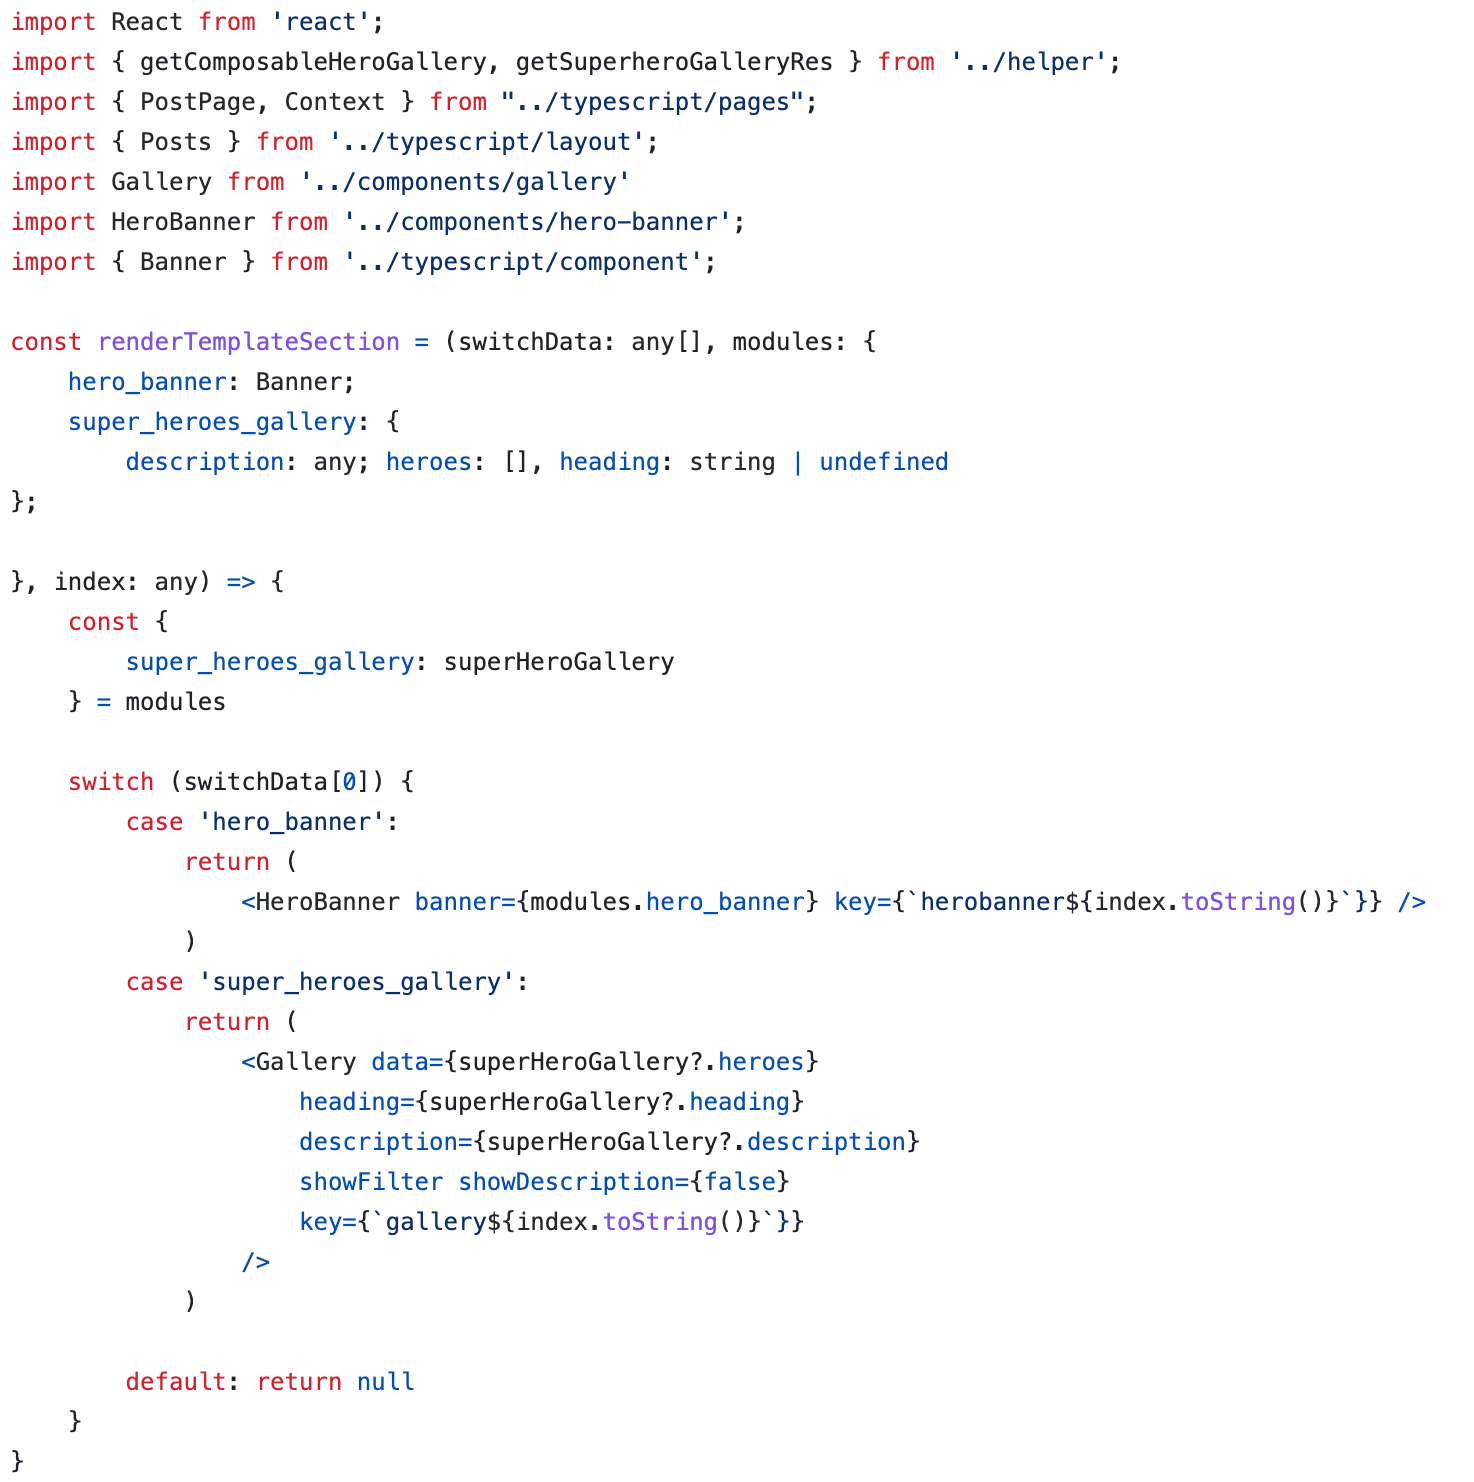
Each block is rendered with its own NextJS Component
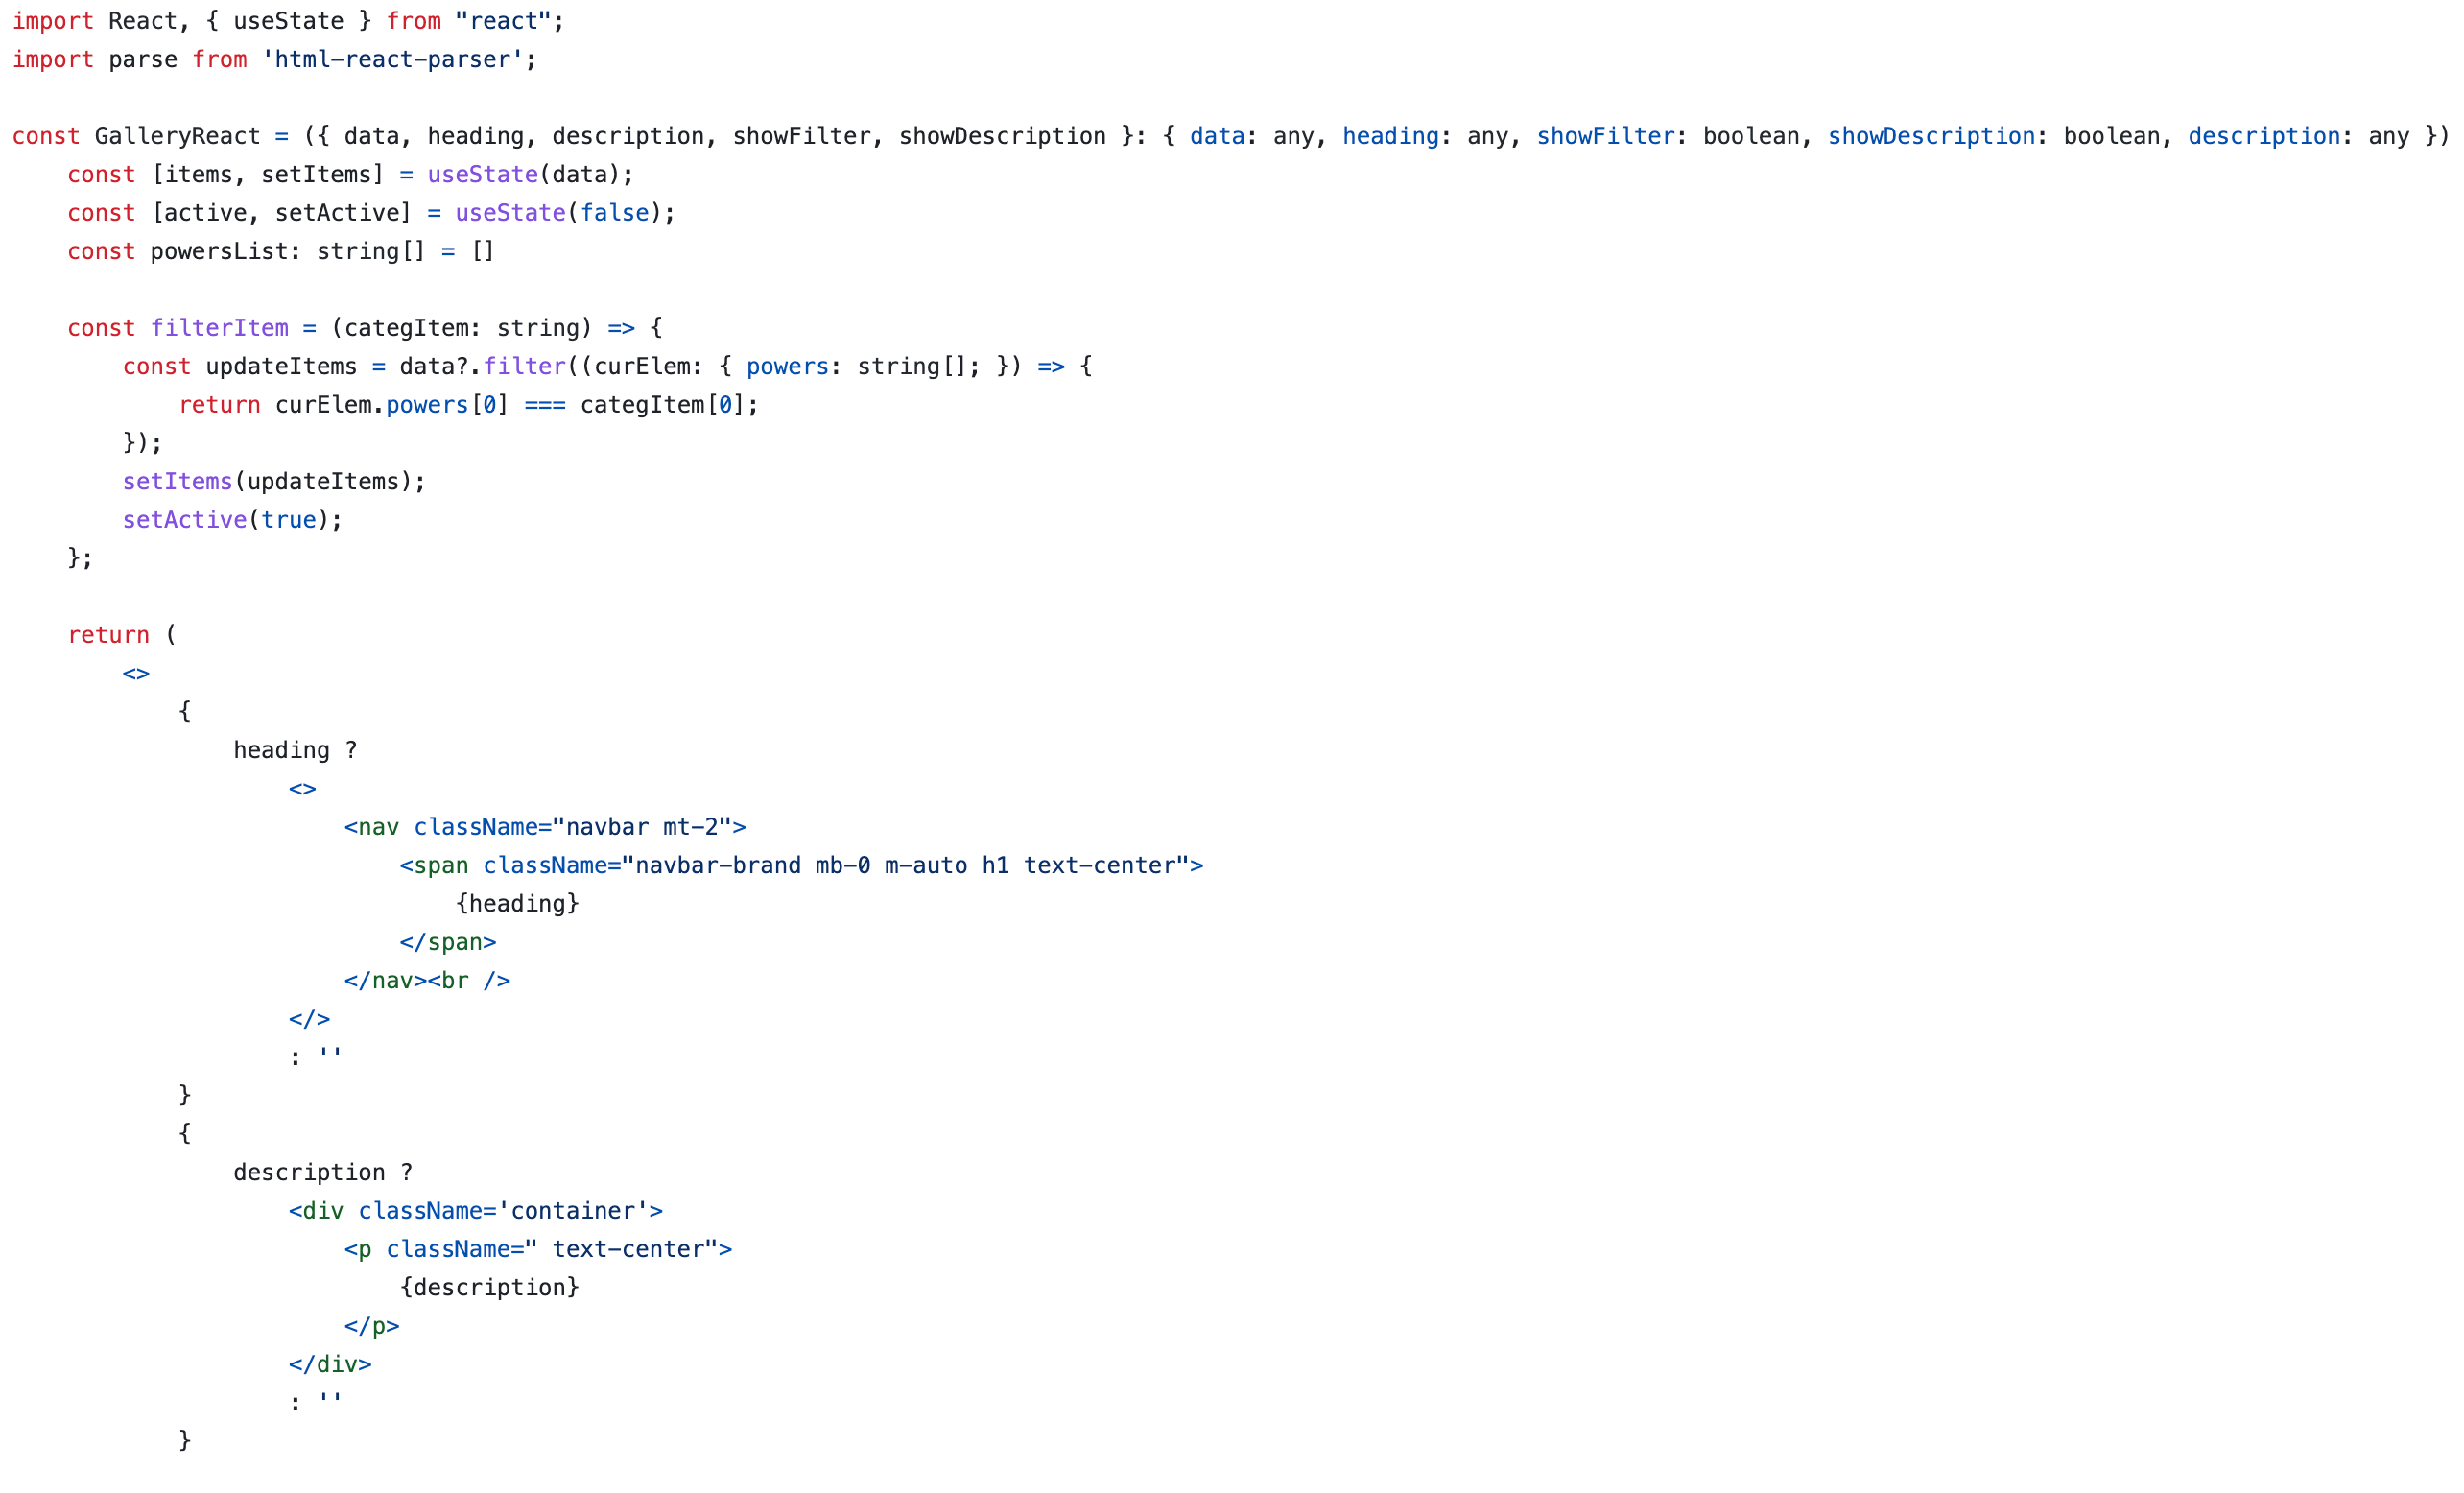
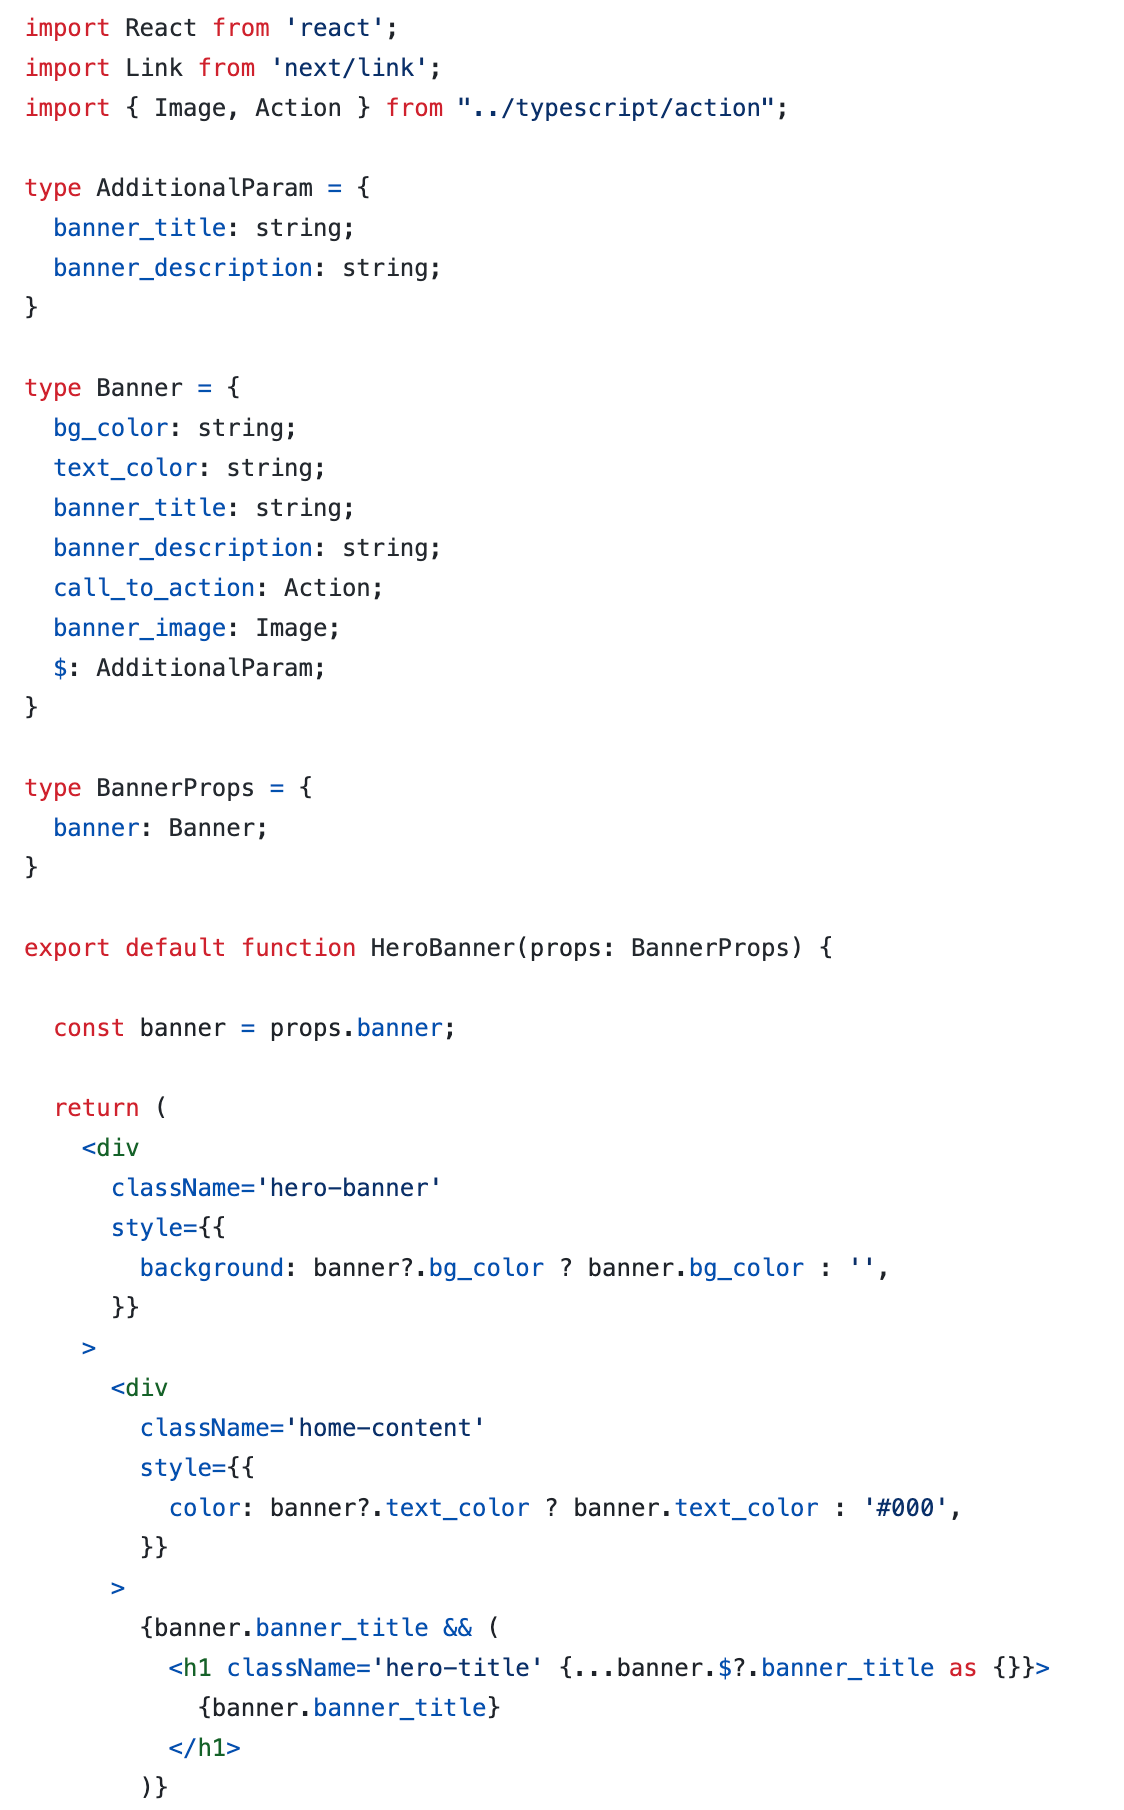
By adopting this approach, we can isolate the HTML/Code for each block within a single NextJS Component. This simplifies maintenance and enables easy extension of the page in the future by adding a Modular Block and NextJS Component for additional content block types.
With this method, you can modify the individual content blocks without having to make changes to the entire page structure. This approach makes the codebase more organized and easier to manage, especially when dealing with complex web applications.
By leveraging this technique, you can increase the scalability and modularity of your website, allowing you to add new features and functionalities with ease.