Importing Content with the CLI and CMA
Introduction to the Content Management API
Our Content Management API (CMA) is a powerful tool that provides a read/write API with a REST interface, as well as SDKs for JavaScript, .NET, and Java. To authenticate with the CMA, we use Tokens. In this exercise, we'll guide you through how to use the CMA with Postman, a popular tool that helps developers use APIs.
Let's get started with the exercise. We'll be using Postman, so first, make sure to download the latest Contentstack Postman collection from here: https://www.contentstack.com/docs/developers/apis/content-management-api/#install-postman
Also, download and use the Postman Environment Files from Github here: https://github.com/contentstack/contentstack-postman-collections#environment-files
The next step is to create a Management Token to use in our Postman query. To do this, go to Settings in the Contentstack UI, then Tokens, Content Management, and create a Management Token. You can follow this guide for more detailed instructions: https://www.contentstack.com/docs/developers/create-tokens/generate-a-management-token/

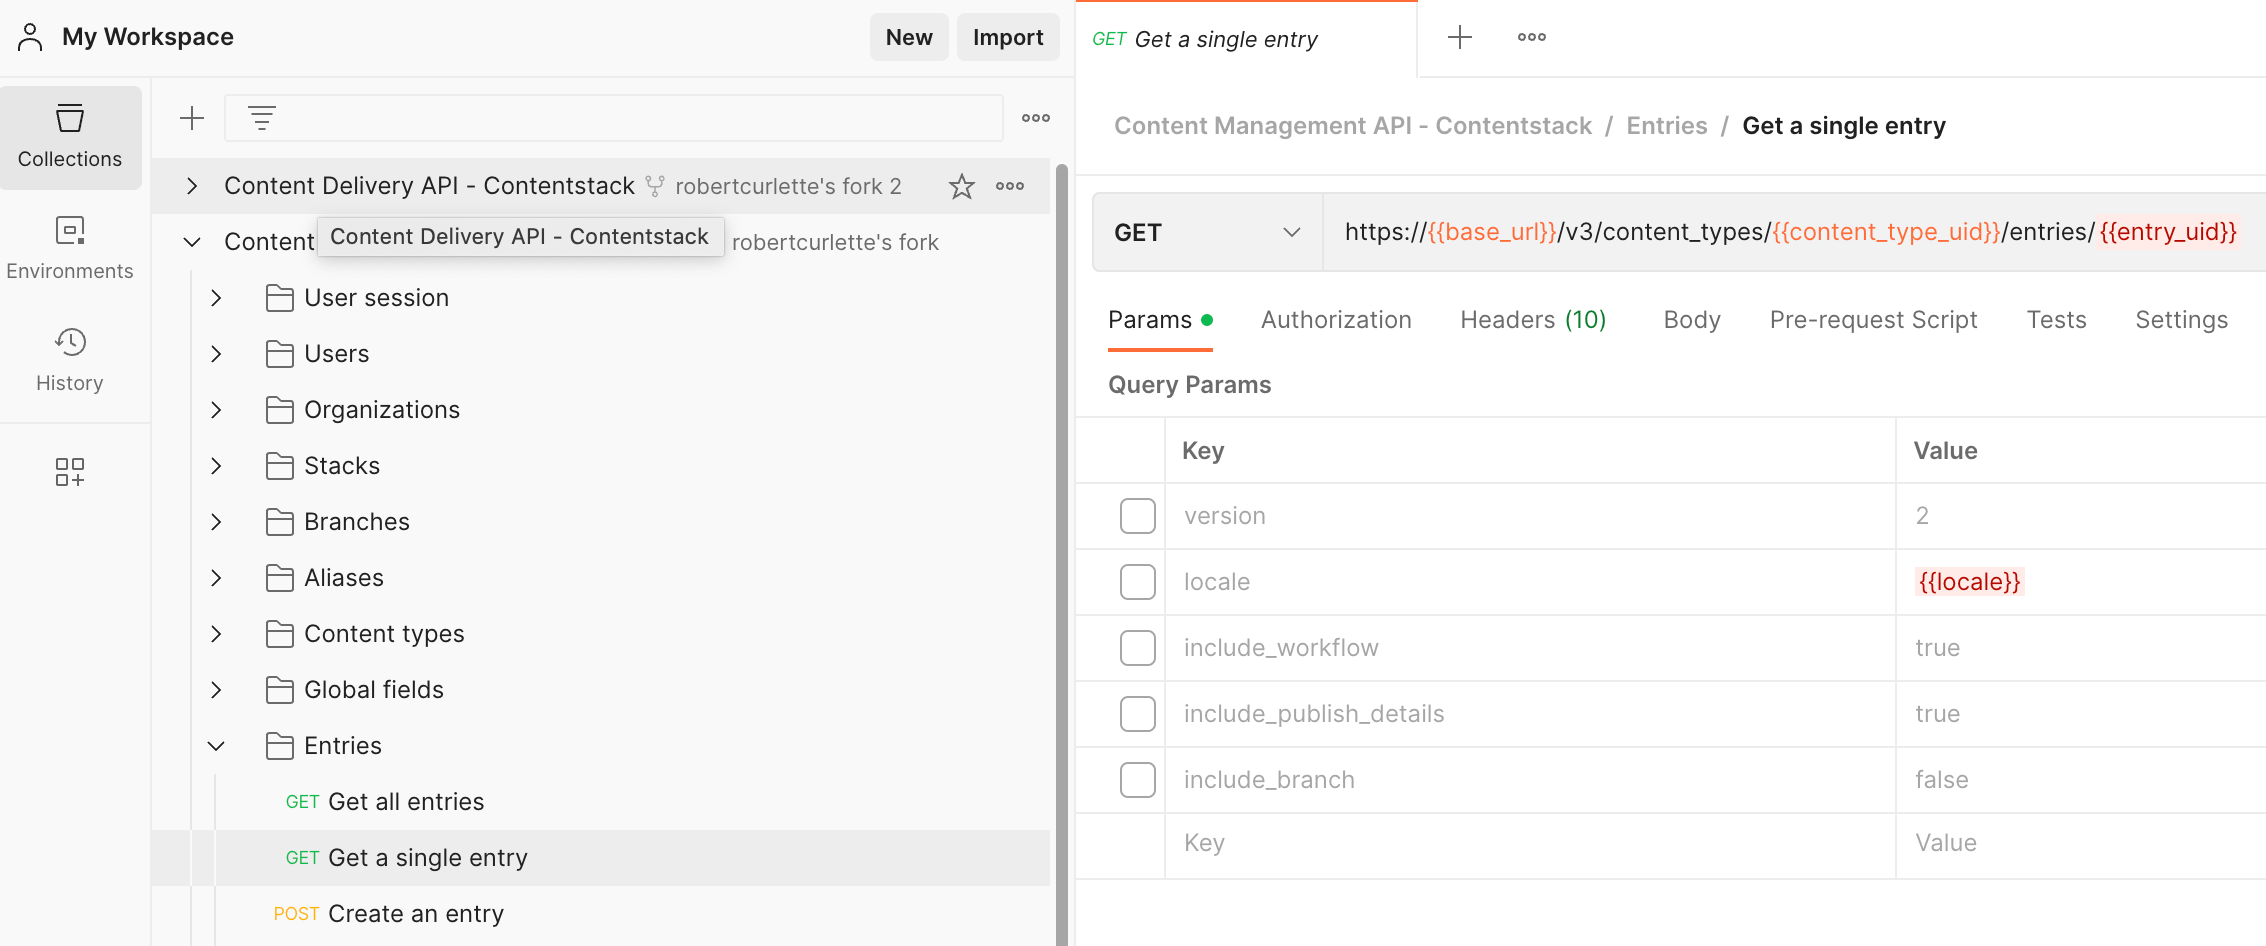
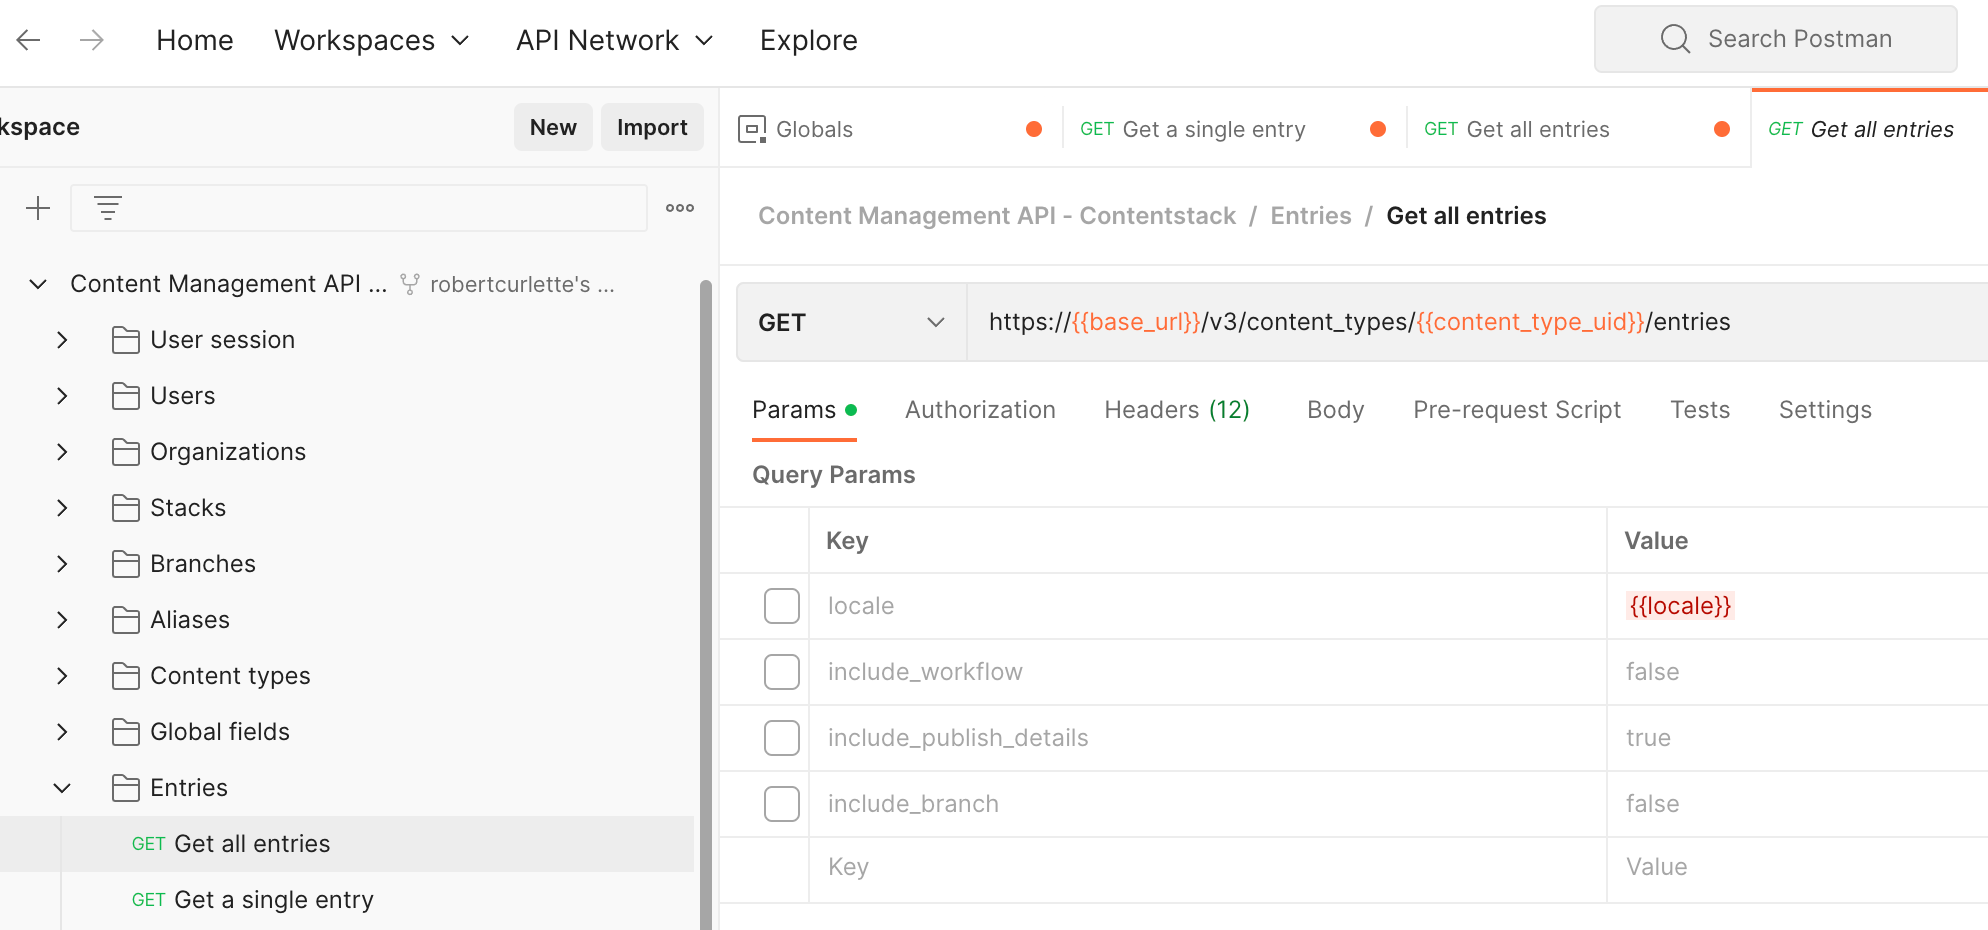
Now, open Postman and add the Content Management API Postman Collection. Select Content Management API - Contentstack, Entries, Get a single entry, and you're ready to go!
In Postman, select Content Management API - Contentstack, Entries, Get a single entry
Update the API Key and Access Token
There are two ways to set the values, using Postman variables like above or hard-coding the values in the Value column. I prefer to use the Environment variables. https://github.com/contentstack/contentstack-postman-collections#environment-files
1. Set the Environment variable values for your Stack in Postman by selecting the icon in the top-right of Postman to open the Environment variable window.
Specify the following header values:
- api_key - This is located in the Settings, Tokens, Management Token page. You can also see it in the URL of the browser, after the /stack/ part of the URL, http://app.contentstack.com/#!/stack/{api_key}
- management_token - Management token created in step 1
2. Use the ‘Get a single entry’’ method and add the base_url, content_type_uid (character) and entry uid to the query. This will retrieve the JSON for the Entry using the backend CMA.
*Note, we do not use this API for our frontend website applications as it is not intended for high load / performance. Instead, the frontend web applications use the Content Delivery API which is tuned for high performance.
3. Run the query and see the JSON result.
Notice that we have Create / Read / Update / Delete operations for most types.
Using the JSON returned from the Get Entry method, we will create new JSON to use for the Create Entry method in the next exercise.
Learn More:
Key Features of Management Tokens:
Creating content with the API: Using the Content Management API
Exercise: Create an entry with the Postman API
In this exercise, we'll guide you through creating a new Entry in Contentstack programmatically using our Content Management API. This method is incredibly useful for quickly migrating content from external systems and avoiding manual entry.
The trickiest part of this process is creating well-formed JSON that contains all the properties and content for the Entry. But don't worry - we've got you covered. In the previous exercise, we used our CMA to retrieve the Entry JSON, and now we'll use a subset of that JSON to create our new Entry.
If you weren't able to retrieve the JSON Entry export in the previous exercise, we've included a sample below. Just make sure to update the UID of the Content Type for it to work.
To get started, let's create the Entry JSON required to make a new Entry. Below is an example JSON, but remember to replace the Content Type UID:
{
  "title": "New Entry Title",
  "url": "/new-entry-url",
  "description": "This is a new Entry created programmatically using the Content Management API.",
  "content_type_uid": "your-content-type-uid",
  "metadata": {
    "tags": ["tag1", "tag2"],
    "author": "John Doe"
  },
  "body": "This is the body of the new Entry."
}
Now, in Postman, open the ‘Create an entry’ method and in the body tab, paste the JSON of the new Entry. Please note that the Title property of the Entry needs to be unique.
As we used Postman variables in the previous exercise, you won't need to add any additional settings here, since the api_key and management token are already specified.
Finally, hit the Send button in Postman to create your new Entry. Head over to the Contentstack UI to confirm that it has been created successfully.
Exporting Content from Contentstack
Contentstack stores all text content in JSON format. This makes it very easy to import / export and update content using the Content Management API or the CLI. In this section we will discuss the three ways to export content from Contentstack: UI, CM API, and the CLI.
Exporting with the UI

Exporting with Postman
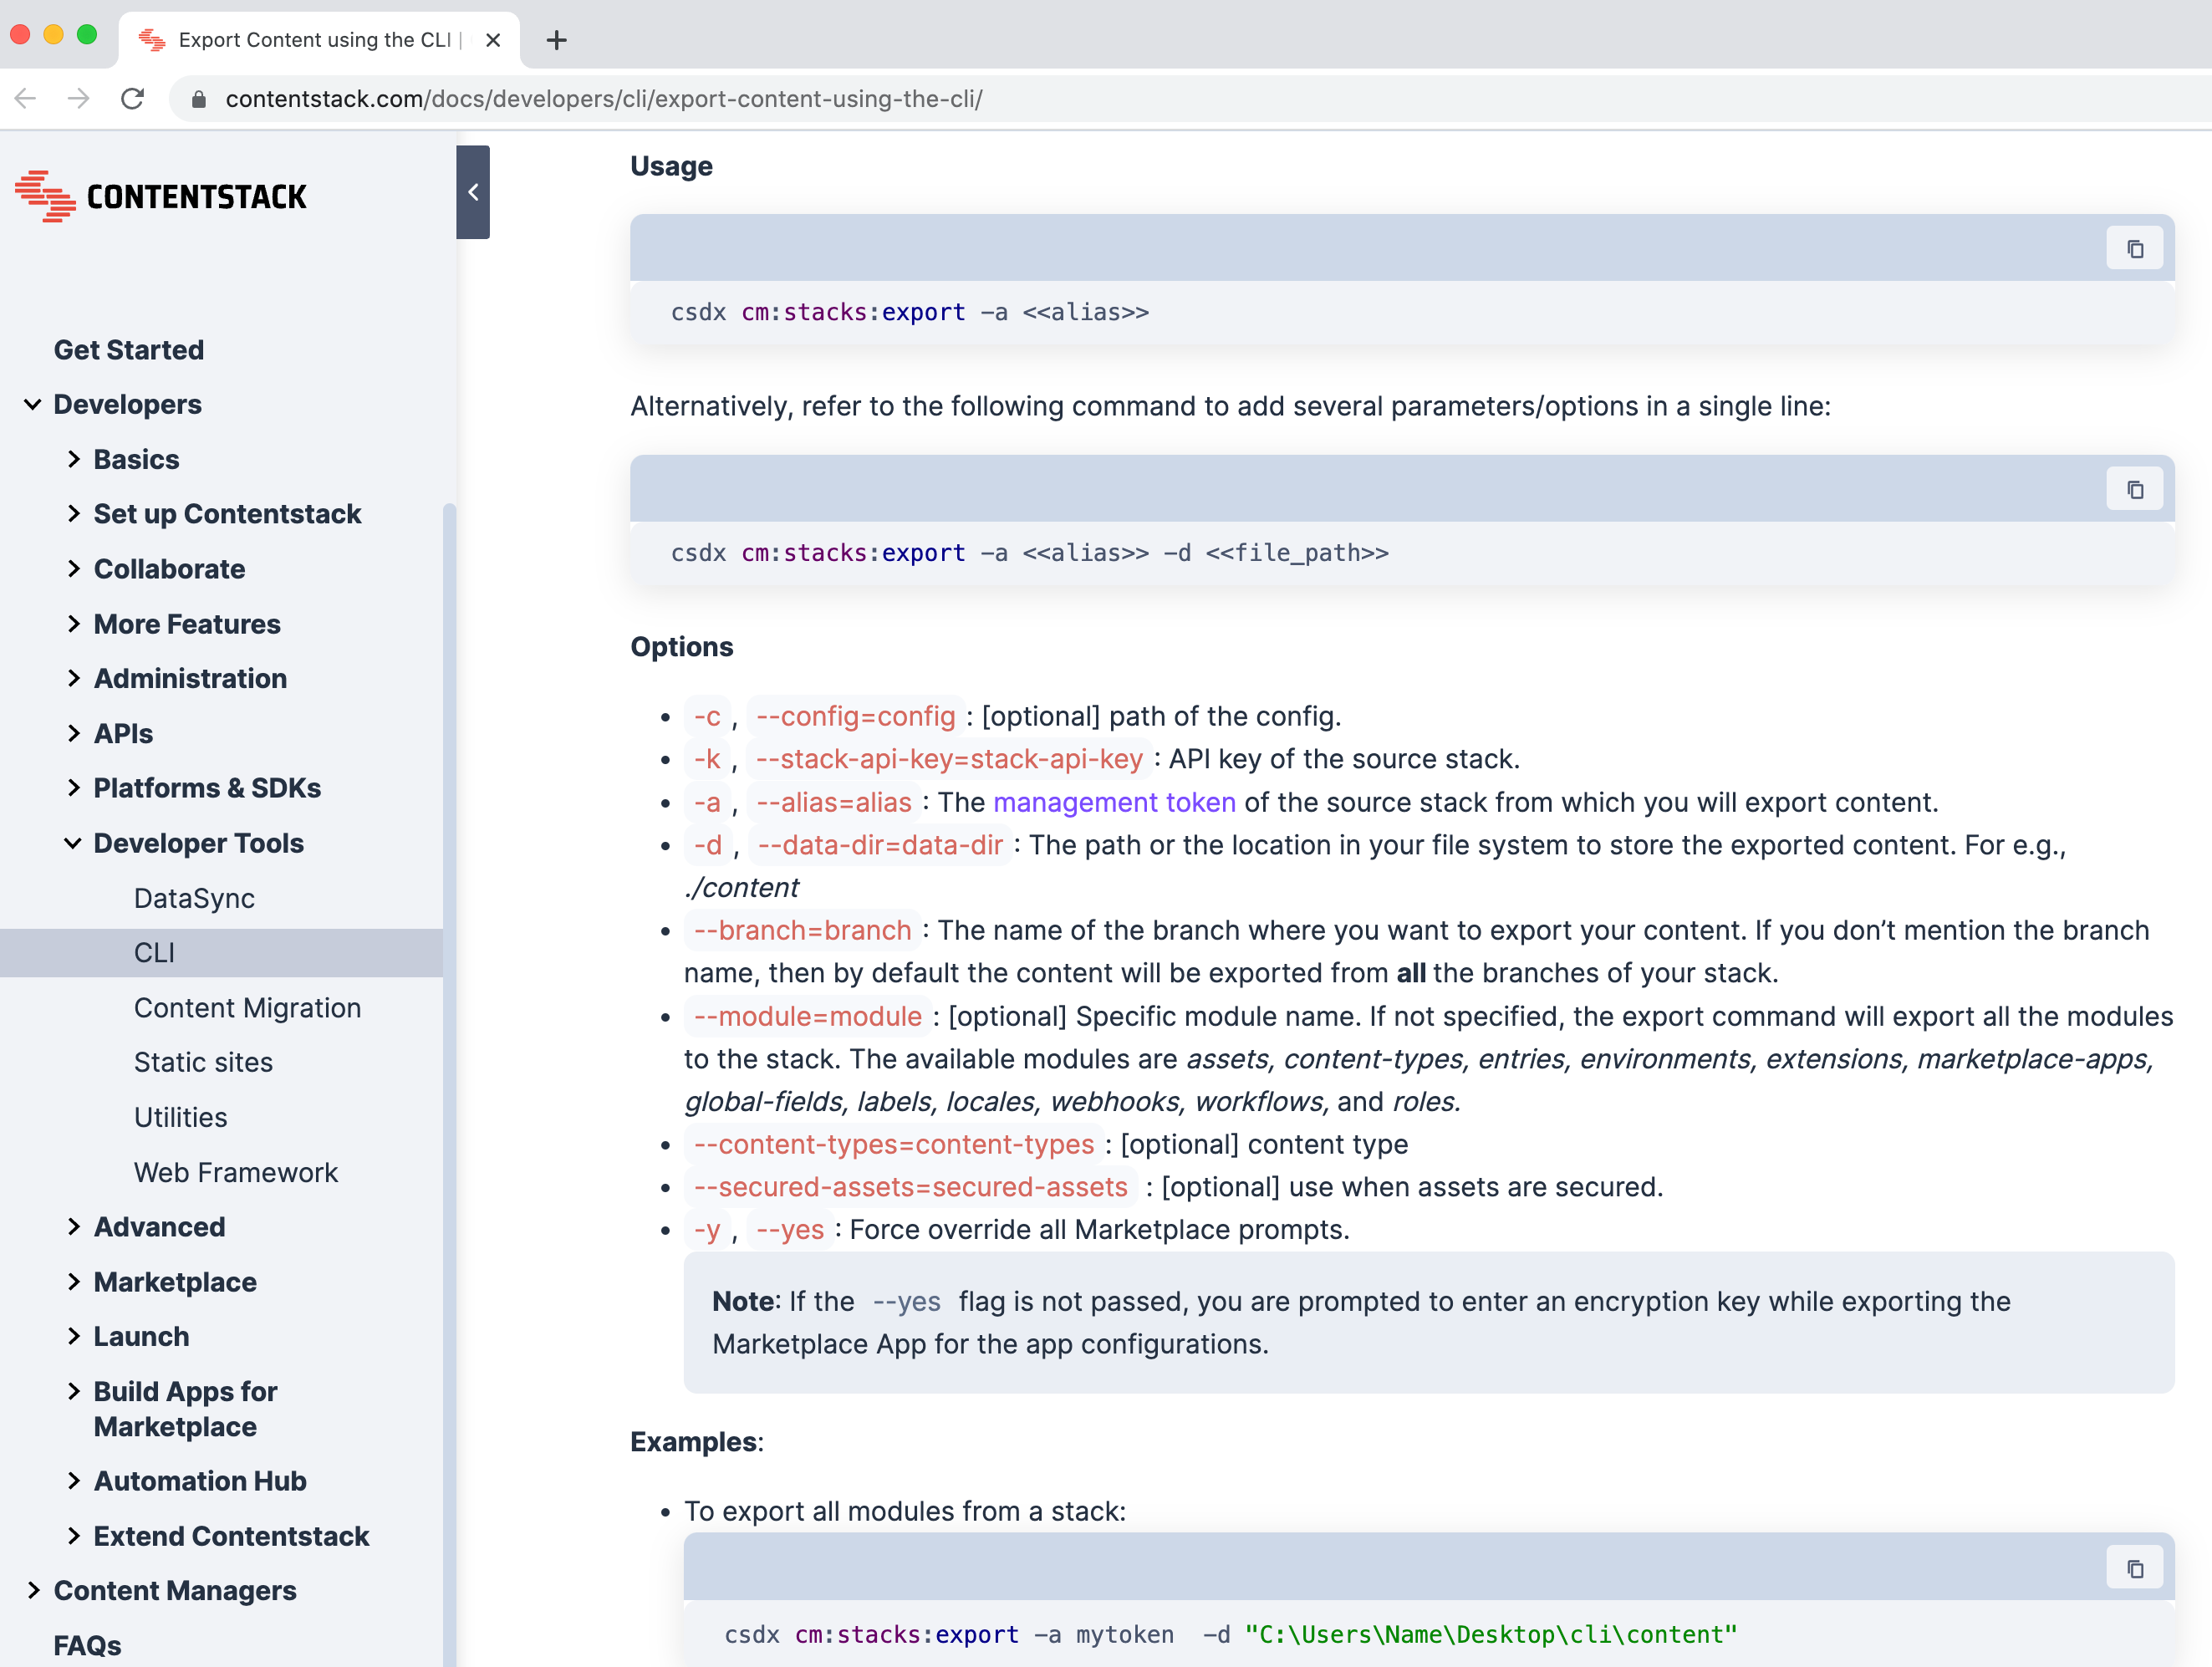
Exporting with the CLI