

Create an A/B Test Experience
An A/B test experience is a randomized experiment that lets you present two or more content variants of a web page or an app and display them to different sets of users at the same time to verify the effectiveness of these variants.
In Contentstack Personalize, A/B Testing empowers you to make data-driven decisions and optimize your content strategy by experimenting with different content variations. By creating and comparing these variations, you can:
- Identifying Effective Content
- Optimizing for Conversions
- Personalizing Experiences
- Reducing Bounce Rates
- Improving Customer Satisfaction
When to use A/B Test experiences in Contentstack Personalize?
- Comparing Content Variations
- Data-Driven Decision Making
- Optimizing for Conversions
- Experimentation and Iteration
- Technical Expertise and Resources
- Contentstack's A/B Testing Capabilities
By carefully considering these factors, you can determine whether A/B testing is the right fit for your optimization strategy and leverage it to drive better results.
Prerequisites
- Contentstack account
- Access to the Contentstack Organization that has Personalize enabled
- Access to a project in Personalize
- Audience created in your Personalize project
- Event created in your Personalize project
Note: Users with Owner and Member access to a Personalize project can create A/B Test experiences.
Steps for Execution
Note: For this guide, we have assumed that you have already created a Personalize project. If not, please follow this guide and create a project in Personalize.
To create an A/B Test Experience, log in to your Contentstack account and perform the following steps:
- In the top navigation bar, click the App Switcher icon and then click Personalize.
- You will be redirected to the Personalize Projects landing page. Click the project for which you want to create a A/B Test Experience.
- On the Experiences page, click the + New Experience button.
- In the Select Experience Type modal, click the A/B Test experience type.
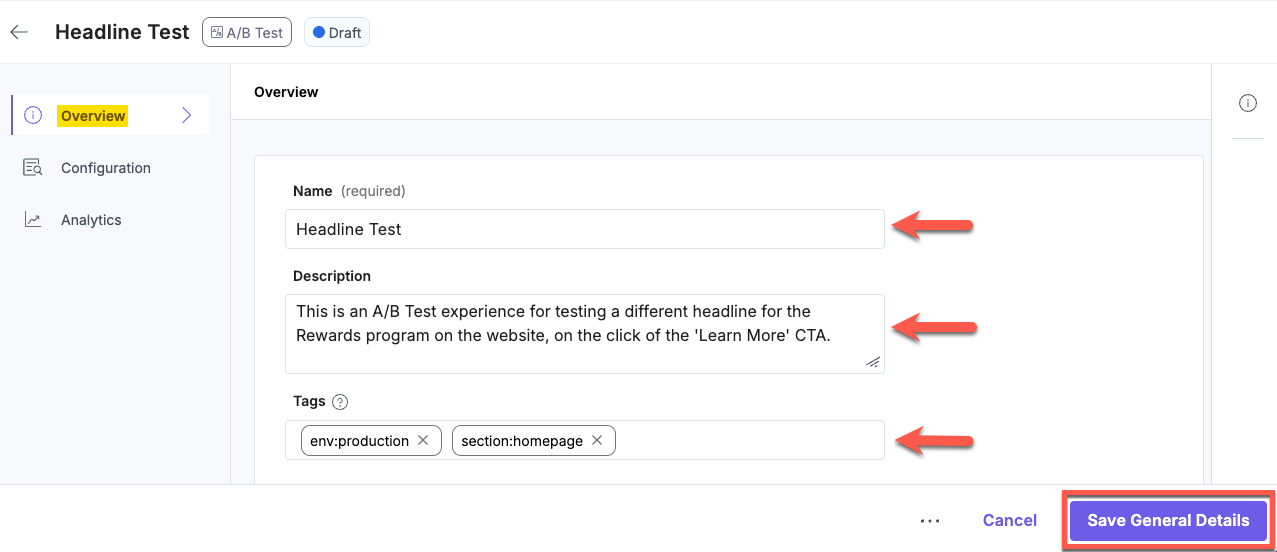
- On the experience draft page, in the Overview tab, provide a suitable Name and an optional Description for the experience. In the Tags field, click inside the input area and type a tag to categorize this experience, for example, env:productionor section:homepage. Press Enter or comma to confirm each tag as a pill. For more information on experience tags, see the Experience Tags documentation. Once done, click the Save General Details button.
- Click the Configuration tab.
- Under the Variants section,
- Variant Distribution: Variant Distribution in A/B testing is the process of determining how traffic is to be divided between the different variants of your content. You can choose from the following distribution options:
- Equally split: Distributes traffic evenly across all variants. Use this option when you want a controlled and unbiased comparison, validate a hypothesis, or ensure that each variant receives the same audience size.
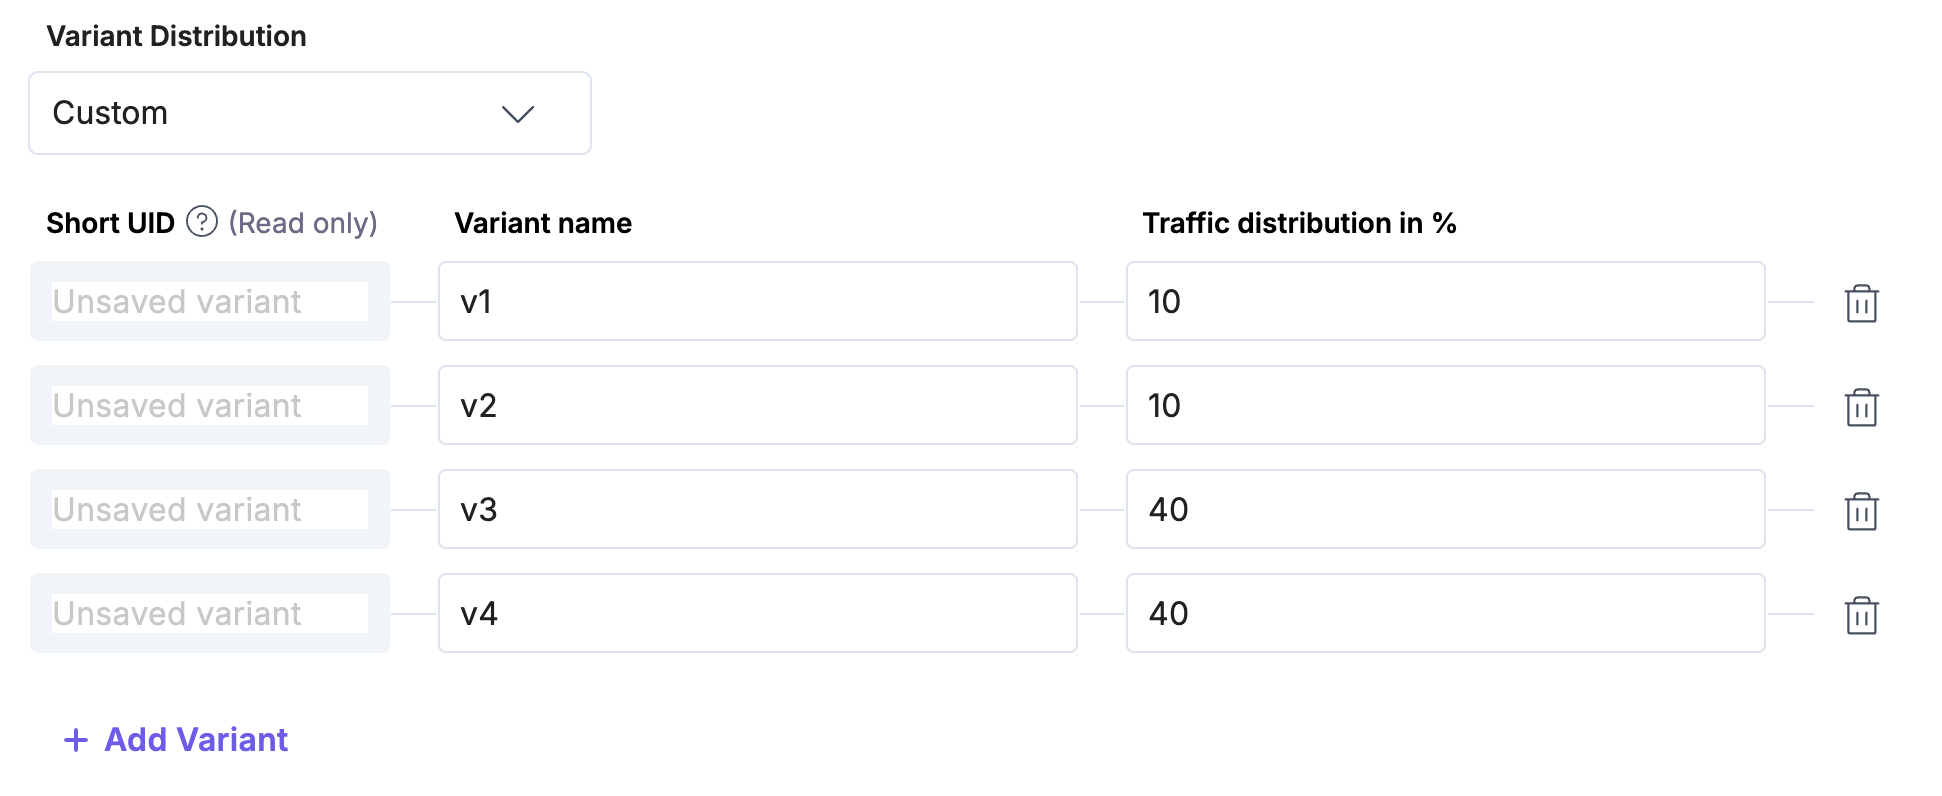
- Custom: Allows you to manually assign traffic percentages to each variant, letting you favor one variant over another.
- Multi-Armed Bandit: Automatically optimizes traffic distribution across variants based on real-time conversion performance. Use this option when your primary goal is to maximize conversions while the test is running and you are comfortable with traffic distribution changing dynamically.
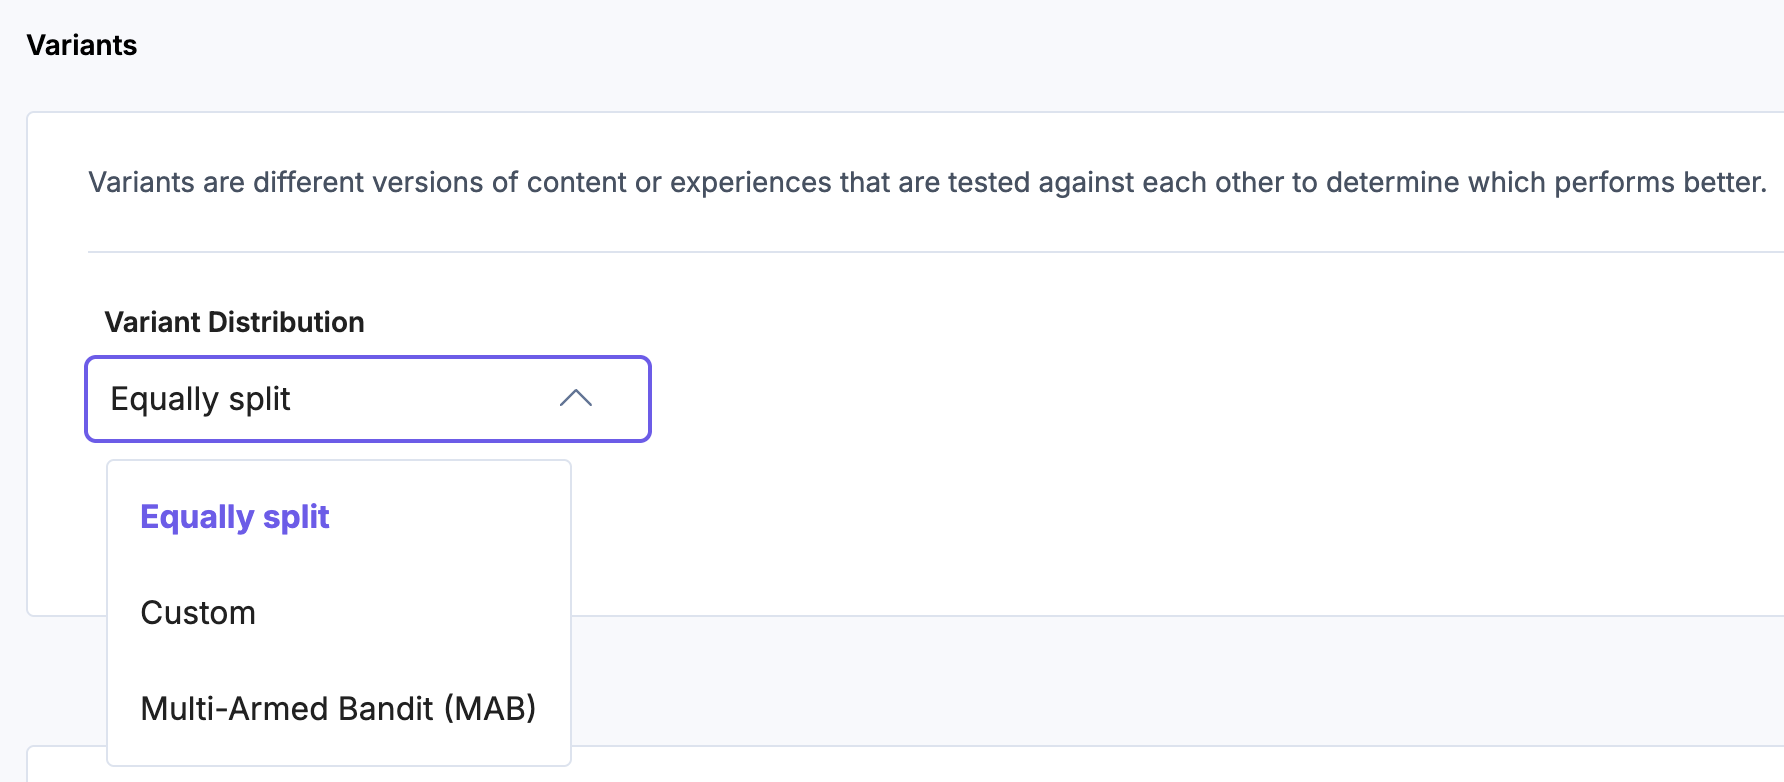
By default, Variant Distribution is set to Equally split.
Distribution Option Description When to Use it Equally split Distributes traffic evenly across all variants for the entire duration of the test. Use when you want a controlled and unbiased comparison between variants, validate a hypothesis, or ensure that each variant receives the same audience size. Custom Allows you to manually assign fixed traffic percentages to each variant. Use when you need precise control over traffic exposure, such as soft launches, phased rollouts, or limiting risk for new or experimental variants. Multi-Armed Bandit Automatically adjusts traffic distribution over time based on real-time conversion performance. Use when your primary goal is to maximize conversions during the test and you are comfortable with dynamic traffic allocation. Multi-Armed Bandit Behavior:
- Traffic is initially distributed equally across all variants.
- You cannot manually edit traffic percentages.
- Traffic allocation is adjusted automatically over time as performance data is collected.
- Traffic redistribution begins only after the experience reaches either of the following thresholds across all variants:
- At least 1,000 total impressions, or
- At least 30 total conversions.
Once one of these thresholds is met, traffic redistribution occurs every minute, as long as the system continues to receive impression and conversion events.
To ensure continued learning, every Multi-Armed Bandit test reserves a minimum exploratory traffic share of 1%, which is split equally across all variants. Until the threshold is met, all variants continue to receive equal traffic.
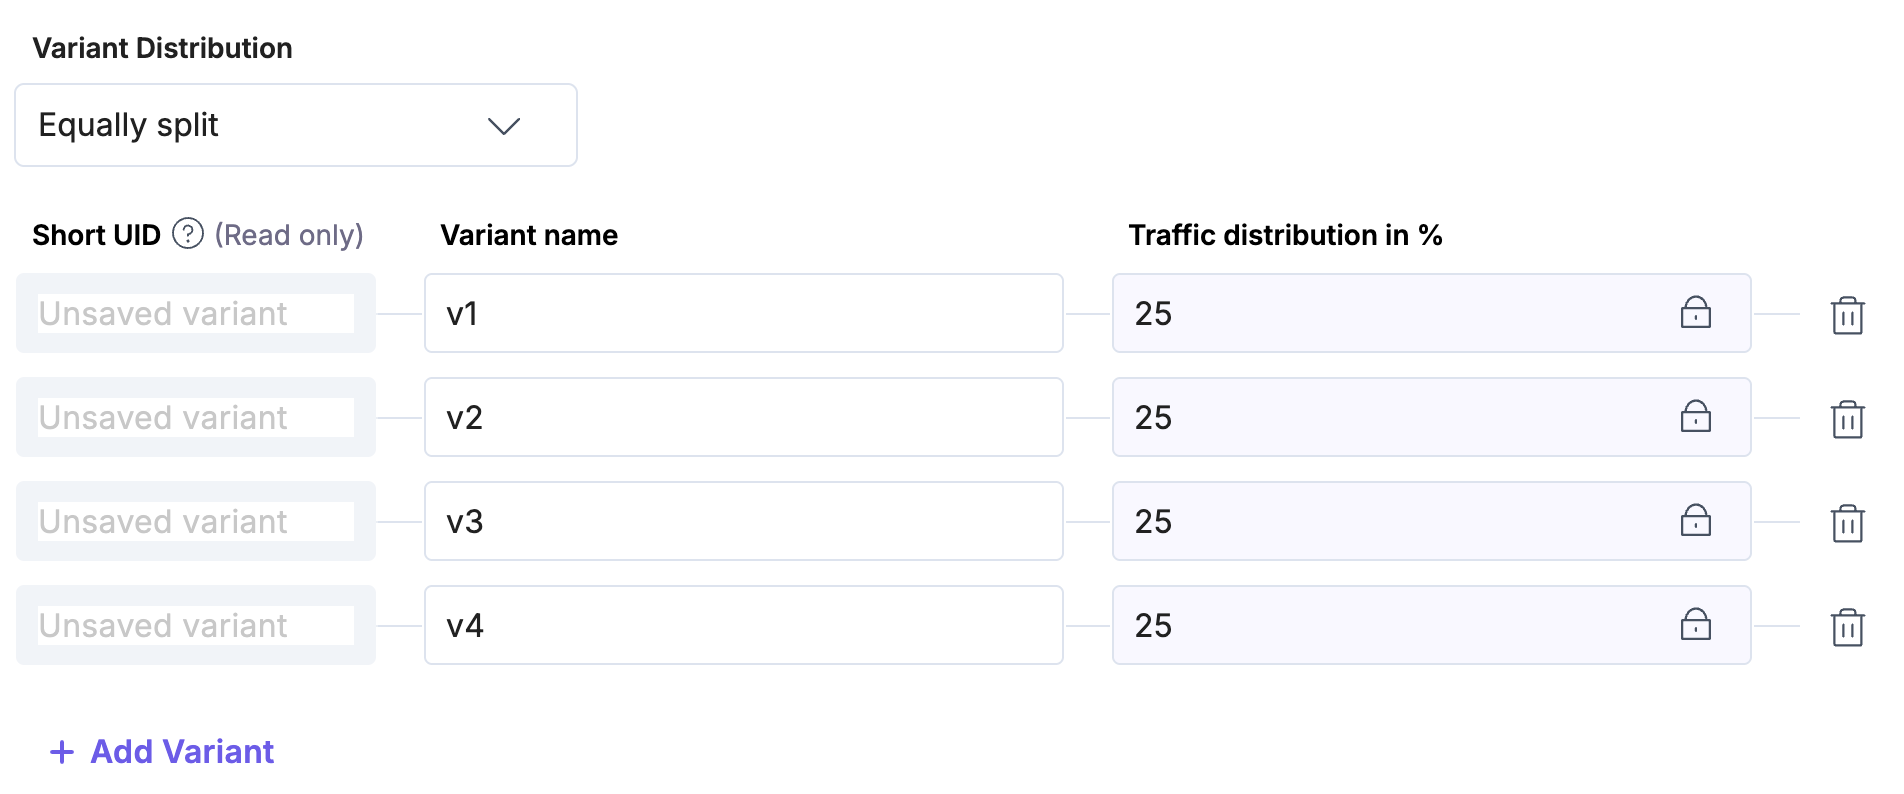
- After selecting the variant distribution, you can create variants for the A/B Test. Variants are alternative versions (CMS Entry Variants) of content or experiences created for testing against each other. To create variants for your experience, click the + Add Variant button.
- Short UID: This unique ID is automatically assigned to each variant and used in Personalize API requests.
- Variant Name: Provide a meaningful name for the variant. This name will be reflected in the Entry Editor for the Entry Variants in the CMS.
Note: Each A/B Test experience must contain at least 2 variants. Each experience is reflected in the CMS as Variant Group and you can create Entry Variants for each of these variants via the Entry Editor.
- Traffic Distribution in %:
- For Equally split, the distribution percentage is calculated automatically.
- For Custom, you can specify the percentage as per your preference.
- For Multi-Armed Bandit, traffic percentages are managed automatically and cannot be edited manually.

- For Equally split, the distribution percentage is calculated automatically.
Similarly, you can add multiple variants by clicking the + Add Variant button.
- Variant Distribution: Variant Distribution in A/B testing is the process of determining how traffic is to be divided between the different variants of your content. You can choose from the following distribution options:
- Under the Metrics section,
- Click + Add Event and select the preferred event from the drop-down list.
You can add multiple events to an A/B Test experience as Metrics. Use the Personalize Edge SDK to trigger the events for your experiences using the triggerEvent method.
Note: The first event that you add becomes the ‘primary’ metric. The 'primary' metric determines the winning variants, while secondary metrics offer additional insights. When any of the listed events occur, metrics calculate an increase in unique conversions per visitor, which you can view in the experience Analytics tab.
- Click + Add Event and select the preferred event from the drop-down list.
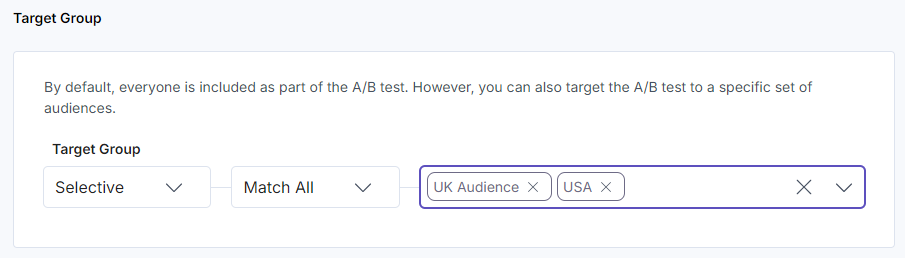
- Under the Target Group section,
- Target Group: By default, Everyone is part of the A/B test, you can target the A/B test to a specific set of audiences (Selective). Here, we are using the Selective split option for the target group.
- Condition: You can set the rule to satisfy either all audiences (Match All) or at least one of them (Match Any) by selecting from the dropdown.
- Audiences: Click the Audiences field. From the Select Audience(s) modal, select one or multiple audiences, then click the Apply Selected Audiences button to set the audience criteria for the target group.
- Once you have defined your variant, click the Save Draft button.
- Now click the Activate Draft button.
- Click Activate in the Activate Draft Modal to activate the experience on your site for your visitors.
Note: Ensure you create Entry Variants in the CMS before activating an experience for a seamless personalized campaign for your visitors.

This creates a new A/B Test Experience in your Personalize project. For managing experience versions (activated/draft/paused), please refer to this guide.
Additional Information: To achieve optimal personalization for your users, prioritize experiences and variants independently. Use experience priority when multiple experiences customize the same element on a digital property, and apply variant priority when audience conditions match multiple variants. For more details, please refer to this guide.
After activating your A/B Test experience, the Analytics are updated within a few minutes when your visitors start accessing and interacting with your content.
Note: To design, preview, and analyze A/B Test experiences effectively, make sure Live Preview and Visual Builder are enabled and set up on your stack. Live Preview provides real-time visibility into how content appears across variants. Visual Builder allows editors to manage variant-specific content and preview multiple variants simultaneously based on different audience selections without developer involvement.
Note:
- Users with Owner and Member access to a Personalize project can create new experiences, and edit/delete existing experiences.
- The default number of Experiences allowed per project is 100. To increase this limit, please contact our support team. By Contentstack permissions, they can be extended till 1000 per project.
Additional Resource: You can use the Personalize Management API to create, edit, delete, and retrieve all existing experiences.
Note: After the A/B test concludes and a winner is declared based on performance metrics, traditional cleanup requires manual entry updates and variant deletion. To streamline this, the Clearwinner app can be used to review and merge winning content into your baseline entries automatically.
More articles in "Working with Experiences"
