

Experience Tags
Experience Tags are labels you can attach to any experience in Contentstack Personalize. They serve two complementary purposes:
- Organizing your experiences in the management UI so you can find and manage them at scale
- Filtering which experiences are evaluated and delivered at runtime via the Edge API and SDK
Tags are free-form strings with no predefined taxonomy, which means you can define a labeling scheme that reflects how your team thinks about your project: by environment, by site section, by campaign, or by microsite.
With Experience Tags, you can:
- Keep large experience lists organized and easy to navigate
- Prevent staging or development experiments from surfacing in production
- Scope runtime personalization to only the experiences relevant to a given page, region, or site
- Group campaign-related experiences for bulk review, pause, or archival
Tags are added in the Overview tab when creating or editing an experience. For step-by-step instructions, see Create a Segmented Experience or Create an A/B Test Experience.
Naming Conventions
Tags are case-insensitive and stored in lowercase. Each tag can contain letters (a–z, A–Z), digits (0–9), hyphens (-), underscores (_), and colons (:).
The colon (:) is particularly useful for creating a namespace:value convention that keeps tags readable and consistent across large projects:
| Pattern | Example Tags |
| Environment | env:production, env:staging, env:development |
| Site section | section:homepage, section:checkout, section:search |
| Microsite / region | site:us, site:uk, site:blog |
| Campaign | campaign:black-friday, campaign:summer-2025 |
You are not required to use this convention, simple tags like homepage or black-friday work equally well, but the namespace:value style becomes valuable as your project grows and you need to filter experiences by category.
Filtering Experiences by Tag in the UI
As your project grows, use the tag filter on the Experiences list page to narrow down which experiences are displayed.
The Tags column on the Experiences list page displays all tags currently applied to each experience. Tags that are too long to display are truncated with an ellipsis. Open an experience to see all its tags in full.
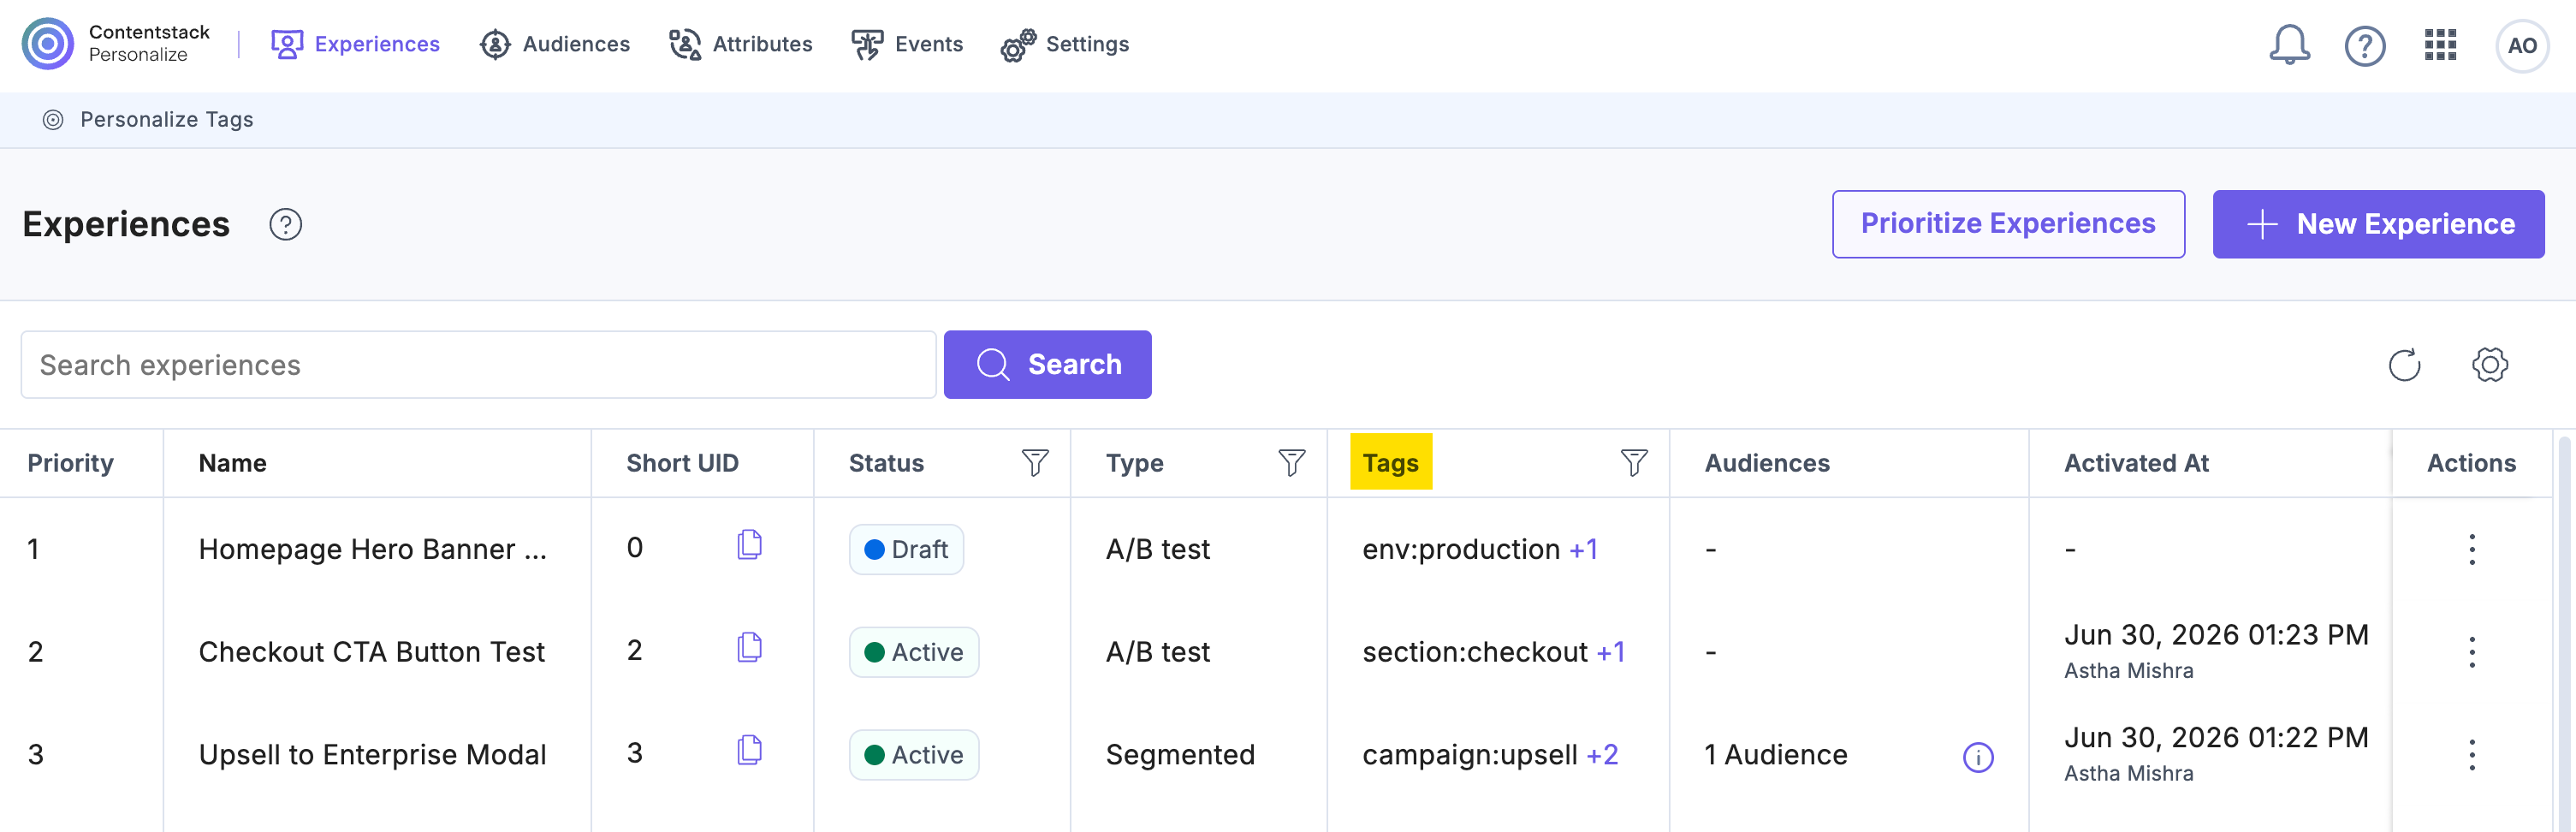
To filter by tag:
- On the Experiences page, click the filter icon in the Tags column header. A Select Tag(s) dropdown appears. Use the Search tags field to find a specific tag, or scroll through the list of all tags in the project.
- Select one or more checkboxes next to the tags you want to filter by, then click Apply.
- The experiences list updates to show only experiences that carry at least one of the selected tags (OR logic).
- You can combine the tag filter with the existing Status and Type column filters. An experience must satisfy all active filters to appear in the results.
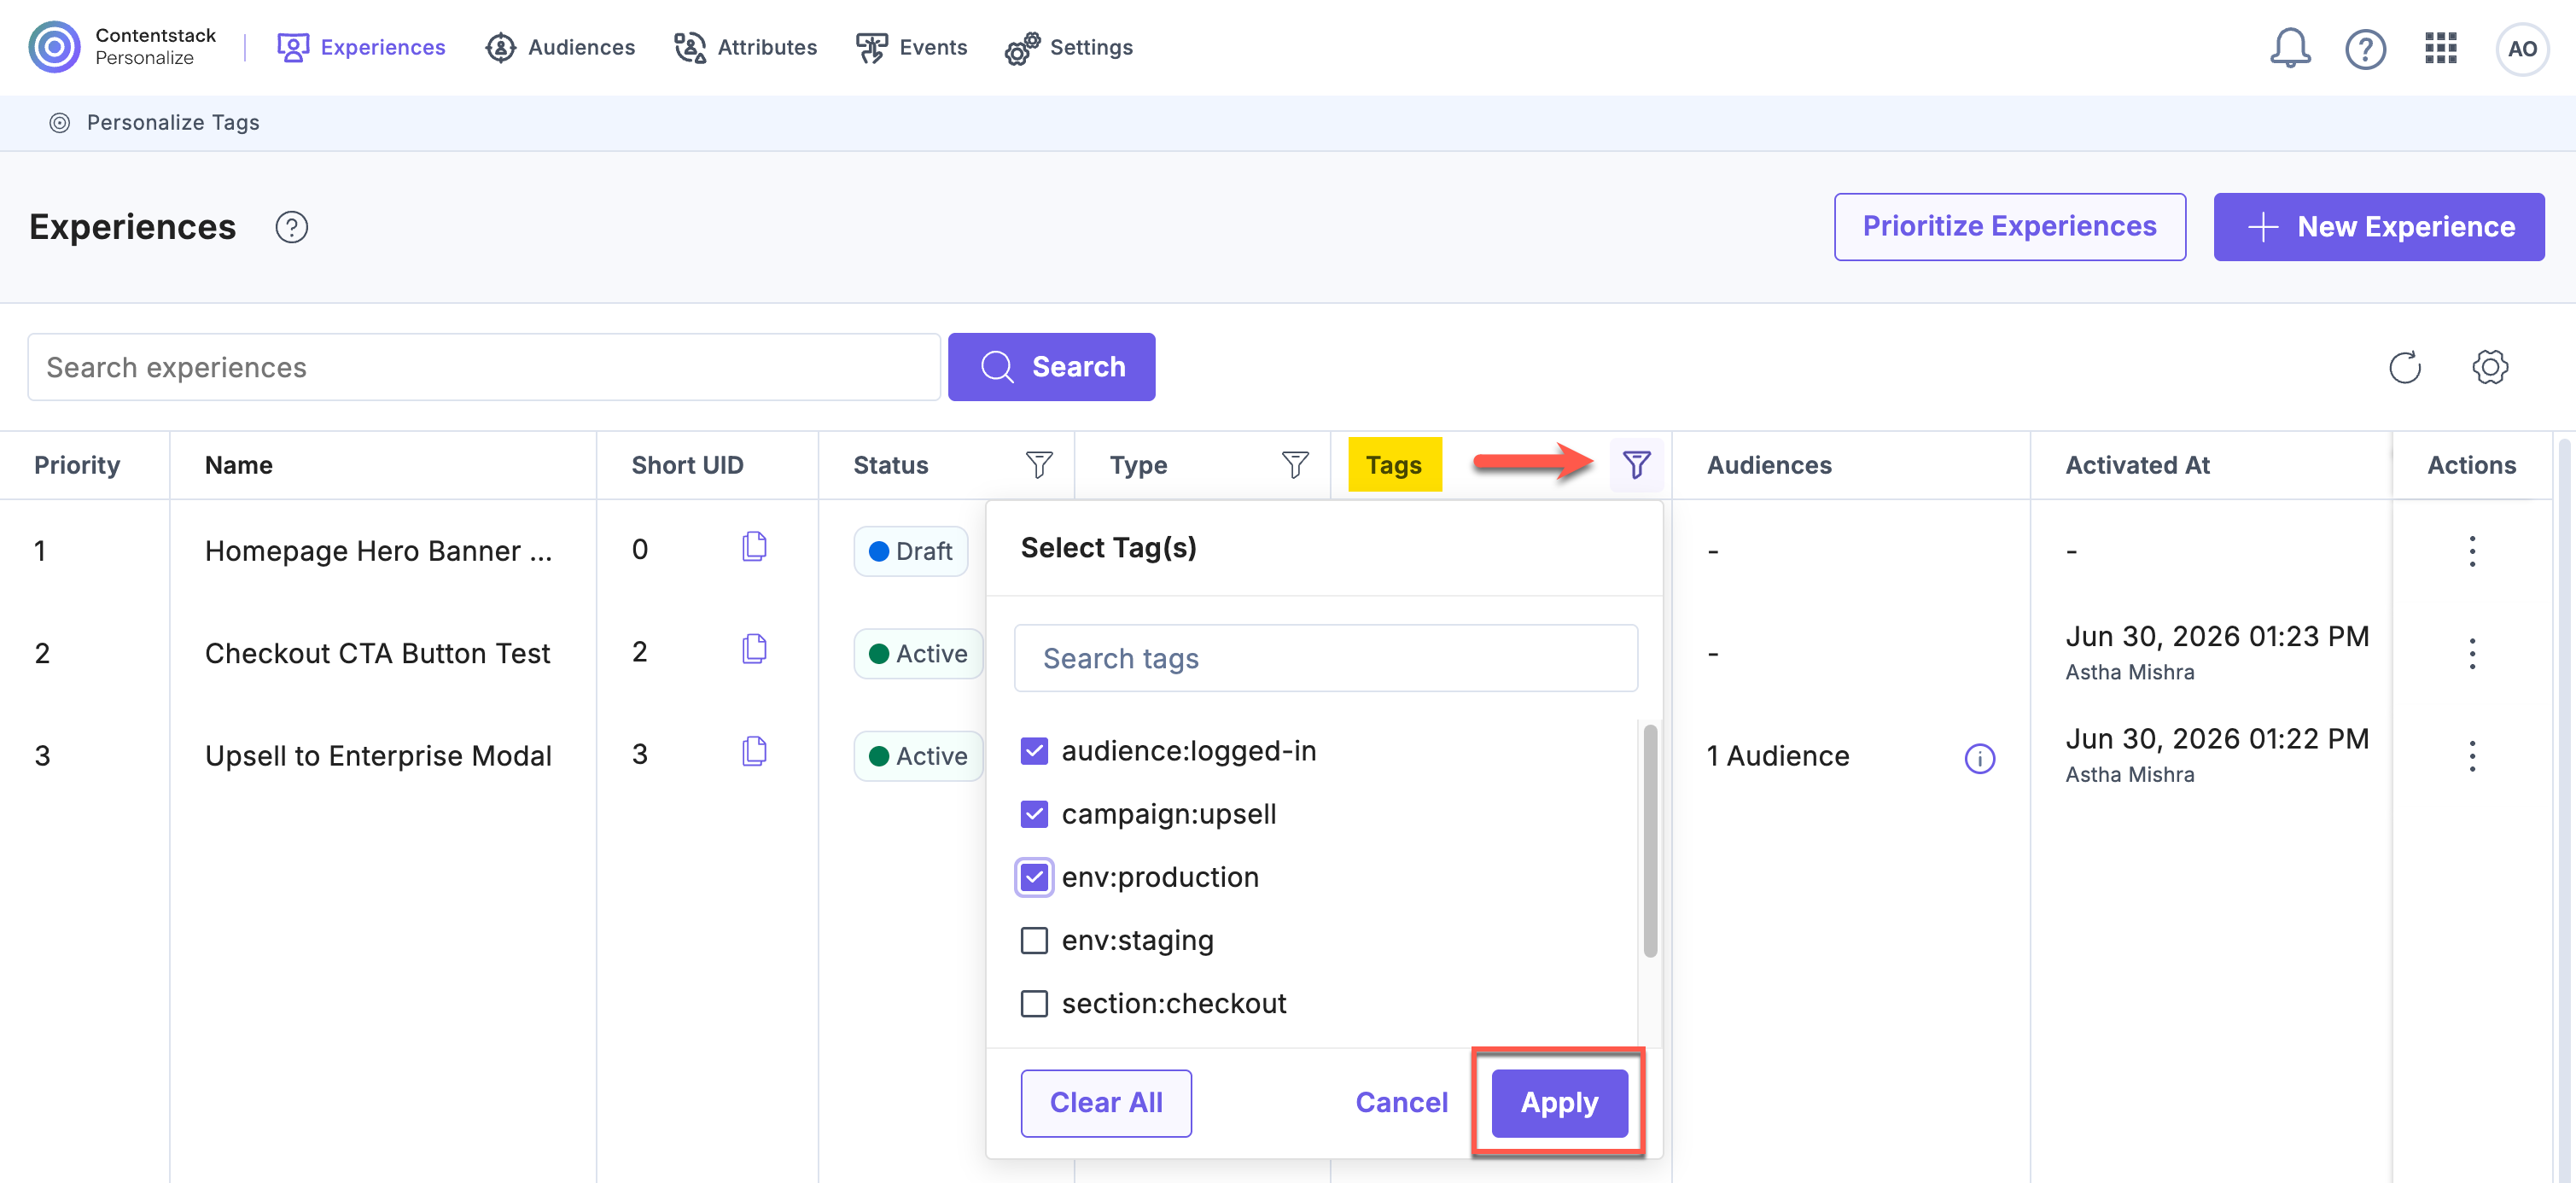
- To clear the tag filter, click the filter icon again and click Clear All, then Apply.
Note: The tag filter only affects what is displayed in the management UI. Runtime delivery filtering is controlled separately via the Edge API and SDK.
Runtime Filtering via the Edge API and SDK
Experience Tags also control which experiences are fetched and evaluated at runtime, for example, passing env:production at initialization ensures the SDK evaluates only production-tagged experiences for that request.
For implementation details, see:
- Get Started with JavaScript Personalize Edge SDK, for how to pass tags during SDK initialization
- JavaScript Personalize Edge SDK API Reference, for the full init() options including tags
- Personalize Edge API Reference, for the tags[] query parameter on the manifest endpoint
Tag Limits and Validation
| Rule | Limit |
| Maximum tags per experience | 10 |
| Maximum characters per tag | 32 |
| Allowed characters | a–z, A–Z, 0–9, -, _, : |
| Case sensitivity | Case-insensitive; stored in lowercase |
| Duplicates | Automatically de-duplicated on save |
| Maximum tags in a filter request | 10 |
Note: Tag values are normalized to lowercase when saved, so ENV:Production and env:production are treated as the same tag. Duplicate tags submitted in a single save are silently de-duplicated.
Additional Information
- Users with Owner and Member access to a Personalize project can add, edit, and remove tags on experiences.
- Tags are supported on both Segmented and A/B Test experience types.
- Tags can be added at experience creation or updated at any point in the experience lifecycle (Draft, Active, or Paused).
- Tags are added on an Experience and not a specific version of the Experience. This means that setting or unsetting a tag does not require an Experience’s version to be incremented.
- The Management API also supports reading and writing tags on experiences. See the Personalize Management API reference - Experiences for details.
Related Resources
More articles
