

Edit an Experience
Contentstack Personalize feature allows you to create and manage personalized experiences for your website or application. Regularly editing experiences is crucial because it allows you to keep your content targeting up to date and relevant. As your products, services, and offers change, you can easily update the variants and audiences in your experiences to reflect those changes. This ensures that your visitors always see the most accurate and relevant content.
This guide provides a step-by-step walkthrough for editing experiences in Contentstack Personalize. You will learn how to ensure that your personalized content is always accurate, relevant, and precisely targeted. Note that, at any given point in time, only 1 draft can exist for each experience in your Personalize project.
Prerequisites
- Contentstack account
- Access to the Contentstack Organization that has Personalize enabled
- Access to a project in Personalize
- Experience created in your Personalize project
Note: Users with Owner and Member access to a Personalize project can edit existing experiences.
Steps for Execution
Note: For this guide, we have assumed that you have already created a Personalize project. If not, please follow this guide and create a project in Personalize.
Editing an Experience Draft
To edit an existing experience (draft which was never activated previously), log in to your Contentstack account and perform the following steps:
- In the top navigation bar, click the App Switcher icon and then click Personalize.
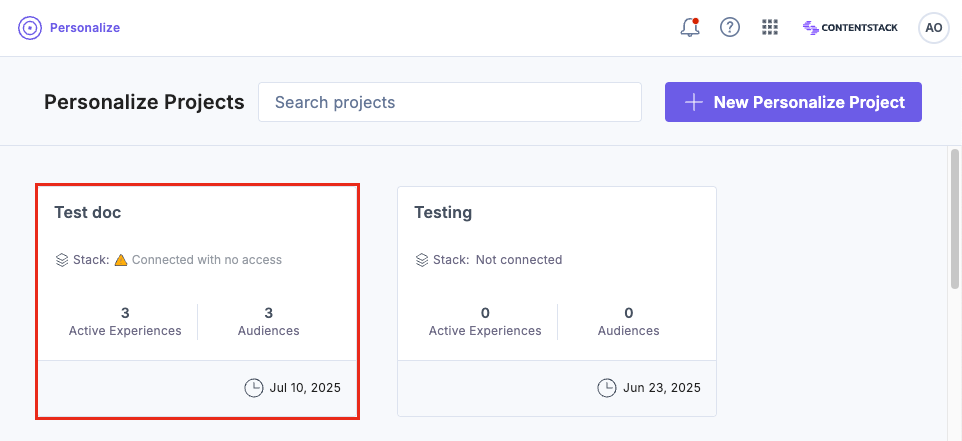
- You will be redirected to the Personalize Projects landing page. Click the project for which you want to edit an existing experience.
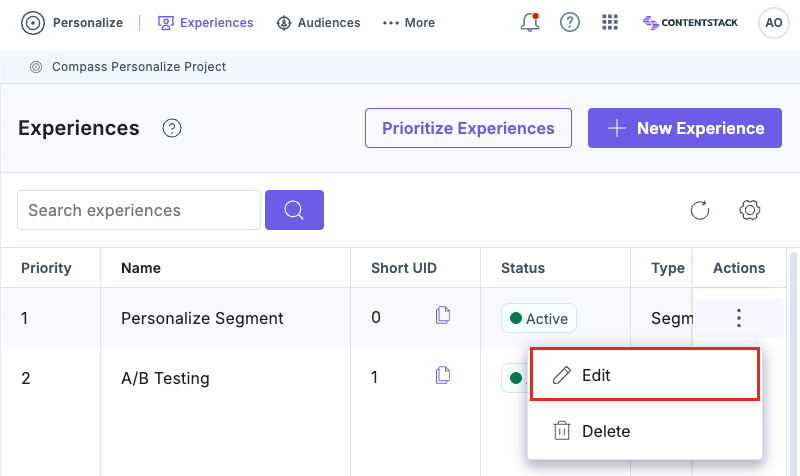
- You can edit an existing experience by clicking your experience to open it or by clicking the corresponding vertical ellipses under Actions and selecting Edit.
Note: An experience must be in the 'Draft' status to edit.
- On the Experience page:
- In the Overview tab, make the necessary changes to the Name and Description and then click Save General Details.
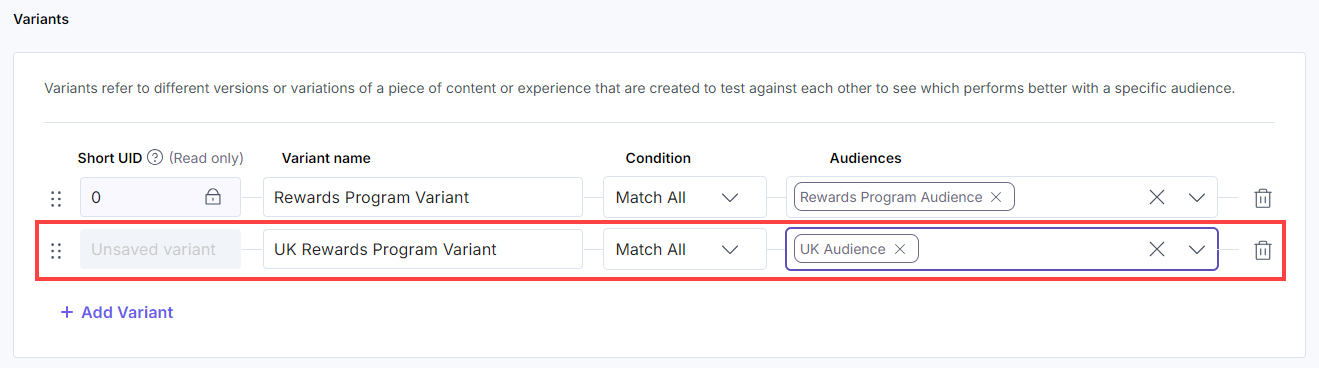
- In the Configuration tab, make the necessary changes to the existing Variants or click the + Add Variant to add more variants and then click the Save Draft button.
- You can choose to activate the draft by clicking the Activate Draft button.
You will get a success message after the experience draft has been successfully updated.
Editing an Active Experience
Note: Editing an active experience will not interrupt the live experience. You can safely create and edit a draft version. When ready, activating the draft will instantly replace the live version without downtime.
Activating a new version resets analytics for the experience. Data collection starts fresh from the point of activation, while historical analytics remain tied to the previous version.
To edit an experience (which is currently active or paused), log in to your Contentstack account and perform the following steps:
- In the top navigation bar, click the App Switcher icon and then click Personalize.
- You will be redirected to the Personalize Projects landing page. Click the project for which you want to edit an existing experience.
- You can edit an existing experience by clicking your experience to open it or by clicking the corresponding vertical ellipses under Actions and selecting Edit.
- On the Experience page:
- In the Overview tab, make the necessary changes to the Name and Description and then click Save General Details.
- In the Configuration tab, click the Create Draft button.
The Edit Version modal will appear, confirming that a new clone of the current active version will be created. Click Edit Version to proceed and switch the Experience to Draft mode.Note: Pausing an active experience temporarily disables the personalization for that experience. During this time, visitors see the content from the Base Entry of the Entry Variant. We recommend, you create a draft from the active version to make changes, without pausing it.
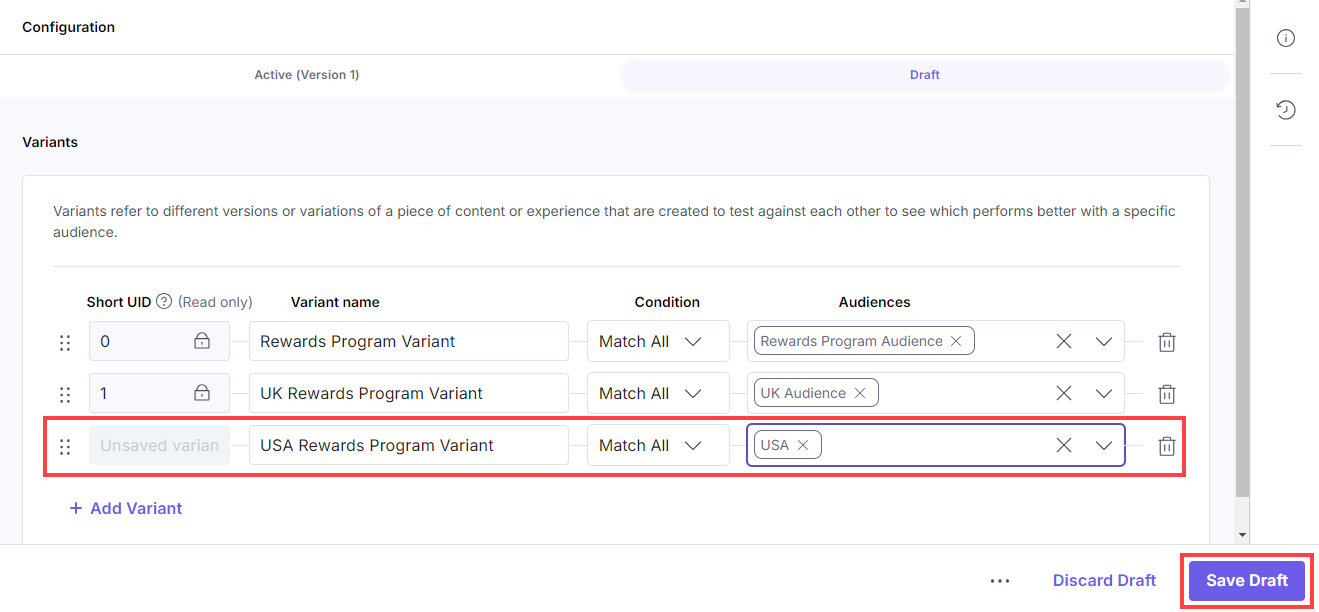
- Make the necessary changes to the existing Variants or click the + Add Variant to add more variants and then click the Save Draft button.
- You can choose to activate the draft by navigating to the Draft tab and then clicking the Activate Draft button.
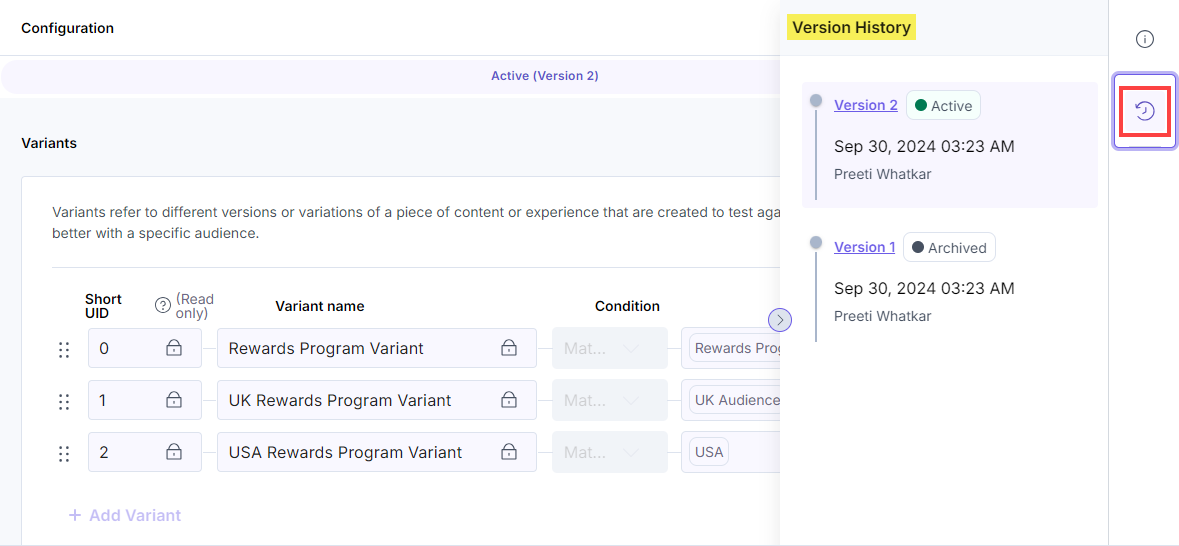
- When you activate a draft of a previously activated experience, the currently active version is automatically archived which you can find in the right sidebar widget.

You will get a success message after the experience has been successfully updated.
Additional Resource: You can use the Personalize Management API to create, edit, delete, and retrieve all existing experiences.
More articles in "Working with Experiences"
