

Build an App using App Permissions
Why App Permissions Matter
Marketplace apps often interact with Contentstack APIs. Apps Permissions ensure apps only have defined access to the resources they need; improving security, trust, and governance.
Benefits for different roles:
- Developers: Clear APIs, fewer errors, smoother builds.
- Security/Compliance: Least privilege access, better auditability.
- PM/Admins: Safer Marketplace apps, well defined access.
Overview
In this guide, we will walk through building an app example for a Quick Info Dashboard App. We will demonstrate how an app can leverage Apps Permissions to securely interact with Contentstack APIs.
This example app highlights a real-world scenario where stack-level statistics (content types, entries, and assets) are displayed in a Dashboard location.
Prerequisites
- Contentstack account with access to Developer Hub
- Understanding Contentstack App Development
- Understanding of Contentstack Management SDK
- Quick Info Dashboard app GitHub Repository
- Marketplace App Boilerplate GitHub Repository
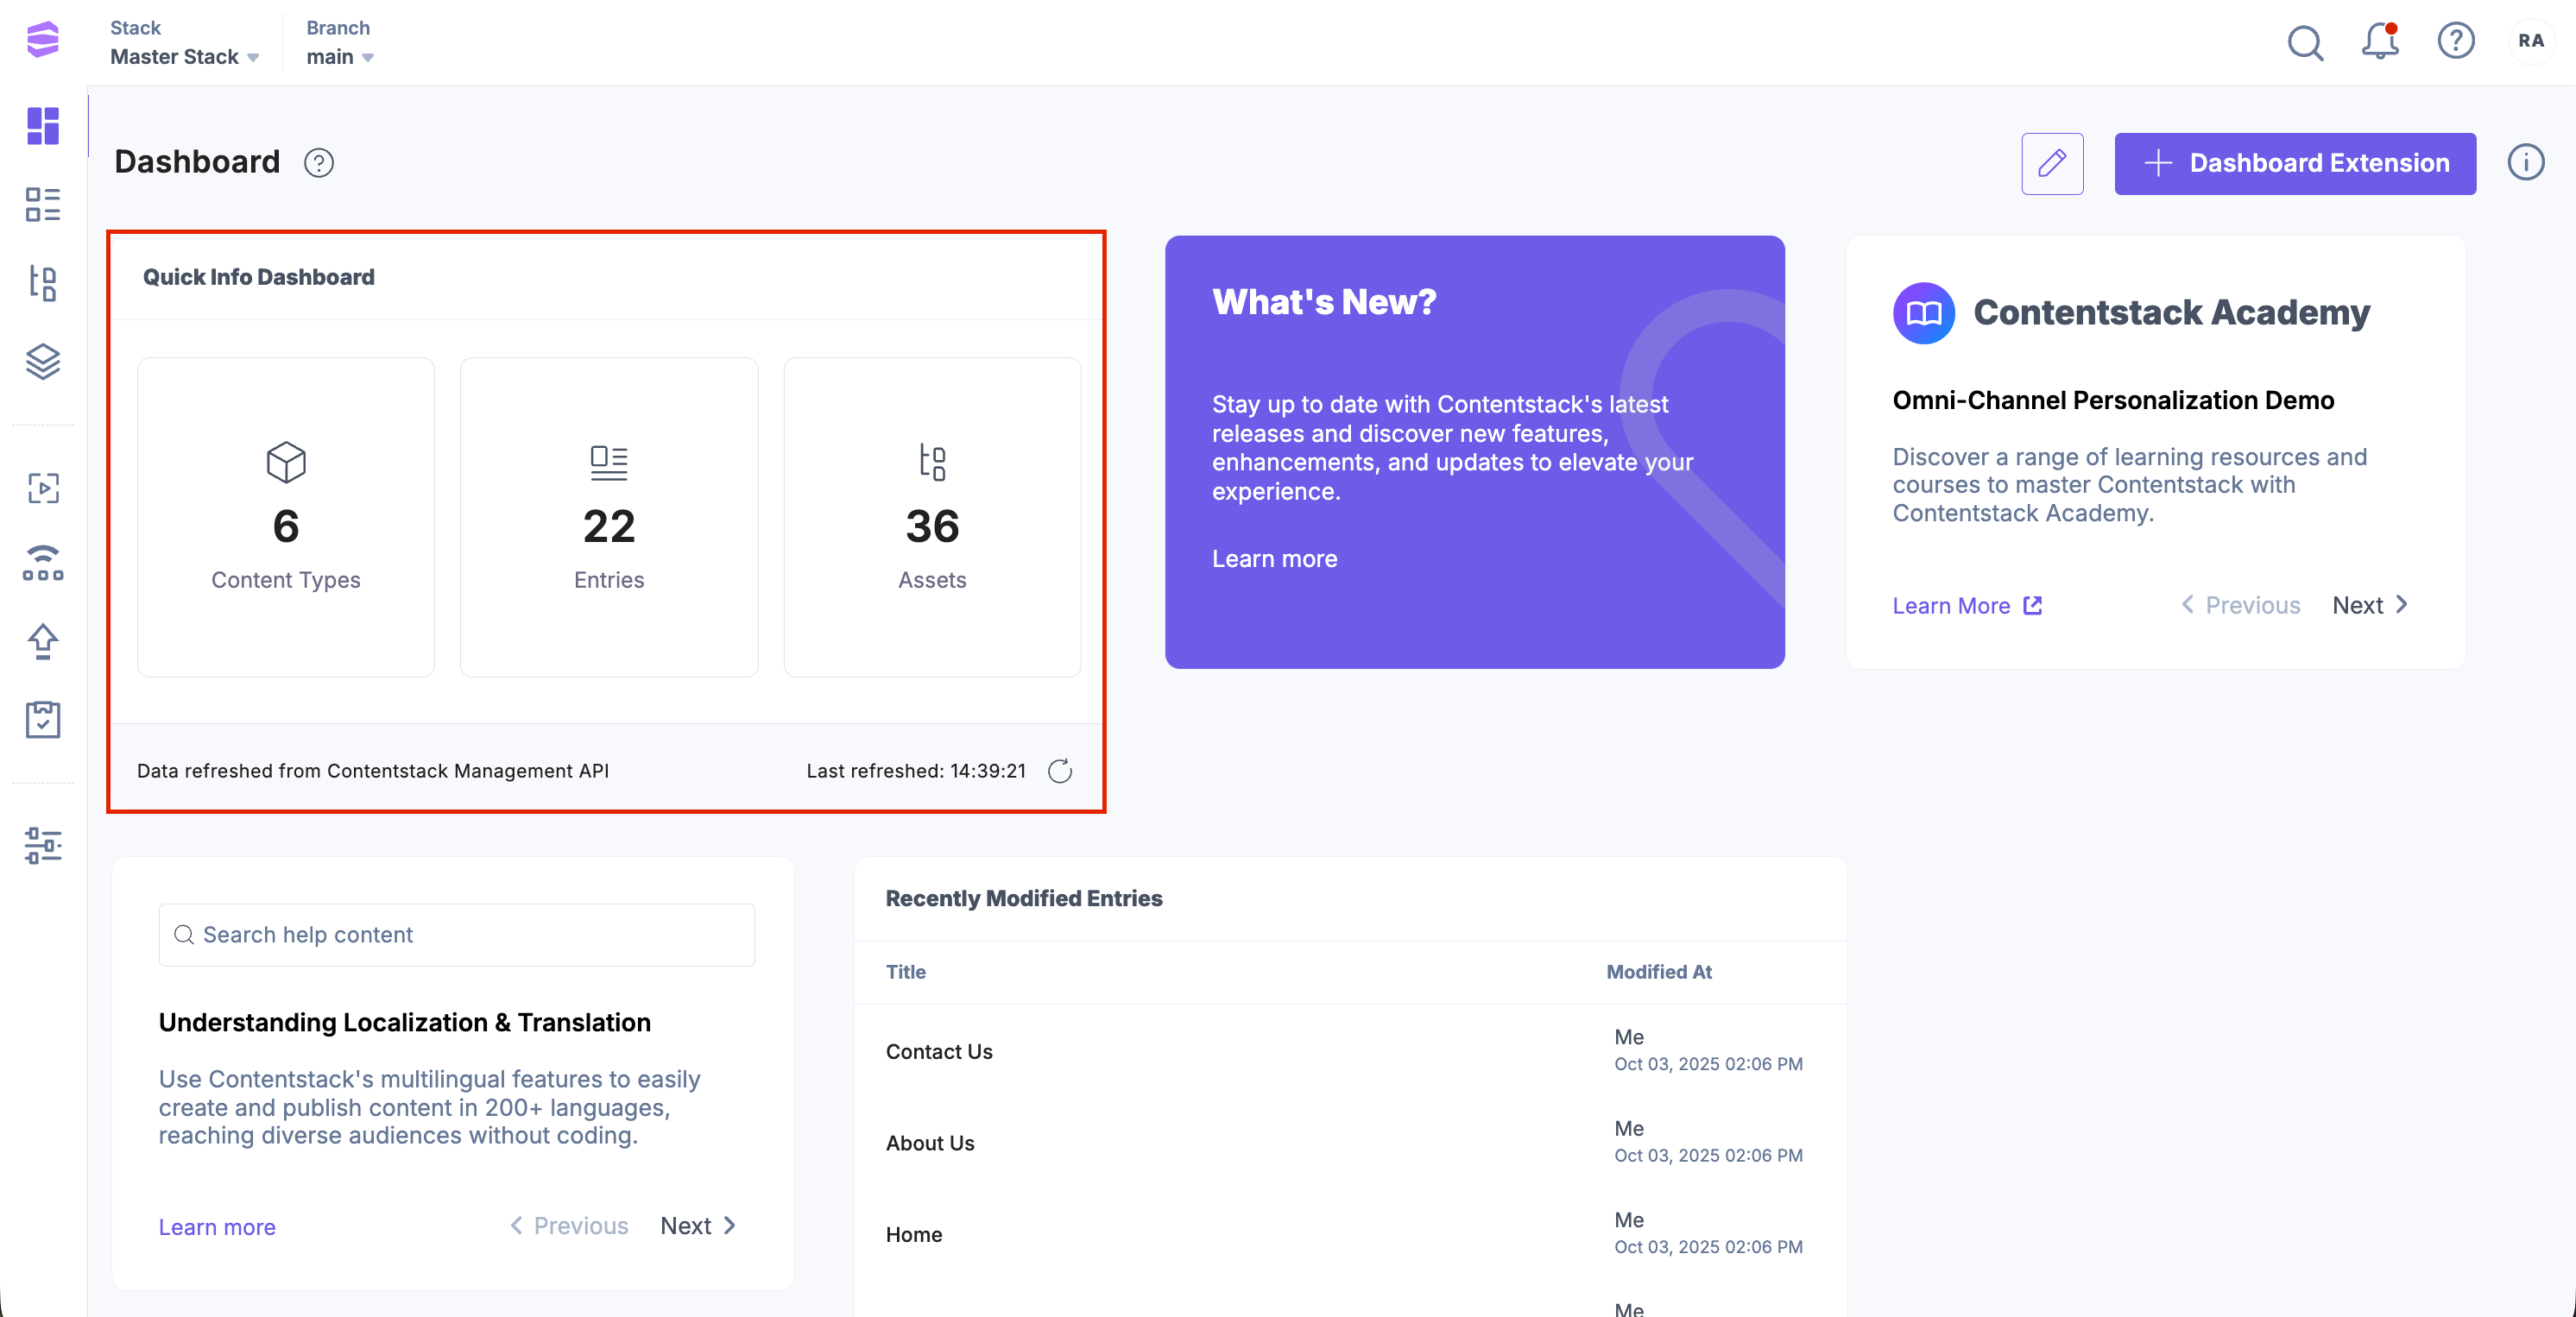
Quick Info Dashboard App
The Quick Info Dashboard App displays stack-level statistics (for example, Content Types, Entries, and Assets).
Create an App
The best place to start a new project is by cloning the Marketplace App Boilerplate. It has all the components you need for rapid dashboard UI Location development.
Clone the Marketplace Boilerplate repository and run the following commands:
npm install
npm run dev
Register the App in Developer Hub
To register an app in Developer Hub, perform the steps given below:
- Log in to your Contentstack account.
- On the Dashboard page, click the Developer Hub icon.
- Click the + New App button.
- Contentstack supports two types of Apps based on two categories: Standard and Machine to Machine. Here, we will use the Standard application.
Additional Resource: Refer to the Creating an App in Developer Hub documentation to know more about Standard and Machine to Machine app categories.
- In the Create Standard App modal, select the App Type, and give a suitable app Name (Quick Info Dashboard) and an optional Description as shown below:
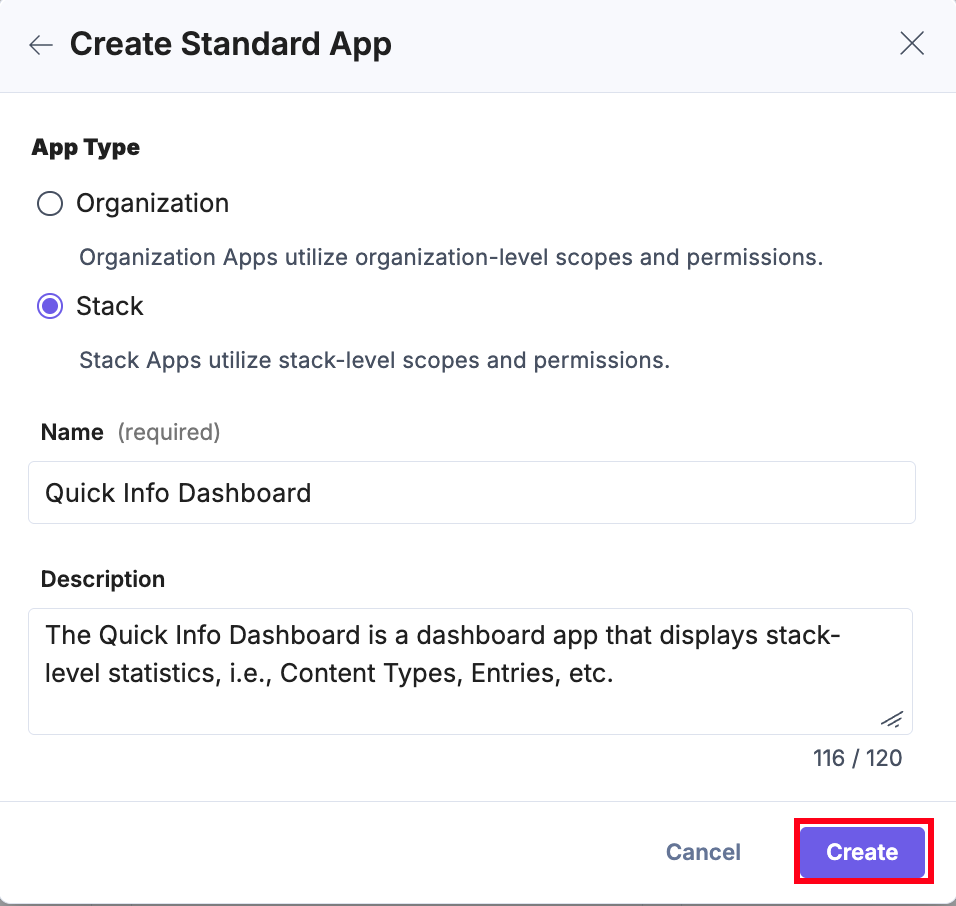
- Click Create. You are redirected to the UI Locations landing page.
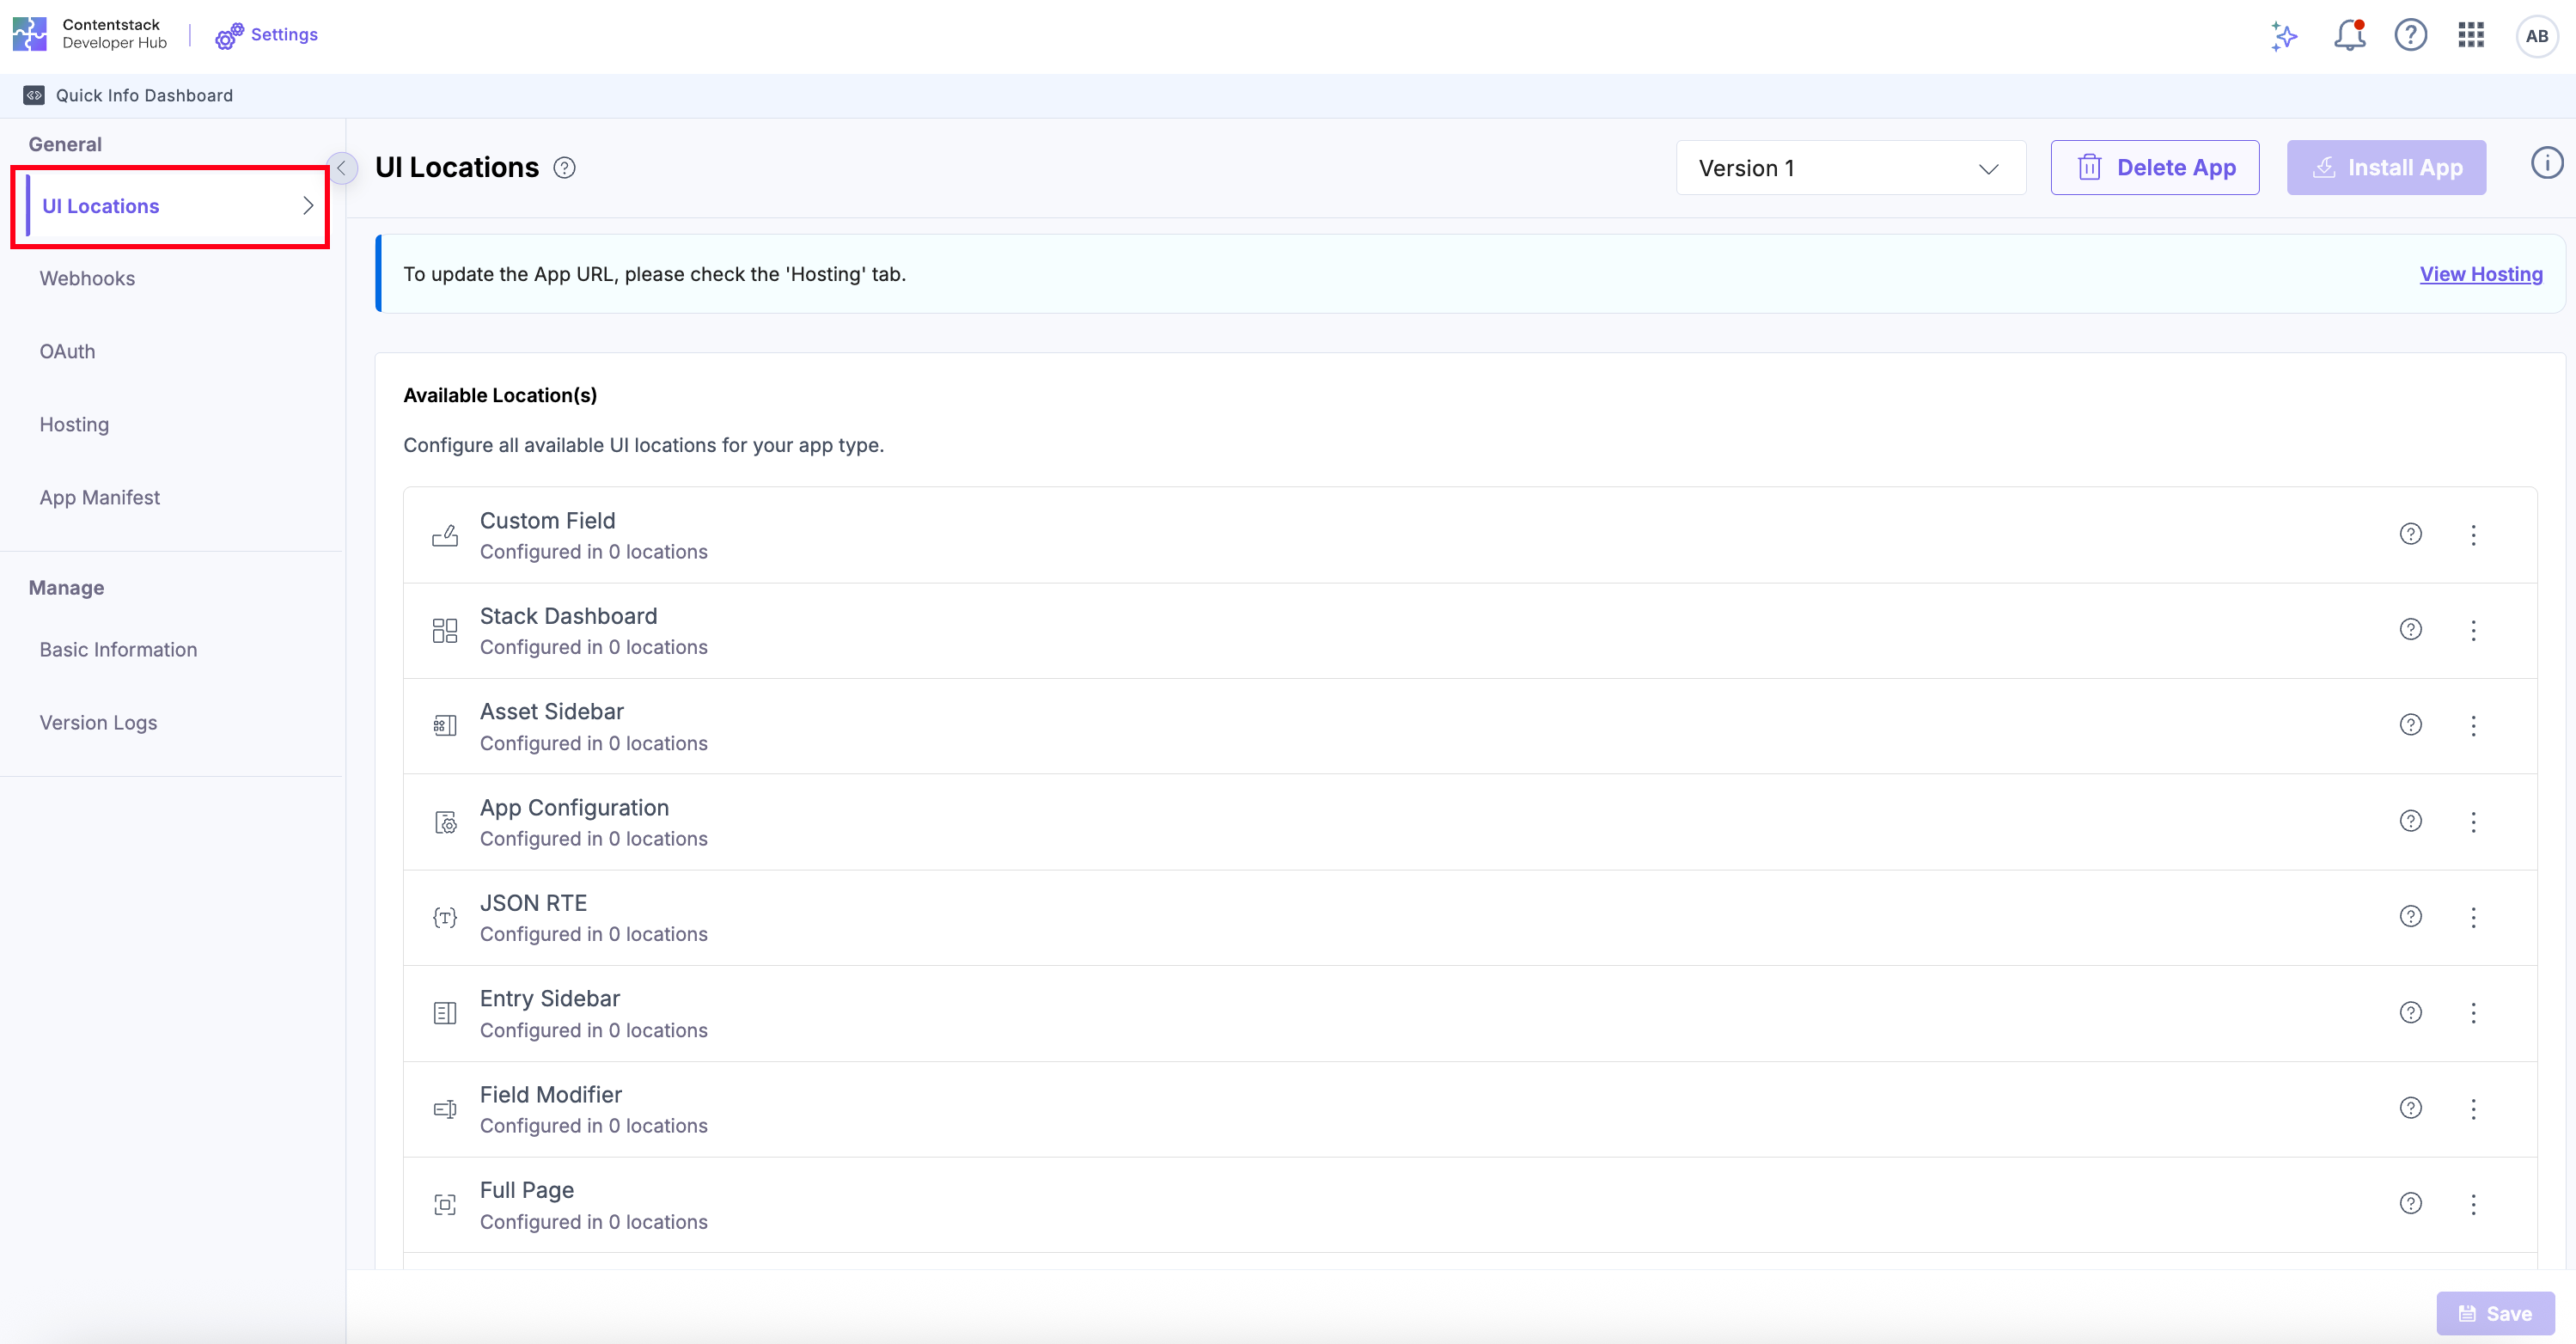
- Navigate back to the UI Locations tab, click the vertical ellipses, then click the + Add UI Location button to add as needed.
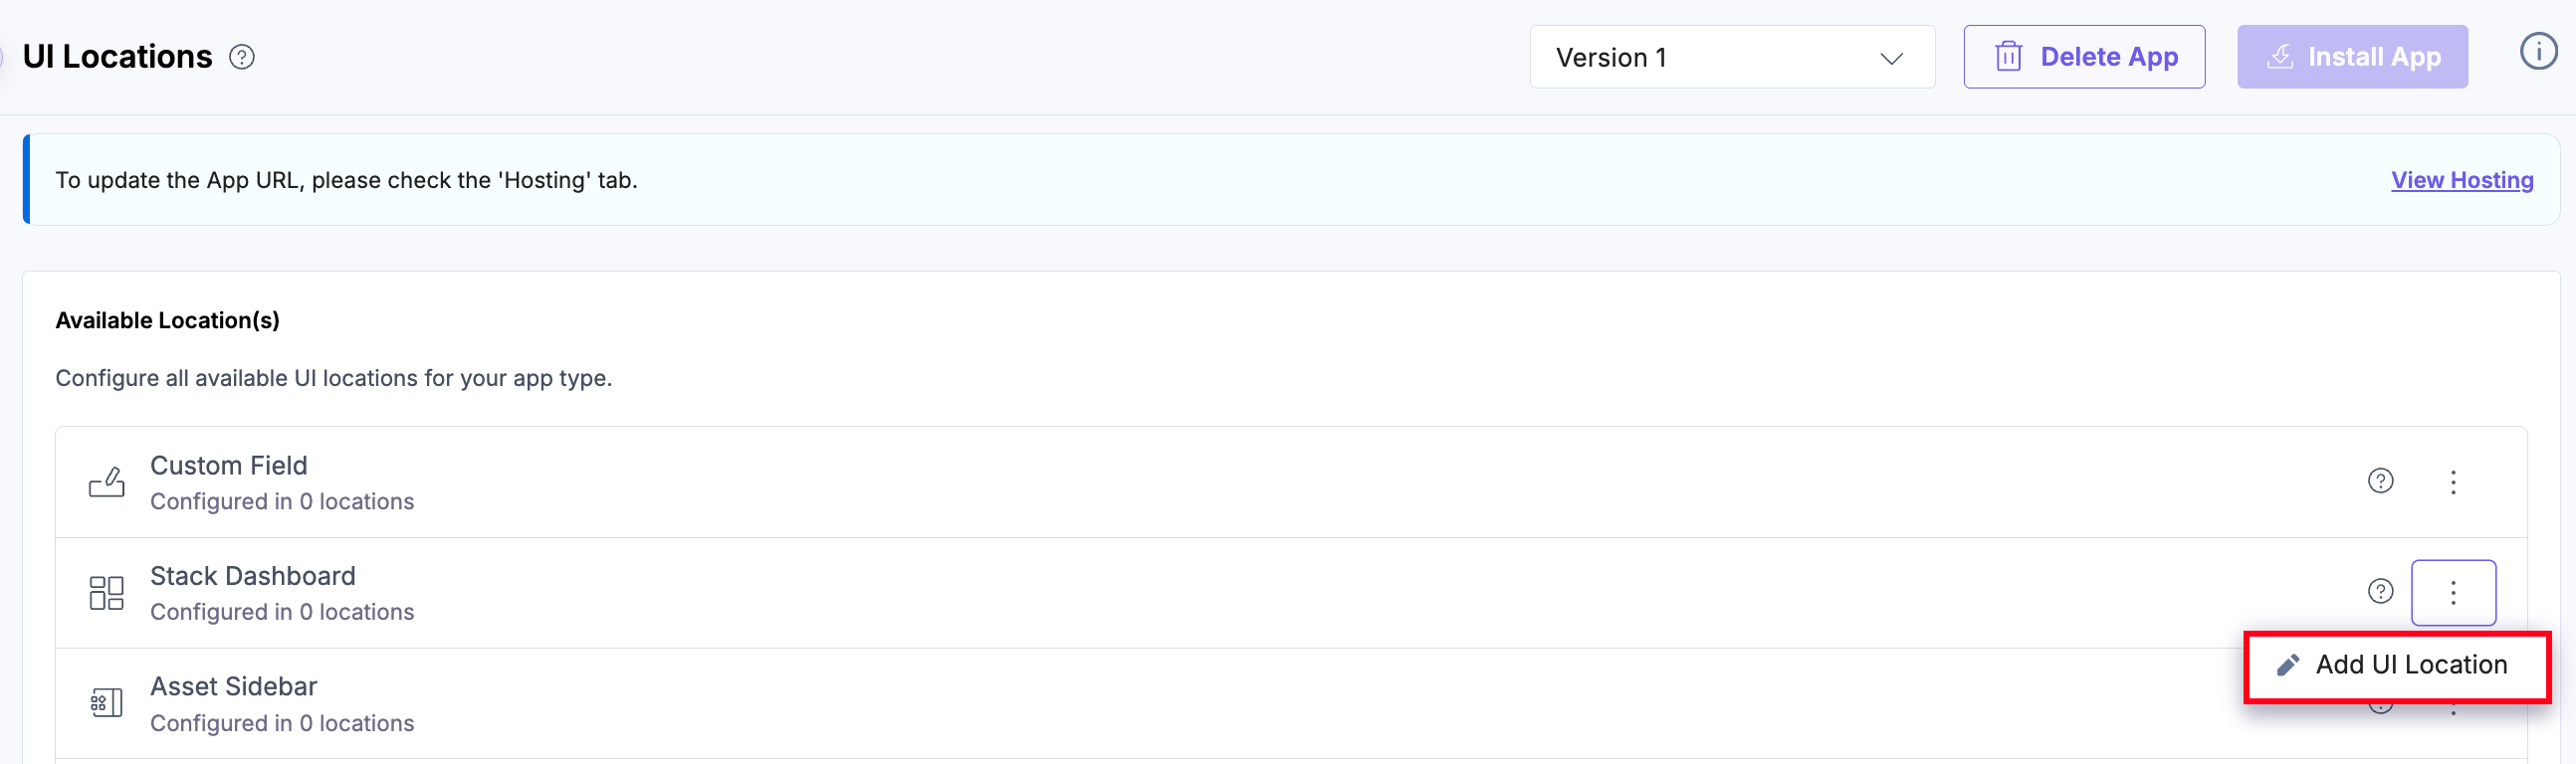
- Stack Dashboard: Enter a Name, use /stack-dashboardas the Path, and select the Default Width, then click Save to apply and store your configuration. This setup ensures your app appears on the Stack Dashboard.
Note: The name for each UI Location is optional, and can be used to override the default app name.
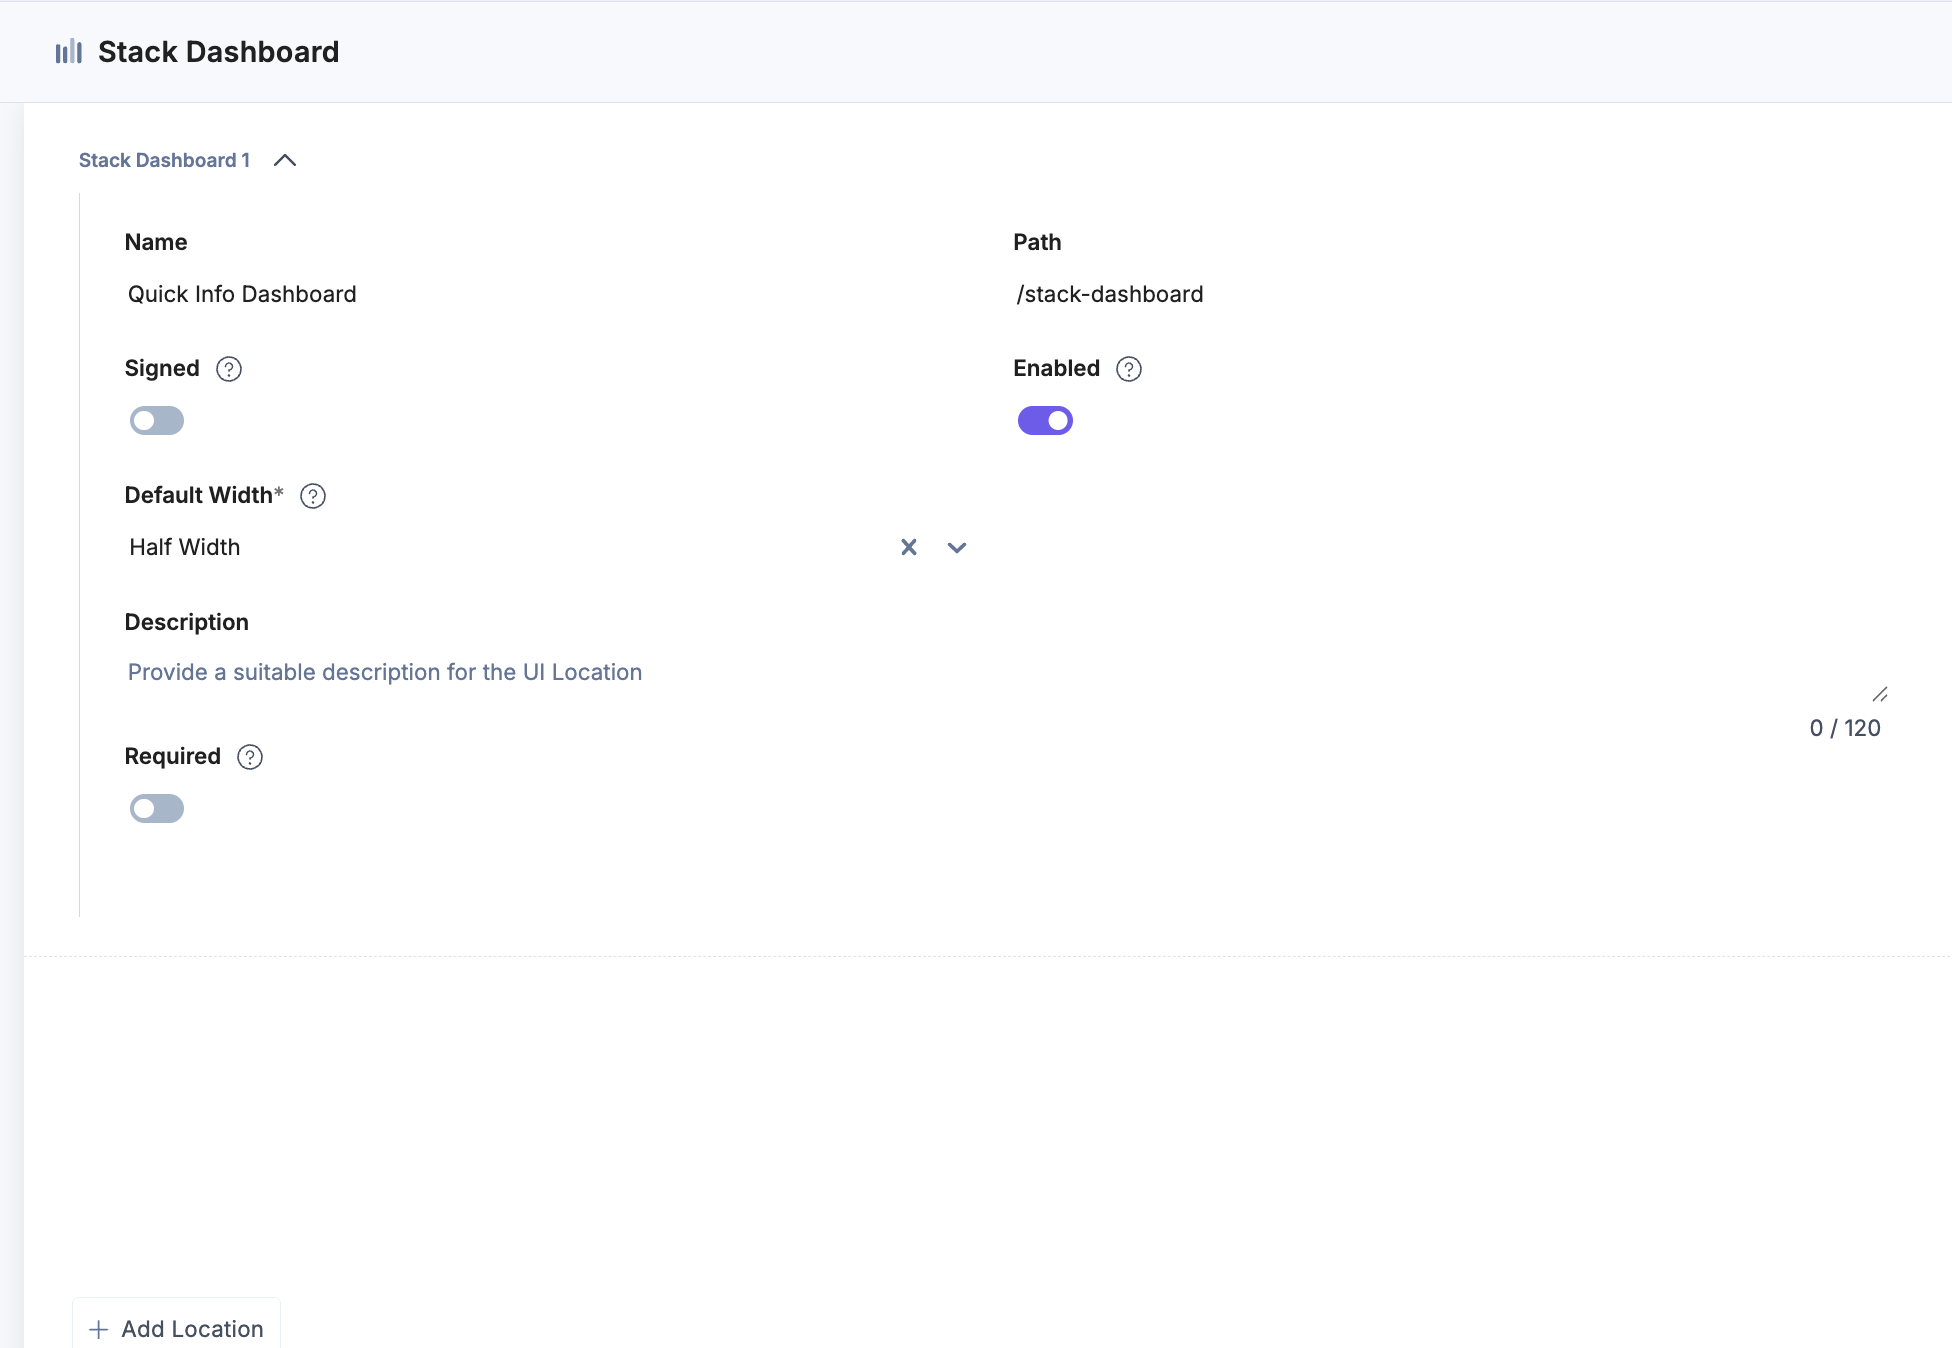
Note: The Save button becomes active once all required fields are completed.
- Stack Dashboard: Enter a Name, use /stack-dashboardas the Path, and select the Default Width, then click Save to apply and store your configuration. This setup ensures your app appears on the Stack Dashboard.
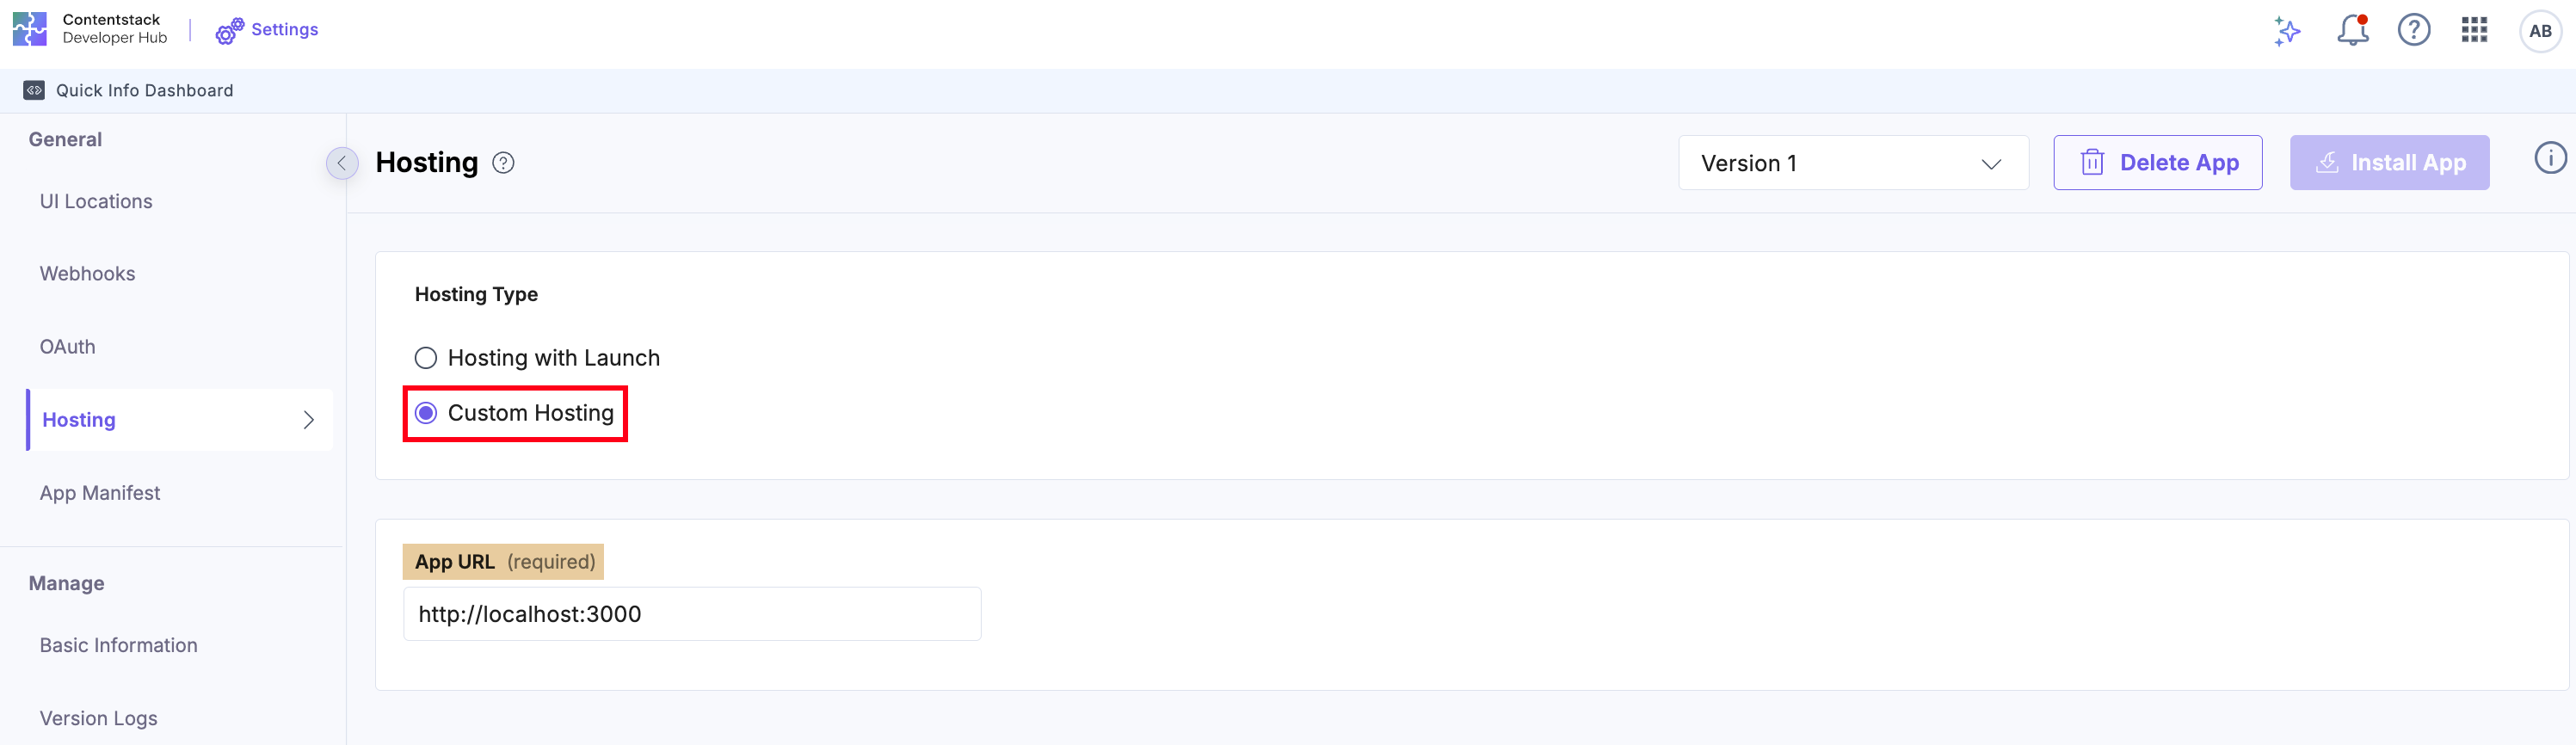
- Navigate to the Hosting tab. You will see Hosting with Launch or Custom Hosting options. Select the Custom Hosting option to enter the hosted URL of your application. Enter the App URL and click Save to apply and confirm your hosting configuration. While running the application locally, select Custom Hosting and use your local app URL (for example, (http://localhost:3000).
After development, you can host your application using Contentstack Launch.
Configure Permissions
Permissions control which Contentstack APIs your app can access.
For the Quick Info App, configure the following permissions in Developer Hub. To do so, follow the steps below:
- Click the UI Locations tab.
- Go to the Permissions section.
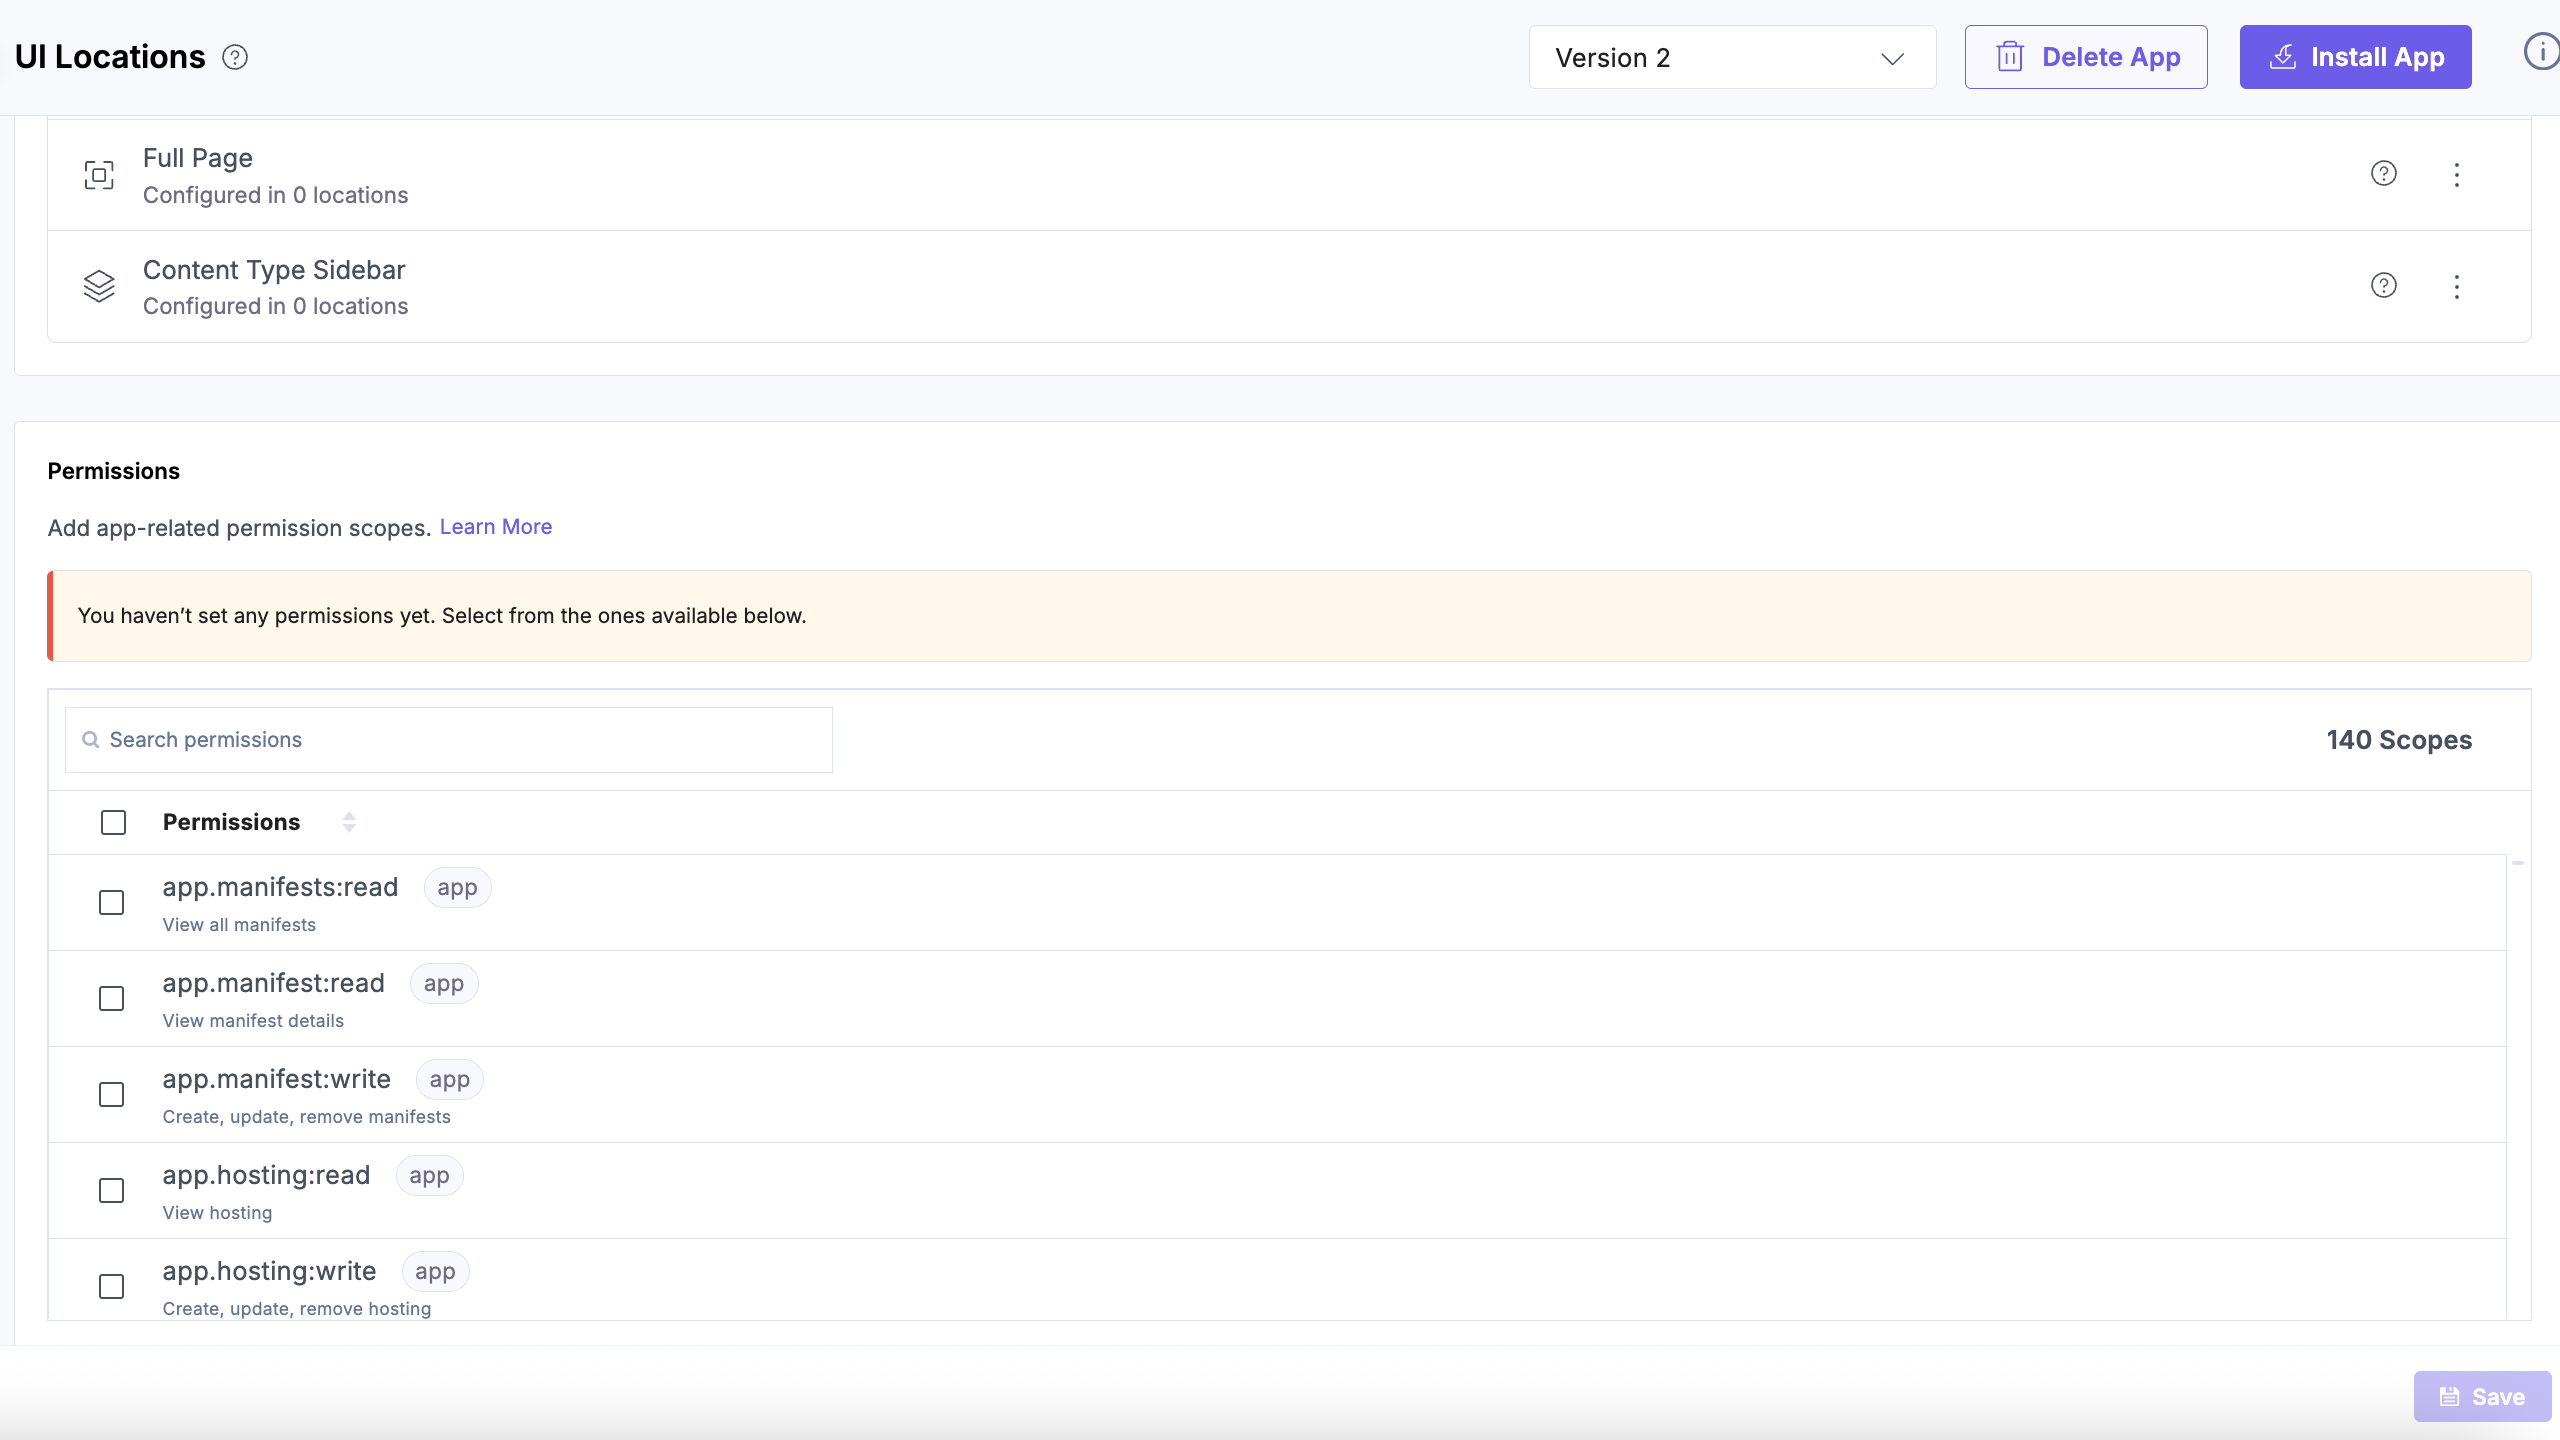
- Select all the permissions you want to add.
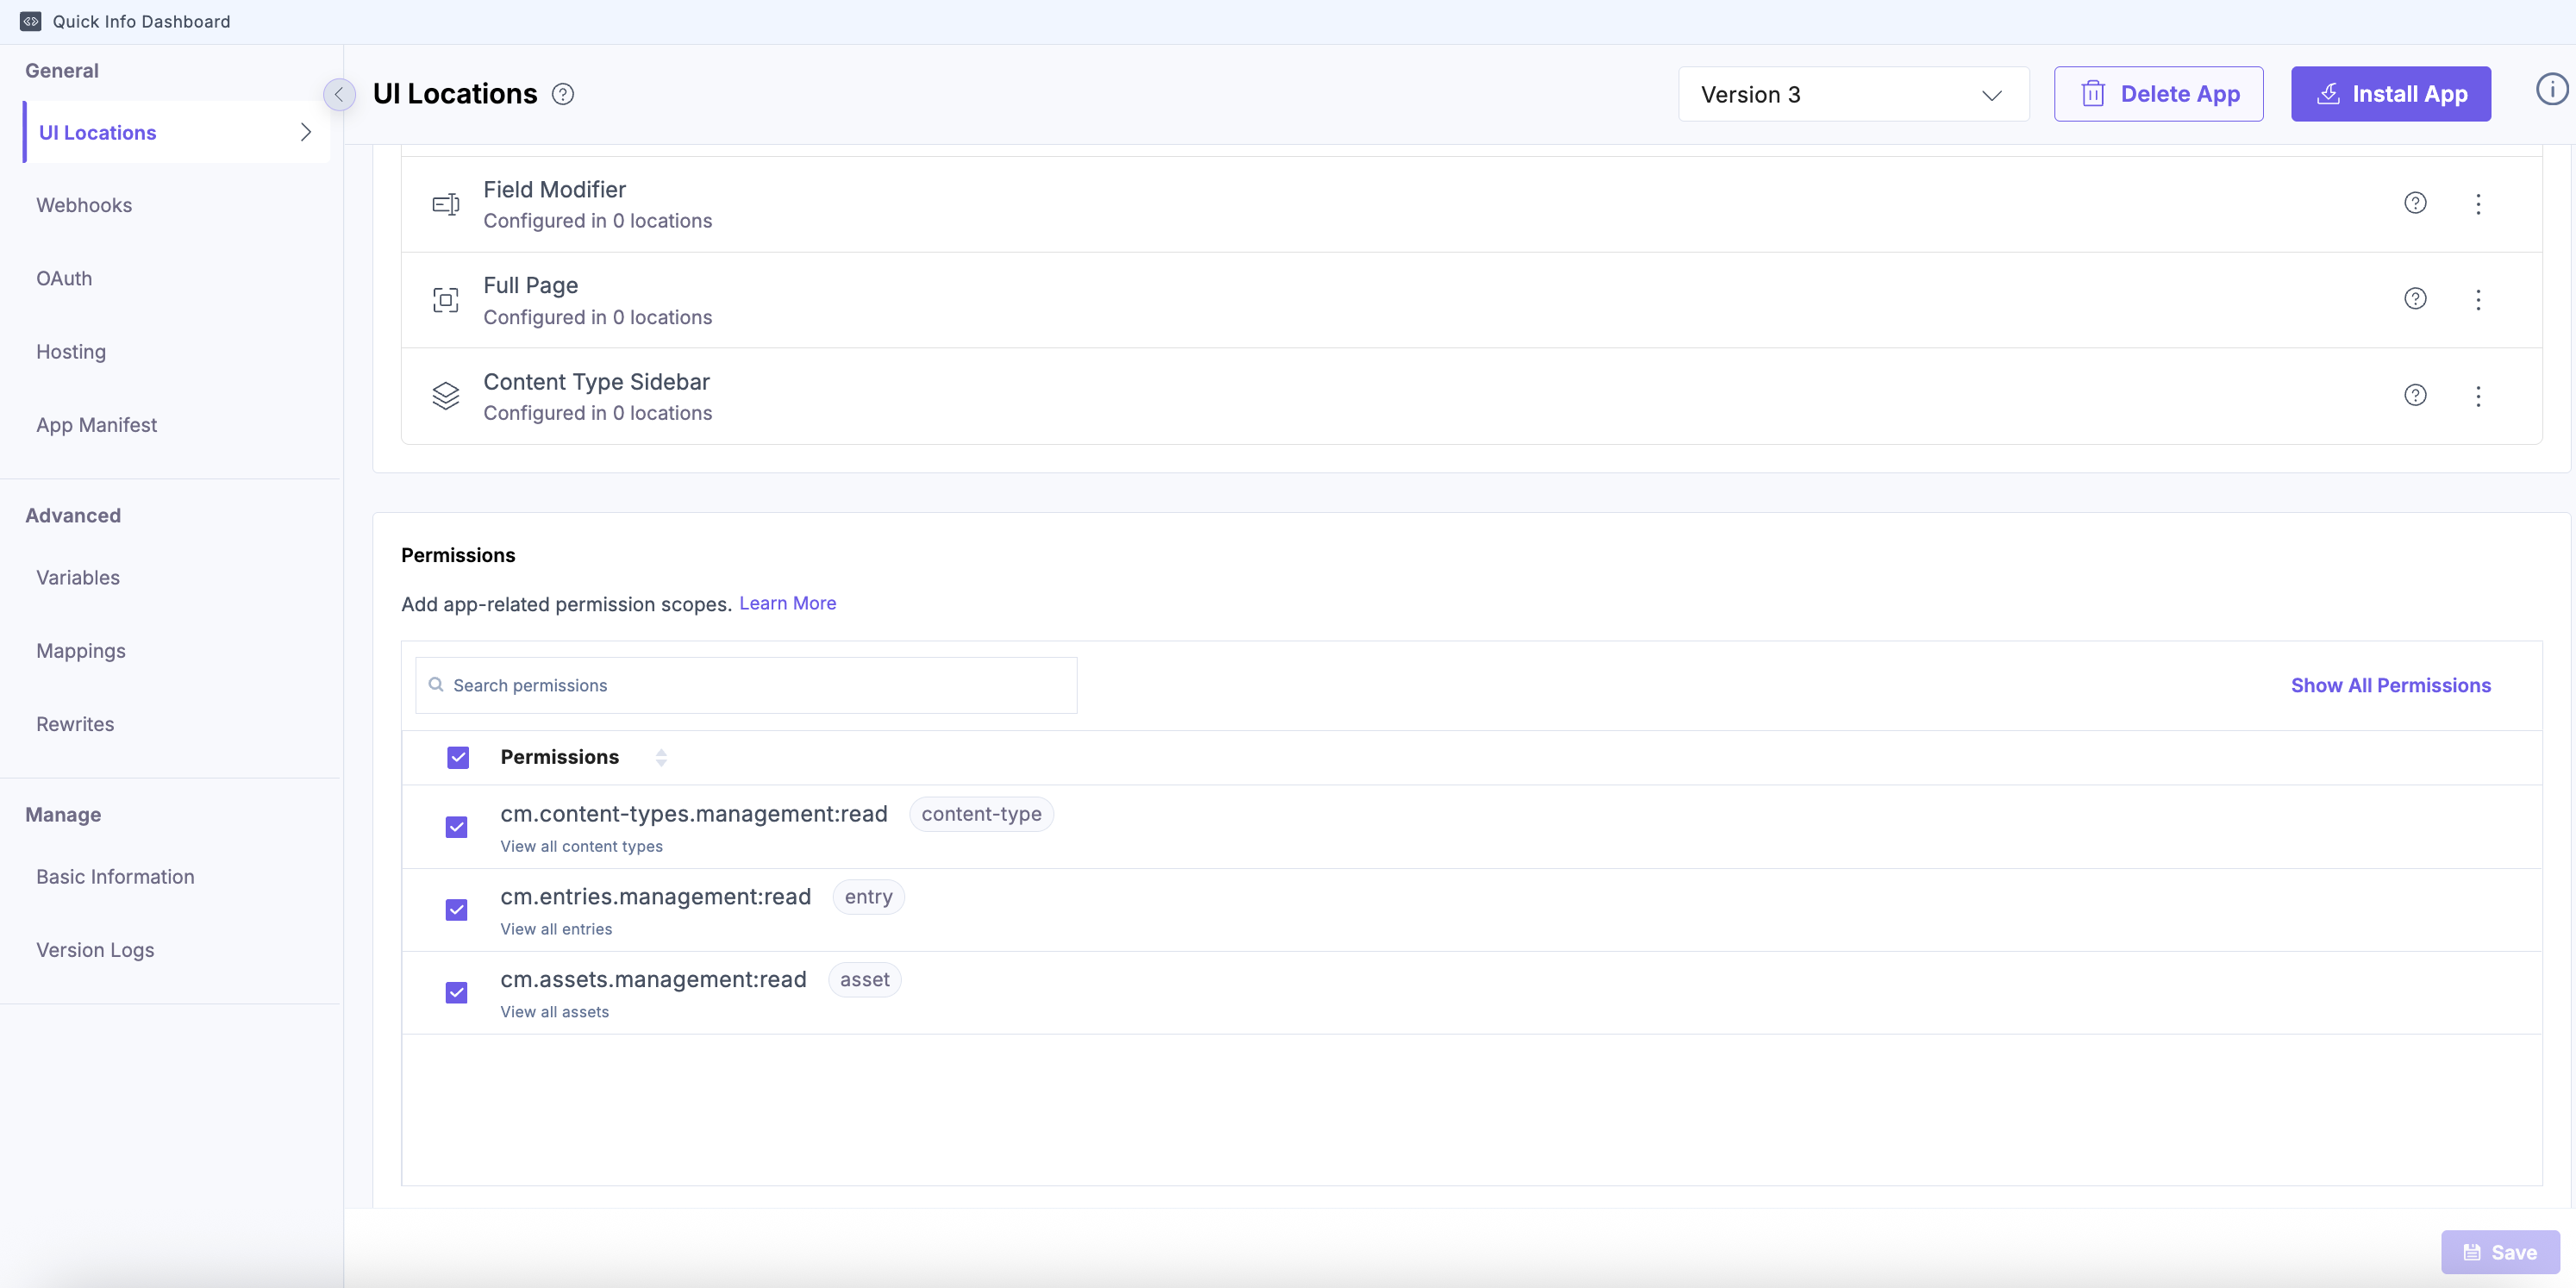
Module Access Endpoint Content Types /v3/content_types Entries /v3/content_types/{uid}/entries Assets /v3/assets
Security Best Practices:
- Rotate tokens periodically (do not rely on long-lived tokens).
- Use .env files and add them to .gitignore (never commit secrets).
- Log permission errors (403s) for audit tracking.
- Review permissions regularly, remove unused ones.
Implement API Integration
Run the following command to navigate to the Dashboard Widget folder:
cd src/containers/DashboardWidgetCreate a new file named StackMetrics.tsx and add the following code snippet.
This component fetches stack statistics for Content Types, Entries, and Assets using the Contentstack Management SDK and displays them in a widget format.
import { useState, useEffect, useCallback } from "react";
import { useAppSdk } from "../../common/hooks/useAppSdk";
import { useManagementClient } from "../../common/hooks/useManagementClient";

export const StackMetrics = () => {
  const appSdk = useAppSdk();
  const managementClient = useManagementClient();
  const [stats, setStats] = useState({ contentTypes: 0, entries: 0, assets: 0 });

  const fetchStackStats = useCallback(async () => {
    if (!appSdk || !managementClient) return;

    const stack = managementClient.stack({ api_key: appSdk.ids.apiKey });

    const { count: contentTypeCount } = await stack.contentType().query({ include_count: true }).find();
    const { count: assetCount } = await stack.asset().query({ include_count: true }).find();

    // Fetch all content types and count total entries
    const contentTypes = await stack.contentType().query().find();
    const entryCounts = await Promise.all(
      contentTypes.items.map(async (ct) => {
        const res = await stack.contentType(ct.uid).entry().query({ include_count: true }).find();
        return res.count ?? 0;
      })
    );

    setStats({
      contentTypes: contentTypeCount,
      entries: entryCounts.reduce((a, b) => a + b, 0),
      assets: assetCount,
    });
  }, [appSdk, managementClient]);

  useEffect(() => {
    fetchStackStats();
  }, [fetchStackStats]);

  return (
    <div>
      <h3>Stack Metrics</h3>
      <ul>
        <li>Content Types: {stats.contentTypes}</li>
        <li>Entries: {stats.entries}</li>
        <li>Assets: {stats.assets}</li>
      </ul>
    </div>
  );
};
Note: For the complete implementation, refer to the StackMetrics GitHub repo.
Import your component:
Open ./src/containers/DashboardWidget/StackDashboard.tsx and import your component. You need to replace the entire code with the following code snippet:
import "../index.css";
import "./StackDashboard.css";
import { StackMetrics } from "./StackMetrics";
const StackDashboardExtension = () => {
  return (
    <div className="layout-container">
      <StackMetrics />
    </div>
  );
};
export default StackDashboardExtension;
Warning: Without the Content Types: Read permission, this call will fail with a 403 permission denied error.
Install and Test Your App
Local development:
To install and test the app, follow the steps below:
- Initiate your development server by running the following commands:
npm run dev
- Now, install the Quick Info Dashboard app using the following steps:
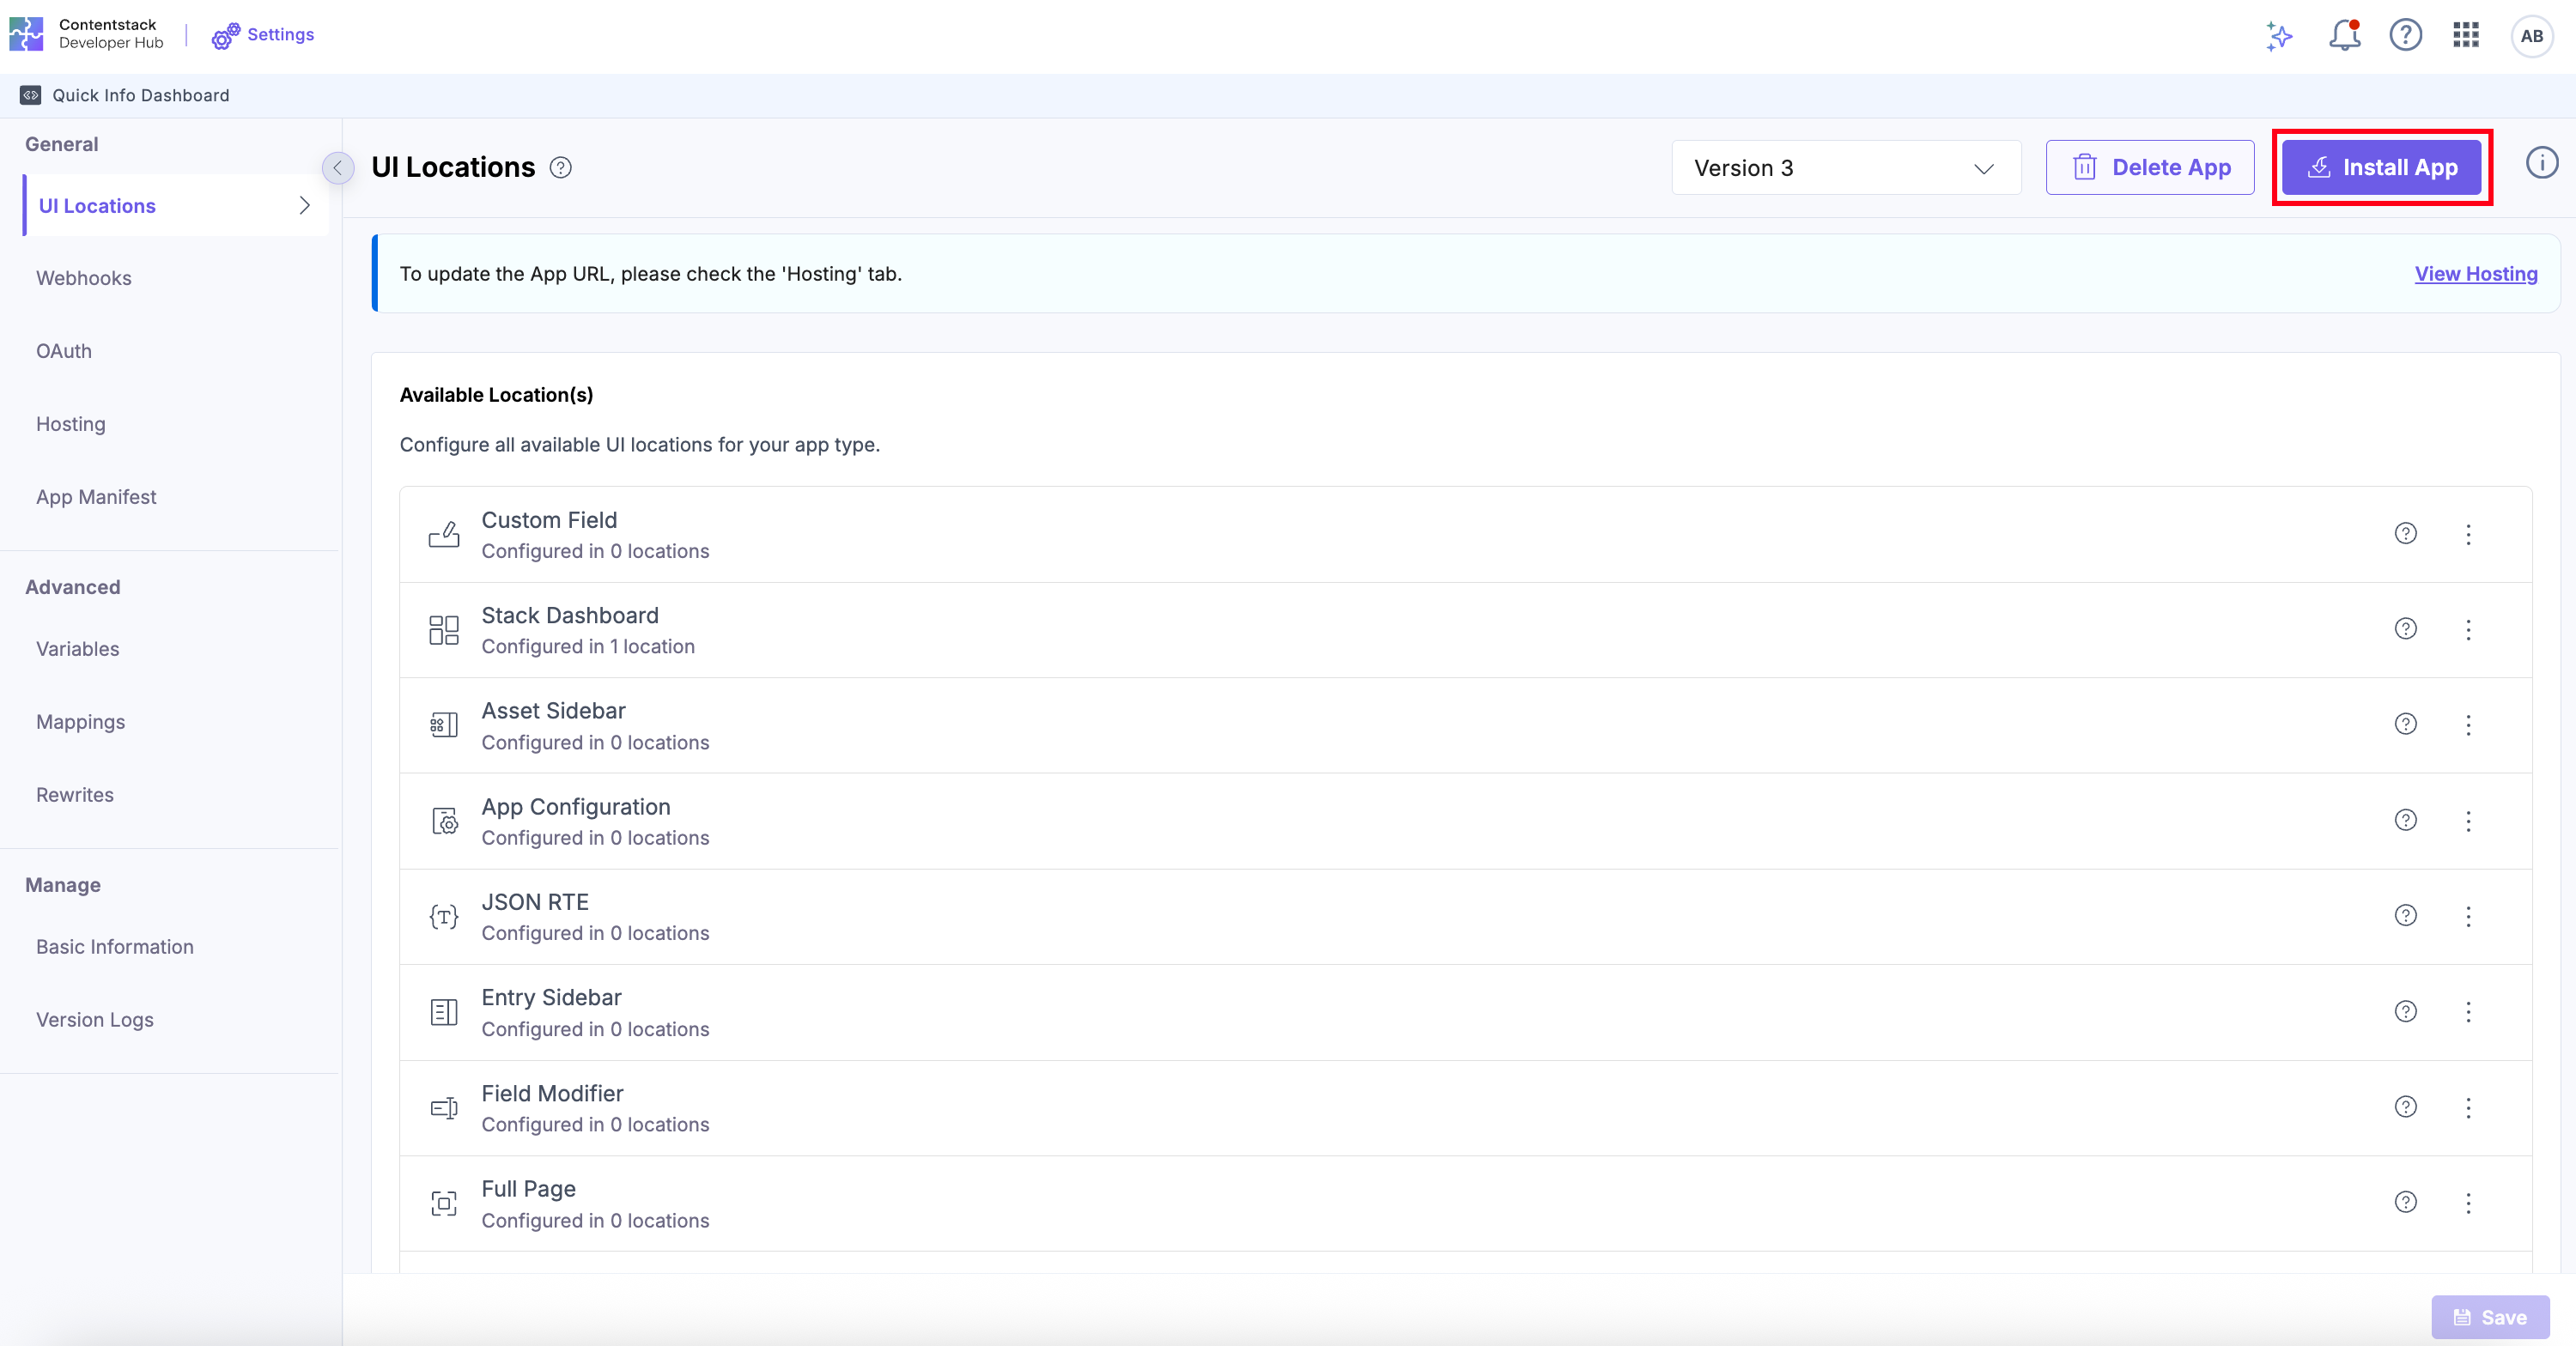
- Navigate to Developer Hub in Contentstack.
- Go to the app, and click the Install App button.
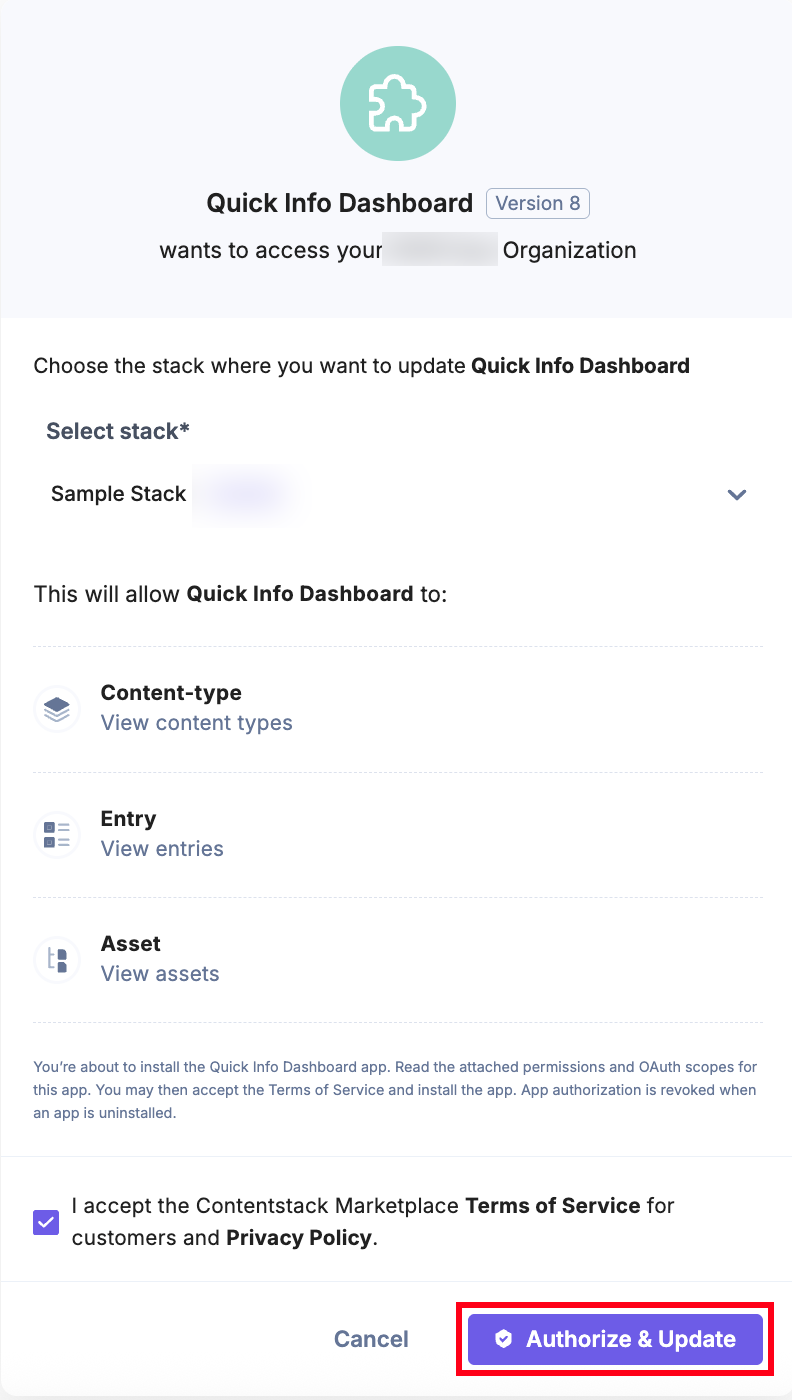
- On the permissions screen, select a Stack and mark the checkbox to accept the Terms of Service and Privacy Policy. Once done, click the Authorize and Install button.
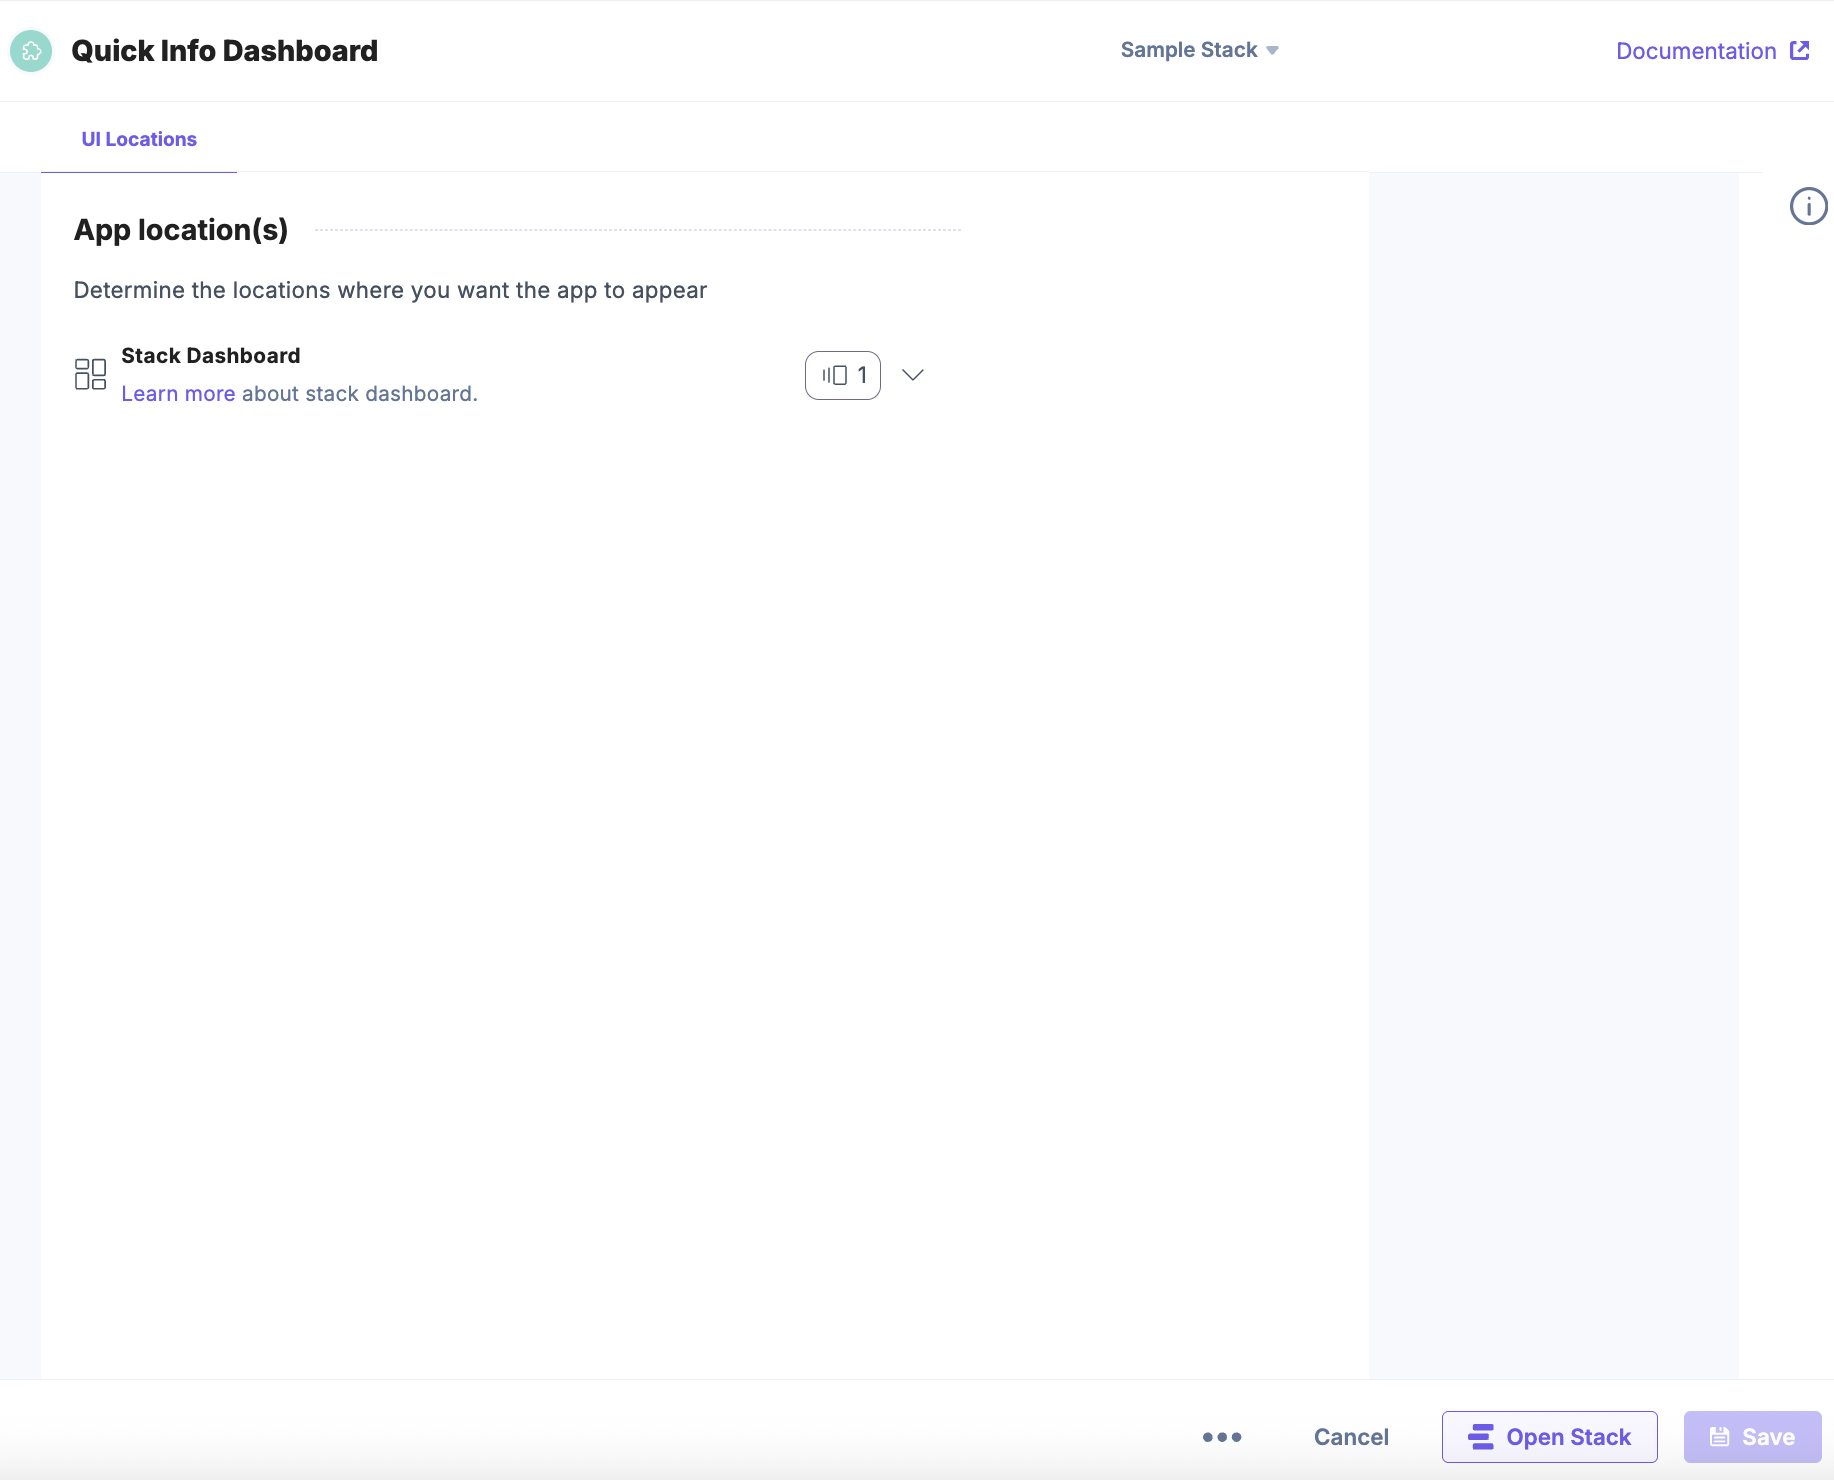
- You will see the Stack Dashboard UI location configured for the app. Click Open Stack to view the app on the Stack Dashboard.
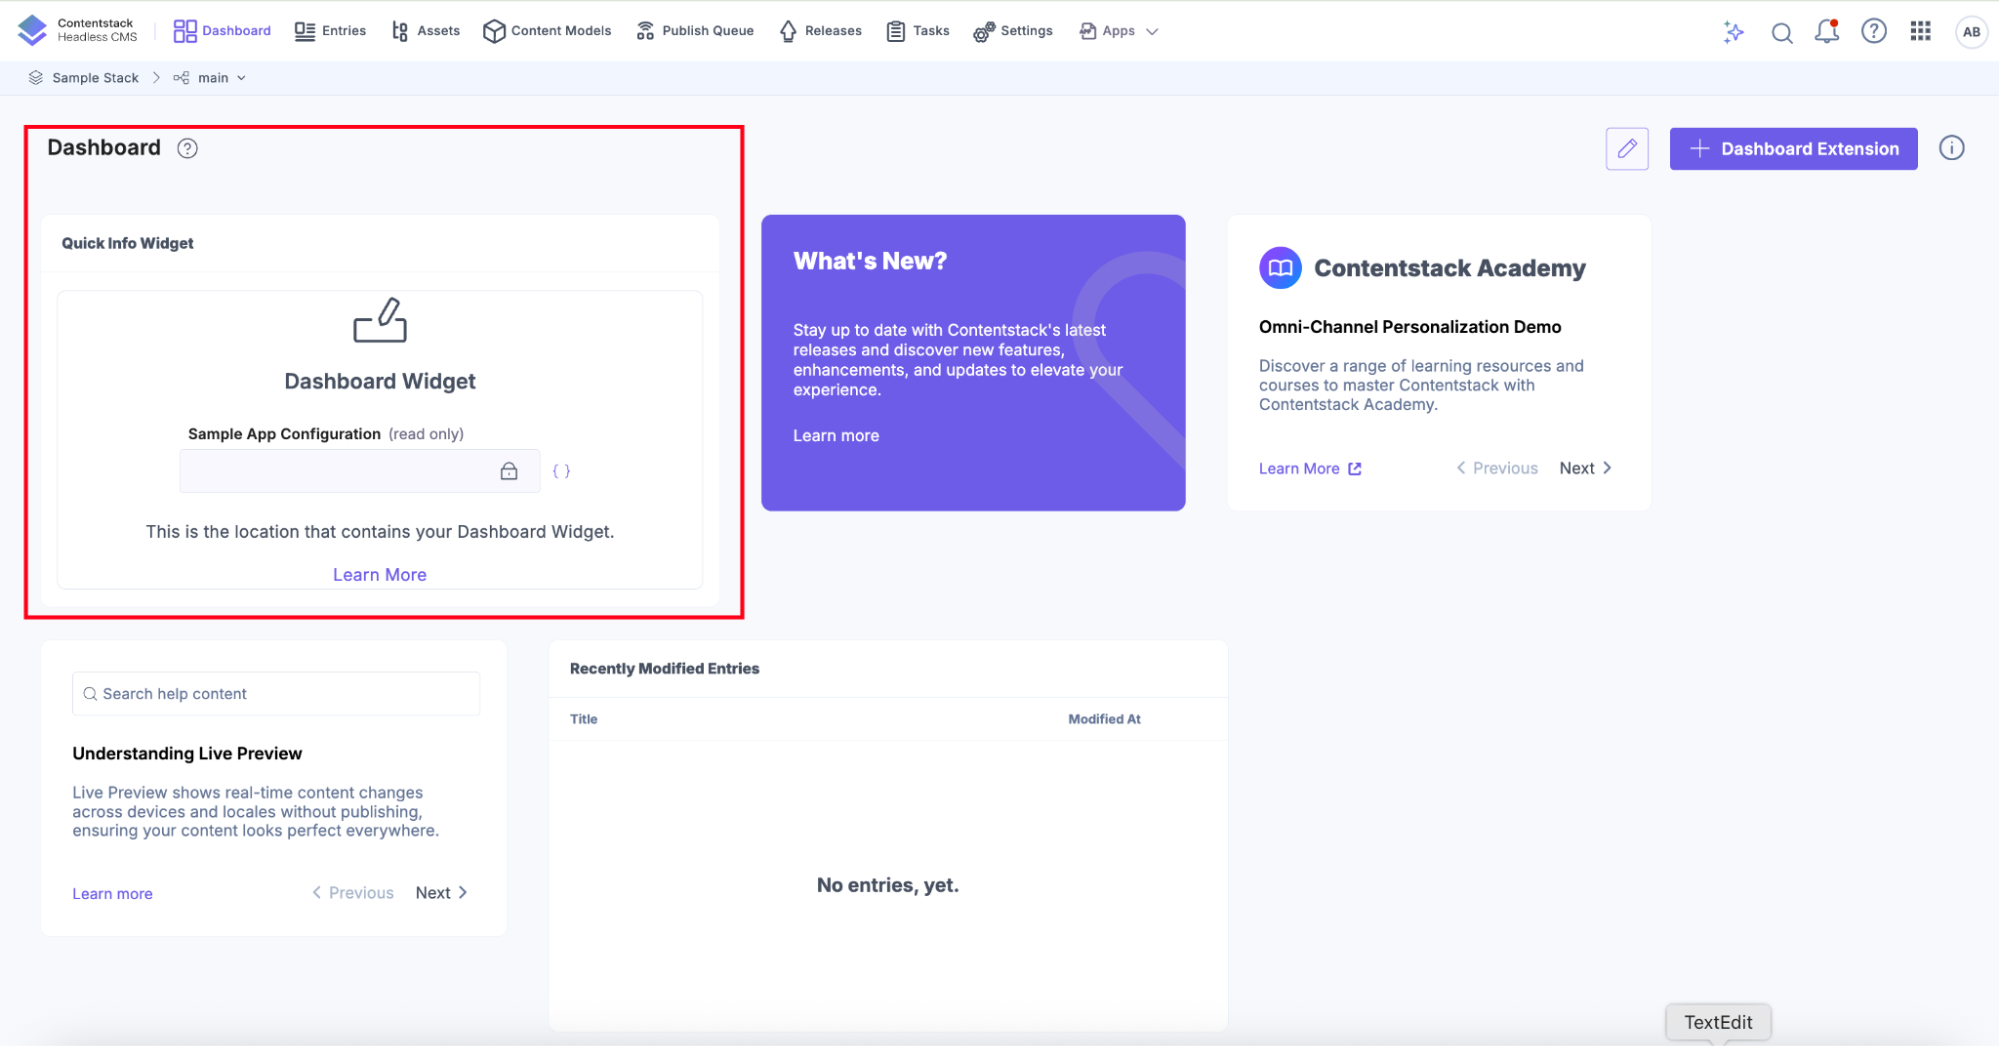
- You will see the Quick Info Dashboard app as shown below:
If you do not use the example app configuration, the Marketplace App Boilerplate shows the following configuration on the Stack Dashboard.
The app is now available as a Stack Dashboard app that utilizes the Permissions feature in conjunction with Management SDK and the AppSDK Adapter.
Full permissions test:
- Enable all required permissions in Developer Hub
- Verify all statistics display correctly
- Test navigation links to Content Types, Entries, and Assets
Limited permissions test:
- Disable specific permissions (e.g., Assets)
- Verify graceful error handling
- Check that permission error messages are clear and actionable
Troubleshooting
- UI Location not visible: Check UI Location in Developer Hub.
- App SDK not initialized: Ensure provider wraps components + installs the app.
- 403 errors: Verify Permissions in Developer Hub.
- CORS/network errors: Match hosting URL with Developer Hub configuration.
Resources and Links
More articles in "Quickstart"
