

Bootstrap Starter Apps
The Bootstrap plugin in the Contentstack CLI simplifies the process of setting up Starter apps by automating stack creation and content import. With a single command, developers can quickly clone a Starter app and configure it with all the required assets and content.
Using this plugin, all necessary content—such as content types, environments, entries, and assets—is automatically created in the stack you choose or create.
This guide explains how to use the Bootstrap plugin to automate the setup process for your Starter app projects.
Note: This Starter app uses Live Preview version 2.0.
Prerequisites
- Contentstack account
- CLI installed
- Set region
- Authenticate CLI using one of the following:
Using the Bootstrap Command
Use the cm:bootstrap command to automate Starter app setup. This command performs the following:
- Clones the selected app from GitHub
- Creates or uses an existing stack
- Imports content types, entries, assets, and environments
Command:
csdx cm:bootstrapWhen executed, the command prompts you to provide the following details:
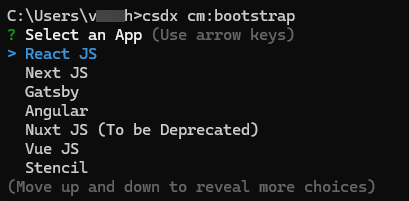
- Technology
Select the Starter app you want to use (e.g., React, Next.js, Gatsby, Angular).
In this example, let's select React JS as the Starter app.
- Path
Choose the folder path to clone the app’s source code.
Use one of the following:- Current Folder
- Other (to provide a custom path)
- Live Preview
Choose whether to enable Live Preview (Y/n).
Press Y to enable or n to skip.

This will start cloning the selected app to the folder you provide.
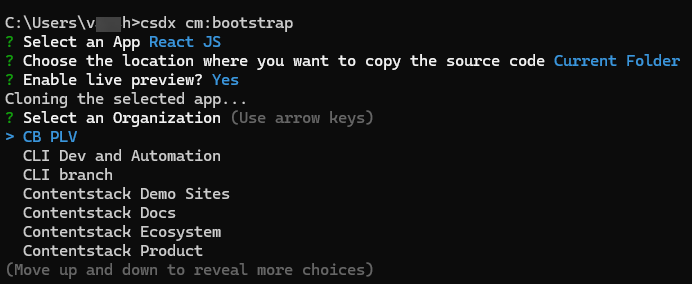
- Organization Name
Select the organization under which the stack should be created.
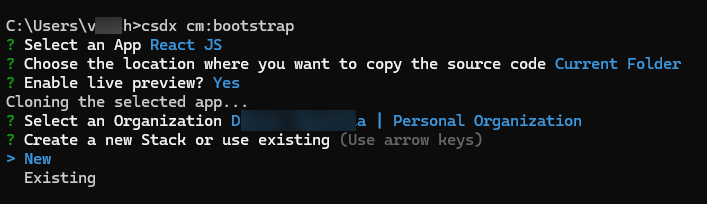
- Stack Preference
Choose to create a New stack or use an Existing stack to import the app content.
In this example, let's create a new stack in the organization we selected.
- Stack Name
Enter a name for the new stack and click Enter.
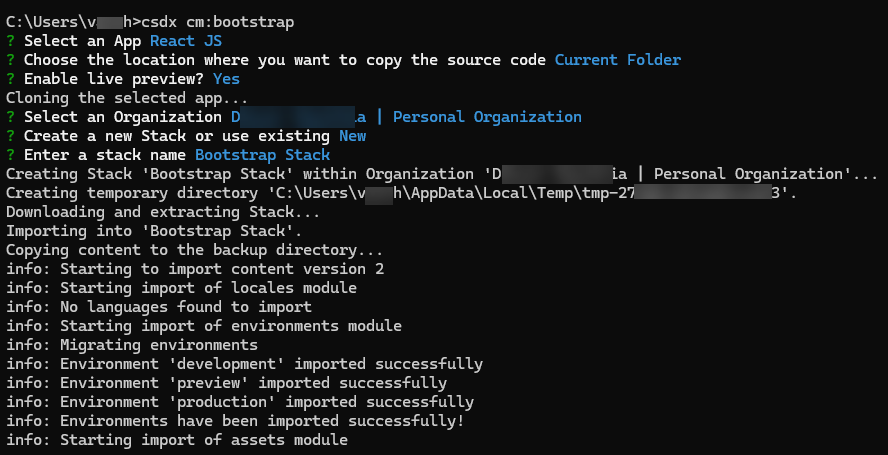
With this process, the content—including fields, assets, environments, languages, and other settings—will be imported into the selected stack.
Note: Imported content will be automatically published in the target stack.
This is how you can automate project setup in Contentstack by using the Bootstrap command.
You can also run the bootstrap command with all required parameters in a single line:
csdx cm:bootstrap --app-name "<starter_app_name>" --project-dir "<path_or_the_location_of_the_folder_to_clone_the_app>" -k "<stack_api_key>"or
csdx cm:bootstrap --app-name "<starter_app_name>" --project-dir "<path_or_the_location_of_the_folder_to_clone_the_app>" --org "<organization_uid>" -n "<stack_name>"Options
- --app-name=app-name: The name of the Starter app you want to use. Example: reactjs-starter, nextjs-starter, gatsby-starter, angular-starter, nuxt-starter.
- --project-dir=project-dir: Directory/path to setup the project. If the path contains spaces, wrap it in quotes or escape the space using a backslash.
- -k, --stack-api-key=stack-api-key: API key of the stack where the content should be seeded.
- --org=org: The UID of the organization where a new stack will be created.
- -n, --stack-name=stack-name: The name of the new stack to be created.
- -y, --yes=yes: [Optional] Skip stack confirmation.
- -a, --alias=alias: Alias of the management token.
Examples
-
To select the app you want to clone:
csdx cm:bootstrap --app-name "<starter_app_name>"Example: React JS
csdx cm:bootstrap --app-name reactjs-starter -
Use this command to provide the path to the location of the folder to clone the app:
csdx cm:bootstrap --project-dir "<The path or the location to clone the app>"Example:
csdx cm:bootstrap --project-dir "C:\Users\Name\Desktop\cli\content" -
Use this command to add all the flags in a single command:
csdx cm:bootstrap --app-name <<starter-app-name>> --project-dir "<The path or the location to clone the app>" --org "your-org-uid" --stack-name "stack-name"Example
csdx cm:bootstrap --app-name reactjs-starter --project-dir "C:\Users\Name\Desktop\cli\content" --org "your-org-uid" --stack-name "sample-stack"
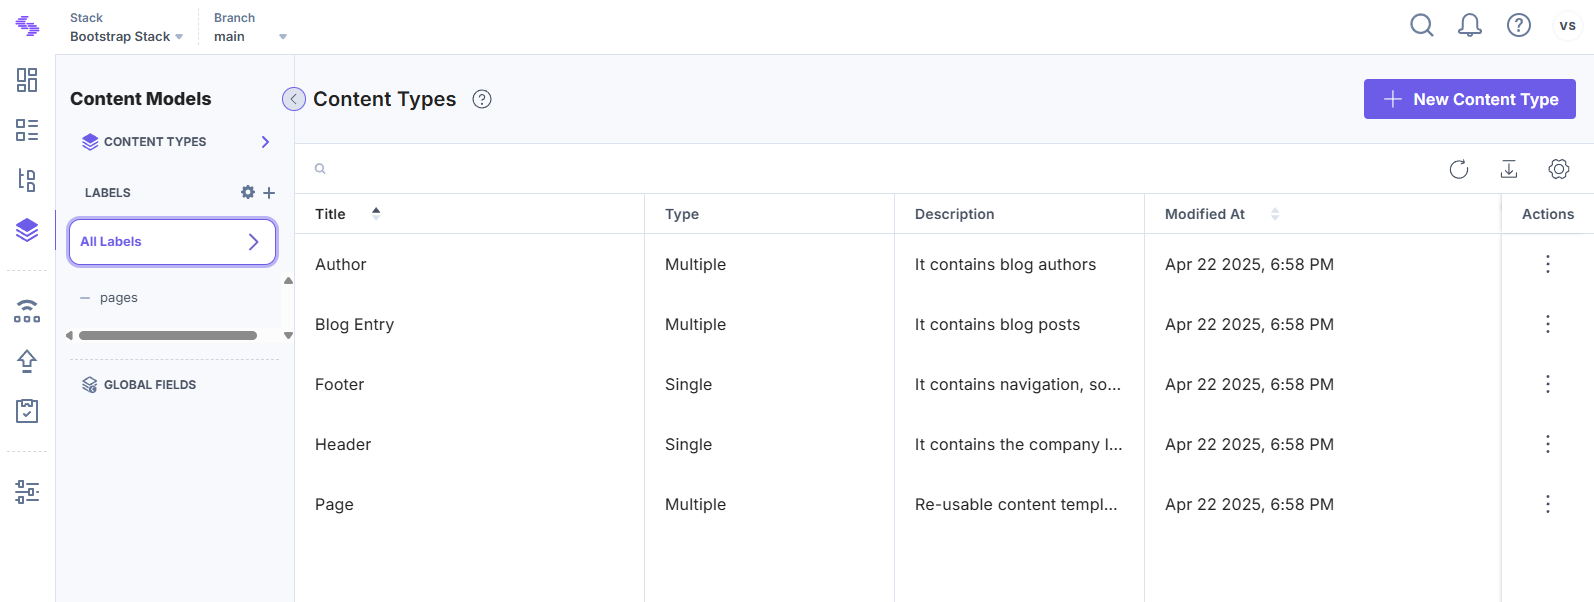
The above command will add the Starter app’s (React JS) content to your stack as shown below:
Run the Bootstrap Starter App
You can easily run this Starter app on your local machine by following the steps below:
- Build, Configure, and Run the Website (Manual Process)
- Download the website code.
- Open your terminal.
- Navigate to your project folder.
- Run the following command to create a configuration file named .env.development.
cp .env.example .env.developmentNote: If you are a Windows user, replace cp with copy in the command above.
The .env.development file contains all the necessary configuration parameters.
- Open it in any code editor or IDE of your choice.
- Provide your stack credentials (such as API key, Delivery token, and environment), and save the file.
# Contentstack is the tool we use to manage our website's content.
# You need to replace 'your_stack_api_key', 'your_delivery_token', and 'your_environment_name' with the actual information.
REACT_APP_CONTENTSTACK_API_KEY=<your_stack_api_key>
REACT_APP_CONTENTSTACK_DELIVERY_TOKEN=<your_delivery_token>
REACT_APP_CONTENTSTACK_ENVIRONMENT=<your_environment_name>

# Below config options are for enabling live preview/live edit tags for the starter app
REACT_APP_CONTENTSTACK_API_HOST=api.contentstack.io
REACT_APP_CONTENTSTACK_MANAGEMENT_TOKEN=<your_management_token>
REACT_APP_CONTENTSTACK_APP_HOST=app.contentstack.com
REACT_APP_CONTENTSTACK_LIVE_PREVIEW=true
REACT_APP_CONTENTSTACK_LIVE_EDIT_TAGS=false

# API Host, APP Host and Region Environment Variables for AWS North America region users
# REACT_APP_CONTENTSTACK_API_HOST=api.contentstack.io
# REACT_APP_CONTENTSTACK_REGION=NA
# REACT_APP_CONTENTSTACK_APP_HOST=app.contentstack.io


# API Host, APP Host and Region Environment Variables for AWS Europe region users
# REACT_APP_CONTENTSTACK_API_HOST=eu-api.contentstack.com
# REACT_APP_CONTENTSTACK_REGION=EU
# REACT_APP_CONTENTSTACK_APP_HOST=eu-app.contentstack.io


# API Host, APP Host and Region Environment Variables for AWS Australia region users
# REACT_APP_CONTENTSTACK_API_HOST=au-api.contentstack.com
# REACT_APP_CONTENTSTACK_REGION=AU
# REACT_APP_CONTENTSTACK_APP_HOST=au-app.contentstack.io


# API Host, APP Host and Region Environment Variables for Azure North America region users
# REACT_APP_CONTENTSTACK_API_HOST=azure-na-api.contentstack.com
# REACT_APP_CONTENTSTACK_REGION=AZURE-NA
# REACT_APP_CONTENTSTACK_APP_HOST=azure-na-app.contentstack.io


# API Host, APP Host and Region Environment Variables for Azure Europe region users
# REACT_APP_CONTENTSTACK_API_HOST=azure-eu-api.contentstack.com
# REACT_APP_CONTENTSTACK_REGION=AZURE-EU
# REACT_APP_CONTENTSTACK_APP_HOST=azure-eu-app.contentstack.io


# API Host, APP Host and Region Environment Variables for Google North America region users
# REACT_APP_CONTENTSTACK_API_HOST=gcp-na-api.contentstack.com
# REACT_APP_CONTENTSTACK_REGION=GCP-NA
# REACT_APP_CONTENTSTACK_APP_HOST=gcp-na-app.contentstack.io

# API Host, APP Host and Region Environment Variables for Google Europe region users
# REACT_APP_CONTENTSTACK_API_HOST=gcp-eu-api.contentstack.com
# REACT_APP_CONTENTSTACK_REGION=GCP-EU
# REACT_APP_CONTENTSTACK_APP_HOST=gcp-eu-app.contentstack.io

# By default branch=main, if a branch is not provided
# REACT_APP_CONTENTSTACK_BRANCH=<your_branch_name>

SKIP_PREFLIGHT_CHECK=true
Note: Live Preview that uses the REACT_APP_CONTENTSTACK_MANAGEMENT_TOKEN will soon be deprecated. Instead, we recommend using the Live Preview that relies on the REACT_APP_CONTENTSTACK_PREVIEW_TOKEN, REACT_APP_CONTENTSTACK_PREVIEW_HOST, REACT_APP_CONTENTSTACK_APP_HOST, and REACT_APP_CONTENTSTACK_API_HOST as given below.
REACT_APP_CONTENTSTACK_PREVIEW_HOST=rest-preview.contentstack.io
REACT_APP_CONTENTSTACK_PREVIEW_TOKEN=<preview_token_linked_to_delivery_token>
REACT_APP_CONTENTSTACK_APP_HOST=app.contentstack.com
REACT_APP_CONTENTSTACK_LIVE_PREVIEW=true
REACT_APP_CONTENTSTACK_LIVE_EDIT_TAGS=false

# API Host, APP Host, Preview Host and Region Environment Variables for AWS North America region users
# REACT_APP_CONTENTSTACK_PREVIEW_HOST=rest-preview.contentstack.io
# REACT_APP_CONTENTSTACK_REGION=NA
# REACT_APP_CONTENTSTACK_API_HOST=api.contentstack.io


# API Host, APP Host, Preview Host and Region Environment Variables for AWS Europe region users
# REACT_APP_CONTENTSTACK_PREVIEW_HOST=eu-rest-preview.contentstack.com
# REACT_APP_CONTENTSTACK_REGION=EU
# REACT_APP_CONTENTSTACK_API_HOST=eu-api.contentstack.com


# API Host, APP Host, Preview Host and Region Environment Variables for AWS Australia region users
# REACT_APP_CONTENTSTACK_PREVIEW_HOST=au-rest-preview.contentstack.com
# REACT_APP_CONTENTSTACK_REGION=AU
# REACT_APP_CONTENTSTACK_API_HOST=au-api.contentstack.com


# API Host, APP Host, Preview Host and Region Environment Variables for Azure North America region users
# REACT_APP_CONTENTSTACK_PREVIEW_HOST=azure-na-rest-preview.contentstack.com
# REACT_APP_CONTENTSTACK_REGION=AZURE-NA
# REACT_APP_CONTENTSTACK_API_HOST=azure-na-api.contentstack.com

# API Host, APP Host, Preview Host and Region Environment Variables for Azure Europe region users
# REACT_APP_CONTENTSTACK_PREVIEW_HOST=azure-eu-rest-preview.contentstack.com
# REACT_APP_CONTENTSTACK_REGION=AZURE-EU
# REACT_APP_CONTENTSTACK_API_HOST=azure-eu-api.contentstack.com

# API Host, APP Host, Preview Host and Region Environment Variables for Google North America region users
# REACT_APP_CONTENTSTACK_PREVIEW_HOST=gcp-na-rest-preview.contentstack.com
# REACT_APP_CONTENTSTACK_REGION=GCP-NA
# REACT_APP_CONTENTSTACK_API_HOST=gcp-na-api.contentstack.com

# API Host, APP Host, Preview Host and Region Environment Variables for Google Europe region users
# REACT_APP_CONTENTSTACK_PREVIEW_HOST=gcp-eu-rest-preview.contentstack.com
# REACT_APP_CONTENTSTACK_REGION=GCP-EU
# REACT_APP_CONTENTSTACK_API_HOST=gcp-eu-api.contentstack.com

# By default, branch=main if a branch is not provided
# REACT_APP_CONTENTSTACK_BRANCH=<your_branch_name>

SKIP_PREFLIGHT_CHECK=true
Note: By default, the Live Preview feature is disabled for this project. To enable it, set REACT_APP_CONTENTSTACK_LIVE_PREVIEW=true.
- Now, open your terminal, point it to your project location, and run the following commands:
npm install
npm start
That’s it, you have successfully completed the setup!
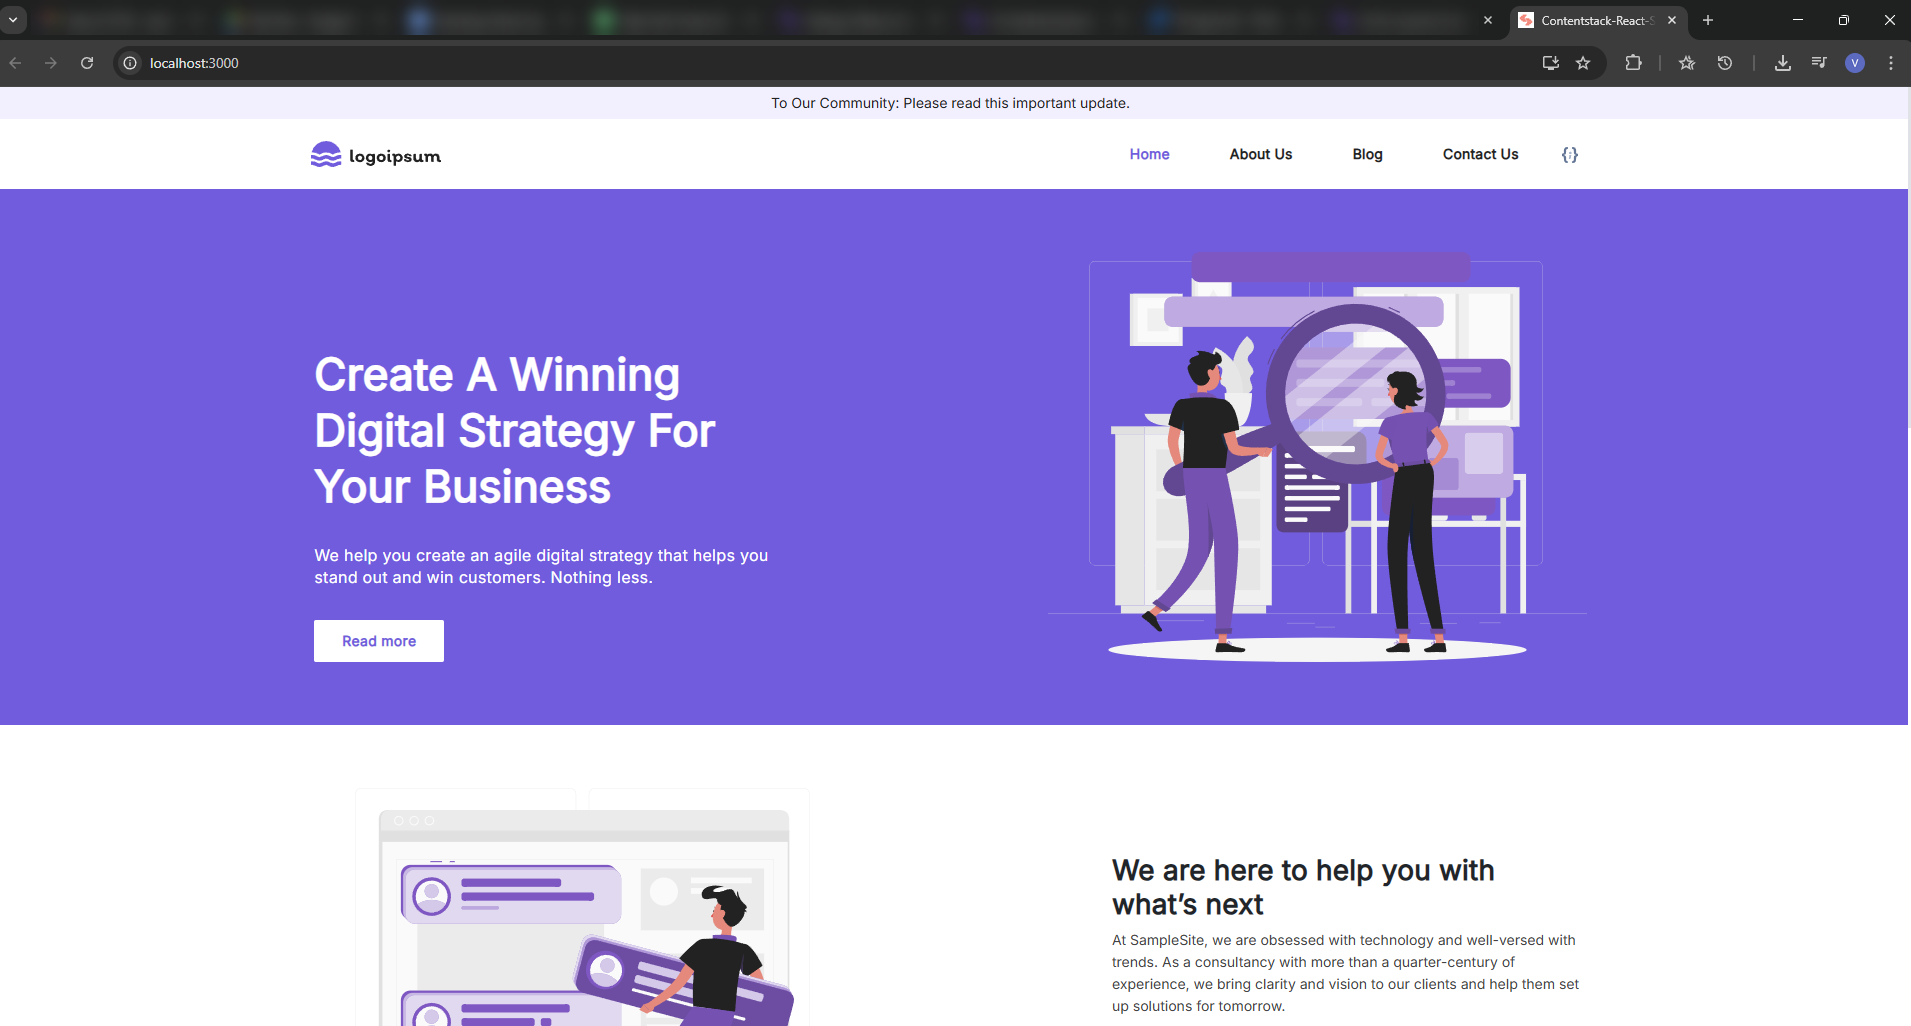
You can now view the website by navigating to http://localhost:3000.
Here's how your website's Home page will look after running on your localhost.
Run the Compass Starter
You can easily run the Compass Starter on your local machine by following the steps below:
- Using Bootstrap Command
- Open your terminal.
- Navigate to your project folder.
- Run the following commands:
npm install
npm start
- Build, Configure, and Run the Website (Manual Process)
- Download the website code.
- Open your terminal.
- Navigate to your project folder.
- Run the following command to create a configuration file named .env:
cp .env.sample .envNote: If you are a Windows user, replace cp with copy in the command above.
The .env file contains all the necessary configuration parameters.
- Open it in any code editor or IDE of your choice.
- Provide your stack credentials (such as API key, Delivery token, and environment), and save the file.
- Now, open your terminal, point it to your project location, and run the following commands:
npm install npm start
Note: While running the Compass Starter app on your local machine in development mode, use the command npm run dev instead of npm start.
That’s it!
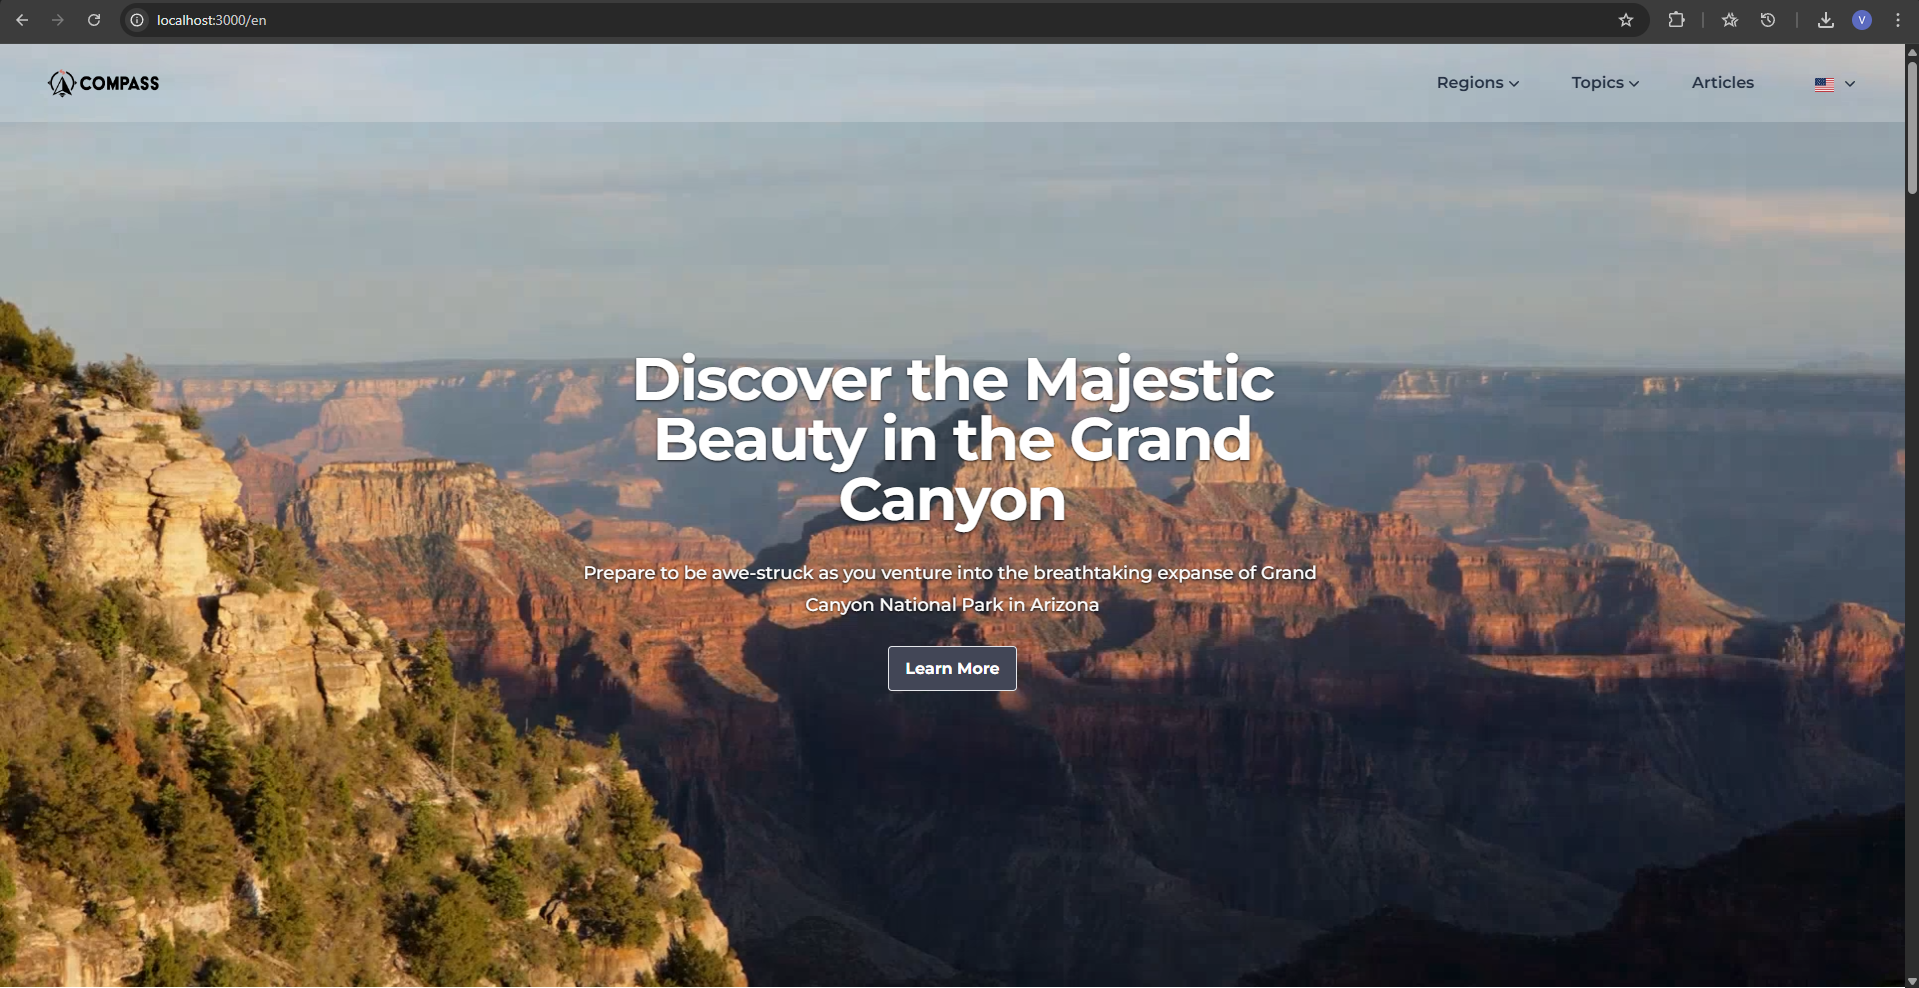
You can now view the website by navigating to http://localhost:3000.
Here's how your website's Home page will look after running on your localhost.
Deploy the Website
You can deploy your Starter app using:
- Contentstack Launch
Additional Resource: For more details, visit the Contentstack Launch documentation.
- Vercel
Supported Starter Apps
Additional Resource: To create and run a demo website, use the sample code and guide provided in the Contentstack Starter apps documentation.
Limitations
More articles in "Miscellaneous"
