

Brightcove App Installation Guide
The Brightcove platform is a cloud-based solution for online video streaming, which facilitates the hosting, sharing, and streaming of video content by organizations. Marketers and creatives can utilize the platform to efficiently organize, control, create, distribute, and measure all their video assets, with the added benefits of scalability, reliability, and security.
Contentstack Marketplace lets you install the Brightcove app and use it within your stack to fetch and display videos from the Brightcove account within your entries.
Prerequisites
- Brightcove account
- Contentstack account
- Access to the Contentstack Organization/Stack as the Owner/Admin
Let's follow this step-by-step guide to install and configure Brightcove within your stack.
Steps for Execution
- Retrieve the Credentials for your Brightcove account
- Install and Configure the Brightcove app in Marketplace
- Use the Brightcove app within your Entry
-
Retrieve the Credentials for Your Brightcove Account
To get your configuration details for Brightcove, follow the steps given below:
- Log in to the Brightcove account using your Brightcove credentials.
- Click the Admin settings icon, as shown in the screenshot, to get the account information.
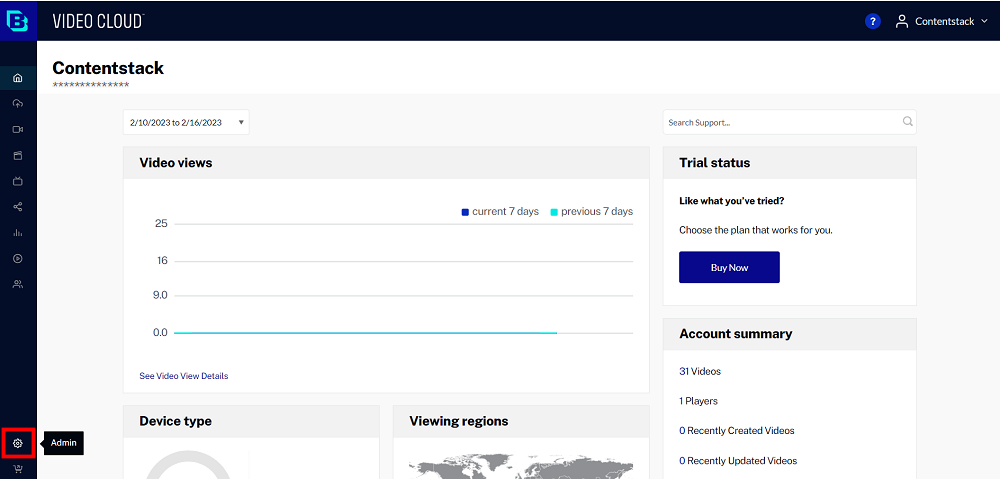
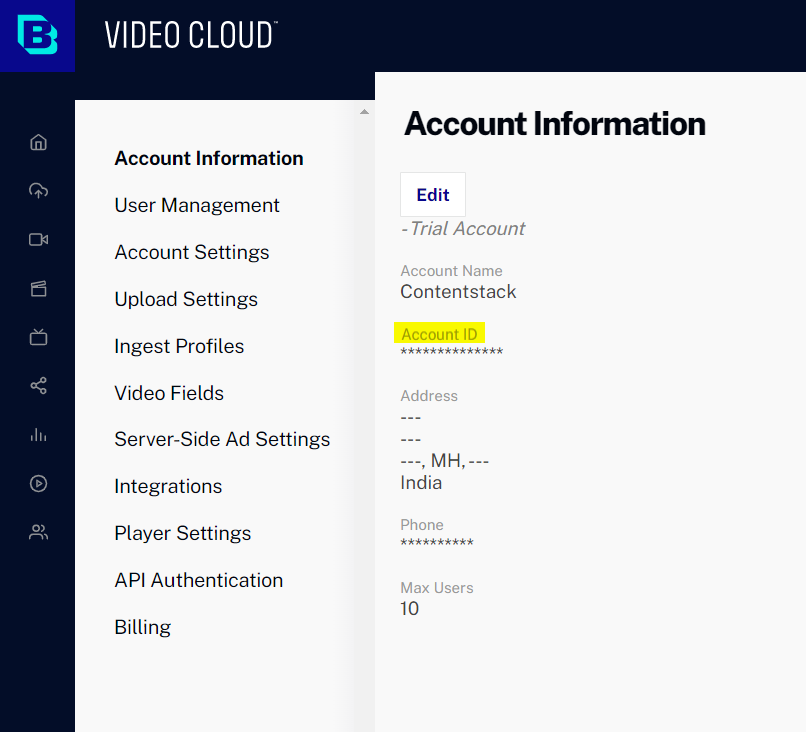
- Copy the Account ID from the Account Information section to use this in step 2 during app configuration.
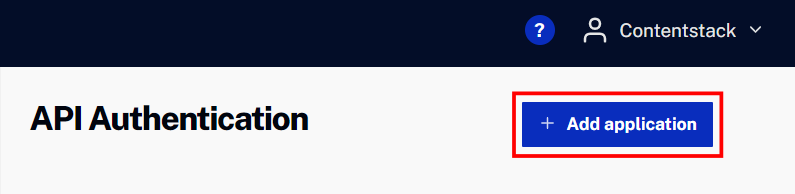
- Go to the API Authentication section and click the + Add application button.
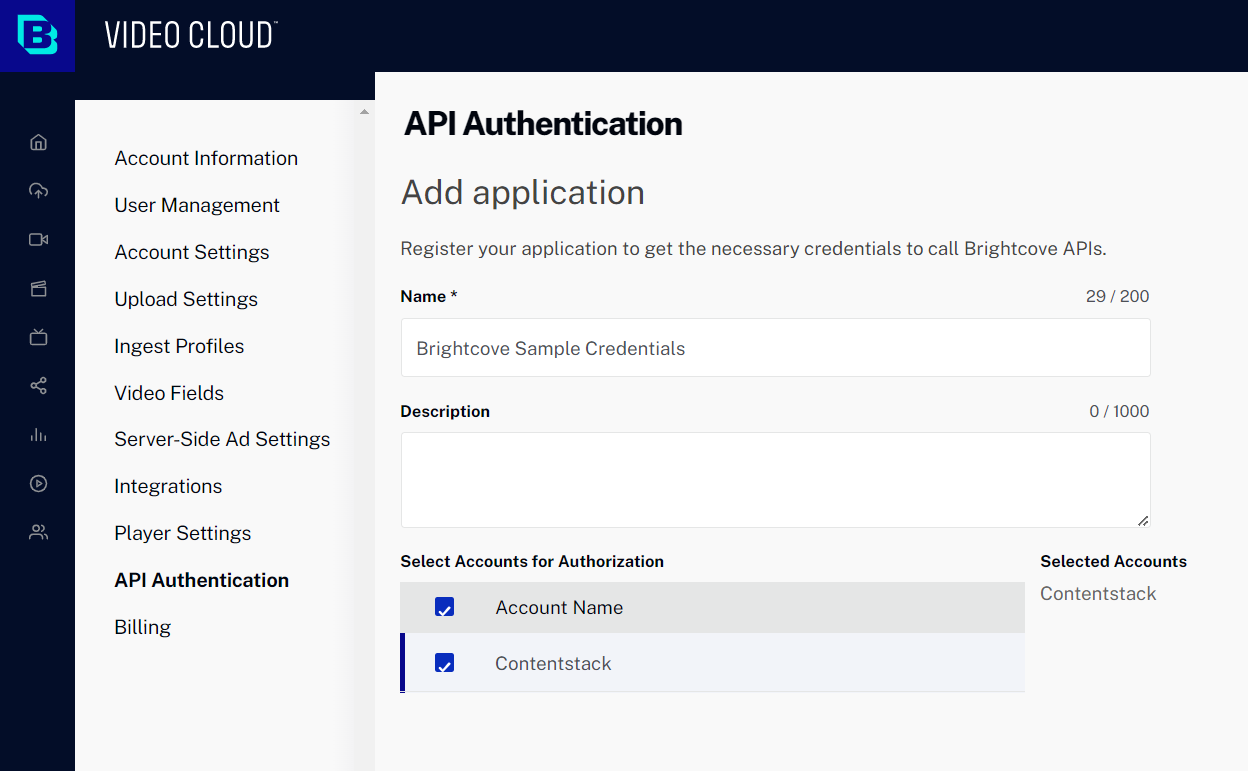
- Enter the Name and Description, and then select the required accounts from Select Accounts for Authorization.
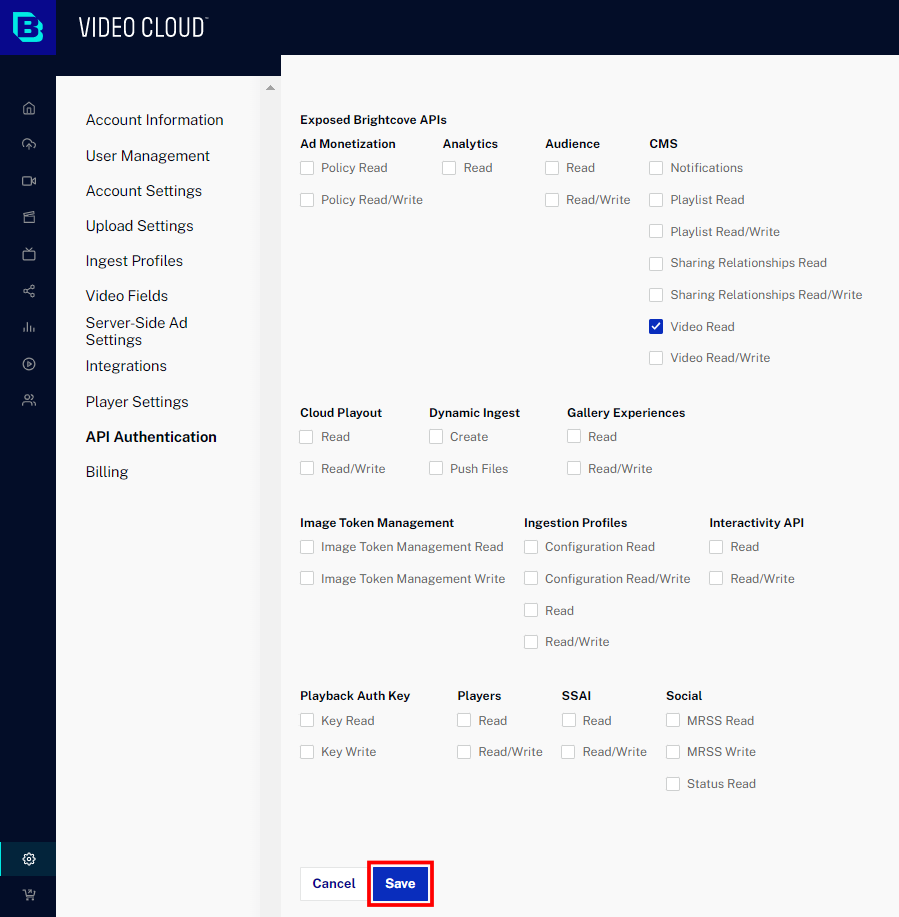
- Scroll down to the Exposed Brightcove APIs section. Under CMS options, mark Video Read, and then click Save.
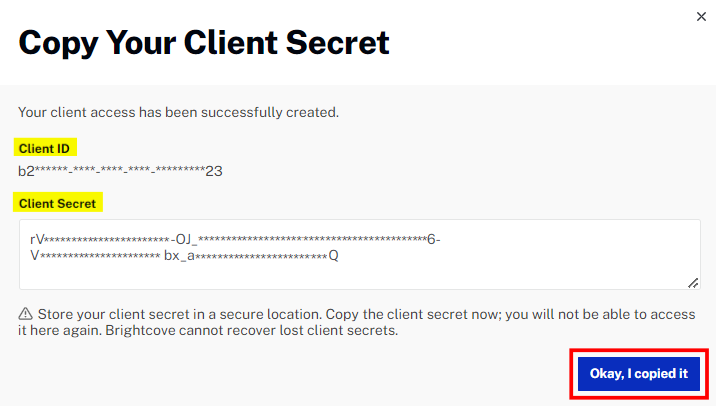
- Copy the Client ID and Client Secret for use in step 2, then click Okay, I copied it to close the dialog box.
-
Install and Configure the Brightcove App in Marketplace
To install the app in Contentstack, log in to your Contentstack account and follow the steps below:
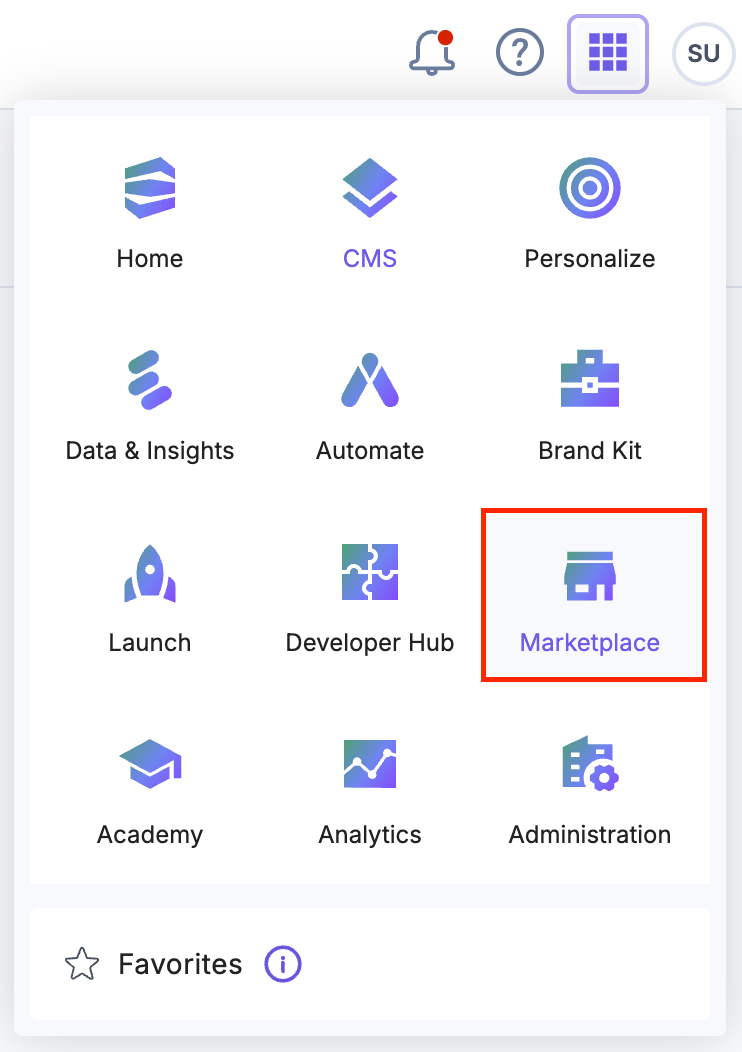
- Navigate to the “App Switcher” icon in the top-right corner and click Marketplace.
- Click Apps from the left panel.
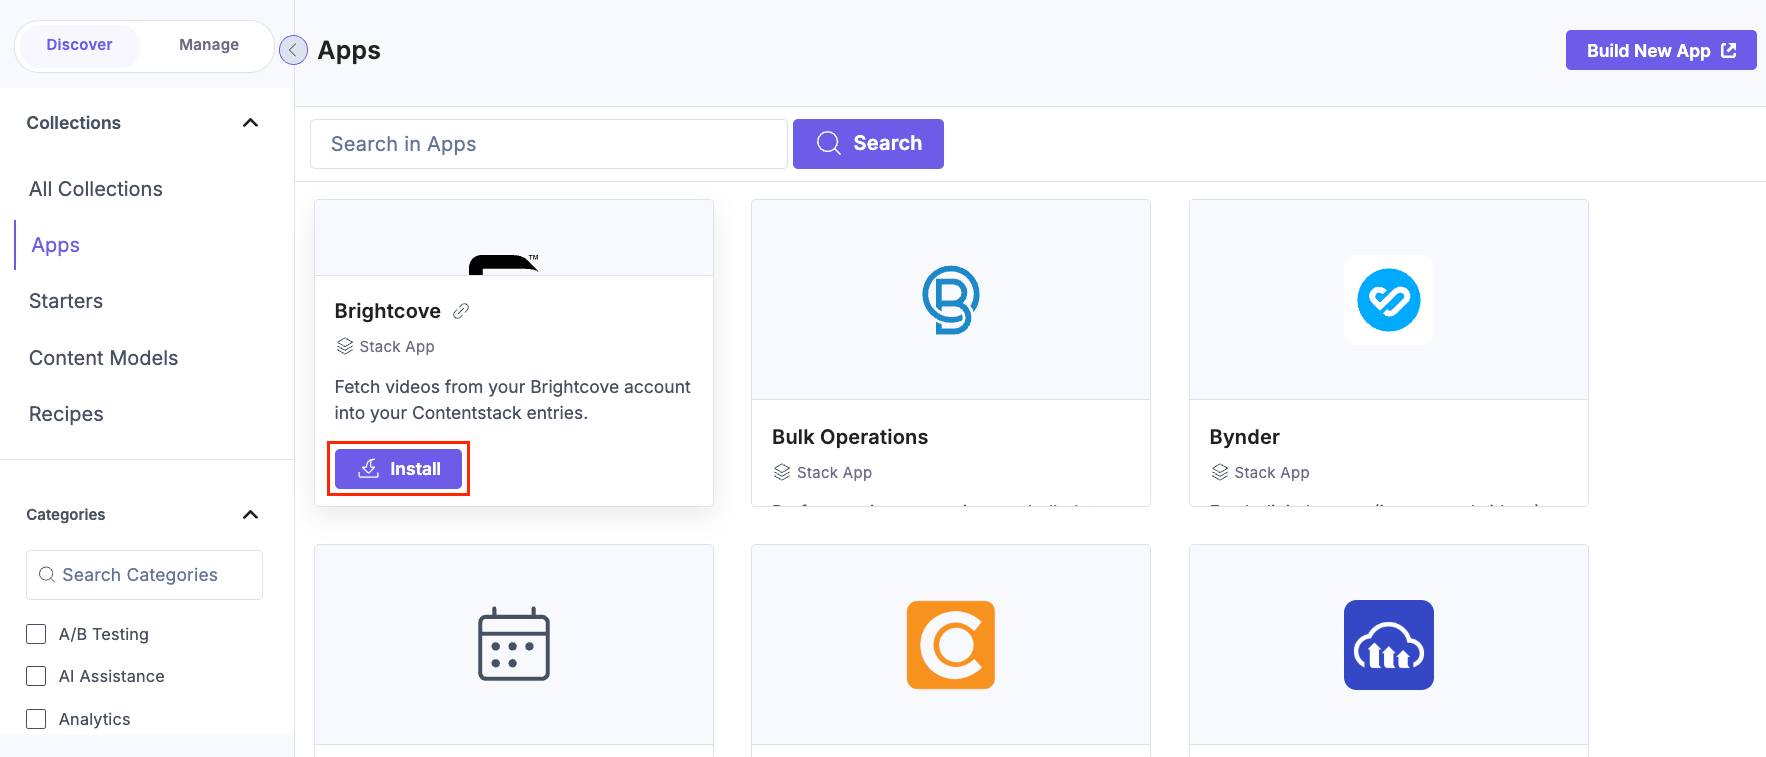
- Within the Marketplace, you can see the available apps. Hover over the Brightcove app and click Install.
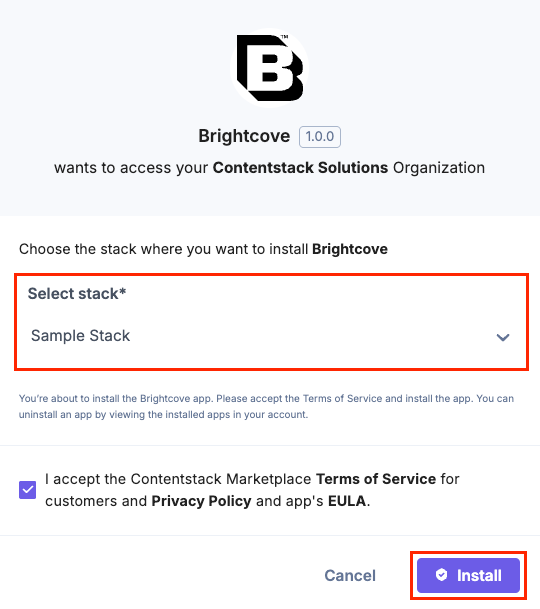
- In the pop-up window, select the stack where you want to install the Brightcove app, accept the Terms of Service, and click the Install button.
- On the Configuration screen, you can add multiple configurations for Brightcove. To do so, follow the steps given below:
- Click the + New Configuration button to add new configuration details.
- In the Add Configuration modal, enter the configuration Name and click Add.
- Enter the Brightcove Account ID, Brightcove Client ID, and Brightcove Client Secret retrieved from your Brightcove Account in step 1.
- Set as Default: To set this configuration as the default, click this checkbox.
Alternatively, click the vertical ellipsis on the top-right side of the configuration section, then select Set as Default from the menu.
Note: At least one app configuration should be selected as the default.
Similarly, you can add multiple configurations by following the steps discussed above.
- To delete the configuration, click the vertical ellipsis and select Delete Configuration. In the Confirm Deletion modal, add the configuration name and click Delete.
- For an existing user, the credentials will be added as the default configuration, and named as legacy_config.
Warning:
- legacy_config is a reserved keyword and you cannot use it when adding new configurations.
- If you delete the legacy_config configuration, data loss may occur and you will not be able to access the products and categories from the related accounts.
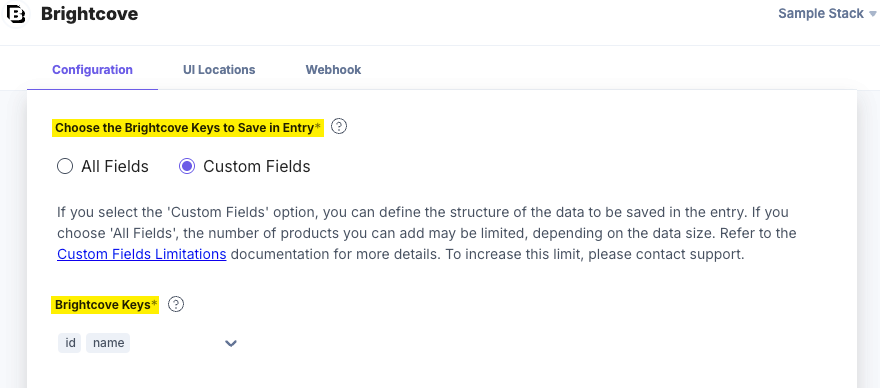
- Choose the Brightcove Keys to Save in Entry: Choose how to save the data fetched from the Brightcove account in Contentstack entries.
- If you select the All Fields option, you can select only a limited number of assets in the entry.
- For Custom Fields, you can search and add specific Brightcove Keys you want to save in entries. By default, the id and name of the assets are selected.
- Click the Save button.
- On the UI Locations tab, you can see the predefined app locations. You can use the toggle button corresponding to each UI location to enable or disable it based on your requirements.
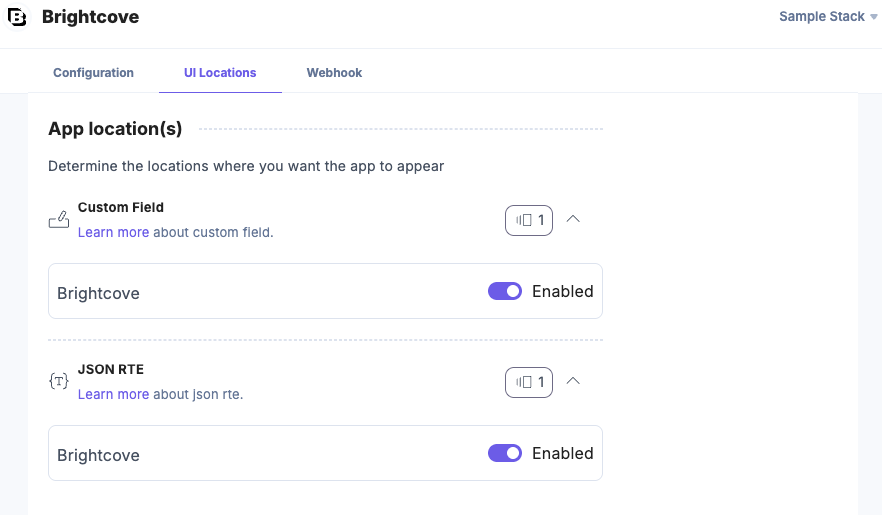
Note: The app requires at least one UI location to be enabled, otherwise you will not be able to save your app configuration settings.
- If the webhook is enabled for your app, you can view the webhook logs under the Webhook tab.
Additional Resource: For more information on UI location and webhooks, please refer to the Installed Apps guide.
- Click Open Stack to start using the Brightcove app.
- Navigate to the “App Switcher” icon in the top-right corner and click Marketplace.
-
Use the Brightcove App Within Your Entry
To use the Brightcove app within an entry of your stack, follow the steps given below:
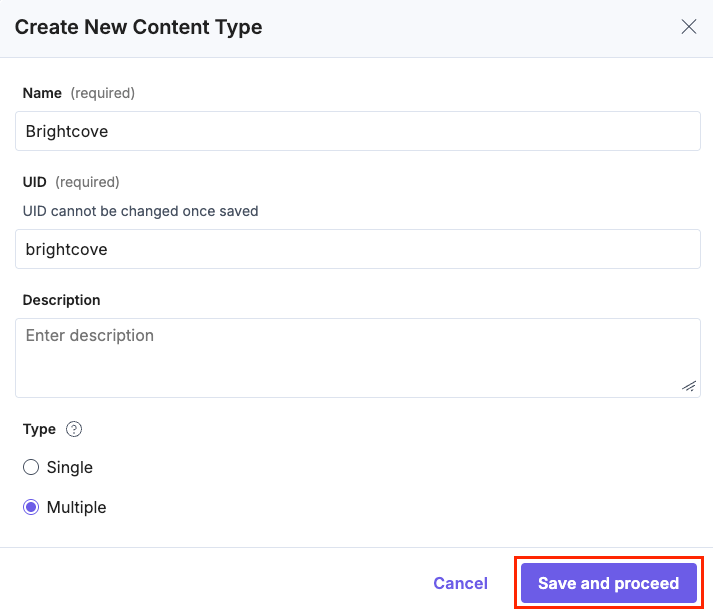
- Navigate to the stack dashboard, click Content Models in the header, then click the + New Content Type button.
- Create a content type by adding relevant details as displayed below:
-
There are two ways to use the Brightcove app in your entry:
Use the Brightcove App as a Custom Field
- In the Content Type Builder page, add a Custom field in your content type by clicking the Insert a field link represented by a + sign.
- Under Select Extension or App, select Brightcove, and click the Proceed button.
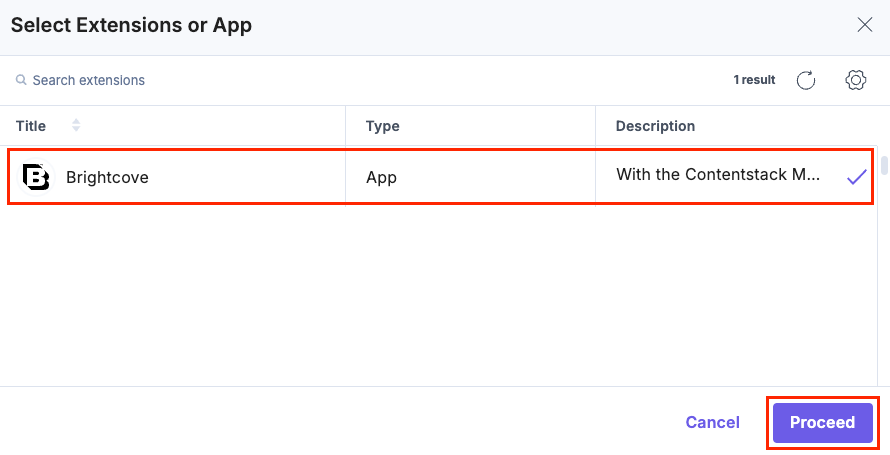
This adds Brightcove in the custom field.
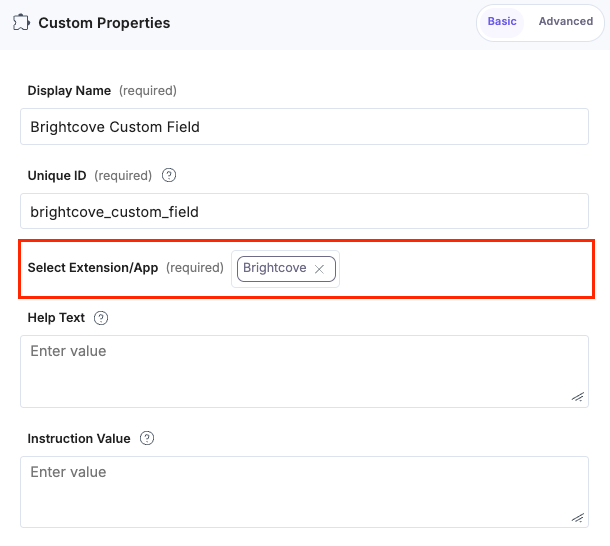
Additional Resource: To set the configuration object, refer to the Set Advanced Config Object in Custom Field section.
- After adding the app in a custom field, click Save or Save and Close to save your changes.
- To use the Brightcove app, create an entry for this content type. Navigate to Entries in the header, click + New Entry to create a new entry for the above content type, and then click Proceed.
You can see the Brightcove app’s custom field on your entry page, as shown below:
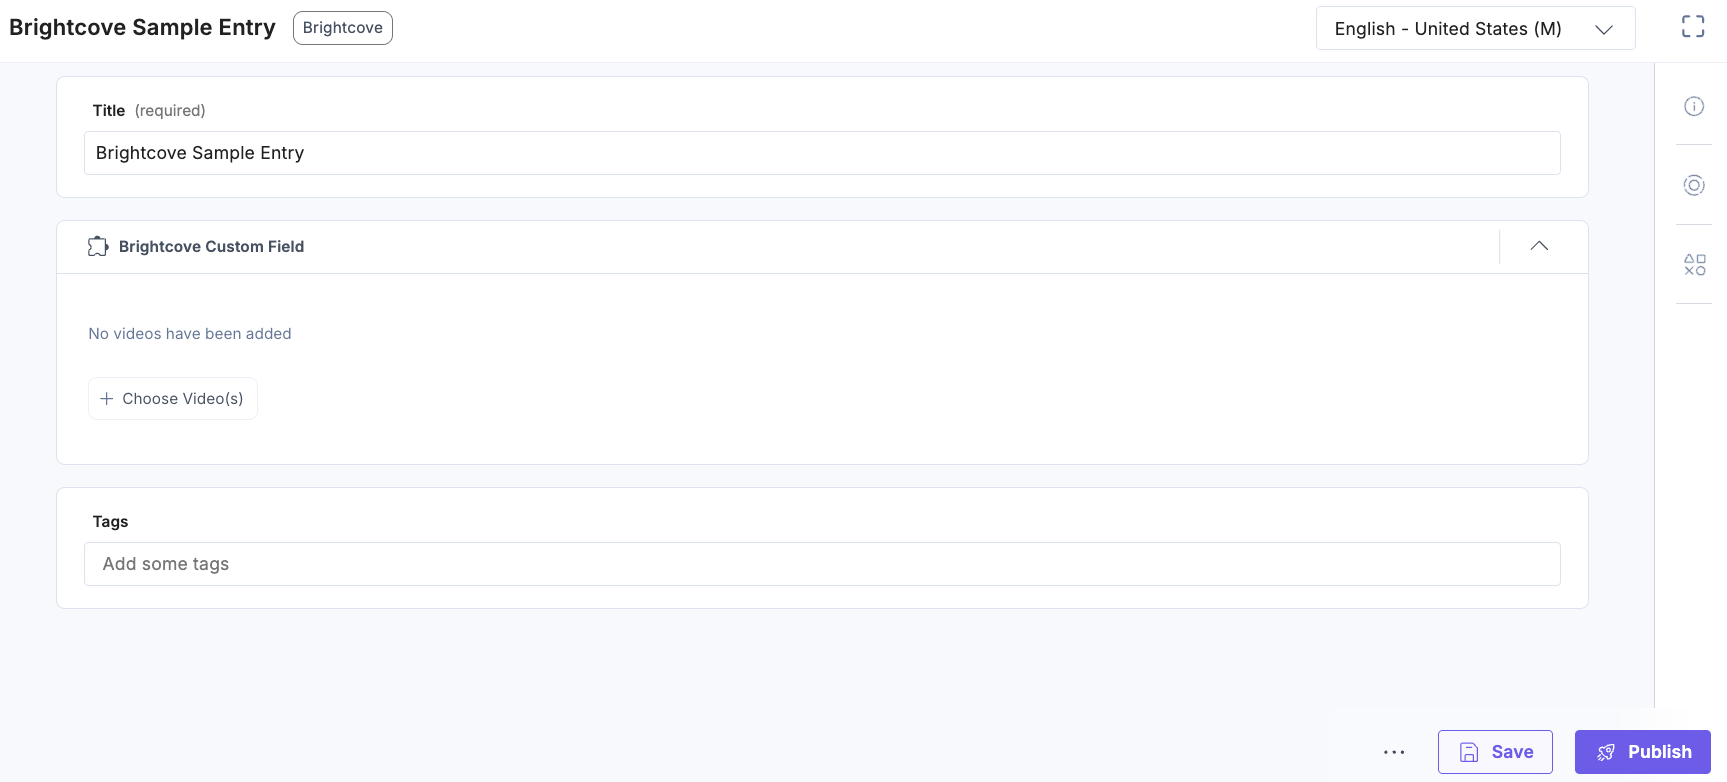
- Click the + Choose Video(s) button.

- Select the video(s) from your Brightcove selector page and click the Add Videos(s) button to add them to your entry.
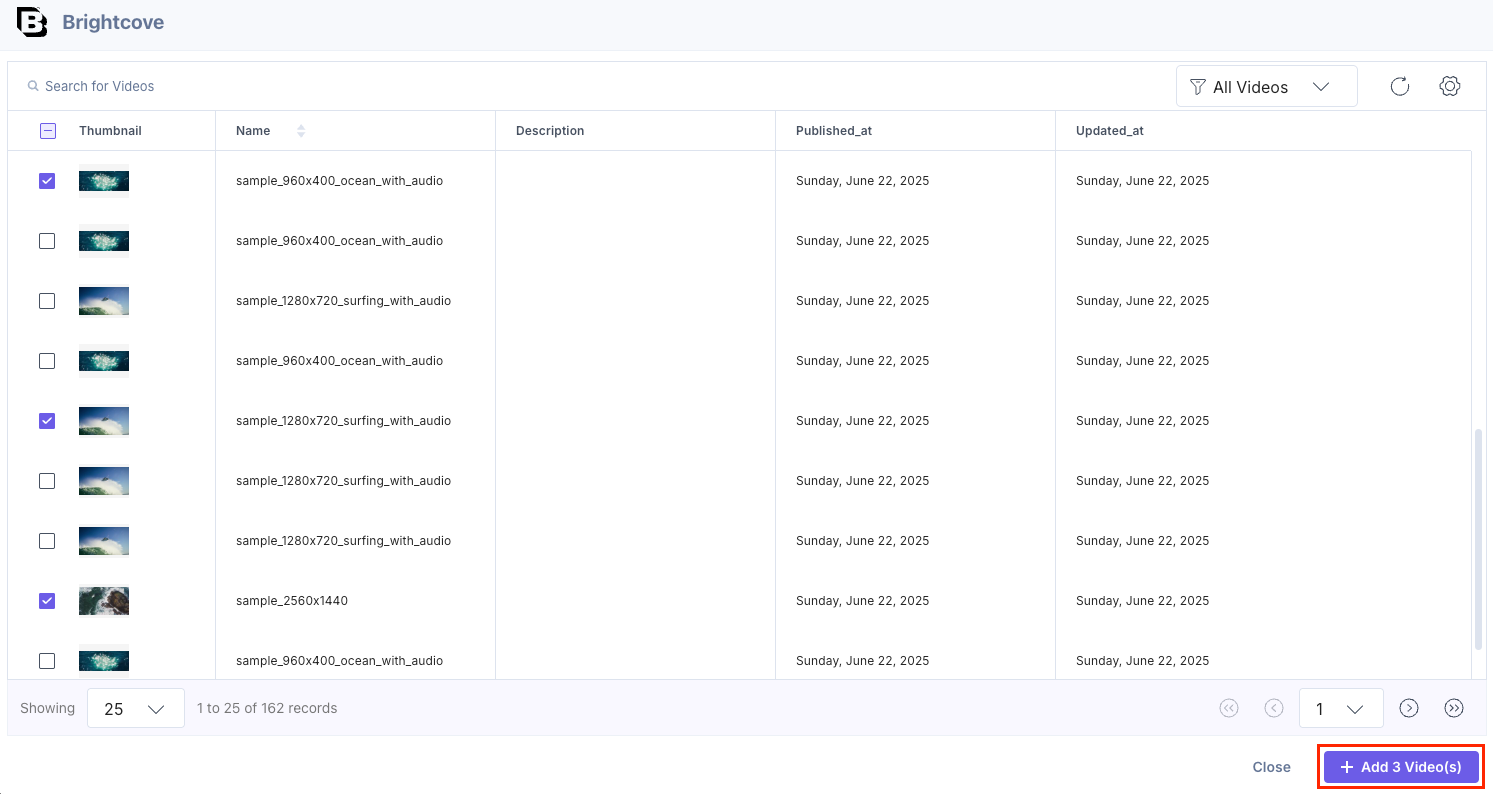
Note: You can add multiple videos in one go.
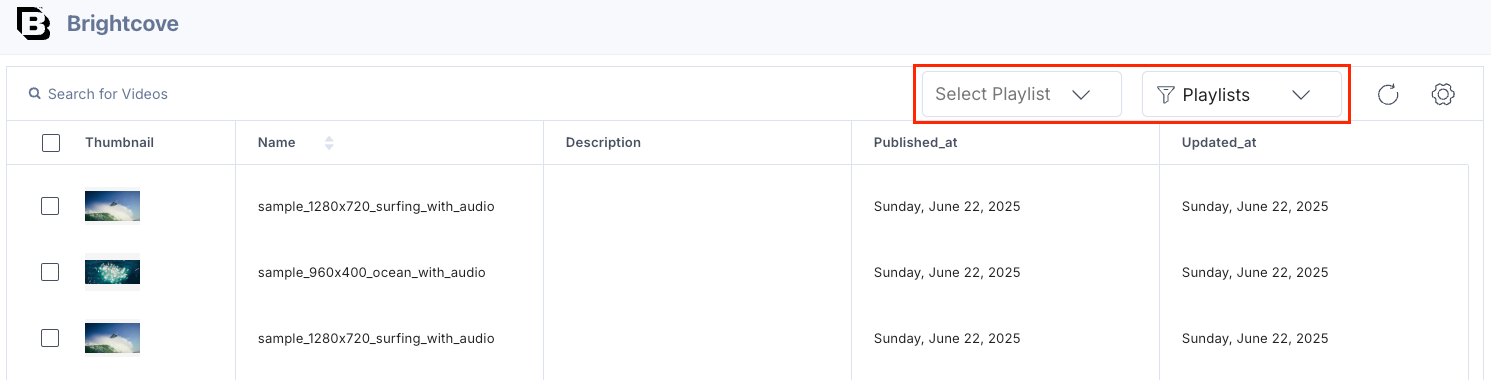
You can filter and view videos grouped under Playlists in the Selector page. Select the desired Playlists and add the videos.
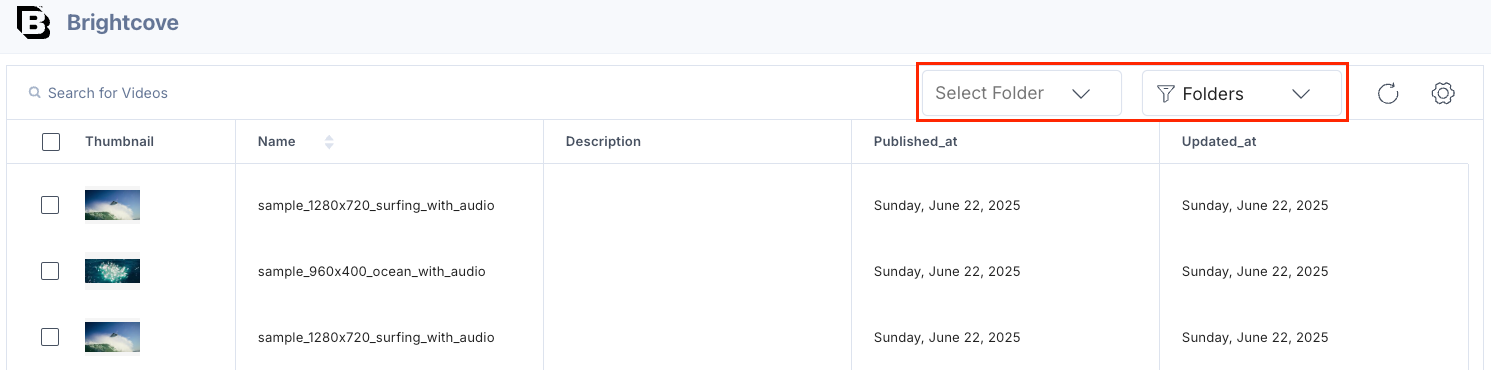
You can also filter videos using Folders in the Selector page. Choose the desired folder from Brightcove and add the videos.
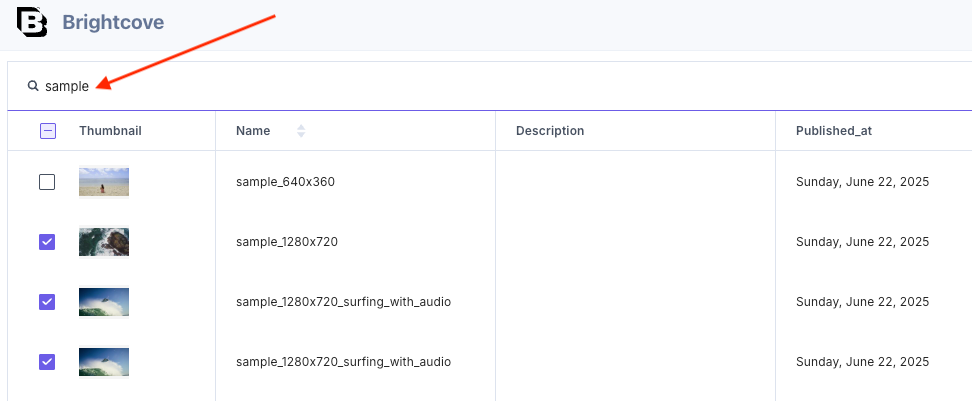
You can also search for videos by video ID in the Brightcove selector page.
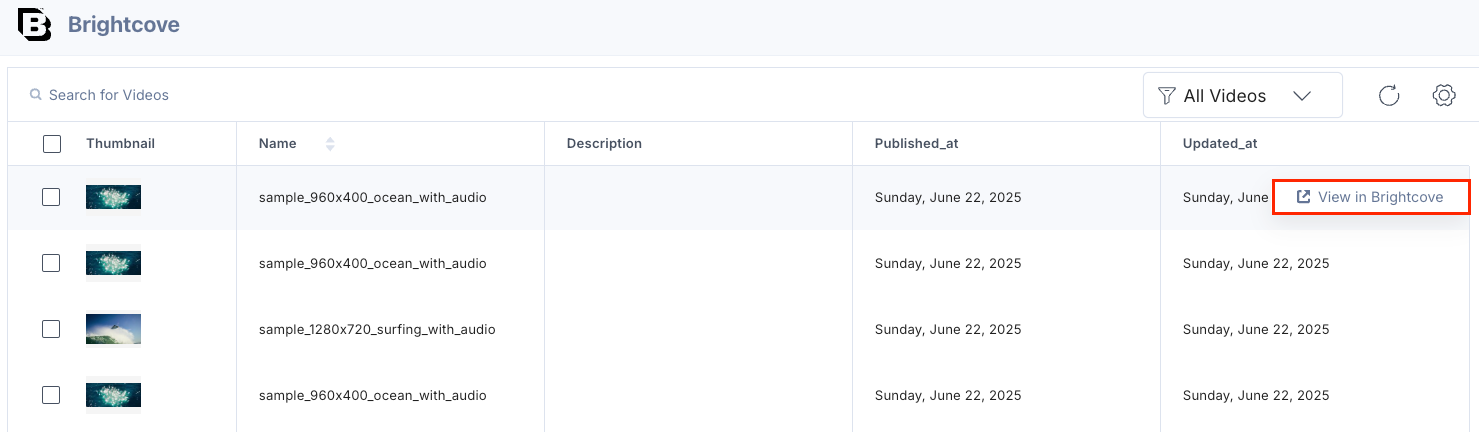
Hover over a video on the Brightcove selector page to see the View in Brightcove option and navigate directly to the Brightcove platform.
-
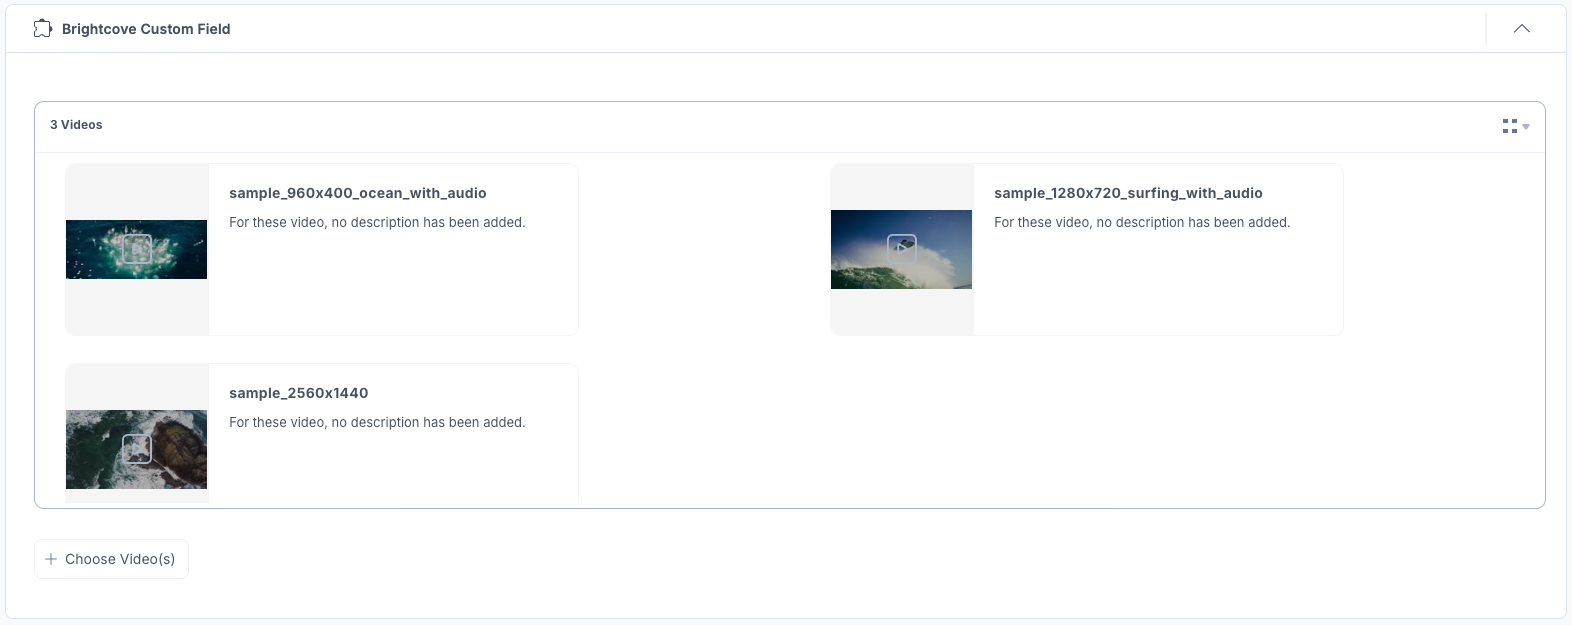
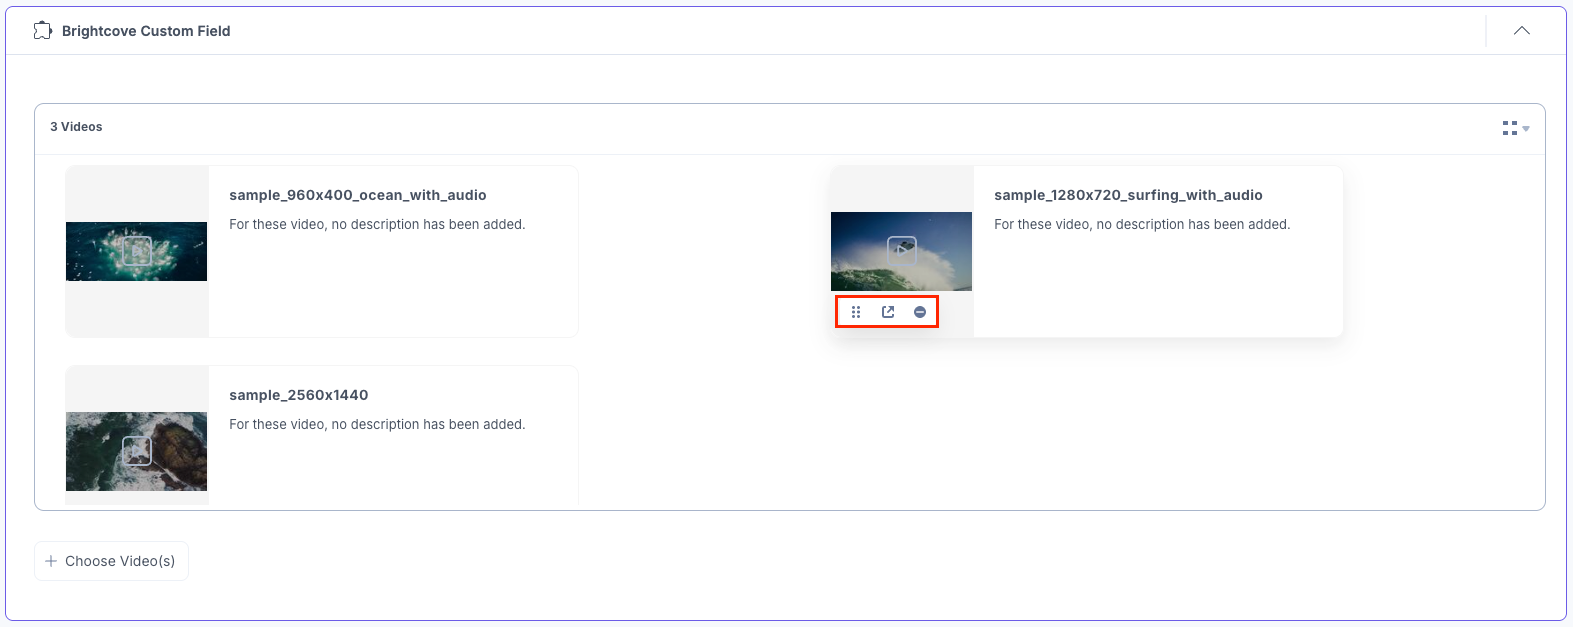
The videos you select get added to your entry in the thumbnail view.
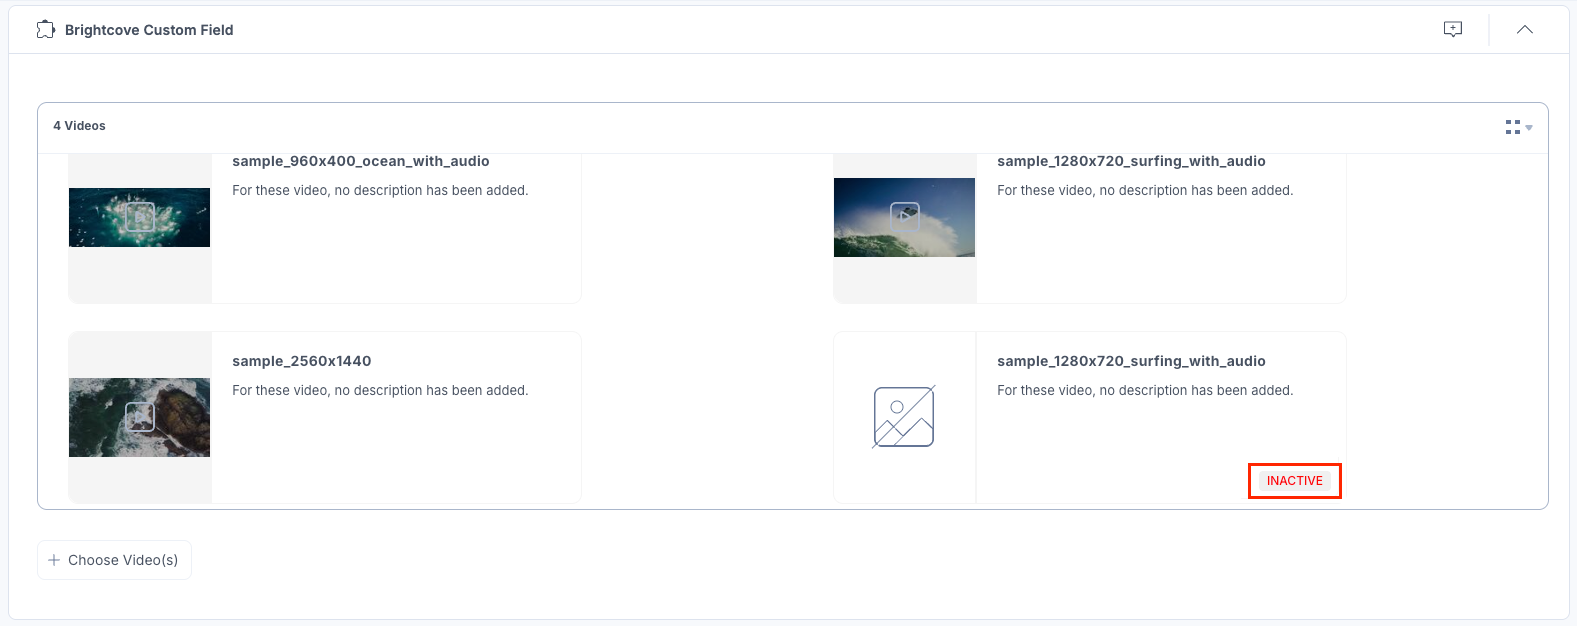
If the video is deactivated in Brightcove, you can view an Inactive mark on the video.
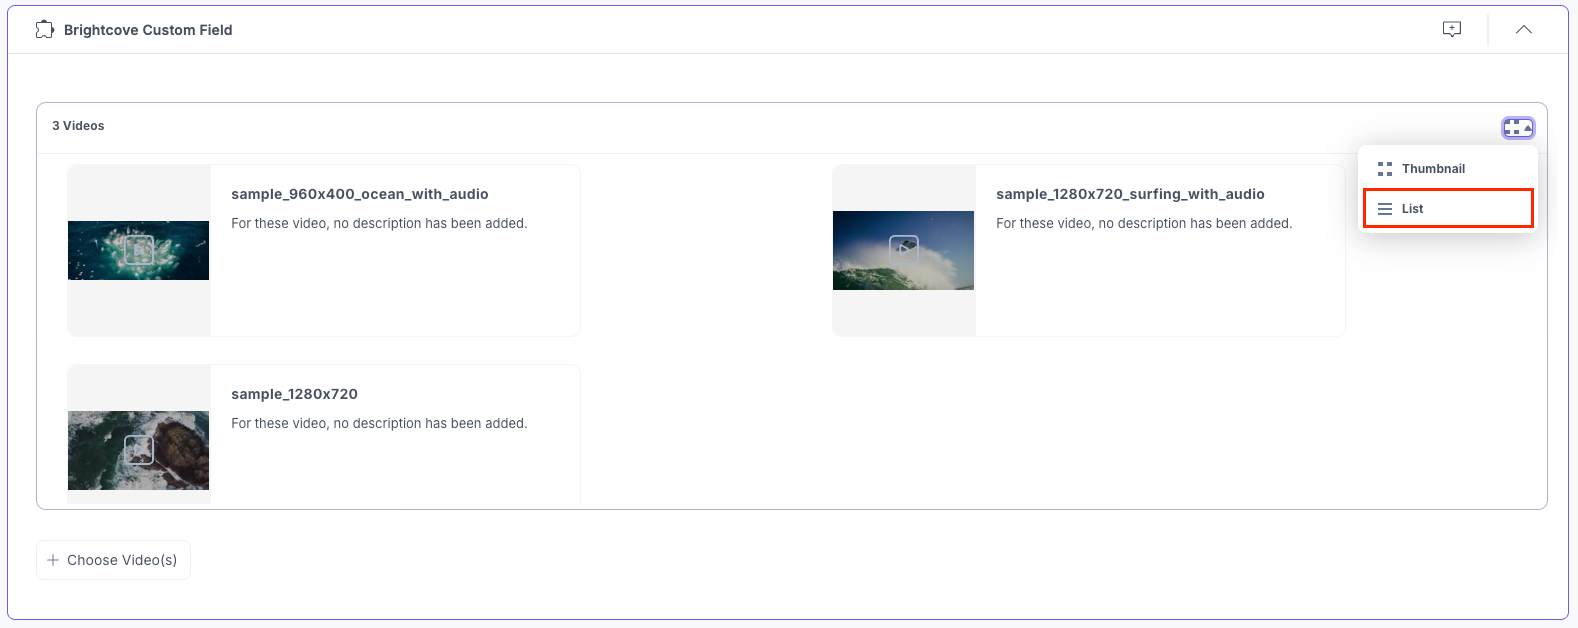
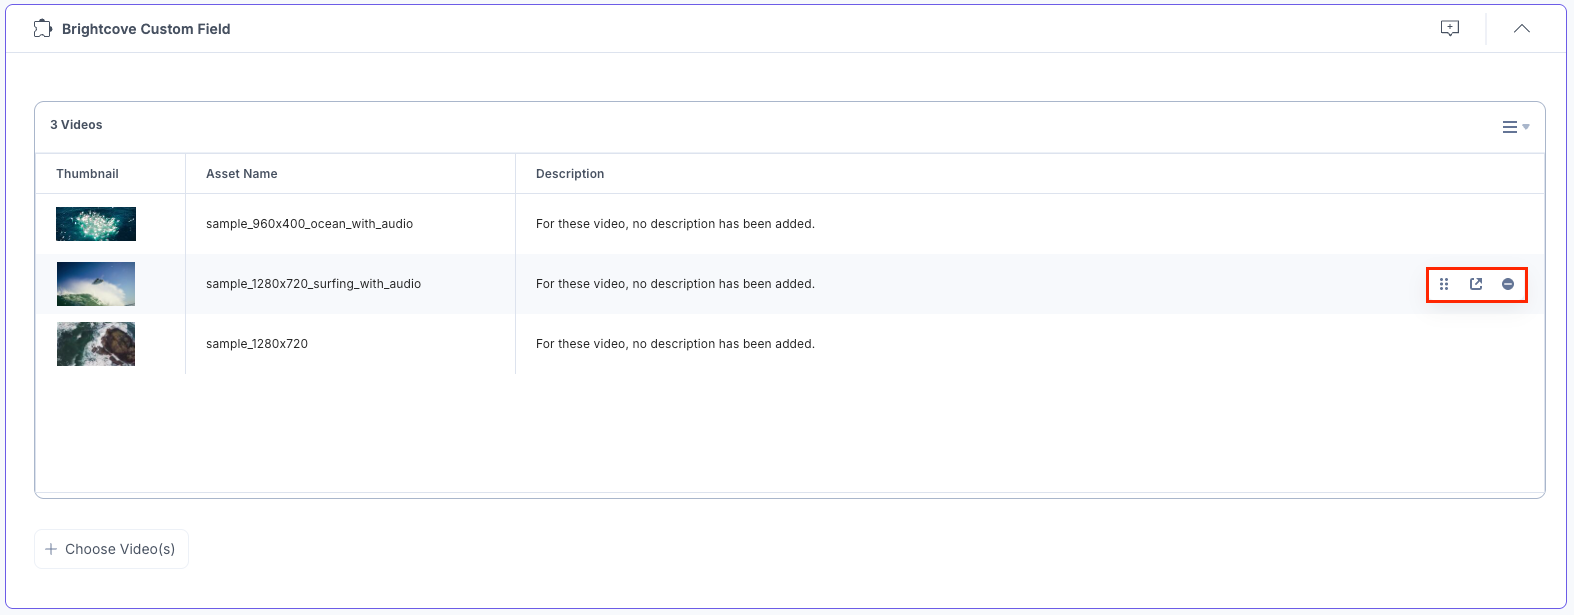
To view the videos in the list view, select the List view option from the dropdown.
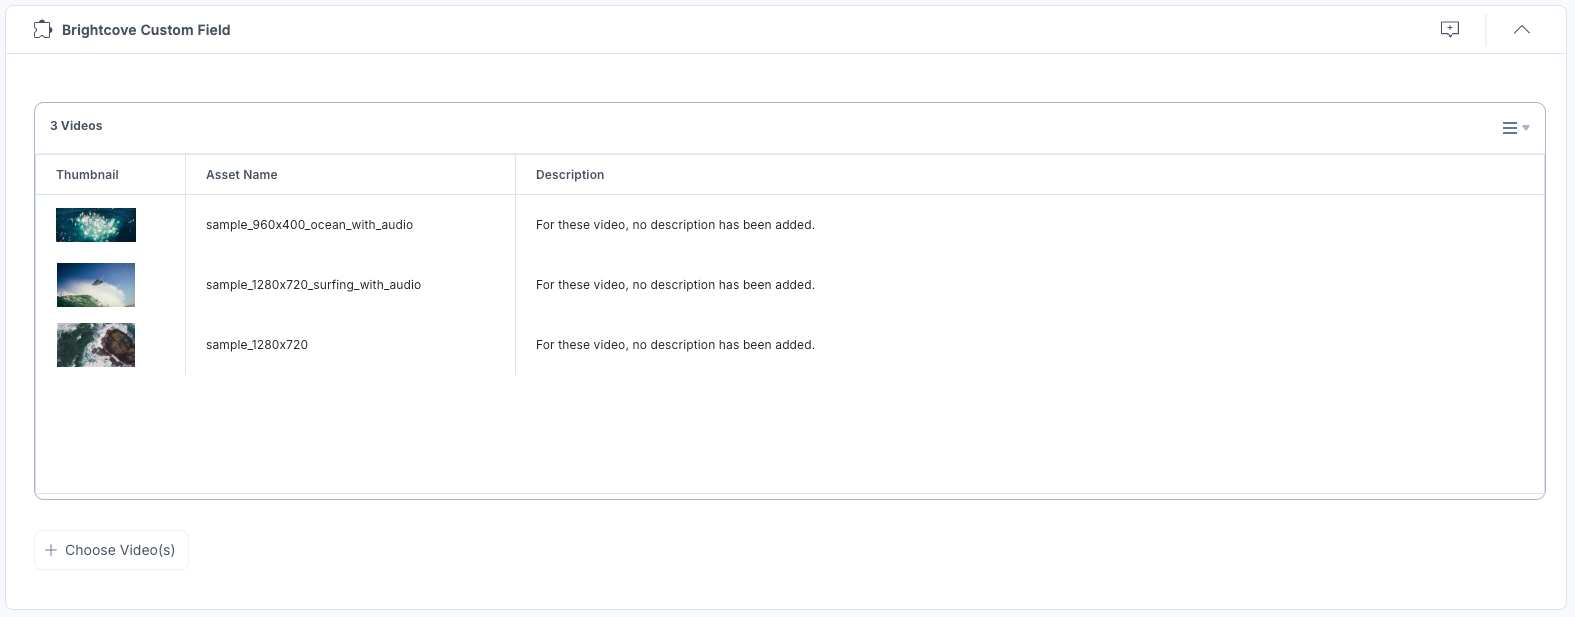
The videos you select get added to your entry in the list view.
- Hover over the video to access these features:
- Click the Reorder icon to drag and reorder the video.
- Click the Open in Brightcove icon to open the video in the Brightcove platform.
- Click the Remove icon to delete the video.
Thumbnail View
List View
- After adding the video(s), Save and Publish your entry.
Set Advanced Config Object in Custom Field (Optional)
While adding the Brightcove app in the custom field in step 3, you can set the configuration parameter if you have added multi-configuration details during app installation in step 2.
Under Advanced properties, you can set the Config Parameter for all entries of a particular content type.
The key:value passed in the configuration object overrides the default app configuration settings.
- Configuration Object: If you want to use a different Brightcove configuration for any custom field within the same stack, you need to specify the configuration name in the Config Parameter.
Configuration Object:
{ "config_label": [ "config2" ] } - Locale Based Configuration Object (Optional): Add a locale parameter to specify the locale value (for example: en-us) as the object key and the configuration object as the value.
{ "config_label": [ "Configuration-2" ], "locale": { "en-us": { "config_label": [ "Configuration-3" ] }, "fr-fr": { "config_label": [ "Configuration-1" ] } } } - Branch Based Configuration Object (Optional): Add a branch parameter to specify the branch value as the object key and the configuration object as the value, scoping video selection to a particular branch.
{ "config_label": [ "Configuration-2" ], "branch": { "main": { "config_label": [ "Configuration-3" ] }, "development": { "config_label": [ "Configuration-1" ] } } } - Max Limit: You can set the maximum number of assets that can be added in the Custom field. In our example, it is 5.
{
  "advanced": {
    "max_limit": 5
  }
}
Use the Brightcove App as a JSONRTE Plugin
- In the Content Type Builder page, add a JSON Rich Text Editor field in your content type by clicking the Insert a field link represented by a + sign.
- Under Select Plugin(s), select Brightcove, and then click Add Plugin(s).
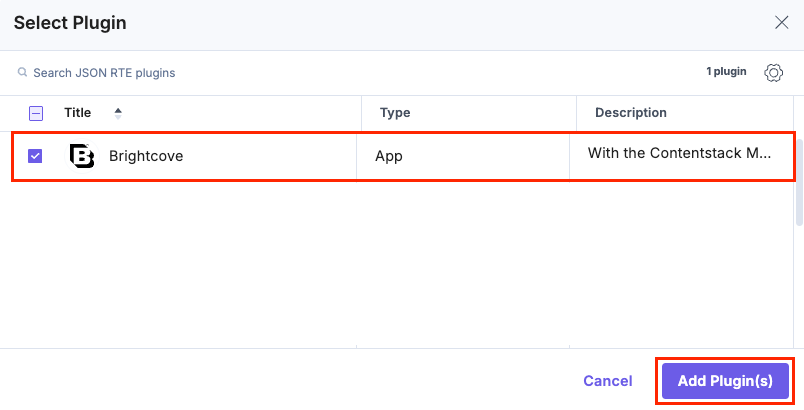
This adds Brightcove in the JSON Rich Text Editor field.
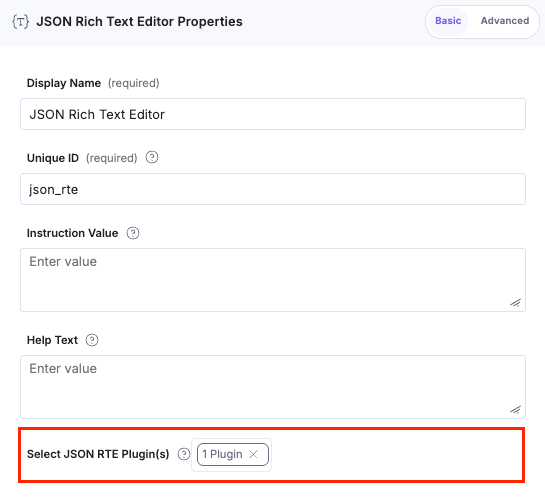
Additional Resource: To set the configuration object, refer to the Set Advanced Config Object in JSON RTE Plugin section.
- After adding the app in a JSON Rich Text Editor field, click Save or Save and Close to save your changes.
- To use the Brightcove app, create an entry for this content type. In the left navigation panel, navigate to the Entries page, click + New Entry to create a new entry for the above content type, and then click Proceed.
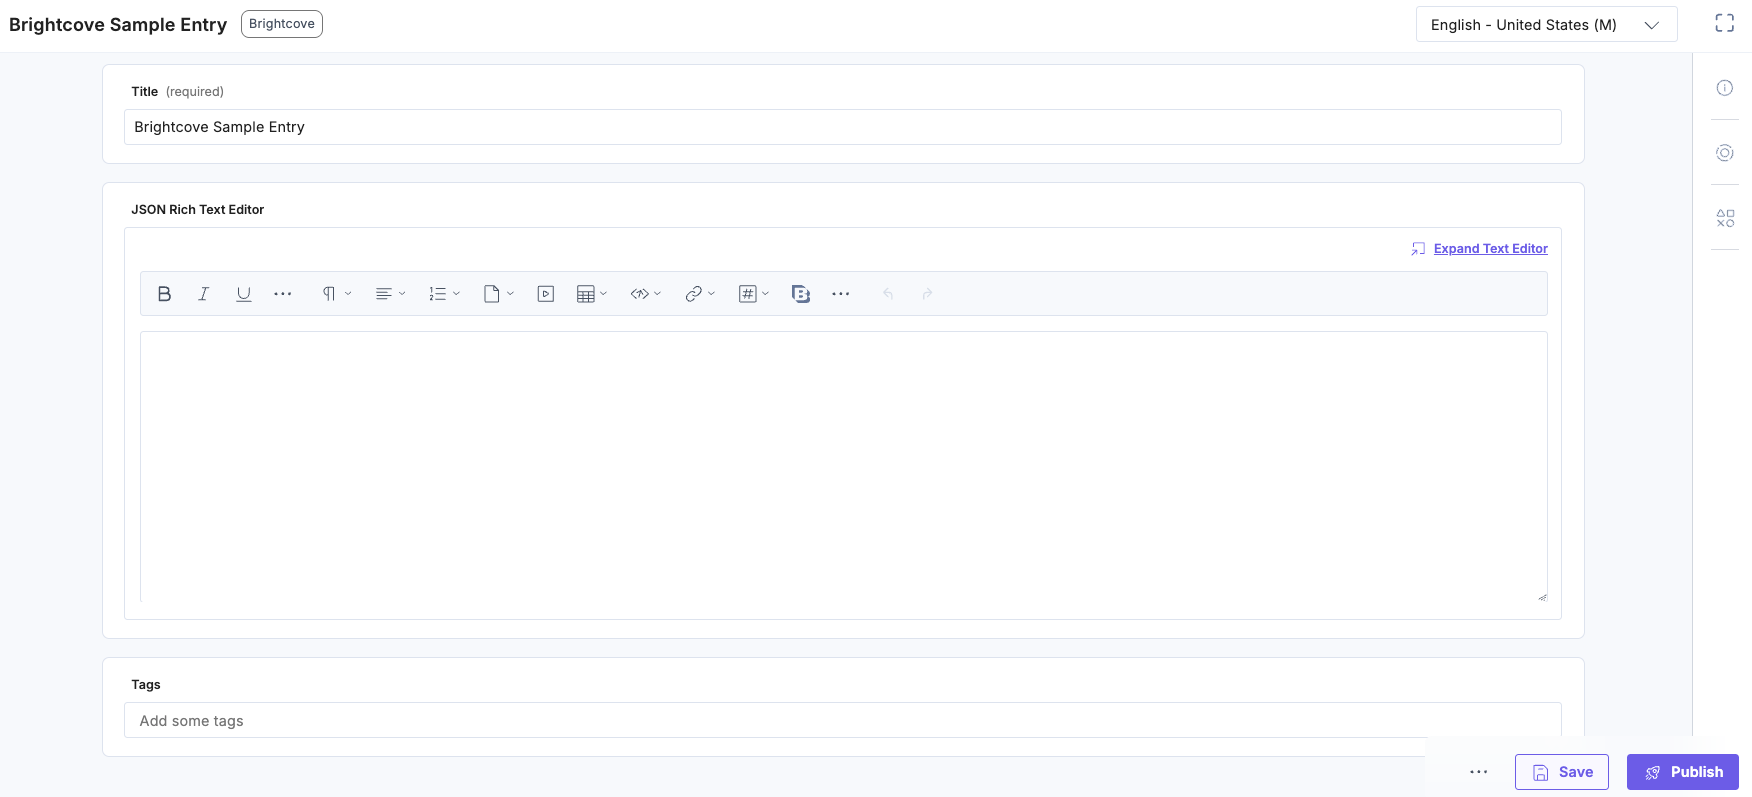
You can see the Brightcove JSON Rich Text Editor field on your entry page, as shown below:
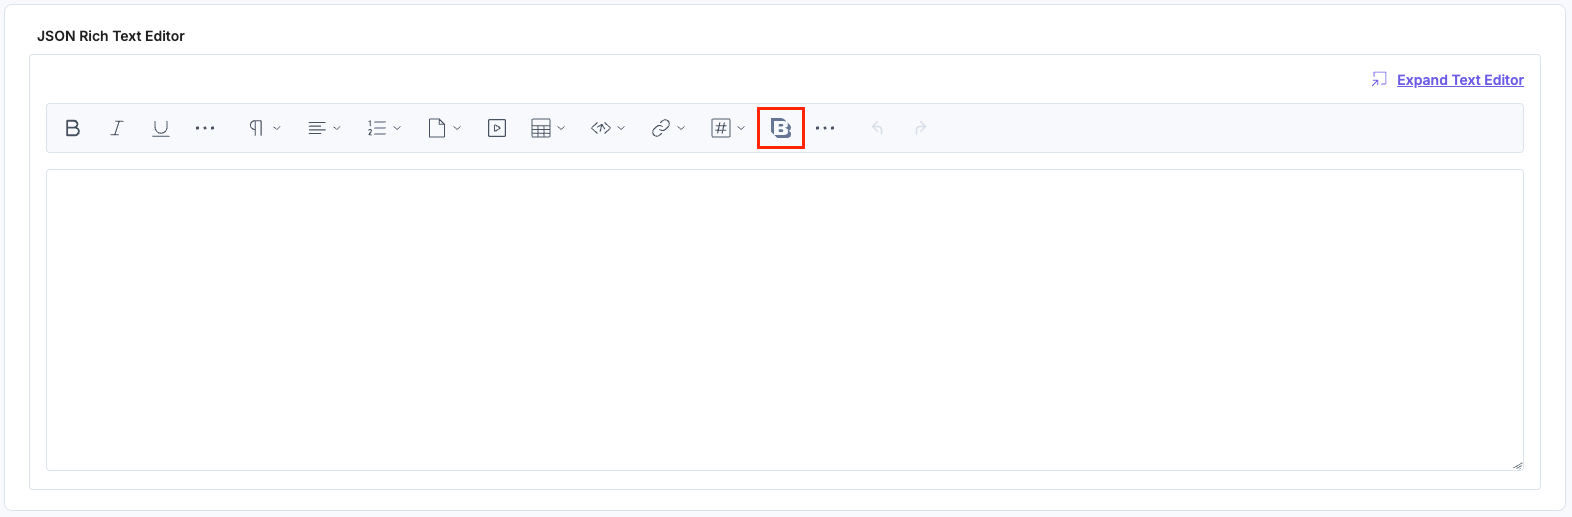
- Click the Brightcove app button.
- Select the video(s) from your Brightcove selector page and click the Add Videos(s) button to add them to your entry.
Note: You can add multiple videos in one go.
You can filter and view videos grouped under Playlists in the Selector page. Select the desired Playlists and add the videos.
You can also filter videos using Folders in the Selector page. Choose the desired folder from Brightcove and add the videos.
You can also search for videos by video ID in the Brightcove selector page.
Hover over the video on the Brightcove selector page to see the View in Brightcove option and navigate directly to the Brightcove platform.
The videos you selected are referenced within your entry:
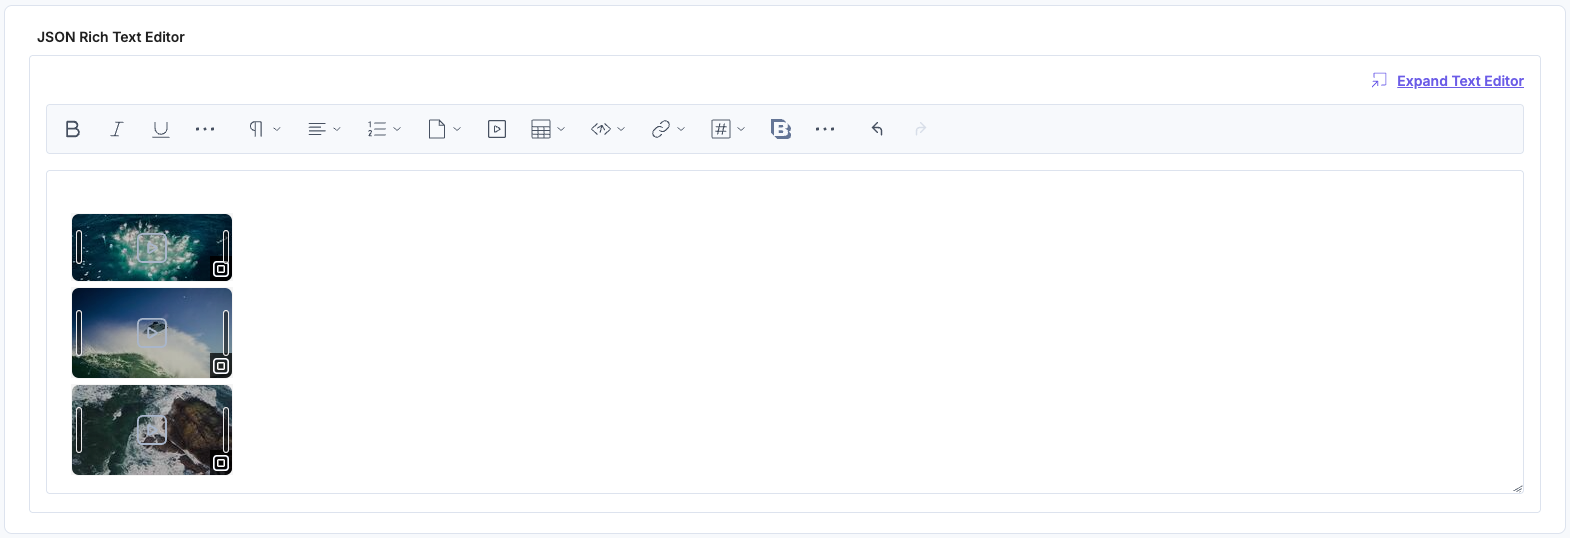
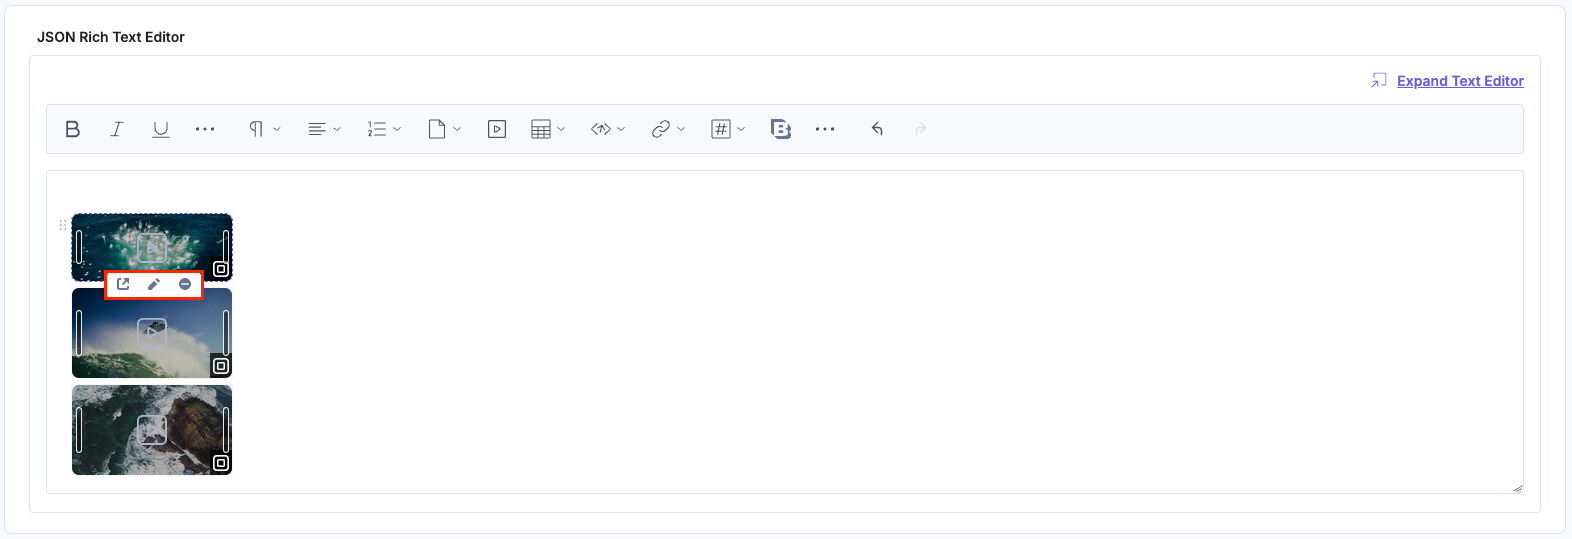
- To resize the video, drag the corner and adjust the size as required. Hover over the video to access these features:
- Click the Preview icon to preview the video in the Brightcove platform.
- Click the Edit icon to edit the video.
- Click the Remove icon to delete the video.
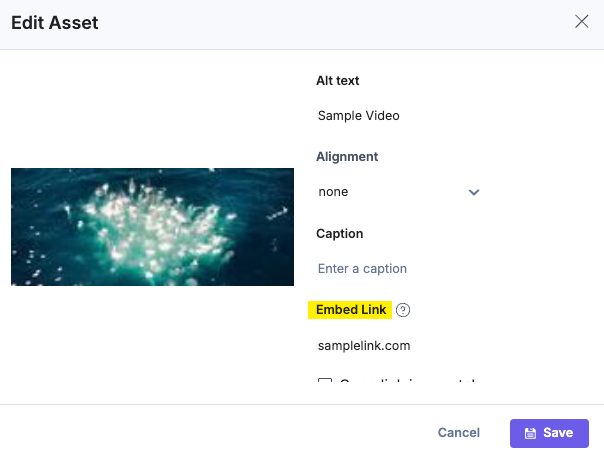
In the Edit Asset modal, you can view the Embed Link field.
Note: Previously, Embed Links were stored using the key link, which conflicted with Brightcove's Related Link feature that also used link. To avoid this conflict, embed links are now stored under embedLink and referenced via redactor_attributes.anchorLink. Entries using the old link key will continue to display correctly.
Additional Resource: You can use alignment and inline asset features to edit the asset placement within the JSON Rich Text Editor field.
- After adding the video(s), Save and Publish your entry.
Set Advanced Config Object in JSON RTE Plugin (Optional)
To add the Config Parameter in the JSON RTE field, click the “gear” icon on the app plugin selector page.
The key:value passed in the configuration object overrides the default app configuration settings.
- Configuration Object: If you want to use a different Brightcove configuration for any JSON RTE field within the same stack, you need to specify the configuration name in the Config Parameter.
Configuration Object:
{ "config_label": [ "config2" ] } - Locale Based Configuration Object (Optional): Add a locale parameter to specify the locale value (for example: en-us) as the object key and the configuration object as the value.
{ "config_label": [ "Configuration-2" ], "locale": { "en-us": { "config_label": [ "Configuration-3" ] }, "fr-fr": { "config_label": [ "Configuration-1" ] } } } - Branch Based Configuration Object (Optional): Add a branch parameter to specify the branch value as the object key and the configuration object as the value, scoping video selection to a particular branch.
{ "config_label": [ "Configuration-2" ], "branch": { "main": { "config_label": [ "Configuration-3" ] }, "development": { "config_label": [ "Configuration-1" ] } } } - Max Limit: You can set the maximum number of assets that can be added in the JSON RTE field. In our example, it is 5.
{
  "advanced": {
    "max_limit": 5
  }
}
More articles in "Video"
