

Add Workflows and Stages
You can create workflows in Contentstack to define the content approval and publishing process for your stack.
Before you get started, note the following:
- Only the stack owner, admin, and users with the developer role can create and manage workflows.
- Content managers and users with custom roles cannot view workflow settings. However, they can use workflows in entries and manage their assigned tasks.
- You can create multiple workflows within a stack. A content type can be linked to more than one workflow if each workflow is associated with a different branch.
Create a Workflow
To create a workflow in your stack, log in to your Contentstack account and perform the following steps:
- Go to your stack and click the “Settings” icon or use the shortcut key “S” (for both Windows and Mac users).
- Select Workflows (press Alt + F on Windows or Option + F on Mac).
- On the Workflow Settings page, open the Workflows tab and click + New Workflow.
Configure Workflow Details
- On the workflow creation page, enter the following details:
- Workflow name: Enter a descriptive name for the workflow.
- Description: Provide additional information about the workflow.
- Scope: Choose whether this workflow applies to all content types or specific ones.
- Branch(es): Select the branches where this workflow applies.
- Select one of the following scope options:
- All Content Types: Applies the workflow to all content types and entries.
- Specific Content Types: Lets you choose one or more content types from the Select Content Type dropdown.
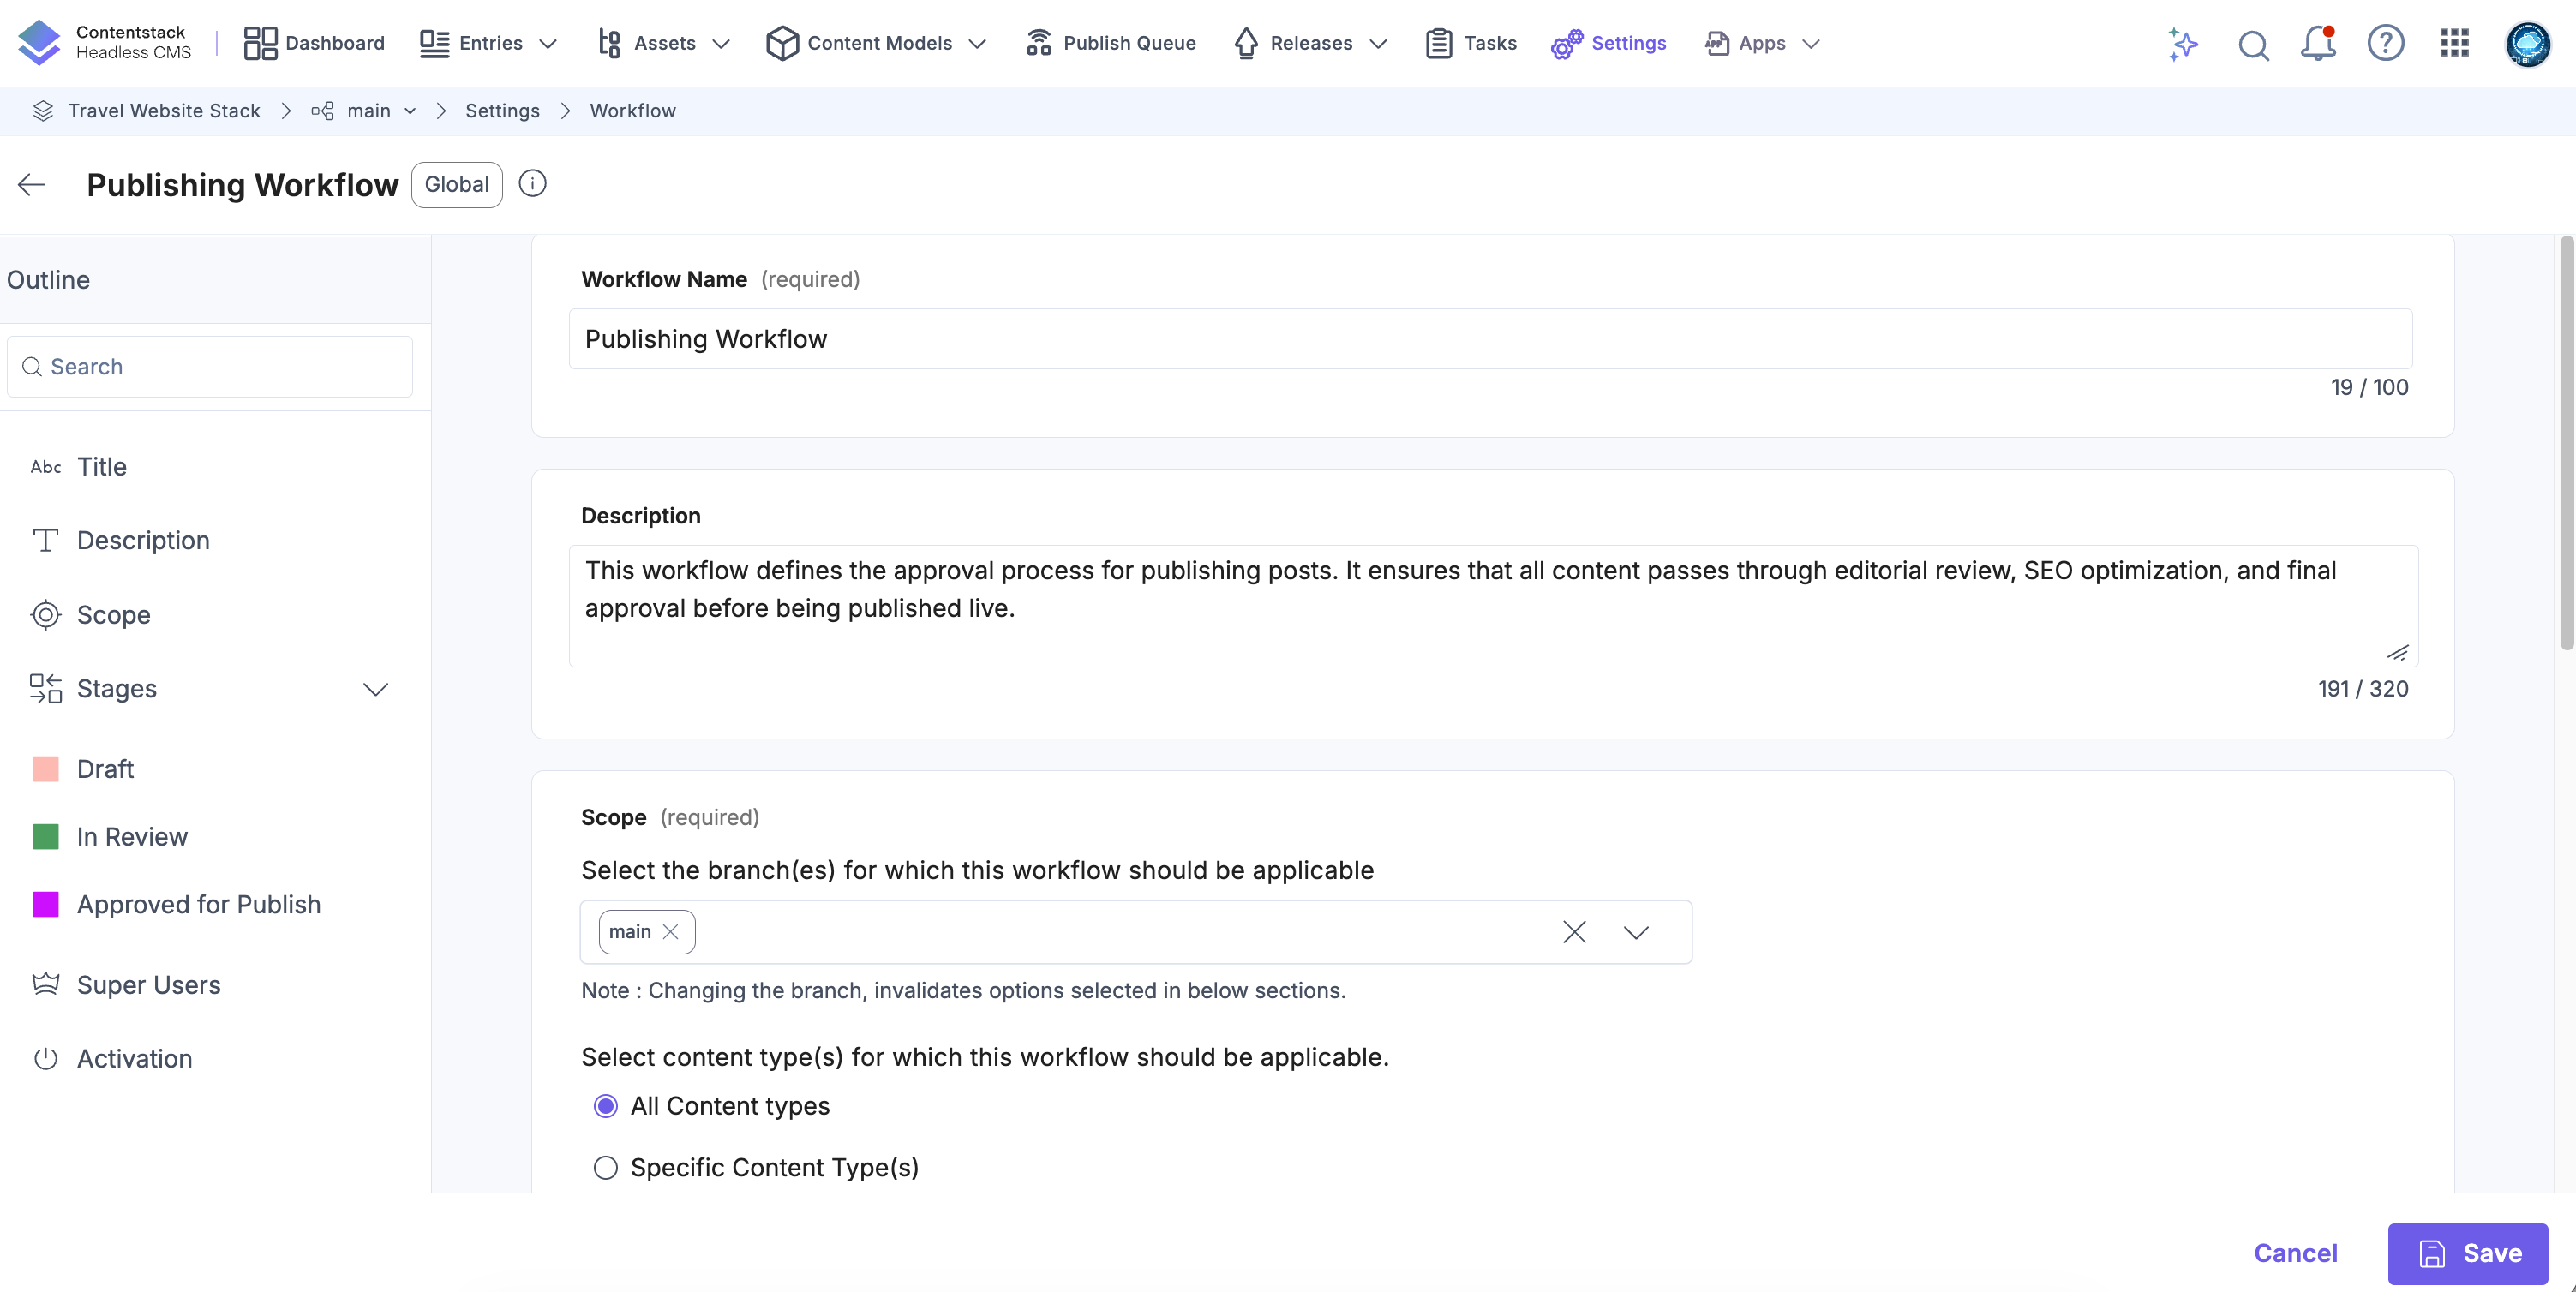
Note: A content type can be associated with more than one workflow if each workflow applies to a distinct branch.
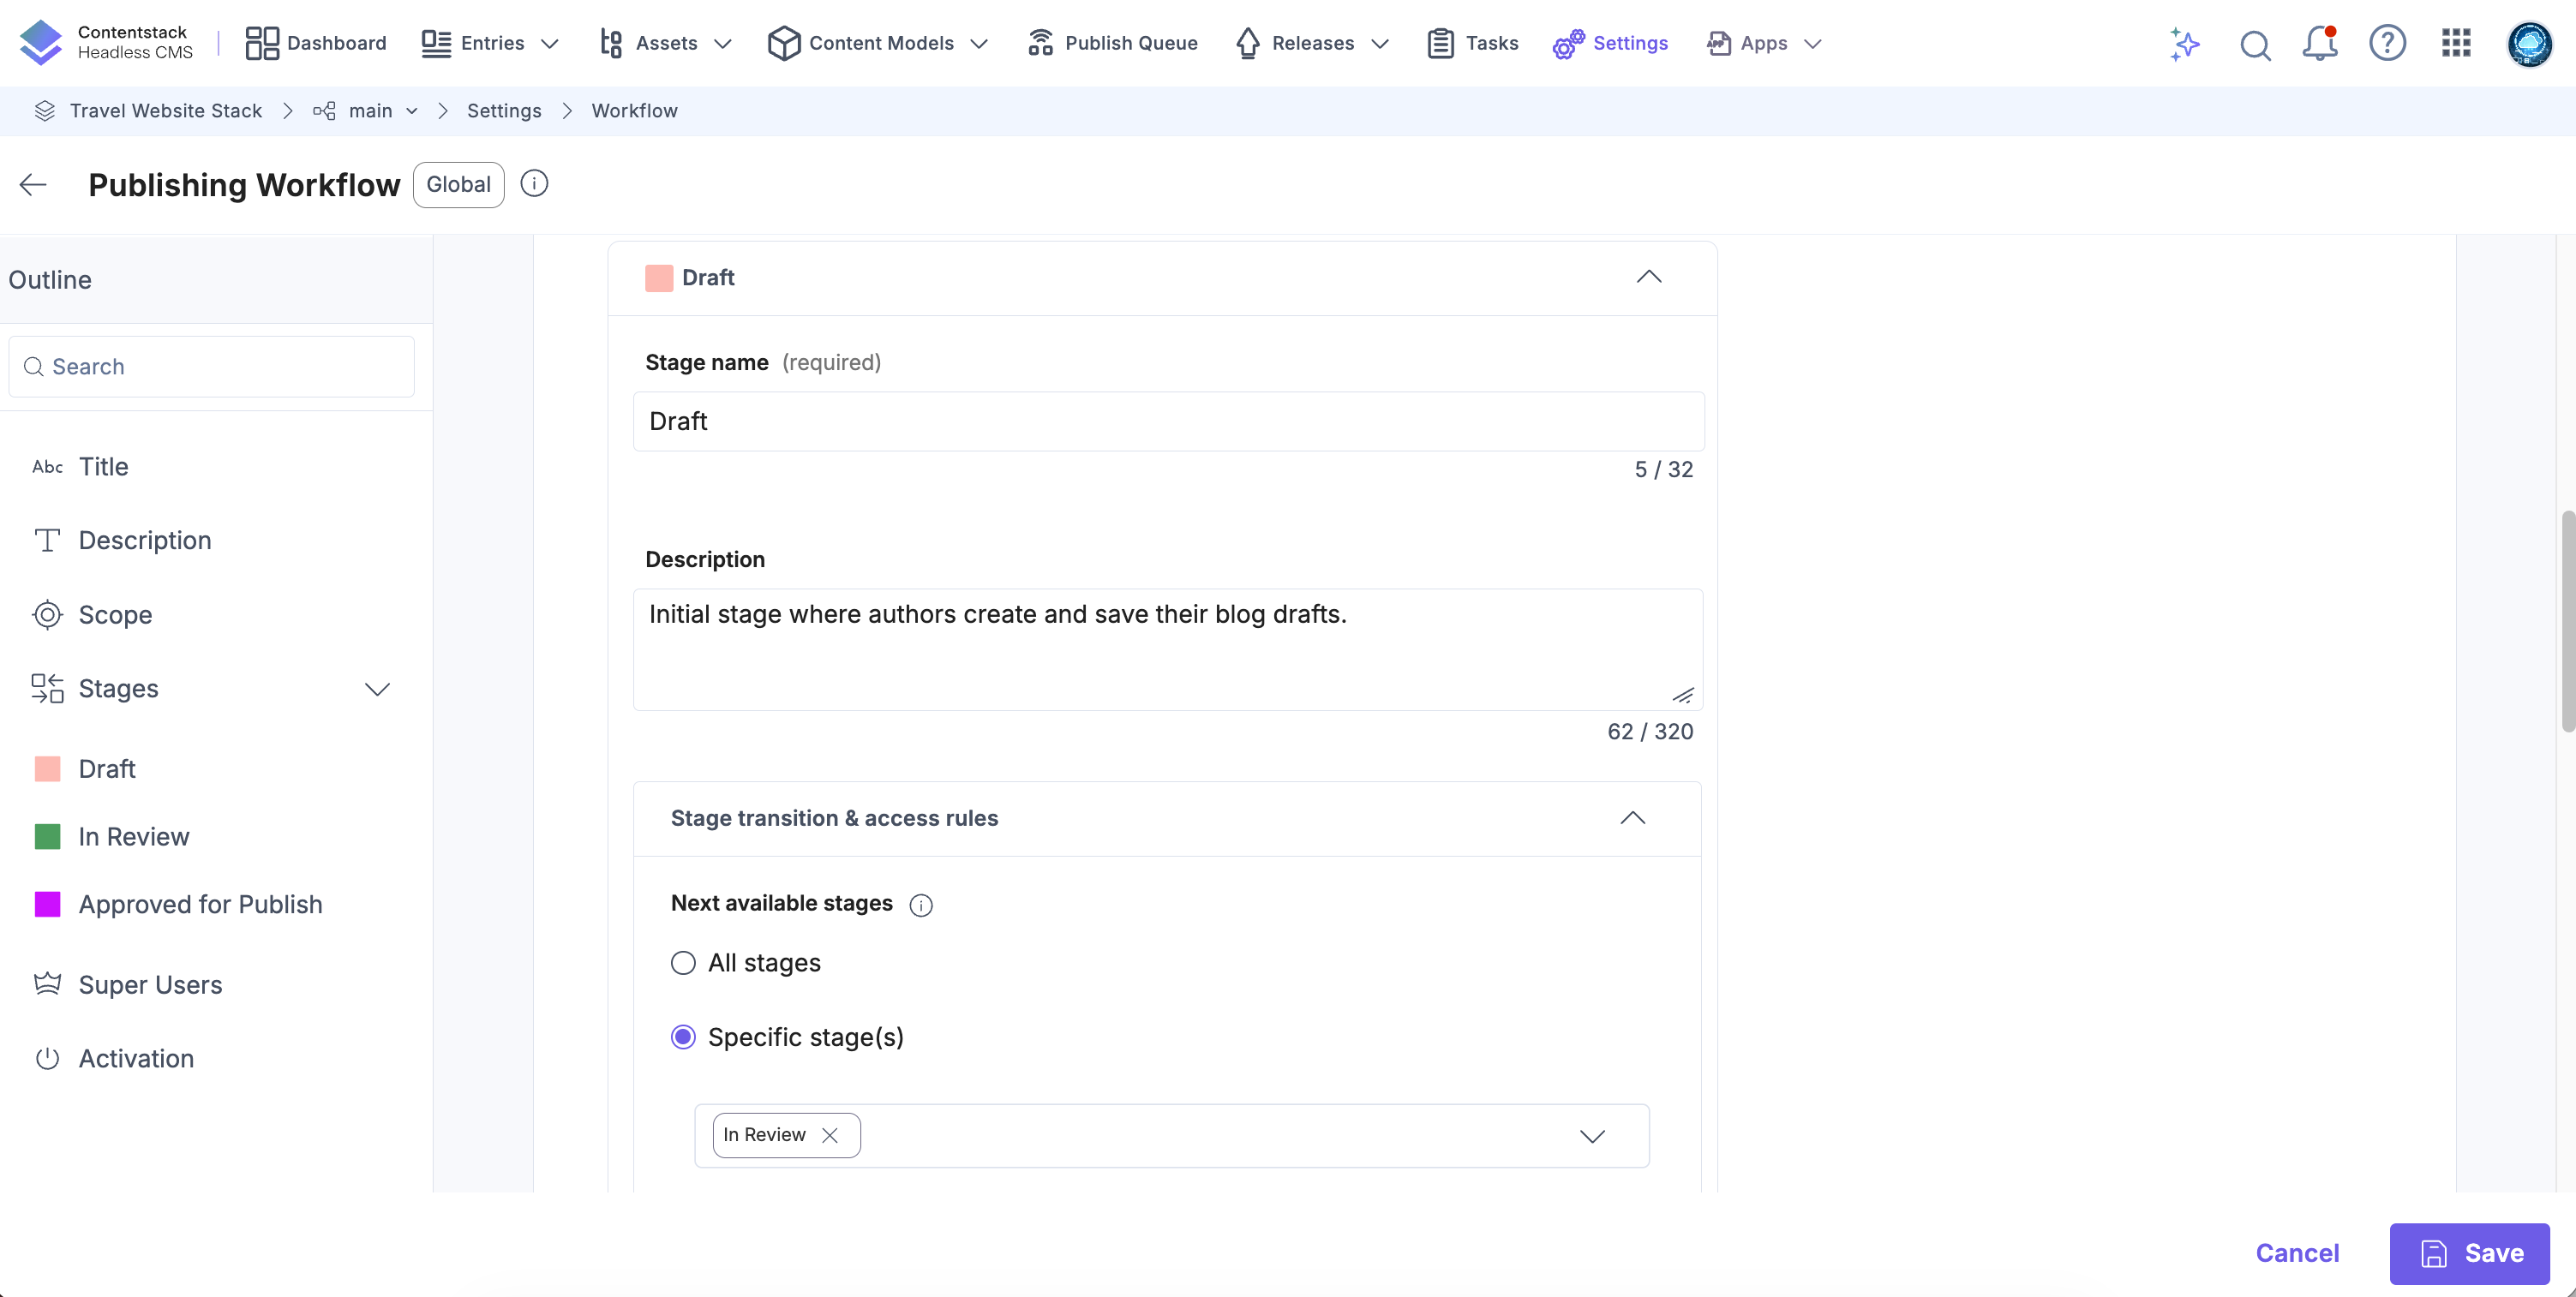
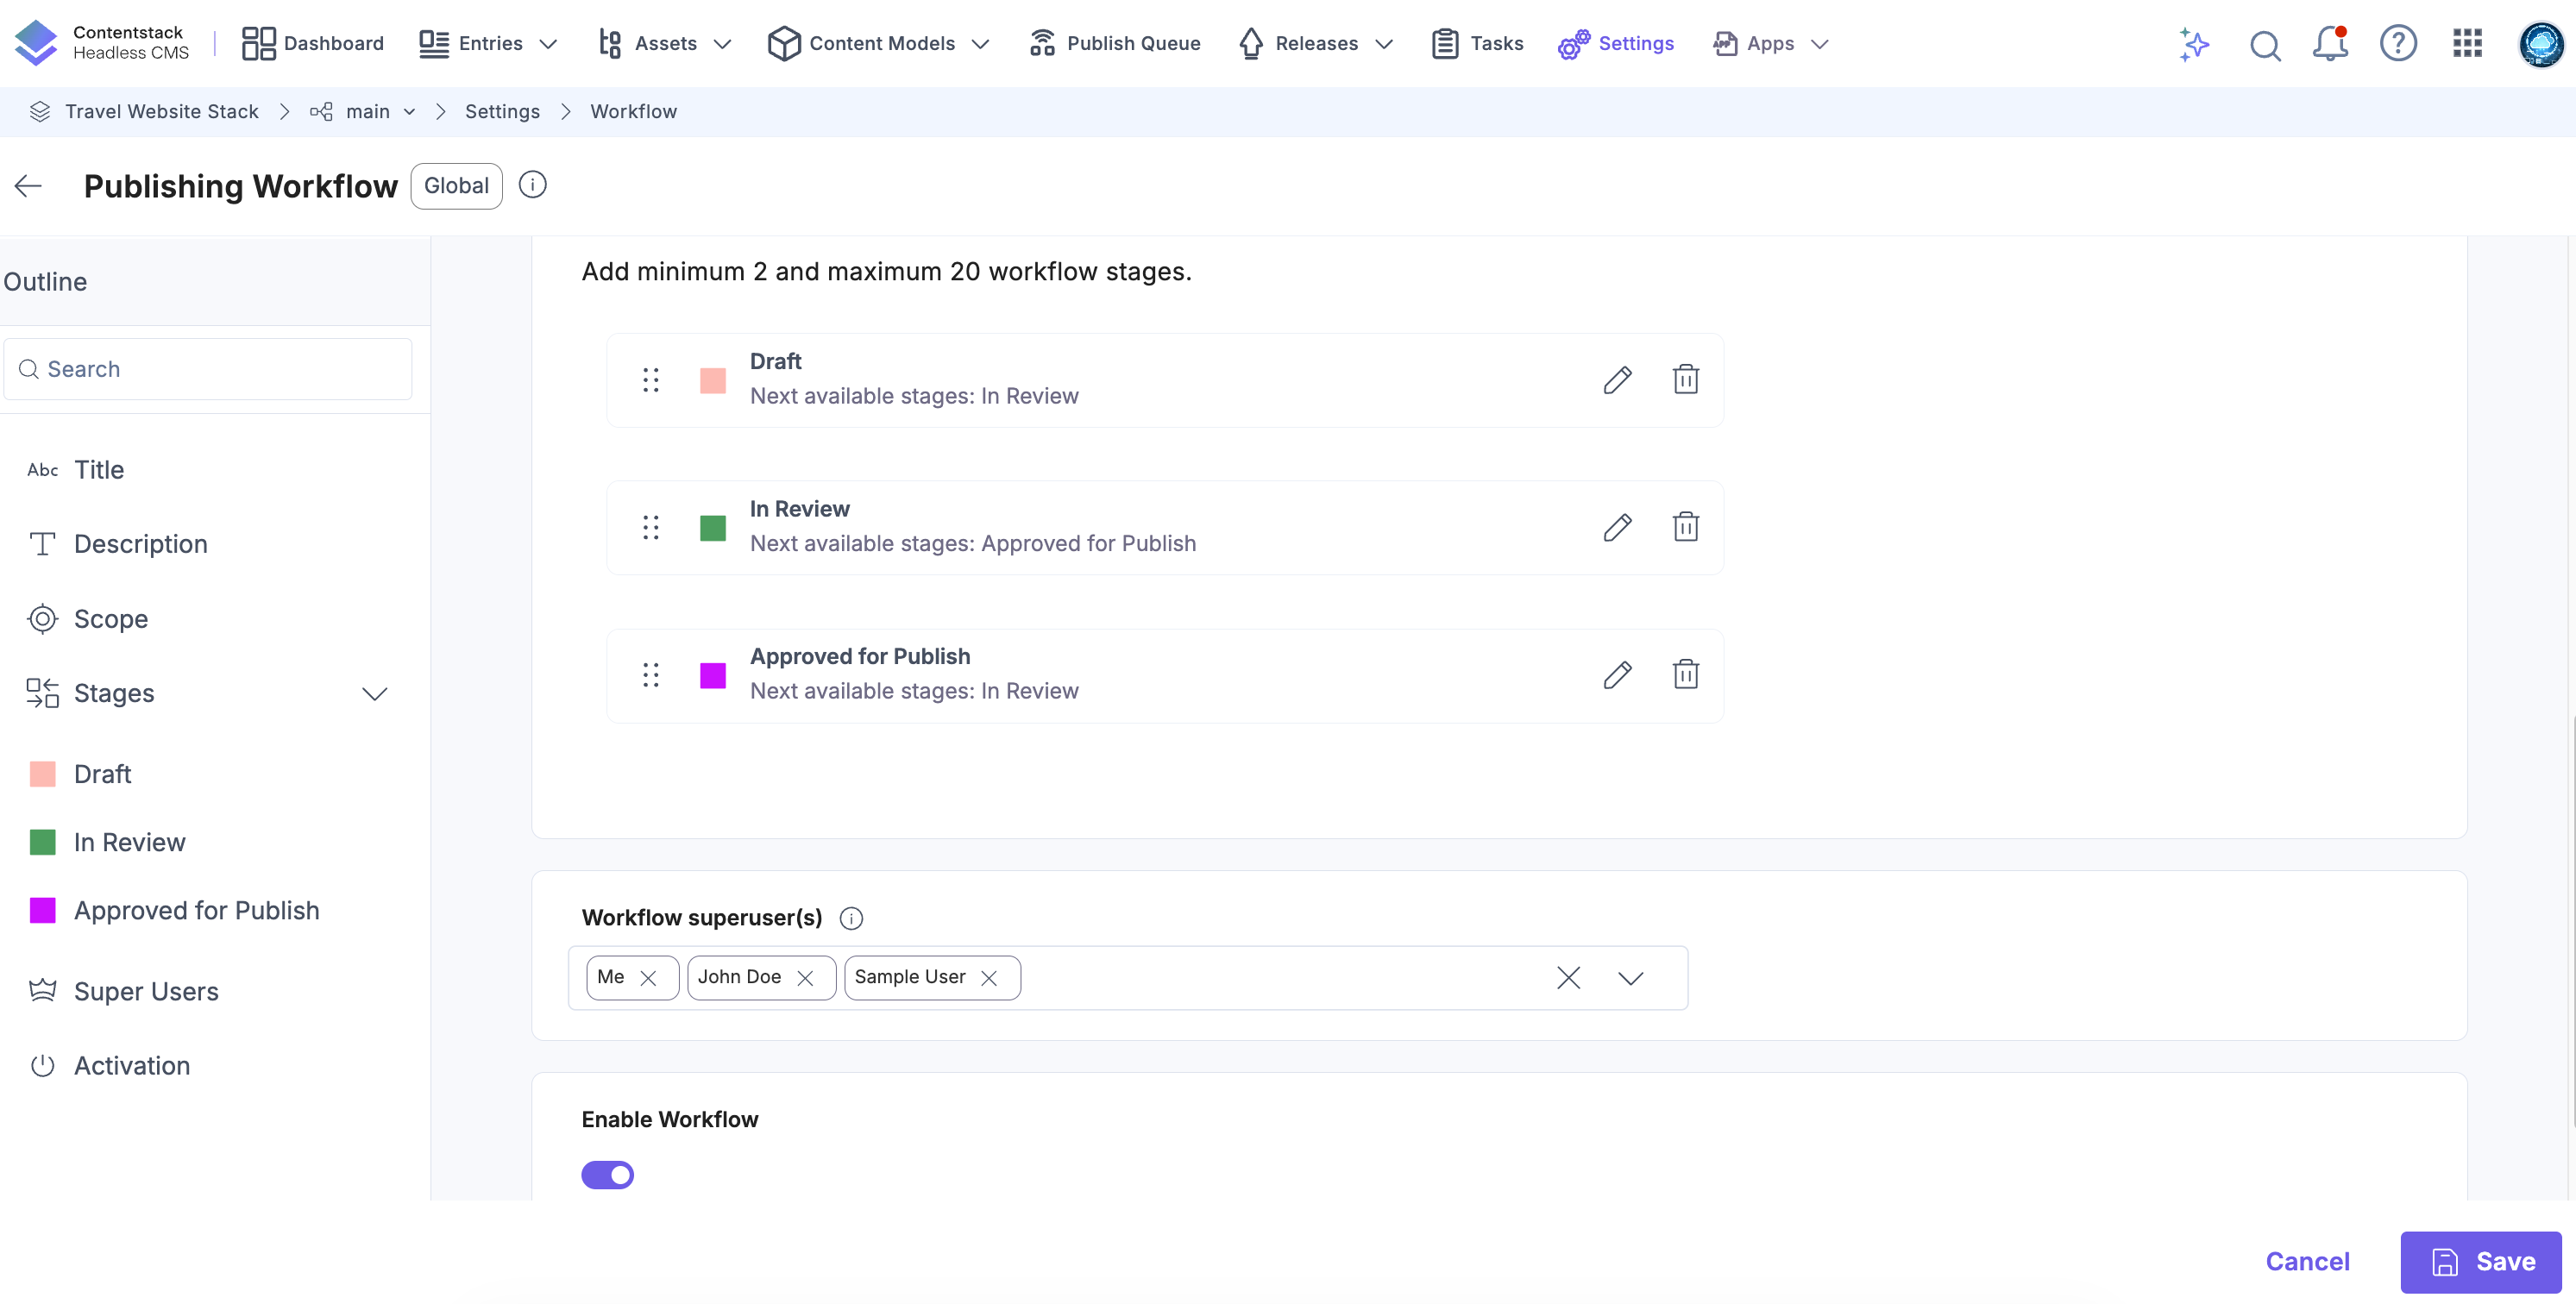
Add Stages
Define the steps in your content lifecycle by adding stages.
- Click Add a stage.
- Enter a Stage name and a Description.
- Choose a color label to identify the stage. Each stage name and color must be unique.
Note: You can add up to 20 stages in a workflow.
Define Stage Transitions
Select the stage to which an entry can move next.
- All stages: Allows users to move entries to any other stage.
- Specific stage(s): Restricts movement to selected stages only.
Tip: You can only select stages that already exist. Create additional stages first if none appear in the list.
Set Permissions
- Define who can move entries from the current stage to the next available stage.
- All users/roles: Any user can move entries between stages.
- Specific user(s)/role(s): Restricts movement to selected users or roles.
Note: When specific users are assigned, others cannot move entries to the next stage.
- Specify who can edit entries at this stage.
- All users/roles: All users can edit entries.
- No users: Restricts editing for all users.
- Current stage users: Allows only users with transition rights to edit entries.
Note: Stack owners, admins, and workflow superusers can always edit entries, regardless of restrictions.
Prevent Self-Advancement
Enable the Prevent self-advancement toggle to add an extra layer of review and accountability.
When enabled:
- The user who moved an entry into a stage cannot move it to the next one.
- You must assign at least two unique approvers (users or roles).
- If only one approver is assigned, an error prompts you to add more.
Tip: Use these controls to enforce dual validation and maintain editorial compliance in review workflows.

Assign Superusers
Superusers have elevated privileges within a workflow.
- Click the Superusers dropdown and select one or more users to grant superuser permissions.
- They can move entries between any stages and edit or delete entries without restrictions.
- You can add multiple users, but not roles.
- Organization and stack owners are superusers by default.
- Superuser permissions apply only to entries within the associated content types.
- Only admins, owners, or developers can edit workflow settings.
Enable and Save the Workflow
- Select the Enable Workflow checkbox. Once enabled, the Workflow section appears in the right sidebar of entries for all associated content types.
- Click Save to create and activate the workflow.
API Reference
To create a workflow and add stages via API, refer to the Create a workflow API request.
