

Security Configuration
Strengthen your organization's security by configuring the level of protection you want to enforce. From Security Configuration, you can set up Multi-Factor Authentication (MFA), password policies, session timeouts, and allowed email domains.
Prerequisites
- Contentstack account
- Organization Owner or Admin permissions
What You Will Learn
How to enable Multi-Factor Authentication for your organization.
How to configure password policies, including duration and minimum length.
How to set maximum session and inactivity timeouts.
How to restrict organization membership to allowed email domains.
Multi-Factor Authentication
Multi-Factor Authentication (MFA) adds an extra layer of protection to user logins. When enabled, all users in your organization must set up MFA the next time they log in.
To enable MFA for your organization, log in to your Contentstack account and perform the following steps:
- Navigate to Administration through “App Switcher”.
- Click the Security Configuration tab.
- Enable MFA using the toggle switch. Click Save to save your configuration.
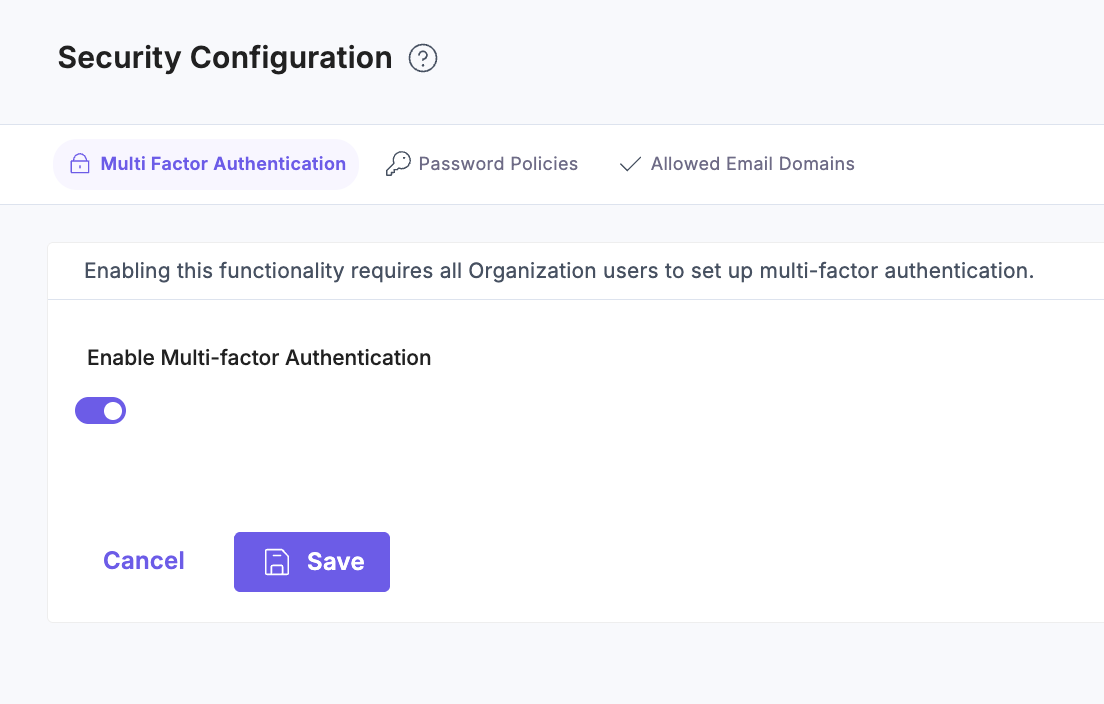
Note: Once enabled, MFA setup becomes mandatory for all users on their next login.
Additional Resources: Refer to our document on setting up multi-factor authentication for more information.
Password Policies
Password policies help you control how passwords are created and maintained in your organization. You can choose to configure any combination of the available settings, depending on the level of security you want to enforce.
To enable and customize password policies for organization users, log in to your Contentstack account and perform the following steps:
- Navigate to Administration through “App Switcher”.
- Click the Security Configuration tab and select Password Policies.
- In the Password Duration field, set the number of days (0 to 365) after which passwords must be updated. For example, setting the duration to 90 days forces users to reset their passwords every 90 days.
Note: Set Password Duration to 0 for no password expiry.
- In Minimum Password Length, enter a value (minimum 8).
- Click Save to save your configuration.

Note:
If you belong to multiple organizations:
- The organization with the highest minimum password length applies during password reset.
- The shortest password expiration period applies.
- Enforcing MFA or password reset in any of these organizations, applies immediately on the next login.
Session Timeout
Session timeout in Contentstack's Security Configuration settings allows organization owners and admins to automatically log users out after a defined period of inactivity or a maximum session duration. This enhances account security by minimizing risks related to unattended active sessions.
Enabling session and idle timeouts helps ensure:
- Improved control over user session duration.
- Reduced risk of unauthorized access from idle sessions.
- Customizable timeout periods that align with your organization’s security policies.
You can also whitelist email addresses to exempt specific users from timeout enforcement, which is ideal for service accounts or trusted users.
To configure session timeout, log in to your Contentstack account and perform the following steps:
- Navigate to Administration through “App Switcher”.
- Click the Security Configuration tab and then select Session Timeout.
- Toggle the Enable Session Timeout switch to turn the feature on.
- In the Maximum Session Duration (hours) field, enter the desired session duration in hours. Users are automatically logged out after the configured session timeout value. Default value: 12 hours.
- In the Maximum Inactivity Timeout (hours) field, enter the inactivity threshold in hours. Users are automatically logged out after the configured idle timeout value. Default value: 1 hour.
- In the Allowlist User Email field, enter comma-separated email addresses. These users are exempt from timeout rules.
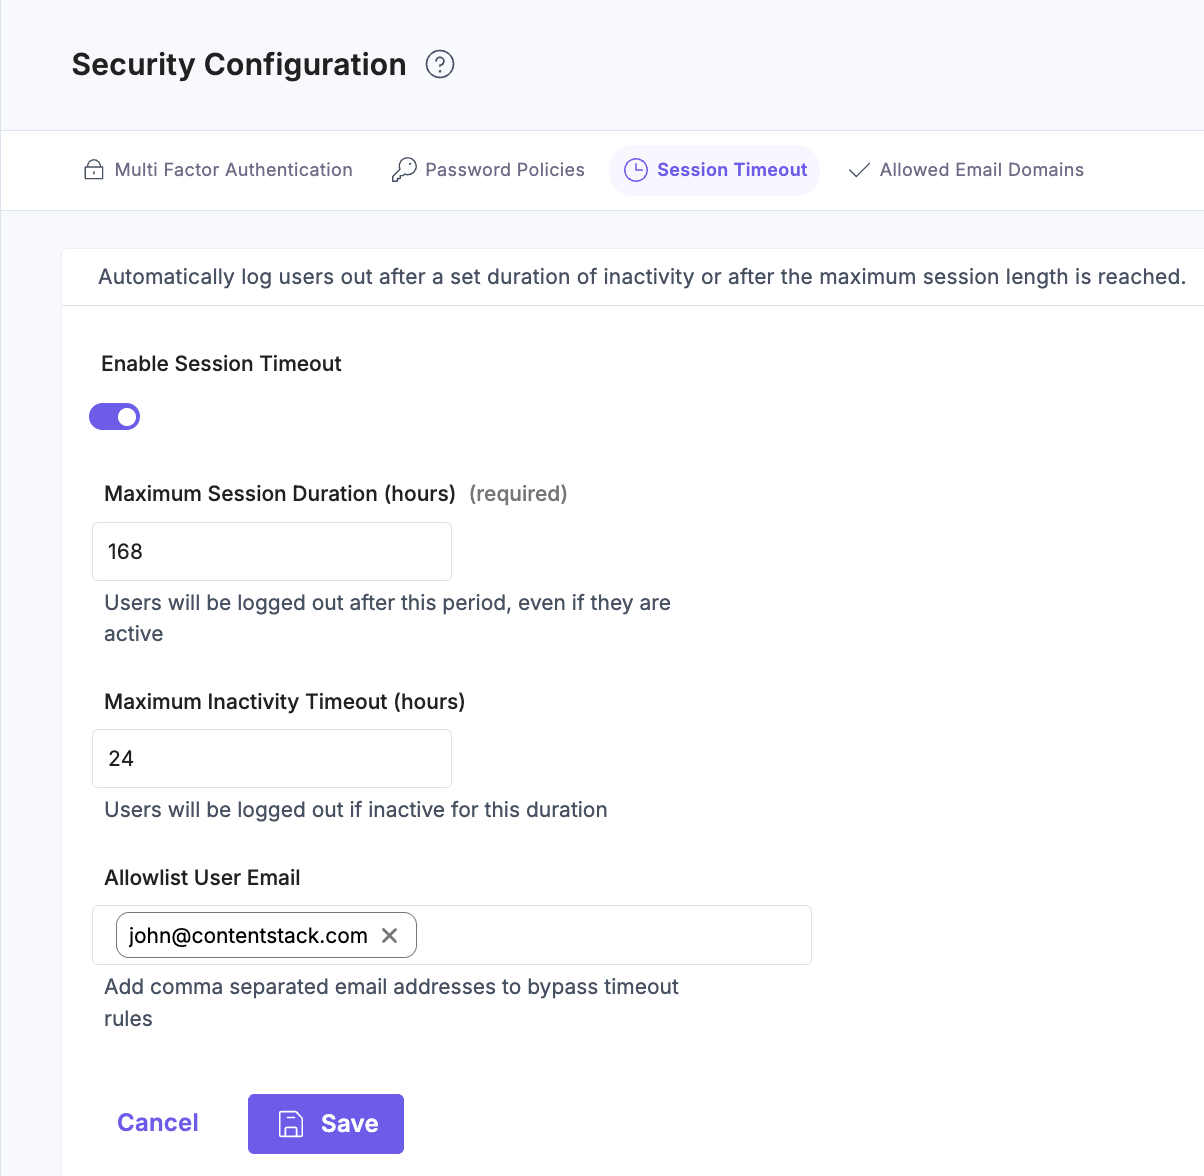
- Click Save to apply your settings, or Cancel to discard changes.
- Session timeout is the maximum duration a user can stay logged in, regardless of activity.
- Idle timeout logs users out after a period of inactivity.
- Idle timeout must be shorter than the session timeout.
- You can add any number of email addresses to the allowlist.
Allowed Email Domains
The Allowed Email Domains feature lets you restrict user access to specific email domains within your organization. This enhances security by ensuring that only users with approved email domains can be added to your organization.
Note: Enabling this setting does not affect existing users.
To enable and add email domains, log in to your Contentstack account and perform the following steps:
- Navigate to Administration through “App Switcher”.
- Click the Security Configuration tab and select Allowed Email Domains.
- Toggle the Enable Allowed Email Domains switch.
- In the Add Allowed Email Domain(s) field, enter the domains you want to allow (e.g., yourcompany.com).
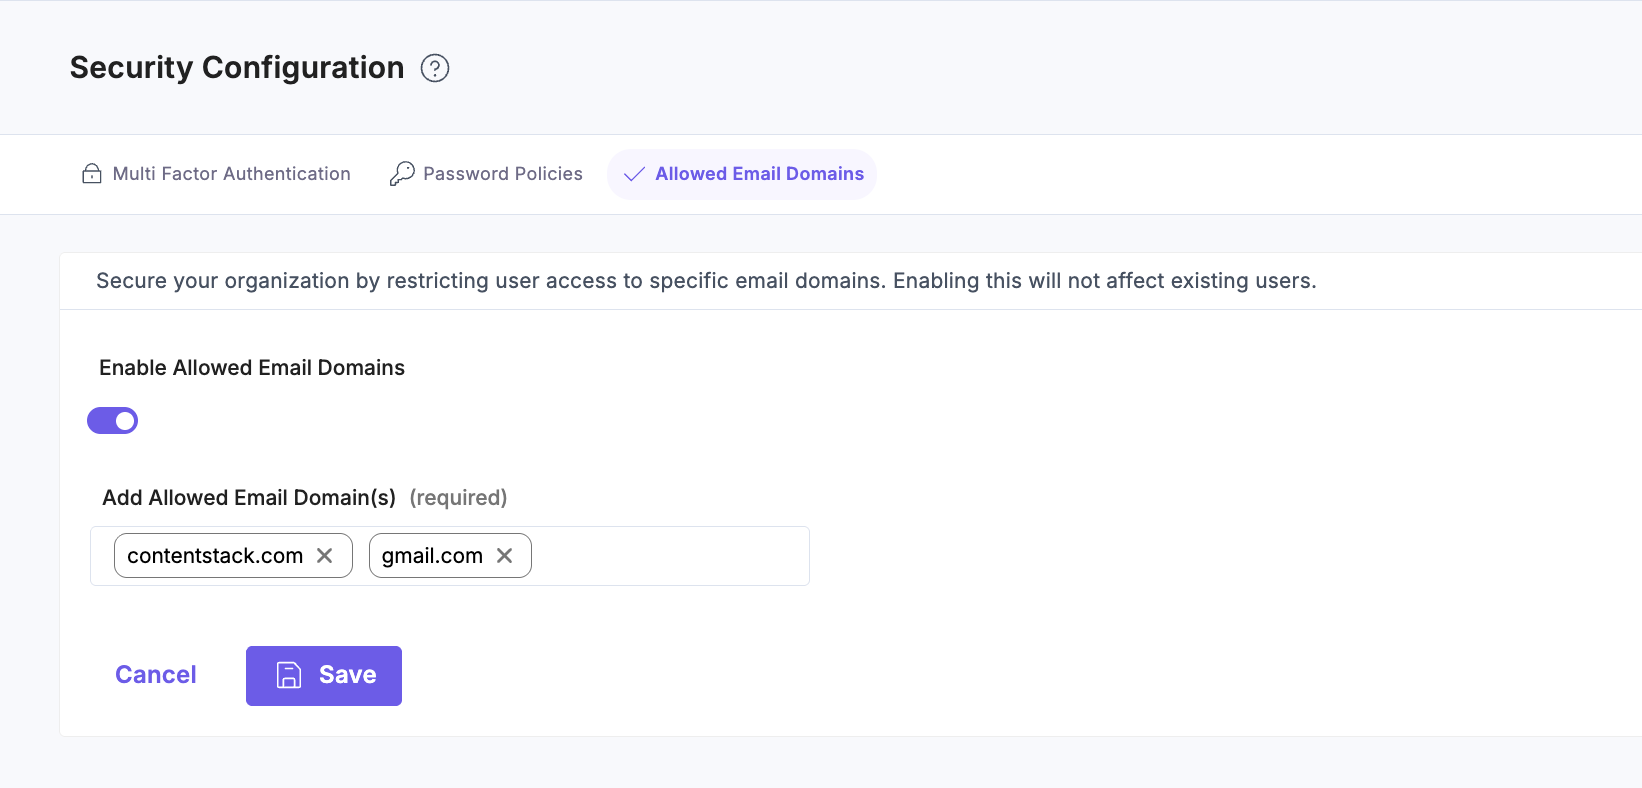
Note: You can add up to 30 email domains.
- Click Save to apply the configuration.
Note: When this setting is enabled, users with unapproved email domains cannot be invited or added to your organization. An error message appears if you attempt to add them.
By implementing these security features, you can significantly enhance your organization’s security.
