

Importing a Starter
Starters in Contentstack are preconfigured templates designed to accelerate the setup of your digital projects. They include predefined content types, sample data, and stack configurations.
This guide provides step-by-step instructions to import a Starter using both the Marketplace and Stack Creation Experience.
Note: Importing a Starter creates a new stack in your organization. Only Organization Owners and Admins can perform this action.
Prerequisites
- Contentstack account
- Access to the Contentstack Organization/Stack as the Owner/Admin
- Launch enabled for your Organization if you are using Launch for website deployment
- Access to the Github repository
Let's follow this step-by-step guide to import and configure a Starter within your stack.
Steps for Execution
-
Import Starters using Marketplace
To import a Starter, log in to your Contentstack account and follow the steps below:
- From the left-hand side primary navigation, click the Marketplace icon.
- Click Starters from the left panel.
- Within the Marketplace, you can see the available starters. Hover over the starter you want to import and click the Import button.
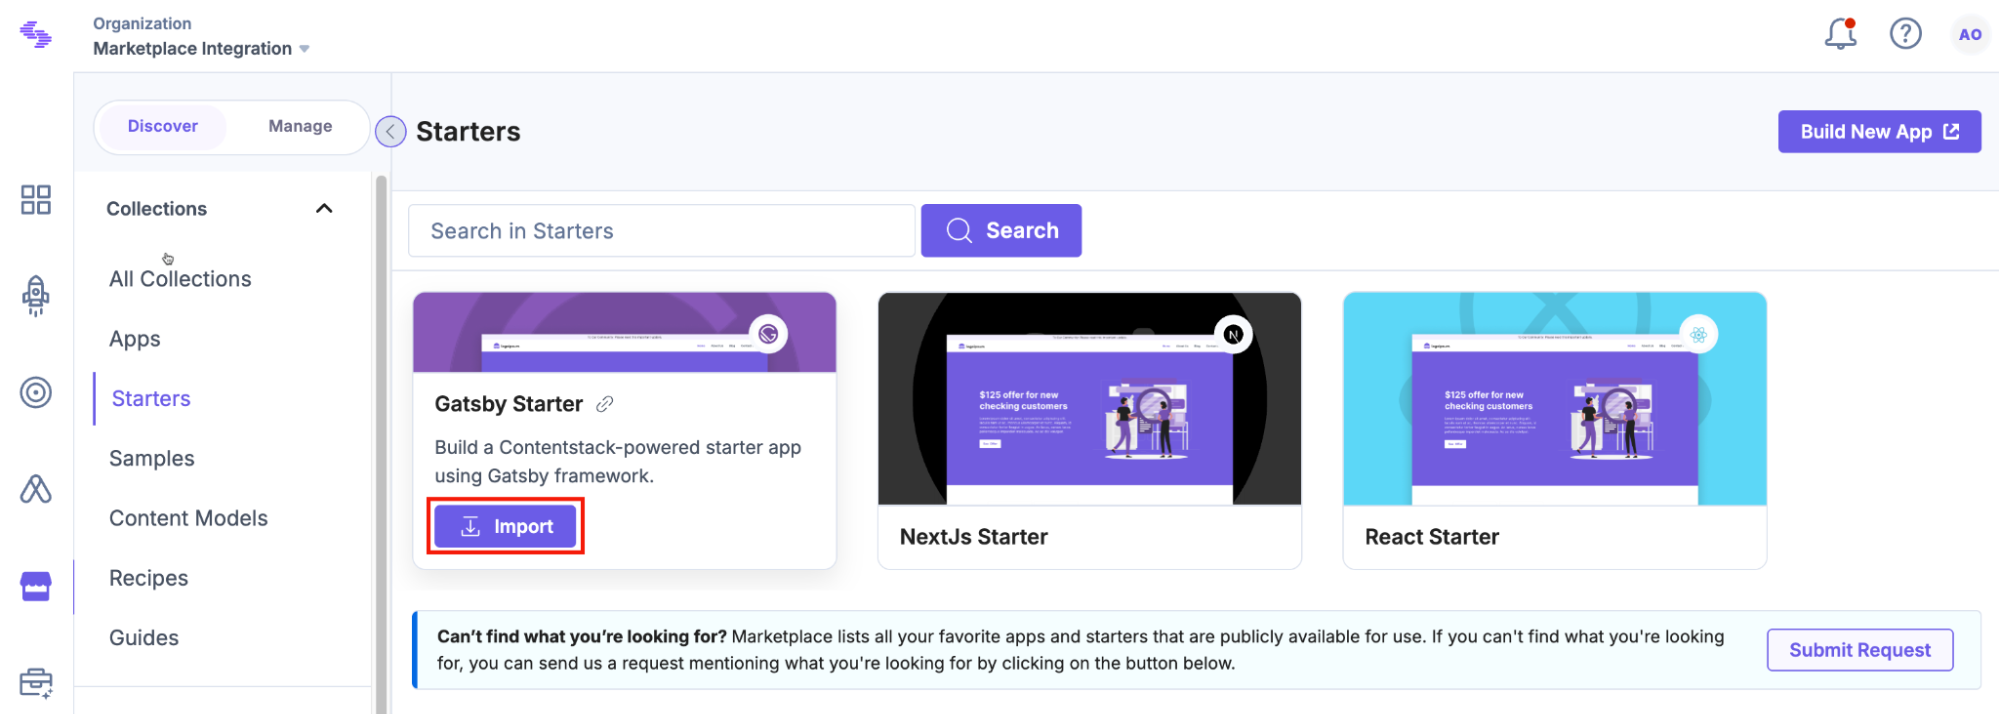
Alternatively, click the Starter card (that you want to import) to open its detail page, review its description, screenshots, and demos, and click the Import button.
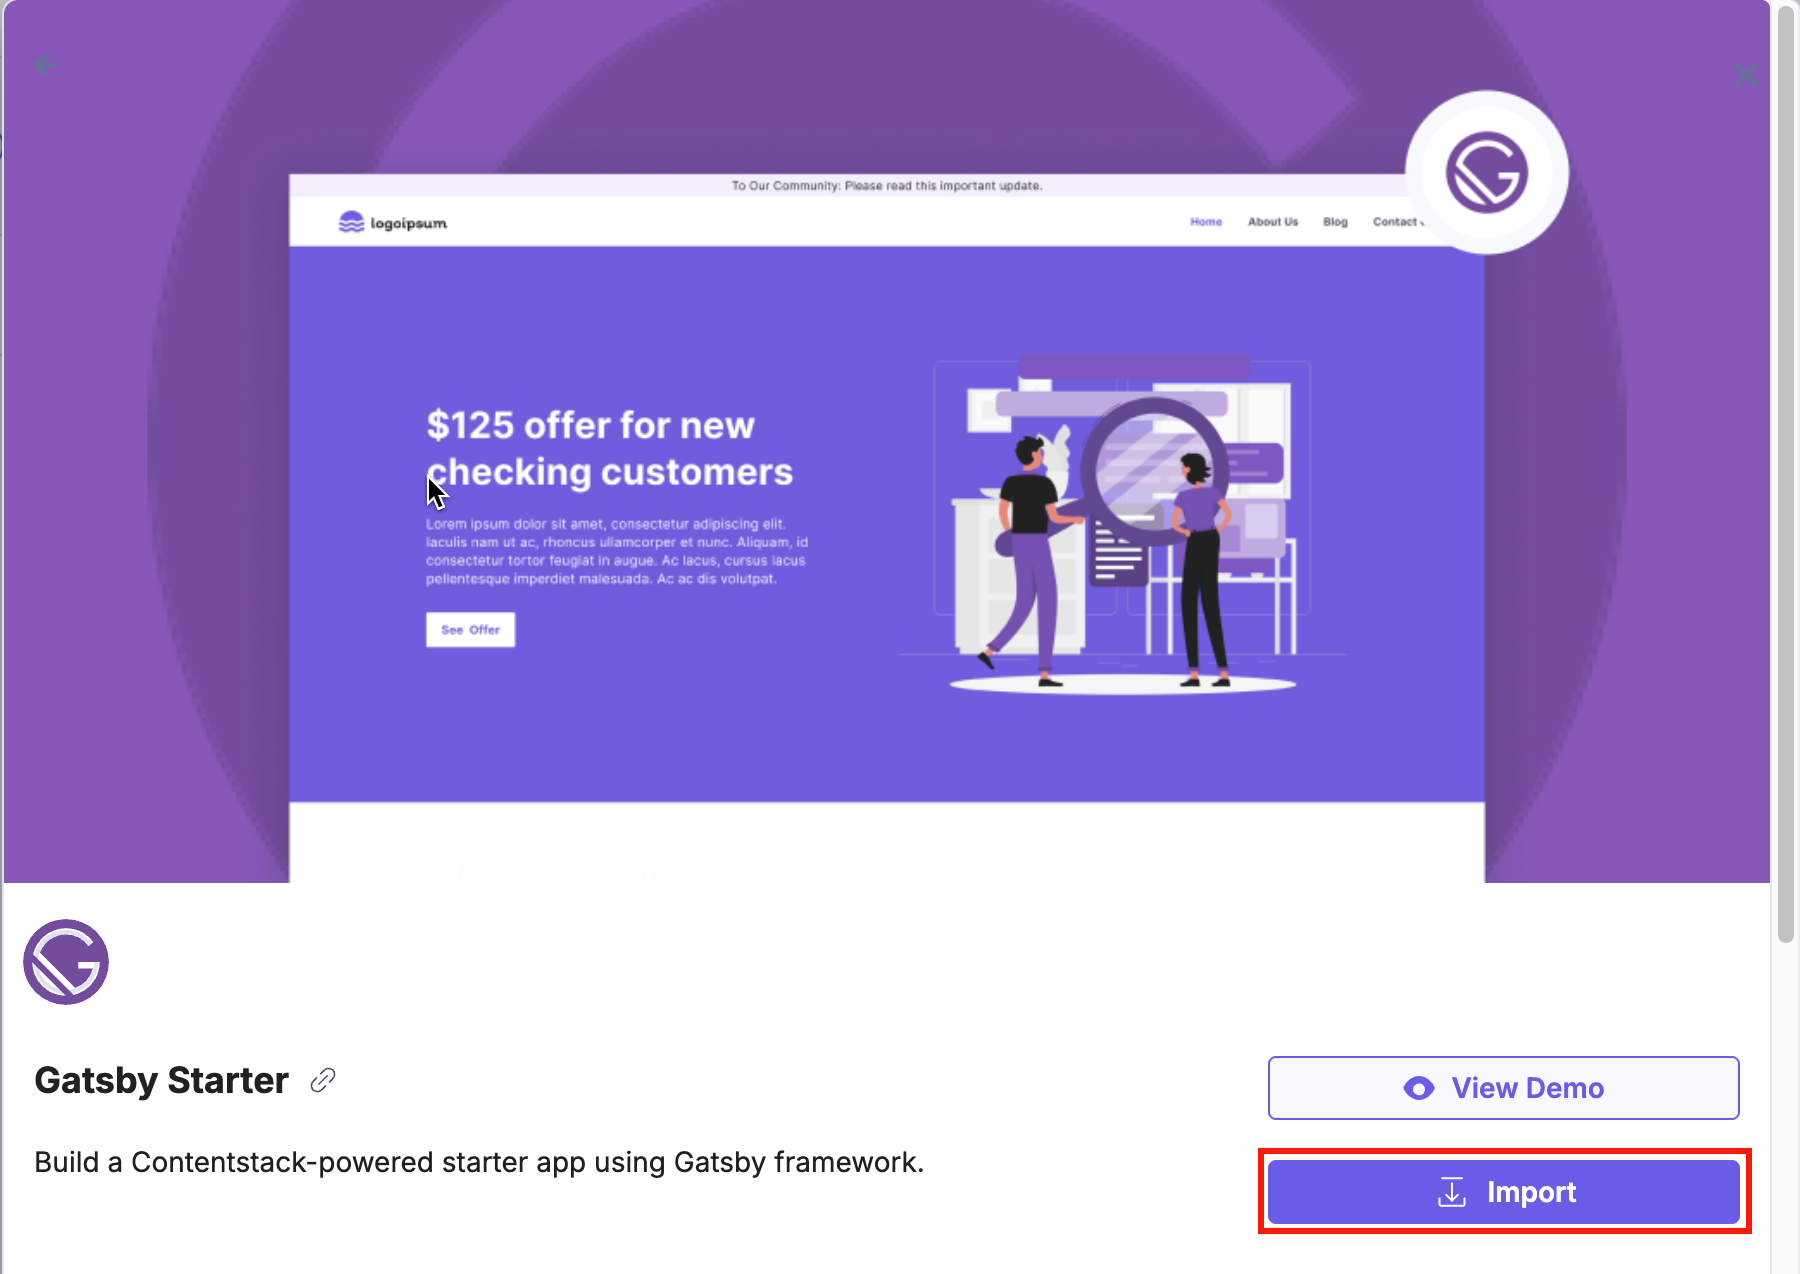
- In the pop-up window, review the permissions and click Authorize.
- Enter a name for your new stack in the Stack Name field, and click Import Starter.
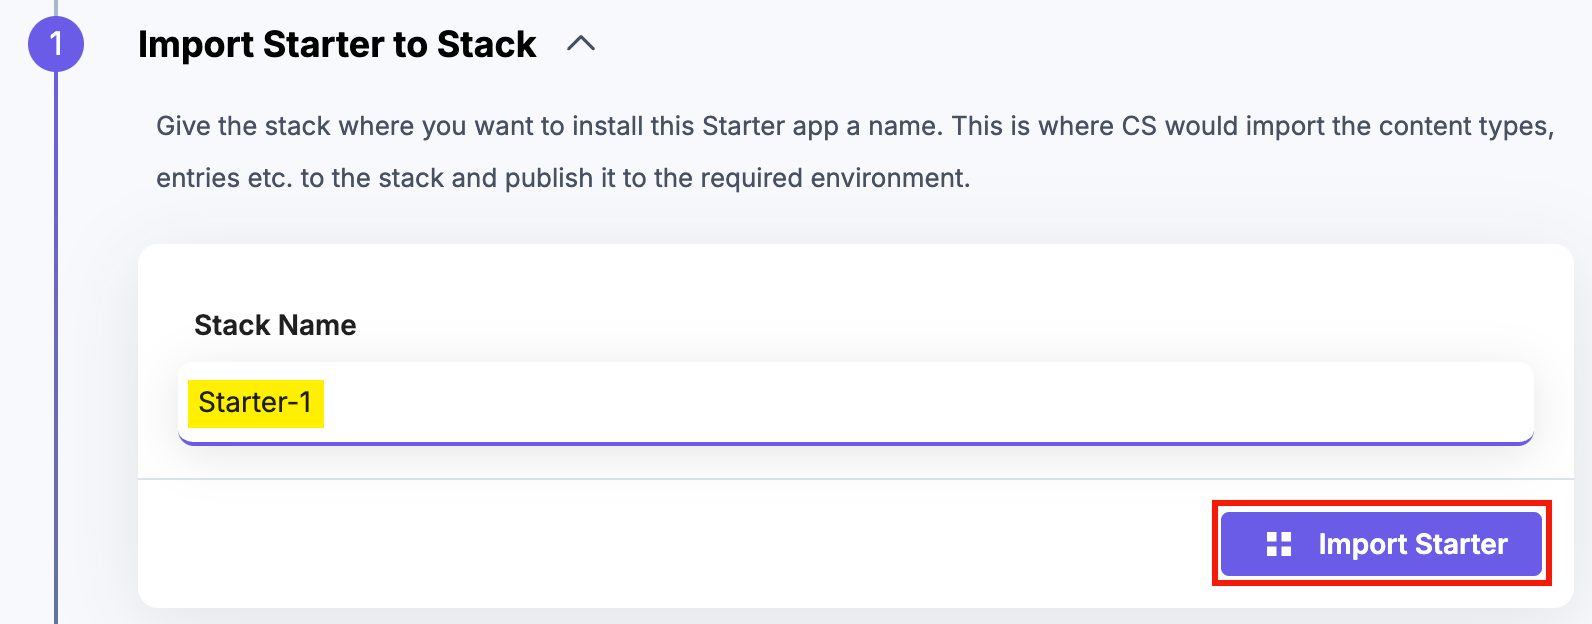
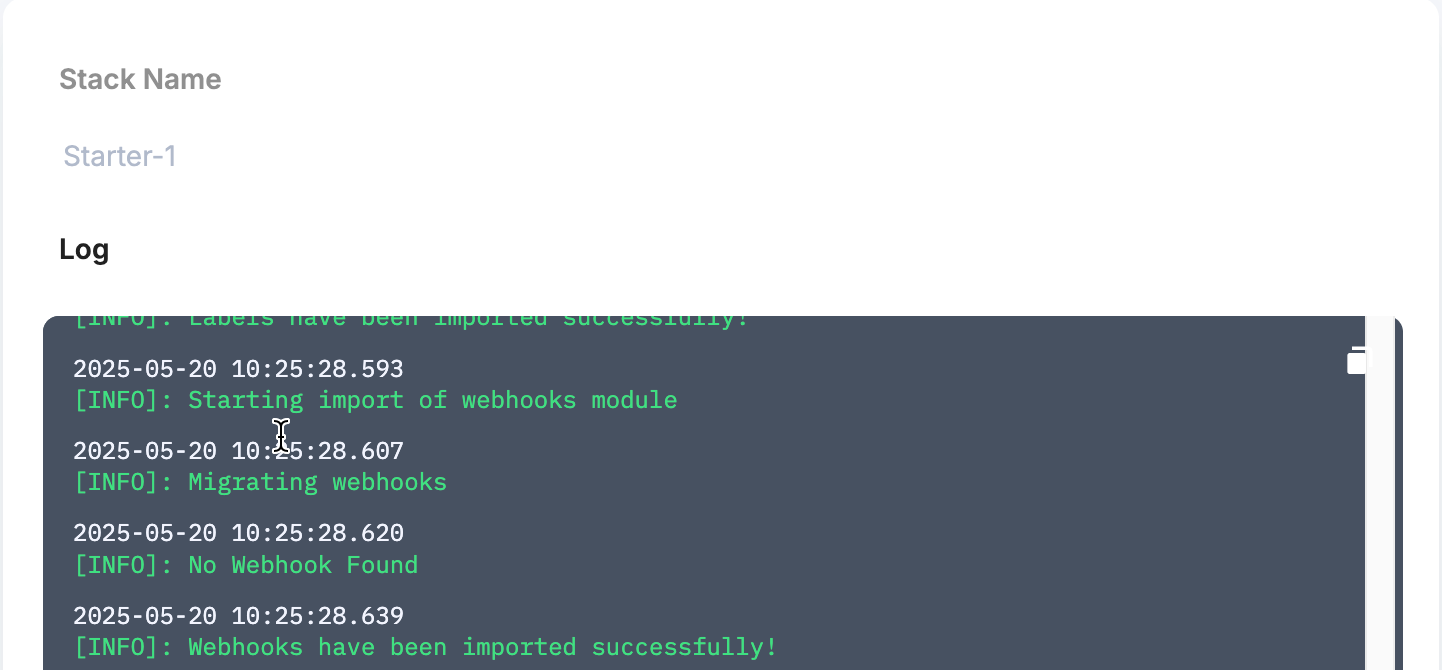
Contentstack will create and configure a new stack in the background. While the Starter is being imported, you can view the logs.
- After a successful import, choose your preferred deployment method:
- Deploy in Launch: Click Deploy in Launch, then click Connect with GitHub, sign in, and authorize the connection. Once connected, the selected starter app repository will appear under the Source Git Repository section.
- Deploy in Vercel: Click Deploy in Vercel, select your Git provider (GitHub, GitLab, or Bitbucket), sign in, and authorize the deployment.
- Once the deployment is complete, you will see the Setup Complete! message.

You can directly navigate to your new stack in Contentstack, visit your deployed website, access the related Launch project, or view your Git repository containing the project's source code. Use the provided quick-action buttons and links to conveniently manage and further customize your Starter stack.
-
Import Starters using Stacks
To import a prebuilt starter, log in to your Contentstack account and follow the steps below:
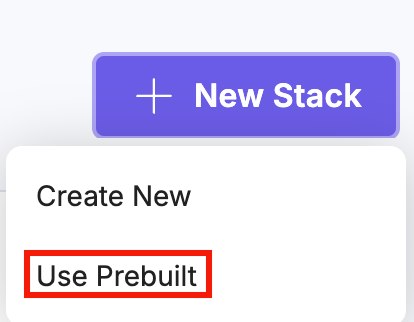
- In the top-right corner of the CMS dashboard, click + New Stack and select Use Prebuilt from the dropdown.
- In the Add Stack modal, hover over the Starter you want to import and click the Import button.
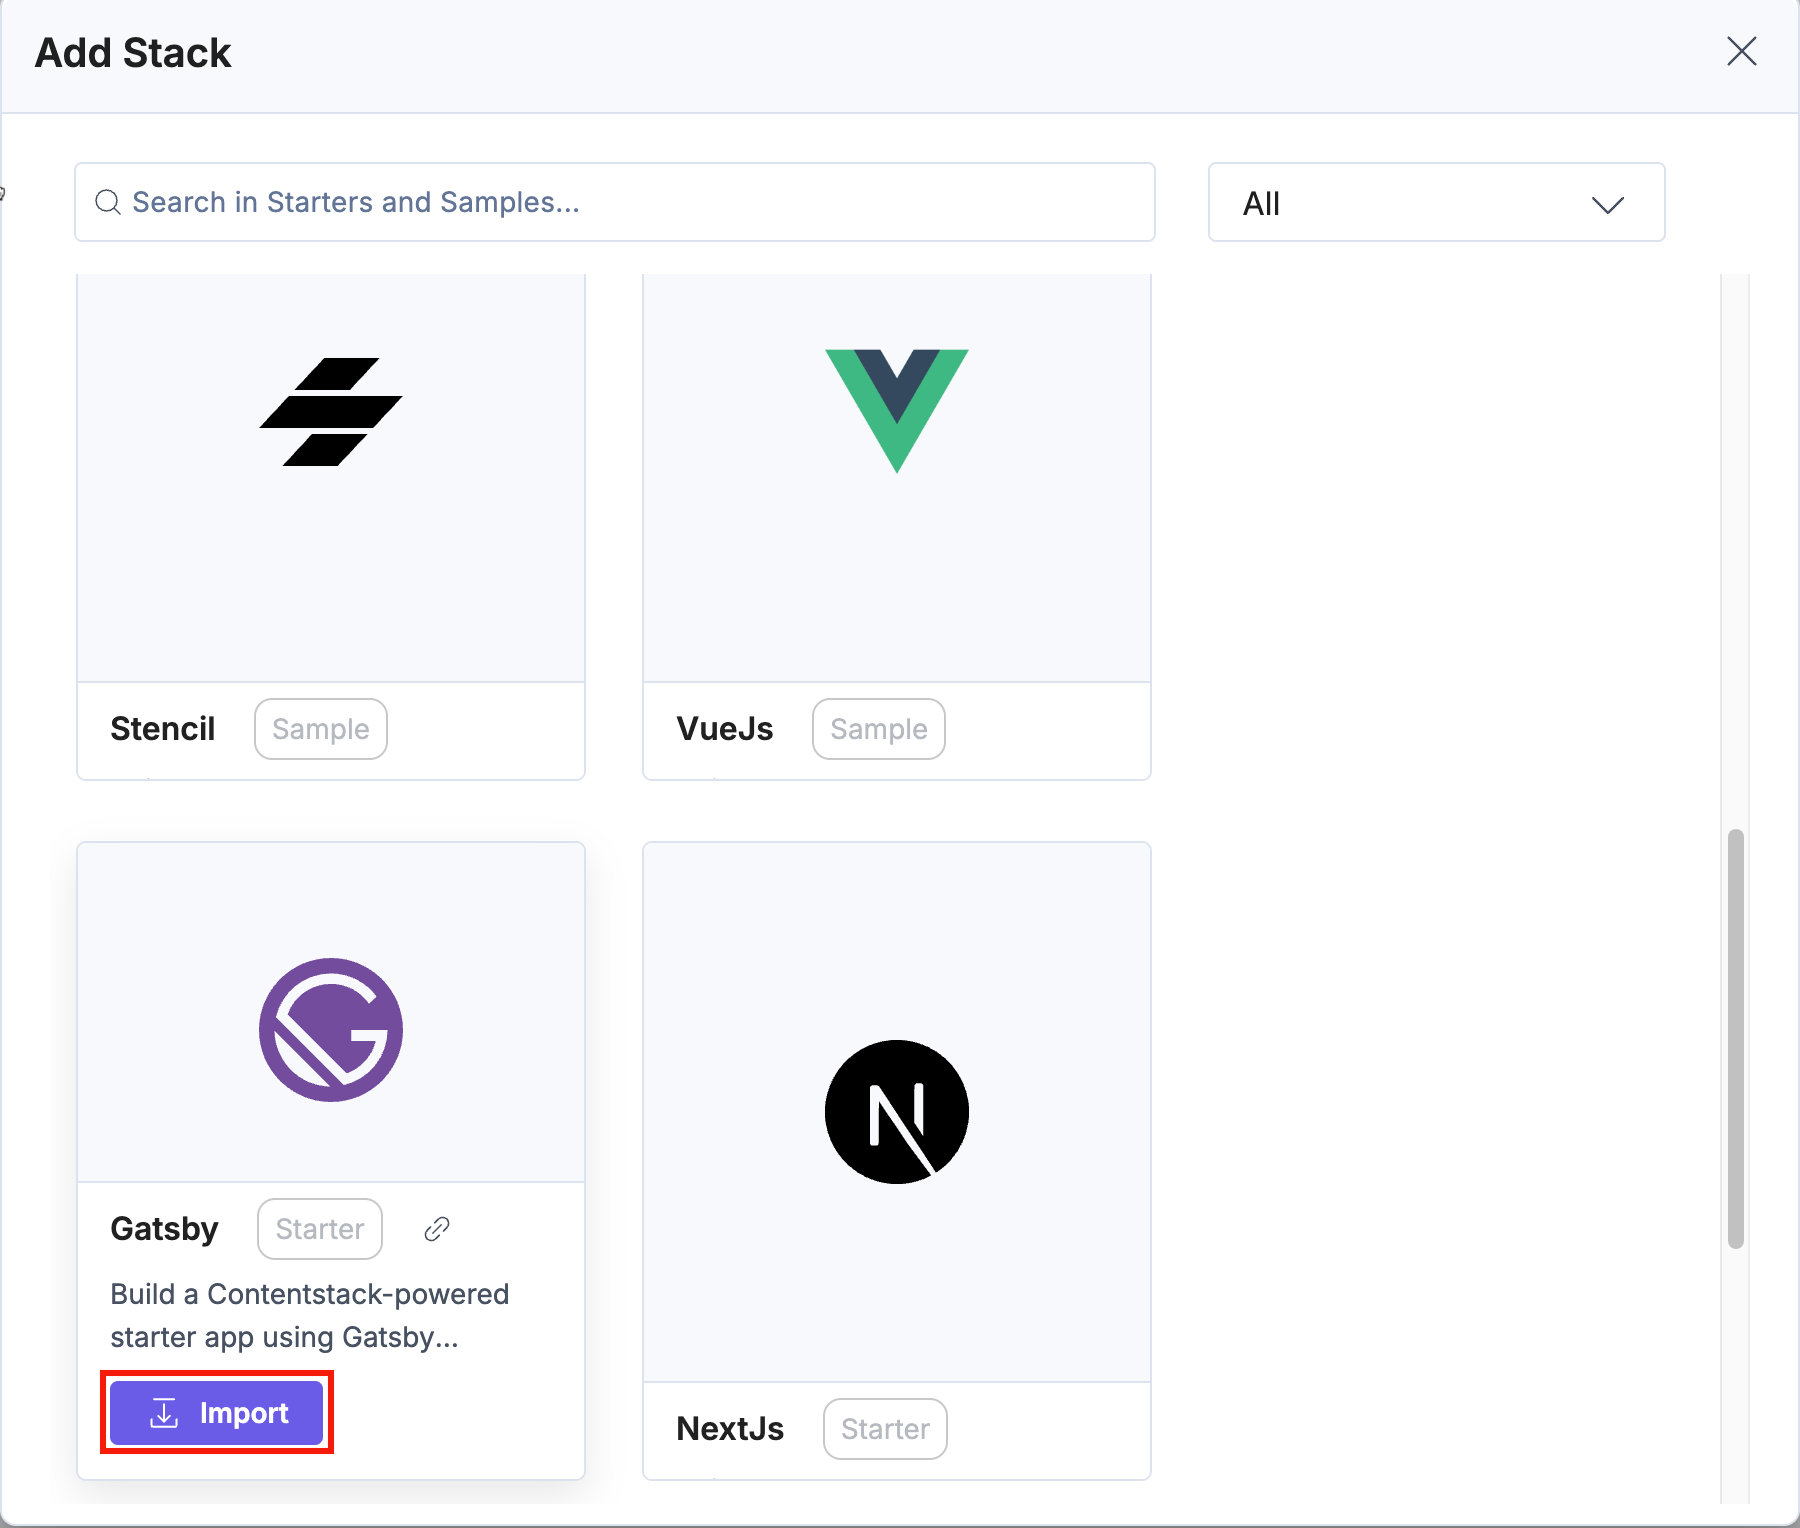
Alternatively, click the Starter card to open its detail page, review the description and demos, and click the Import button.
Now, you can follow the same steps mentioned in the Import Starters Using Marketplace section for successful import.
- In the top-right corner of the CMS dashboard, click + New Stack and select Use Prebuilt from the dropdown.
