

Constructor App Installation Guide
Constructor is a product discovery platform developed specifically for enterprise e-commerce platforms. It optimizes customer experience across digital platforms with enhanced search results powered by machine learning and natural language processing.
With Marketplace, you can now easily install the Constructor app and use it within your stack to link your entries to the collections in your Constructor account.
Prerequisites
- Constructor account
- Contentstack account
- Access to the Contentstack Organization/Stack as the Owner/Admin
Let's follow this step-by-step guide to install and configure the Constructor app within your stack.
Steps for Execution
- Retrieve your credentials from Constructor
- Create collections in Constructor
- Install and configure the Constructor app in Marketplace
- Map and save entries from Contentstack to Constructor
- Use the Constructor app within your Stack
Retrieve your Credentials from Constructor
Note: We assume you already have a working Constructor account. If not, visit the official website and sign up for a plan.
Generate API Token
To generate the API Token, log in to your Constructor account and follow the steps:
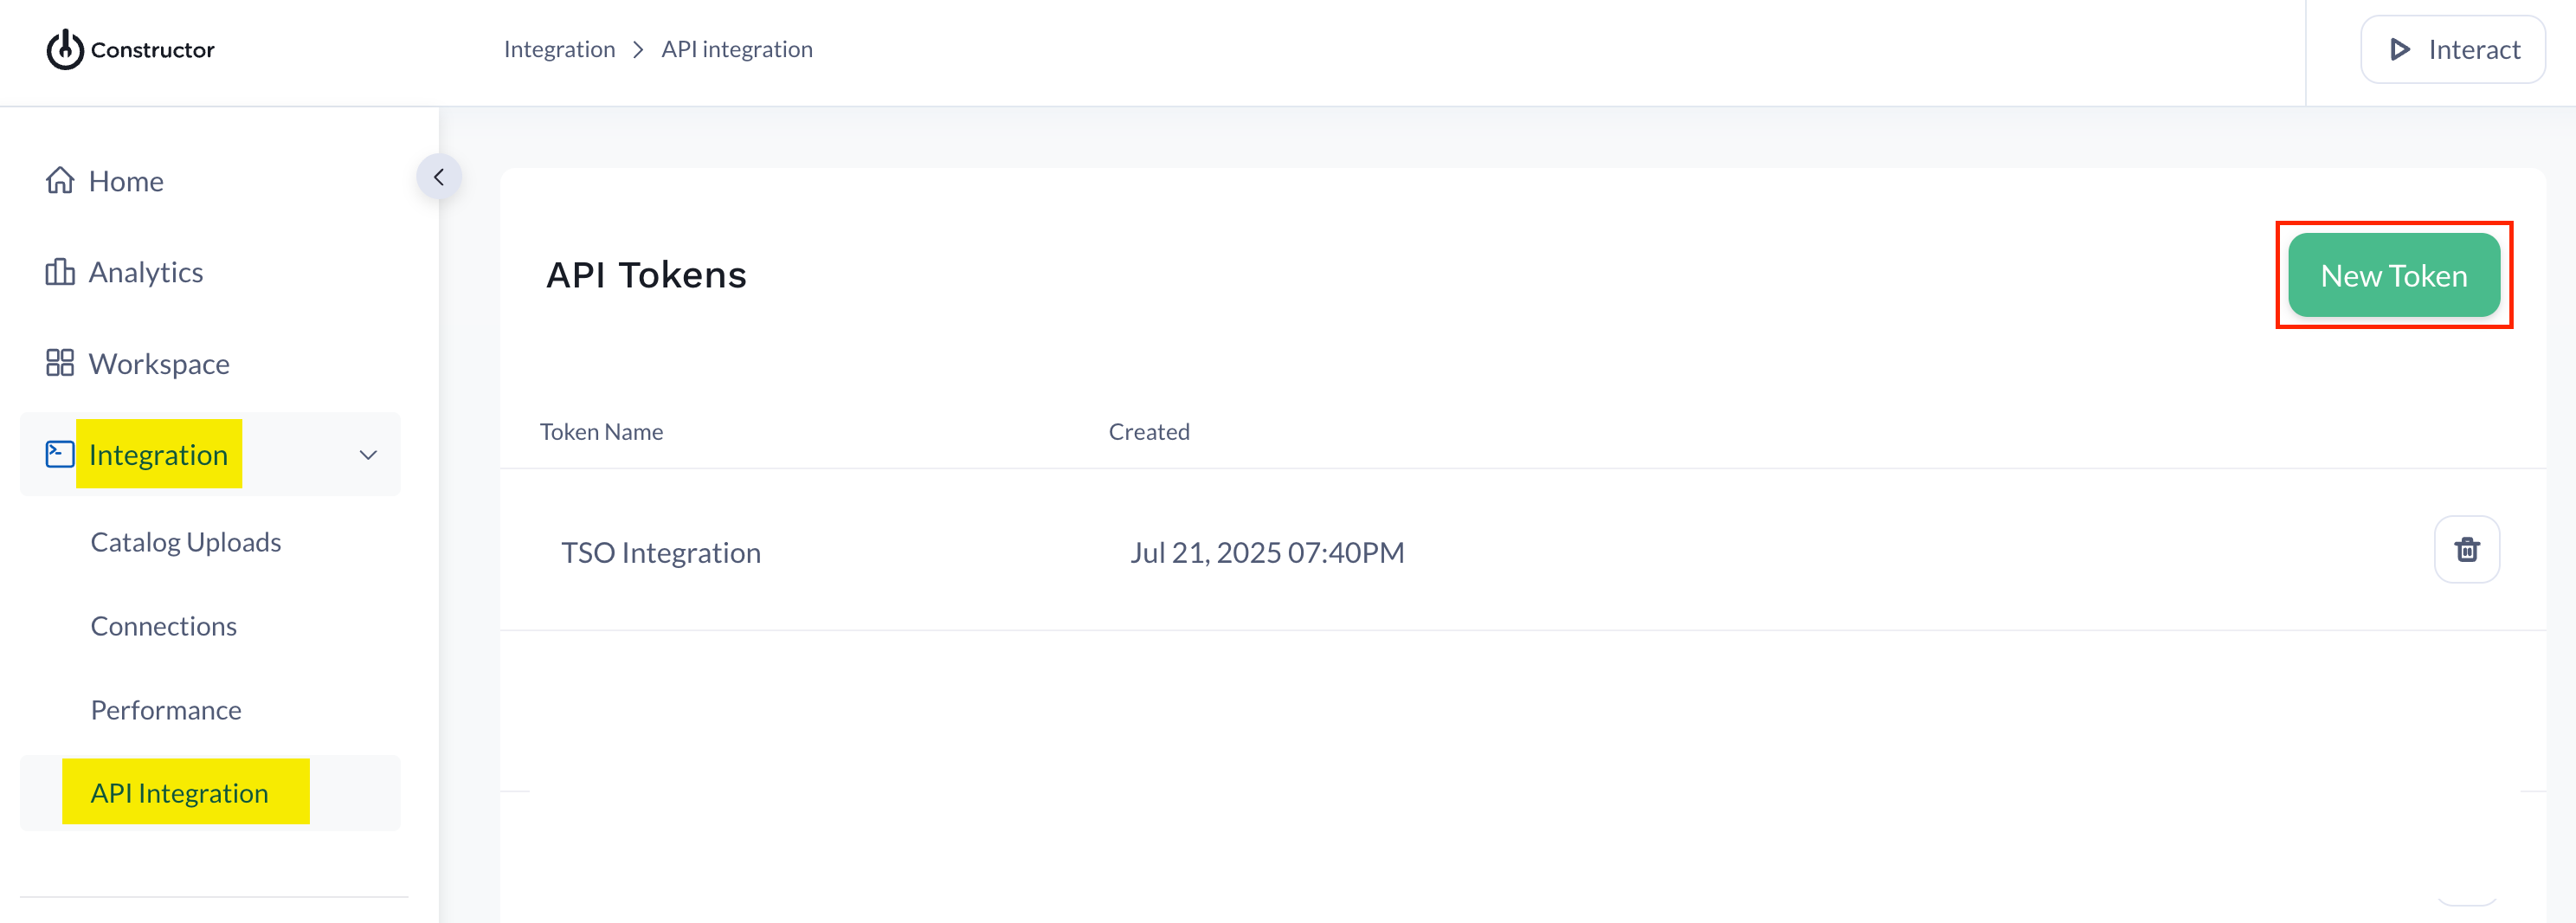
- In the left navigation panel, click the Integration drop-down and select API Integration. To generate the API token, click the New Token button.
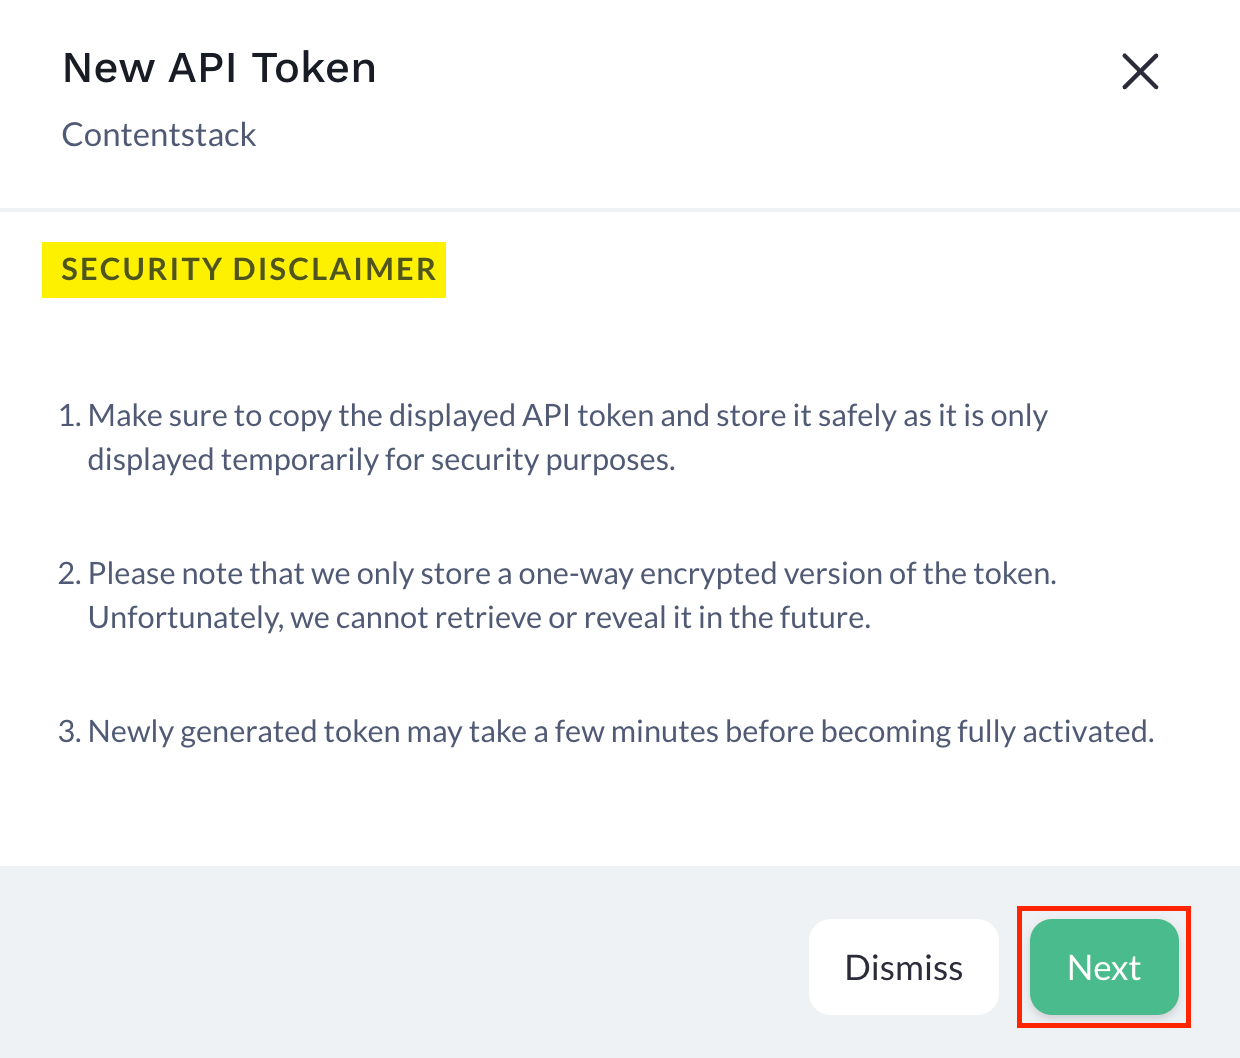
- In the New API Token modal, read the Security Disclaimer carefully and click Next.
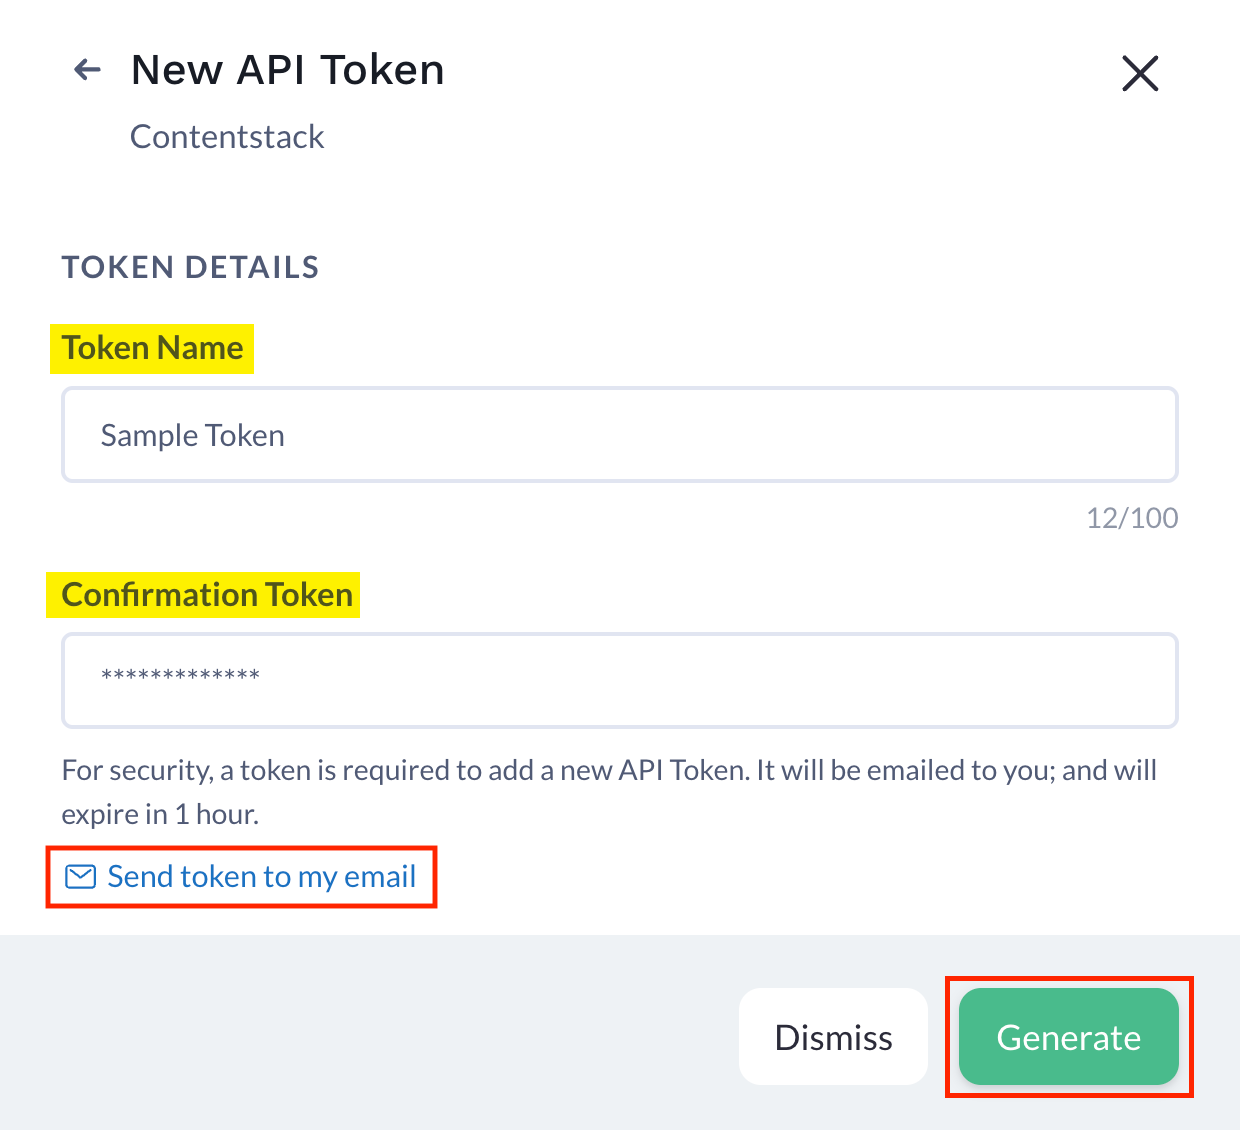
- Fill up the TOKEN DETAILS by providing the Token Name and Confirmation Token. You can get the Confirmation Token by clicking Send token to my email. Copy the token from your email and paste it in the required textbox. After entering all the details, click Generate.
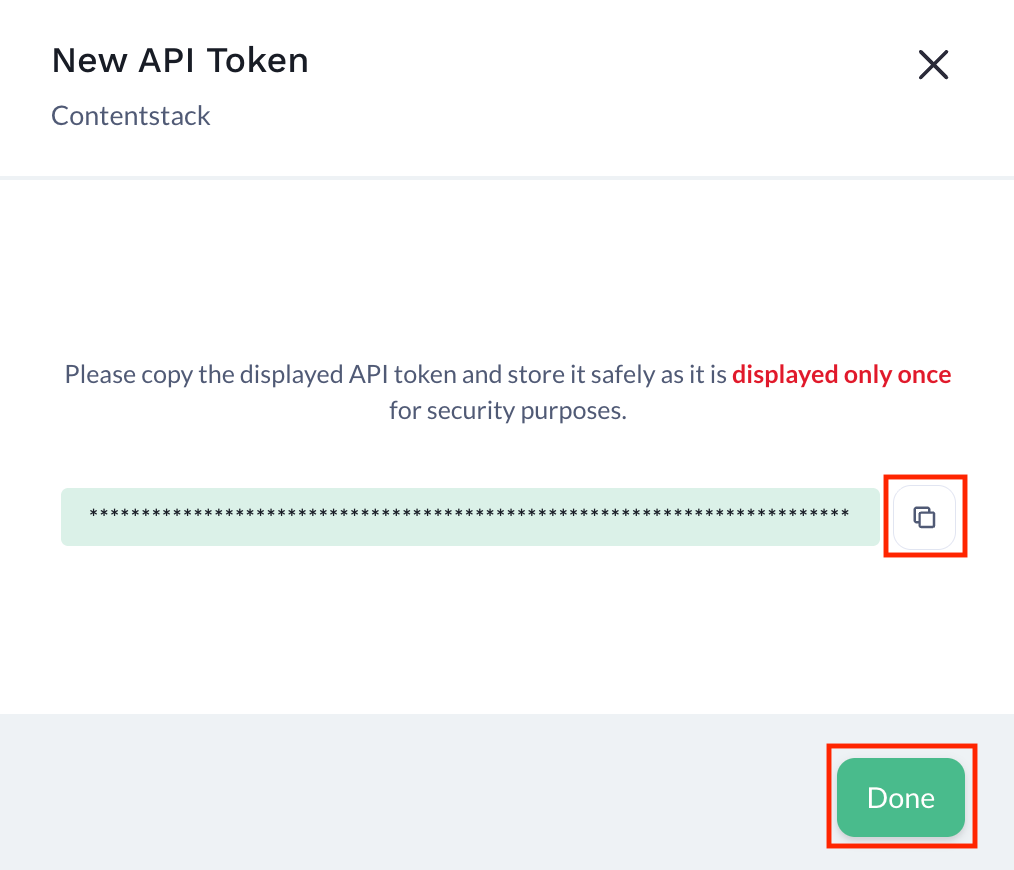
- The API Token is displayed only once. Ensure to copy it to clipboard using the “Copy” icon, and then click Done.
Note: Convert the API token to Base64 format to use it during app configuration in step 3.
Get API Key and Index Section Name
To get the API Key and Index Section Name, log in to your Constructor account and follow the steps:
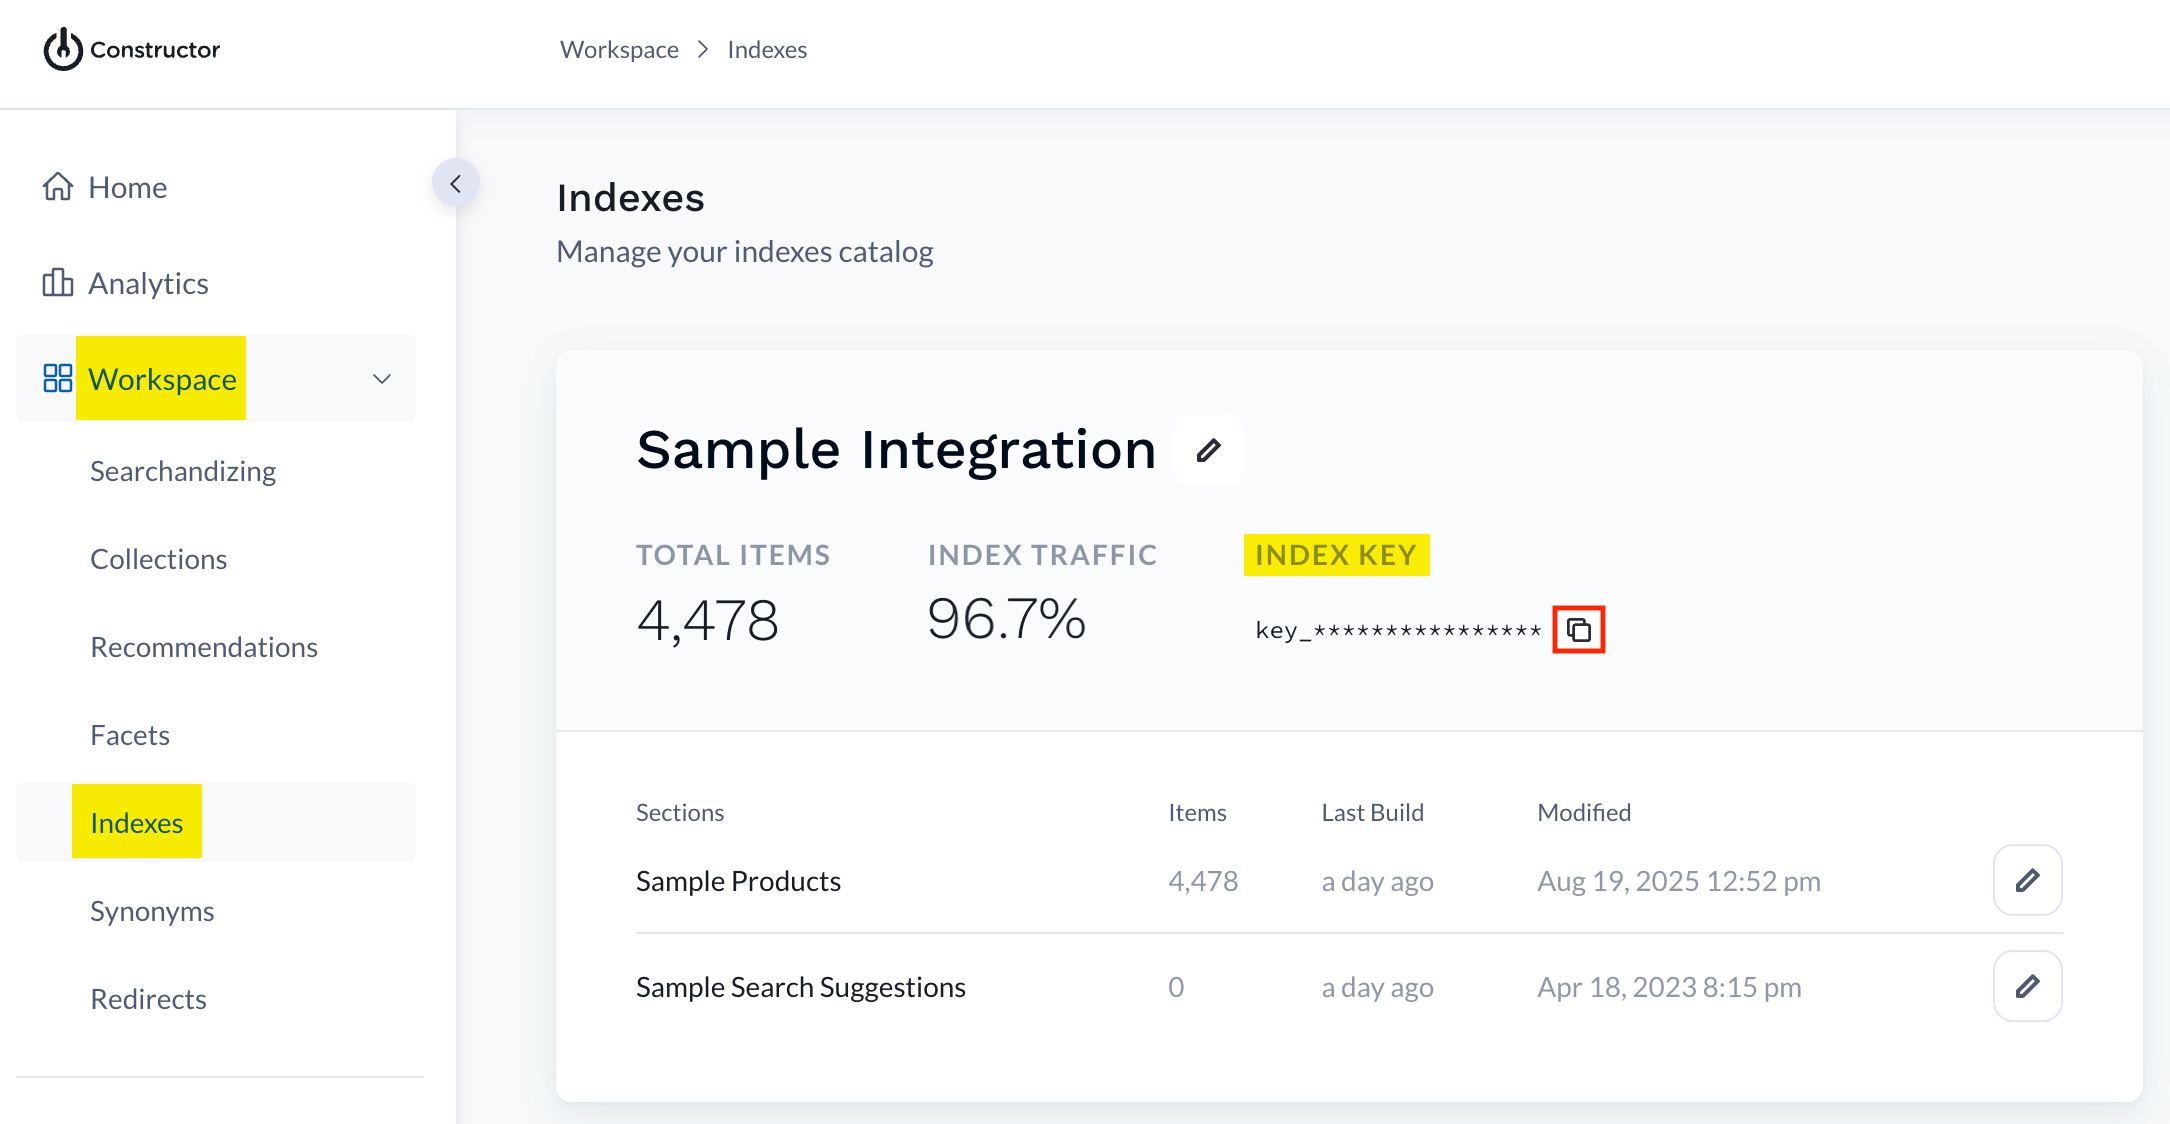
- In the left navigation panel, click the Workspace drop-down and select Indexes. You can view the INDEX KEY which is used as API Key in the Contentstack app configuration in step 3. Click the “Copy” icon to copy it to clipboard.
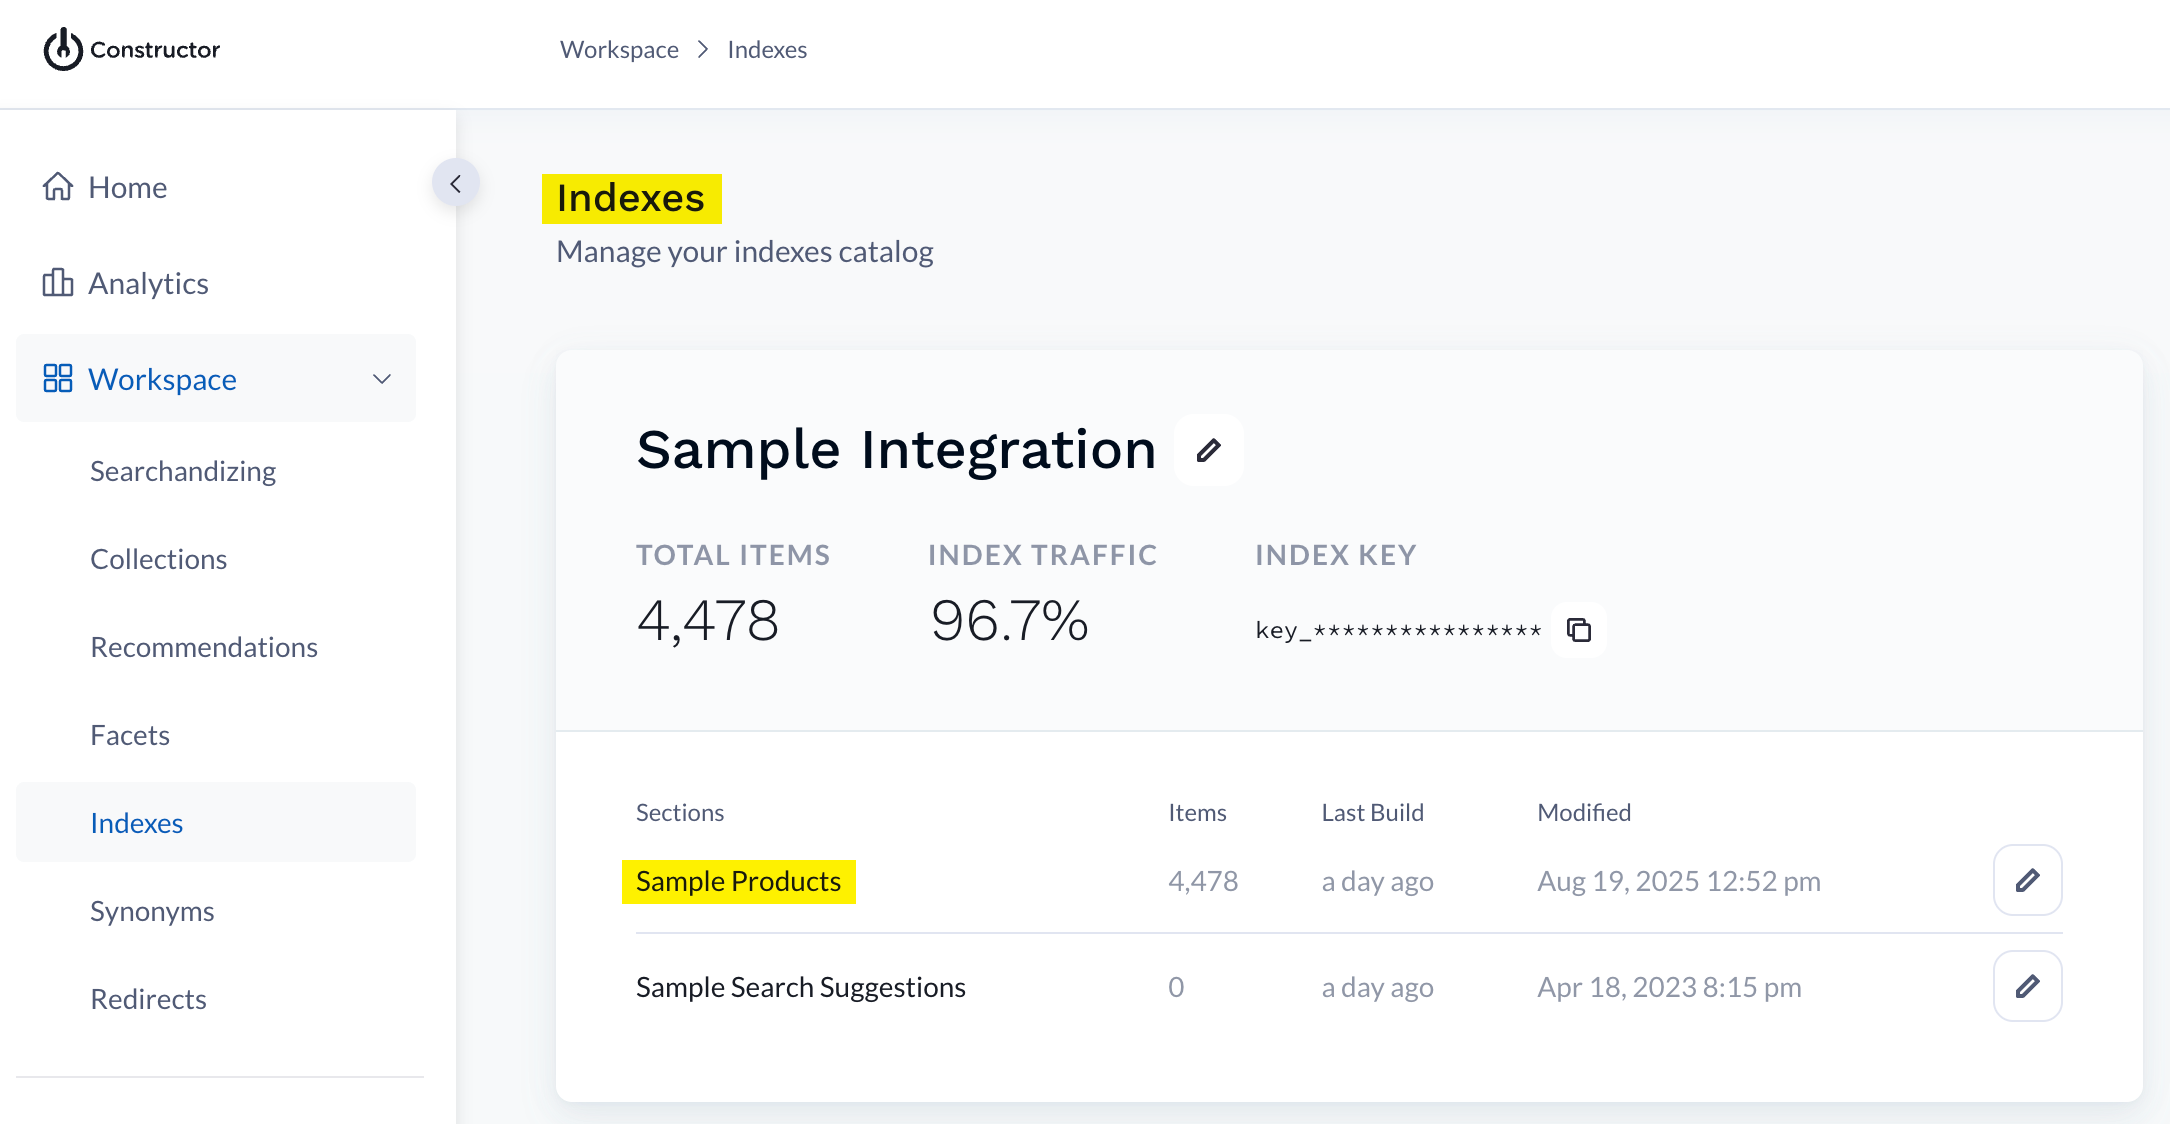
- Under Indexes, you can get the Index Section Name. In the following screenshot, Sample Integration is the Index name and Sample Products is the Index Section Name.
- In the left navigation panel, click the Integration drop-down and select API Integration. To generate the API token, click the New Token button.
Create Collections in Constructor
In Constructor, you can create landing pages that are based on manual lists or automated rules of products by using Collections. This helps you to enhance search, browse, and product discovery experience.
To create a collection in Constructor, log in to your Constructor account and follow the steps:
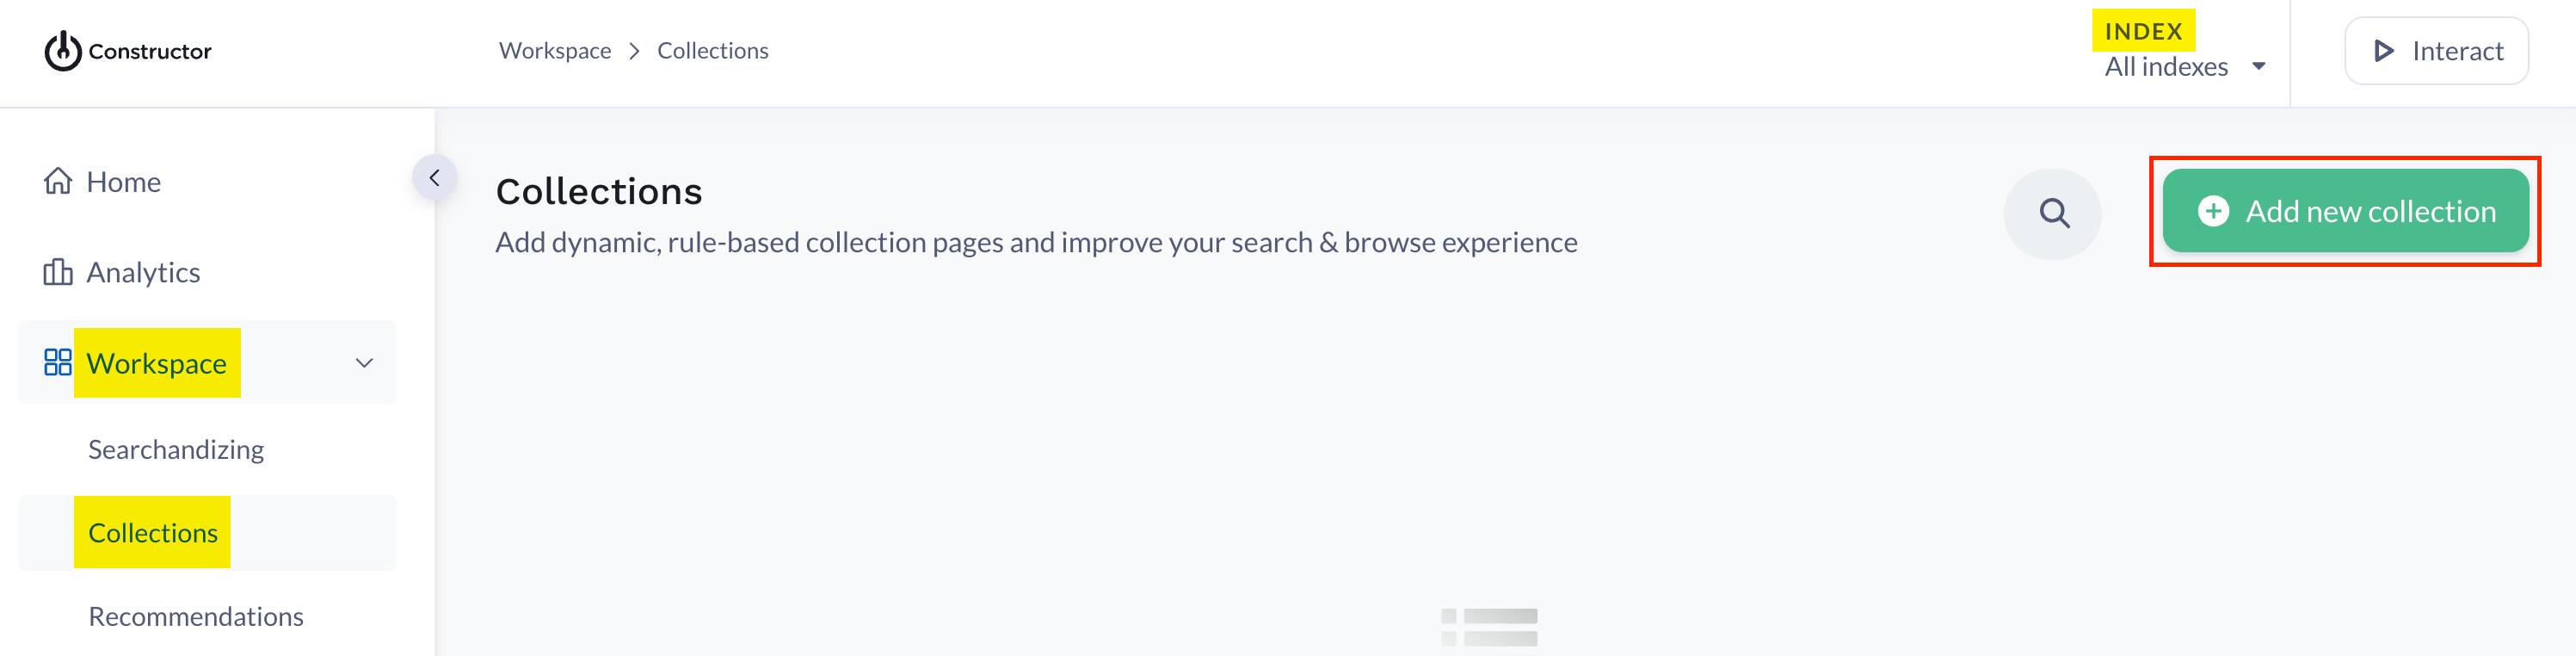
- In the left navigation panel, click the Workspace drop-down and select Collections. Now, select your INDEX from the dropdown and click the Add new collection button.
- On the Add a new collection screen, provide a Display name for your collection and click Create.
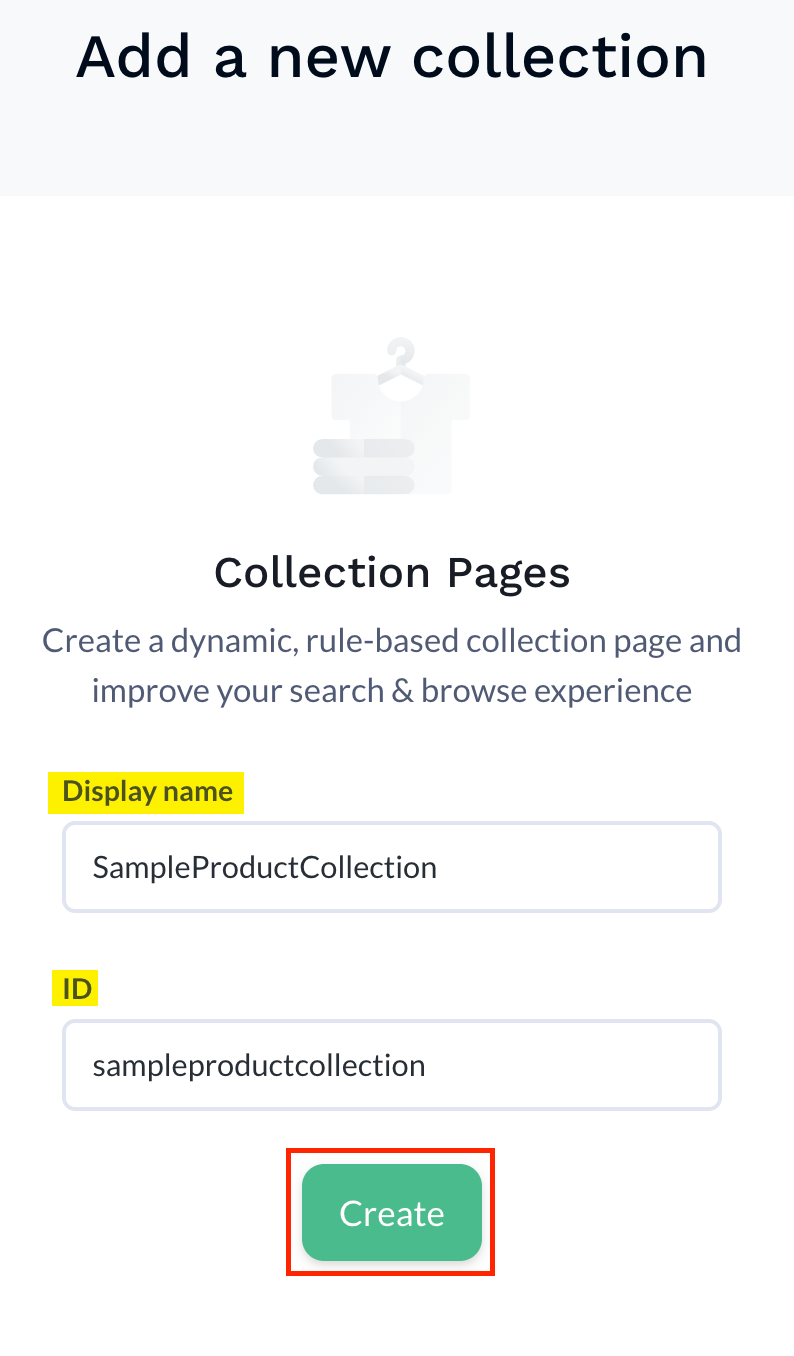
Note: The ID field gets filled automatically as you type the Display name. You can edit the ID if needed.
Collection is created under your selected index.
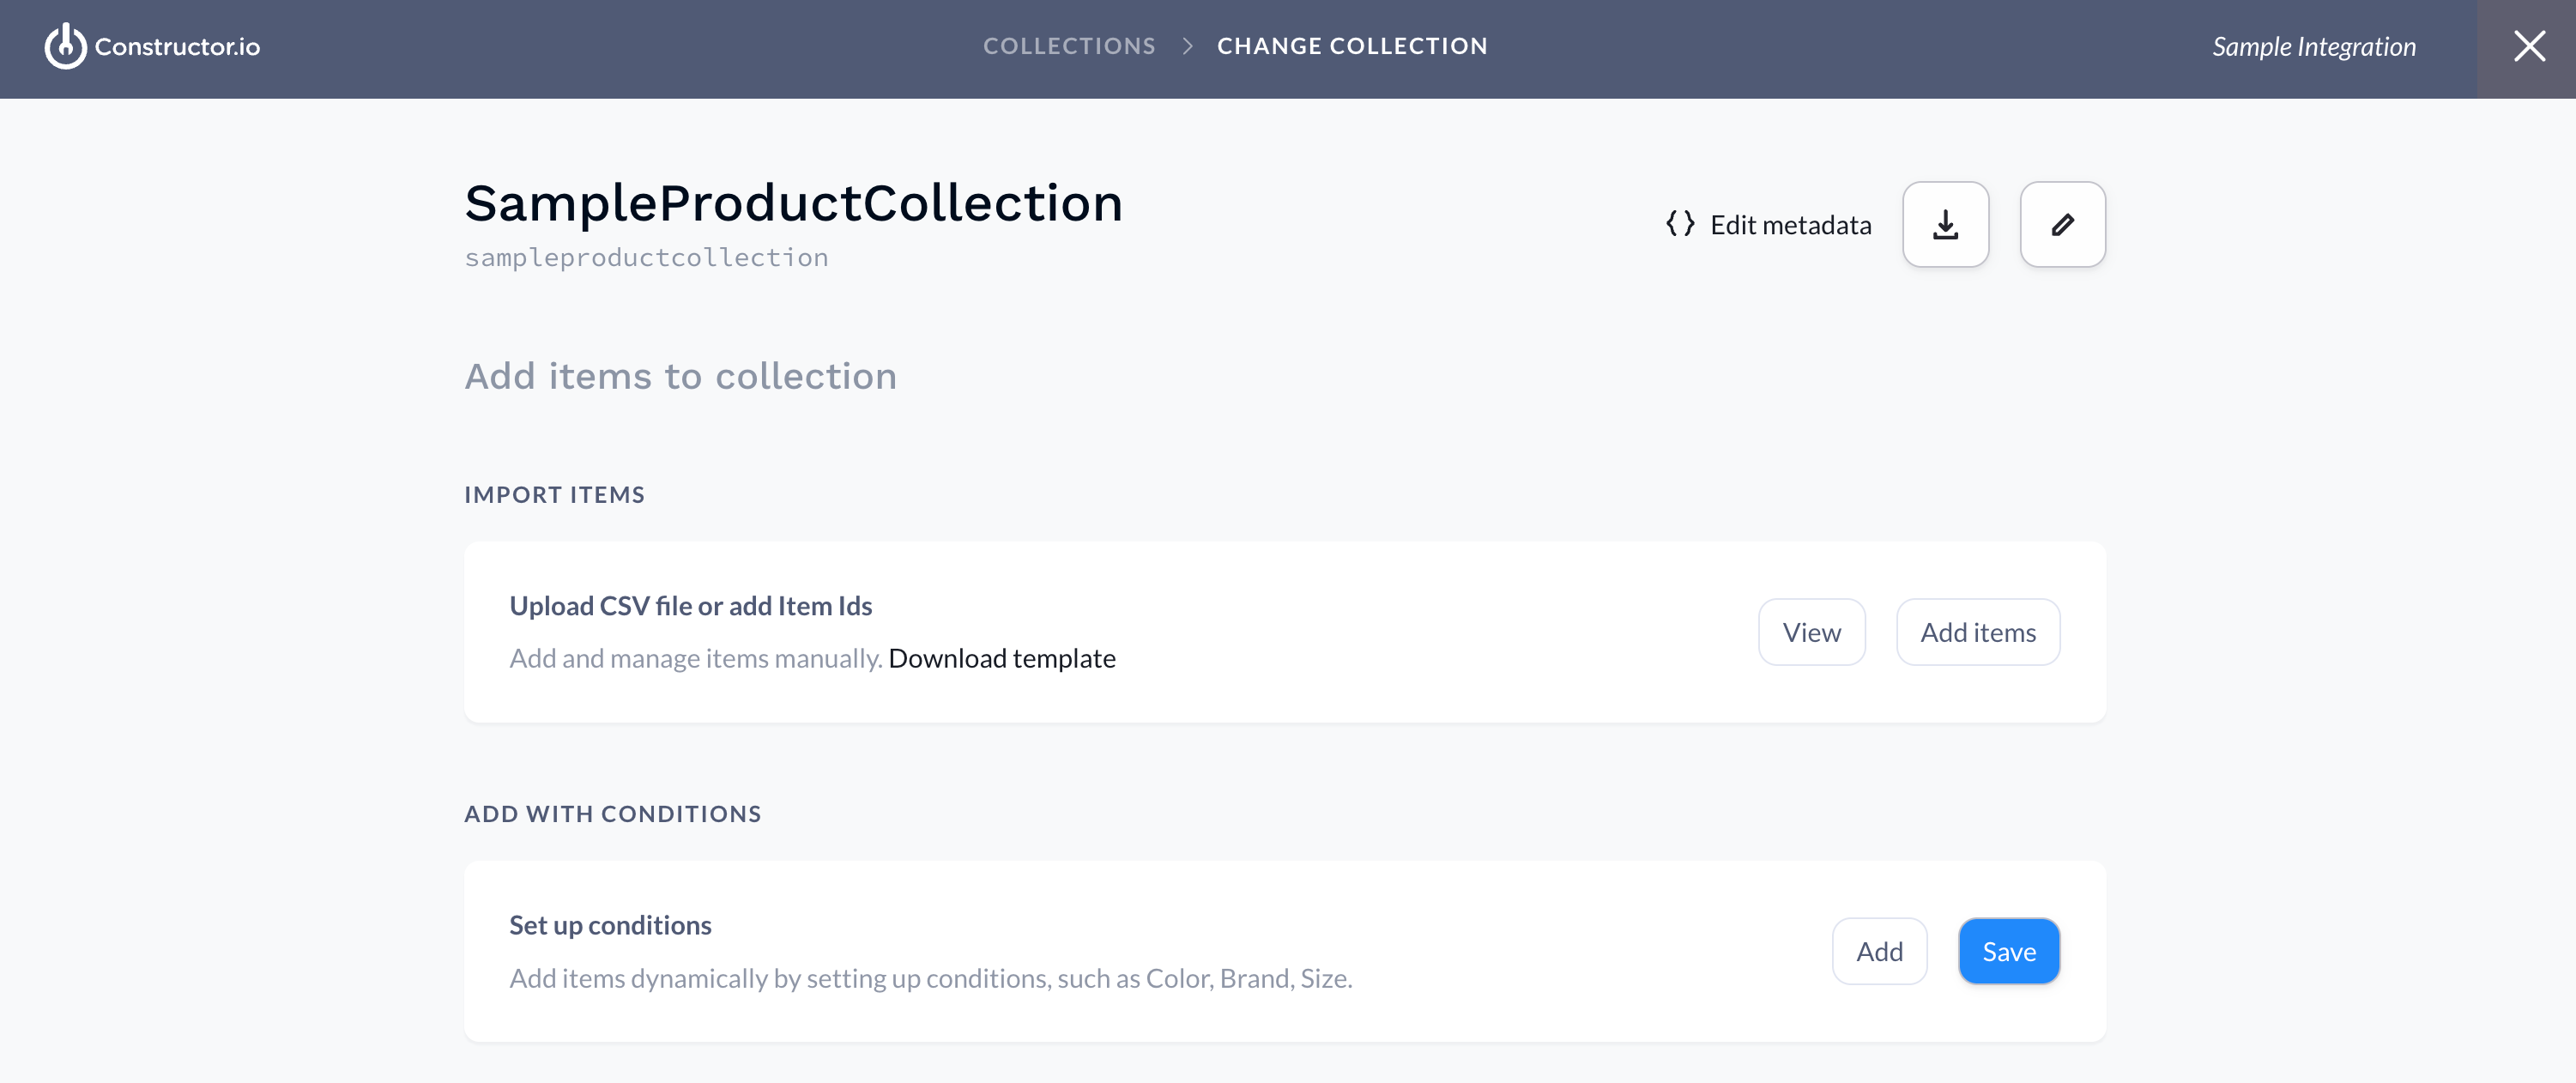
- You can add items to your collection in two ways:
- IMPORT ITEMS: You can upload a CSV file or add item IDs manually by clicking the Add Items button. Additionally, you can view and manage them using the View button.
- ADD WITH CONDITIONS: Click Add to set up conditions and add items dynamically. With the View button, you can view and manage the items. Once you have added all the items, click Save.
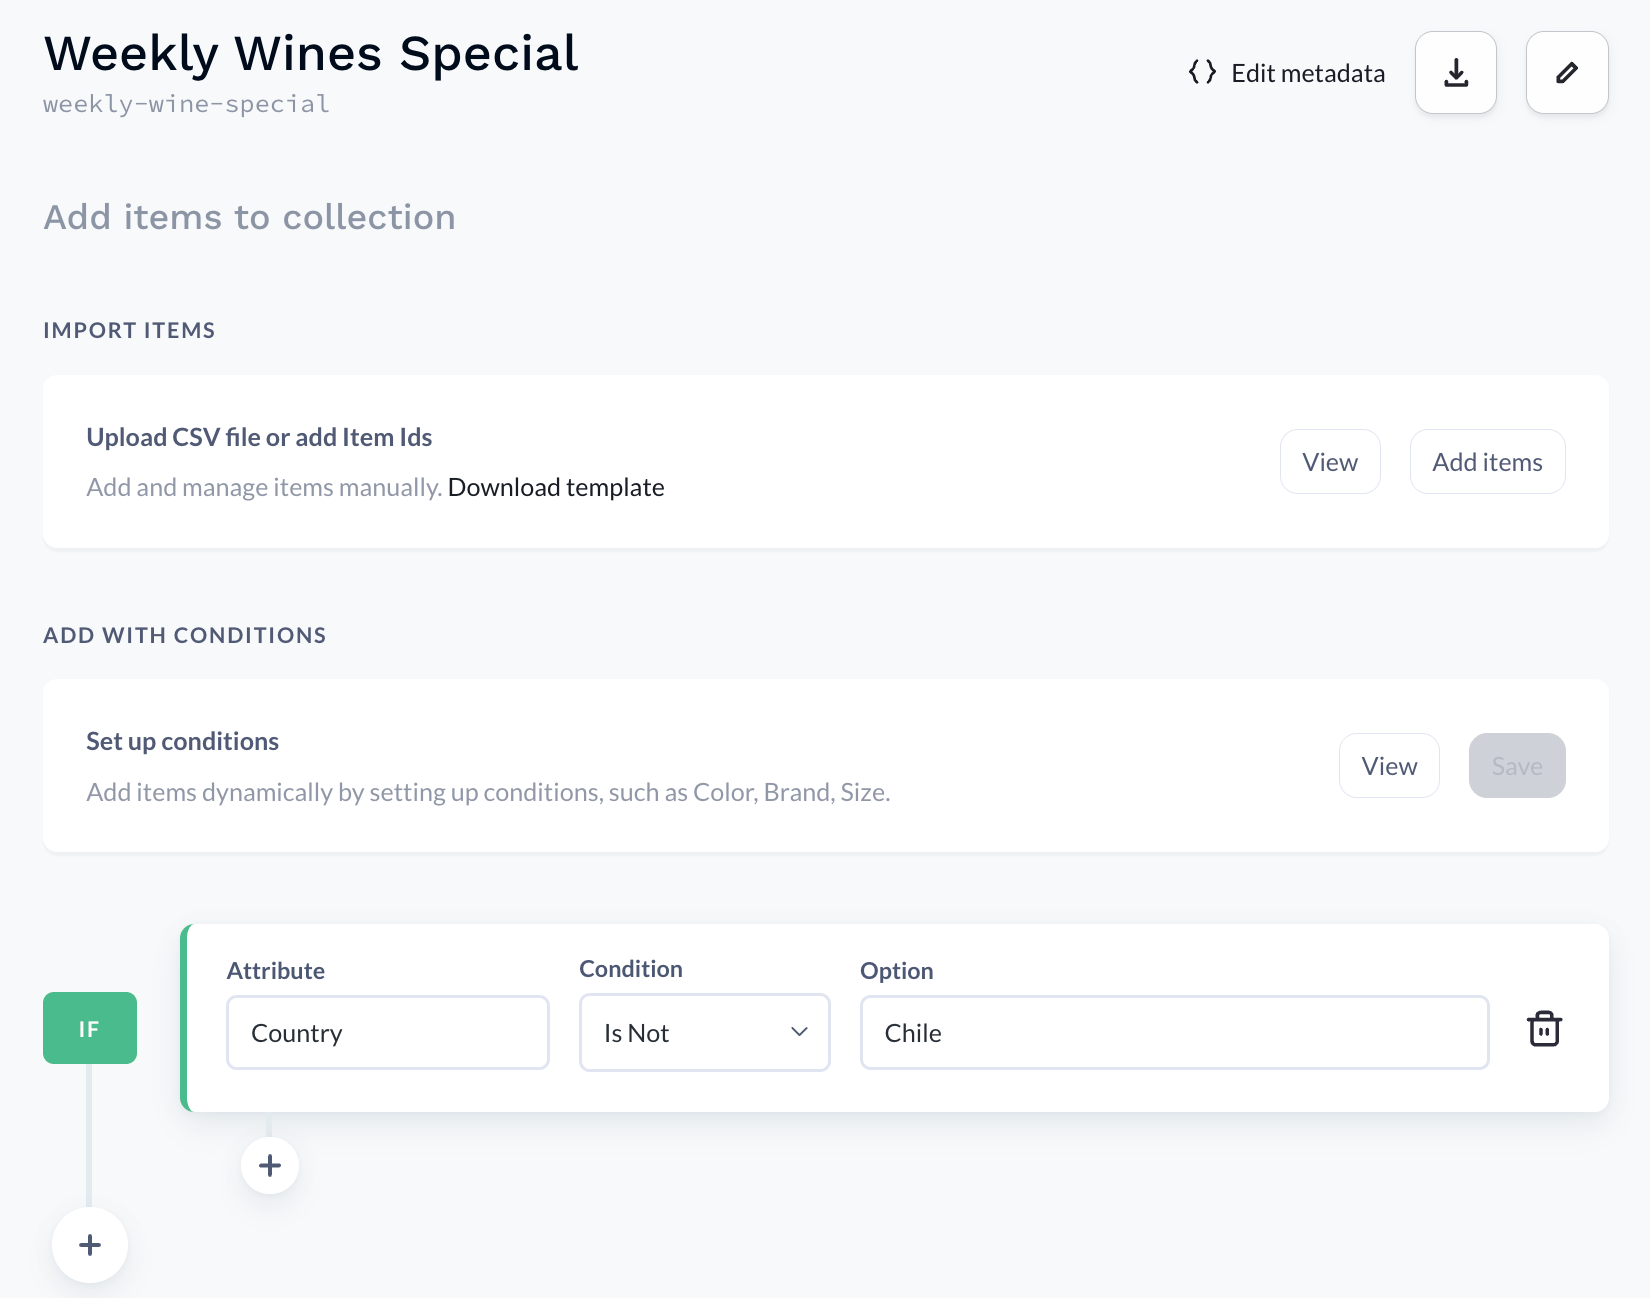
For instance, you can view the collection named Weekly Wines Special. Here the condition is that the attribute Country does not belong with the option Chile.
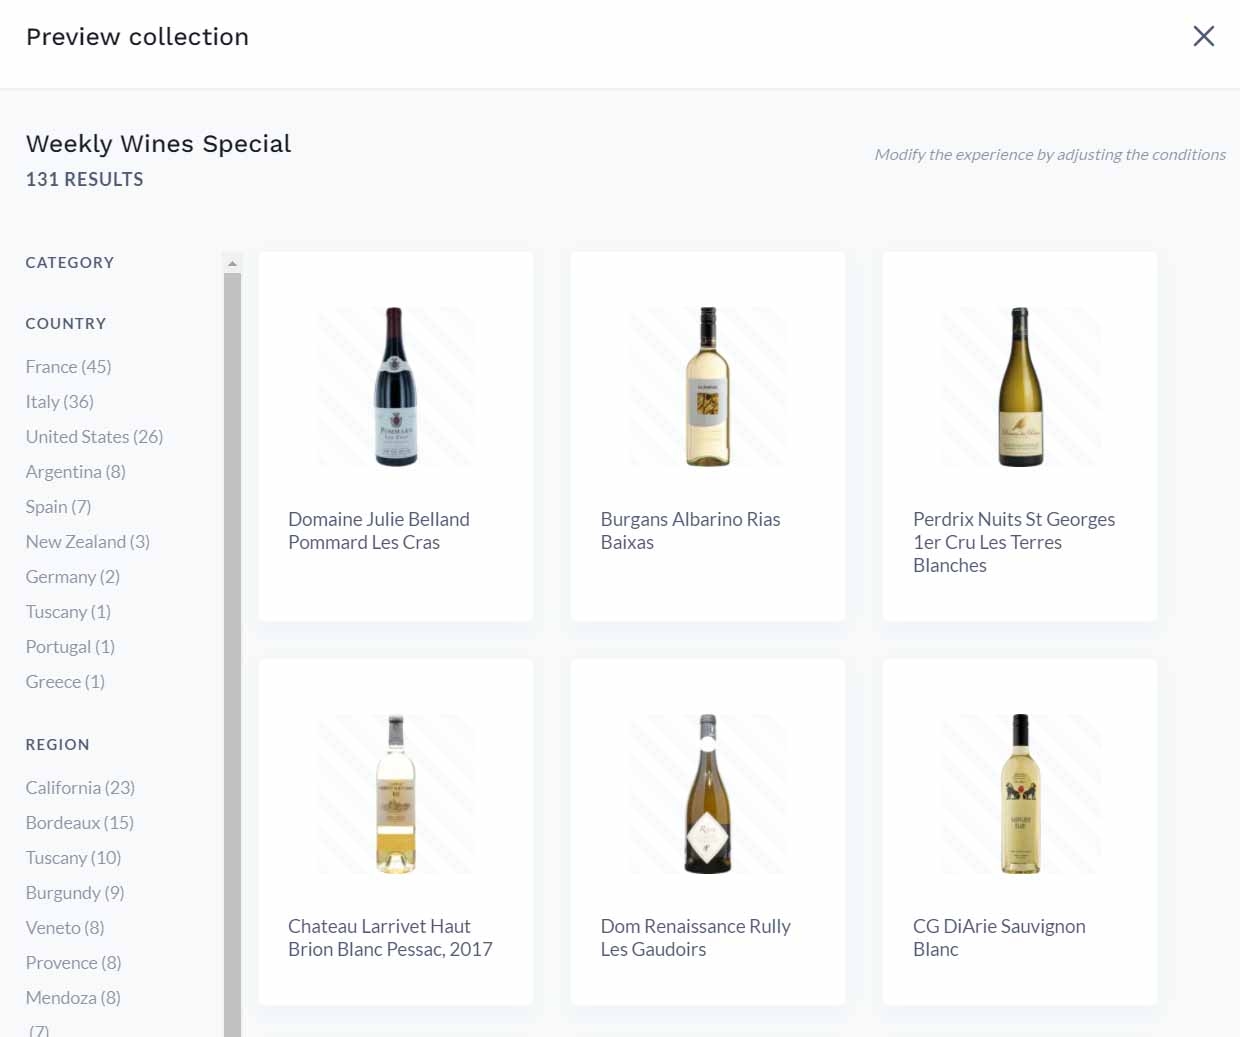
When you click the View button, the following items appear:
Similarly, you can create more collections.
- In the left navigation panel, click the Workspace drop-down and select Collections. Now, select your INDEX from the dropdown and click the Add new collection button.
Install and Configure the Constructor app in Marketplace
To install the app in Contentstack, log in to your Contentstack account, follow the steps below:
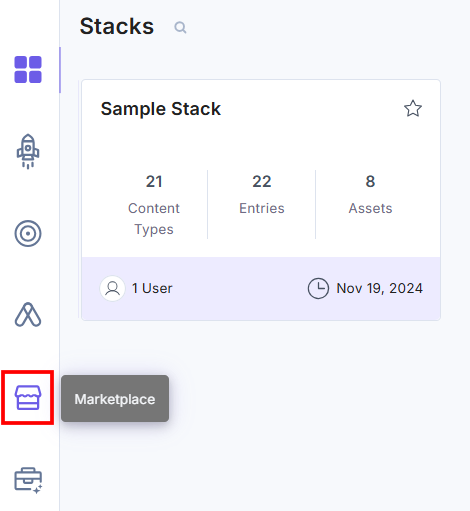
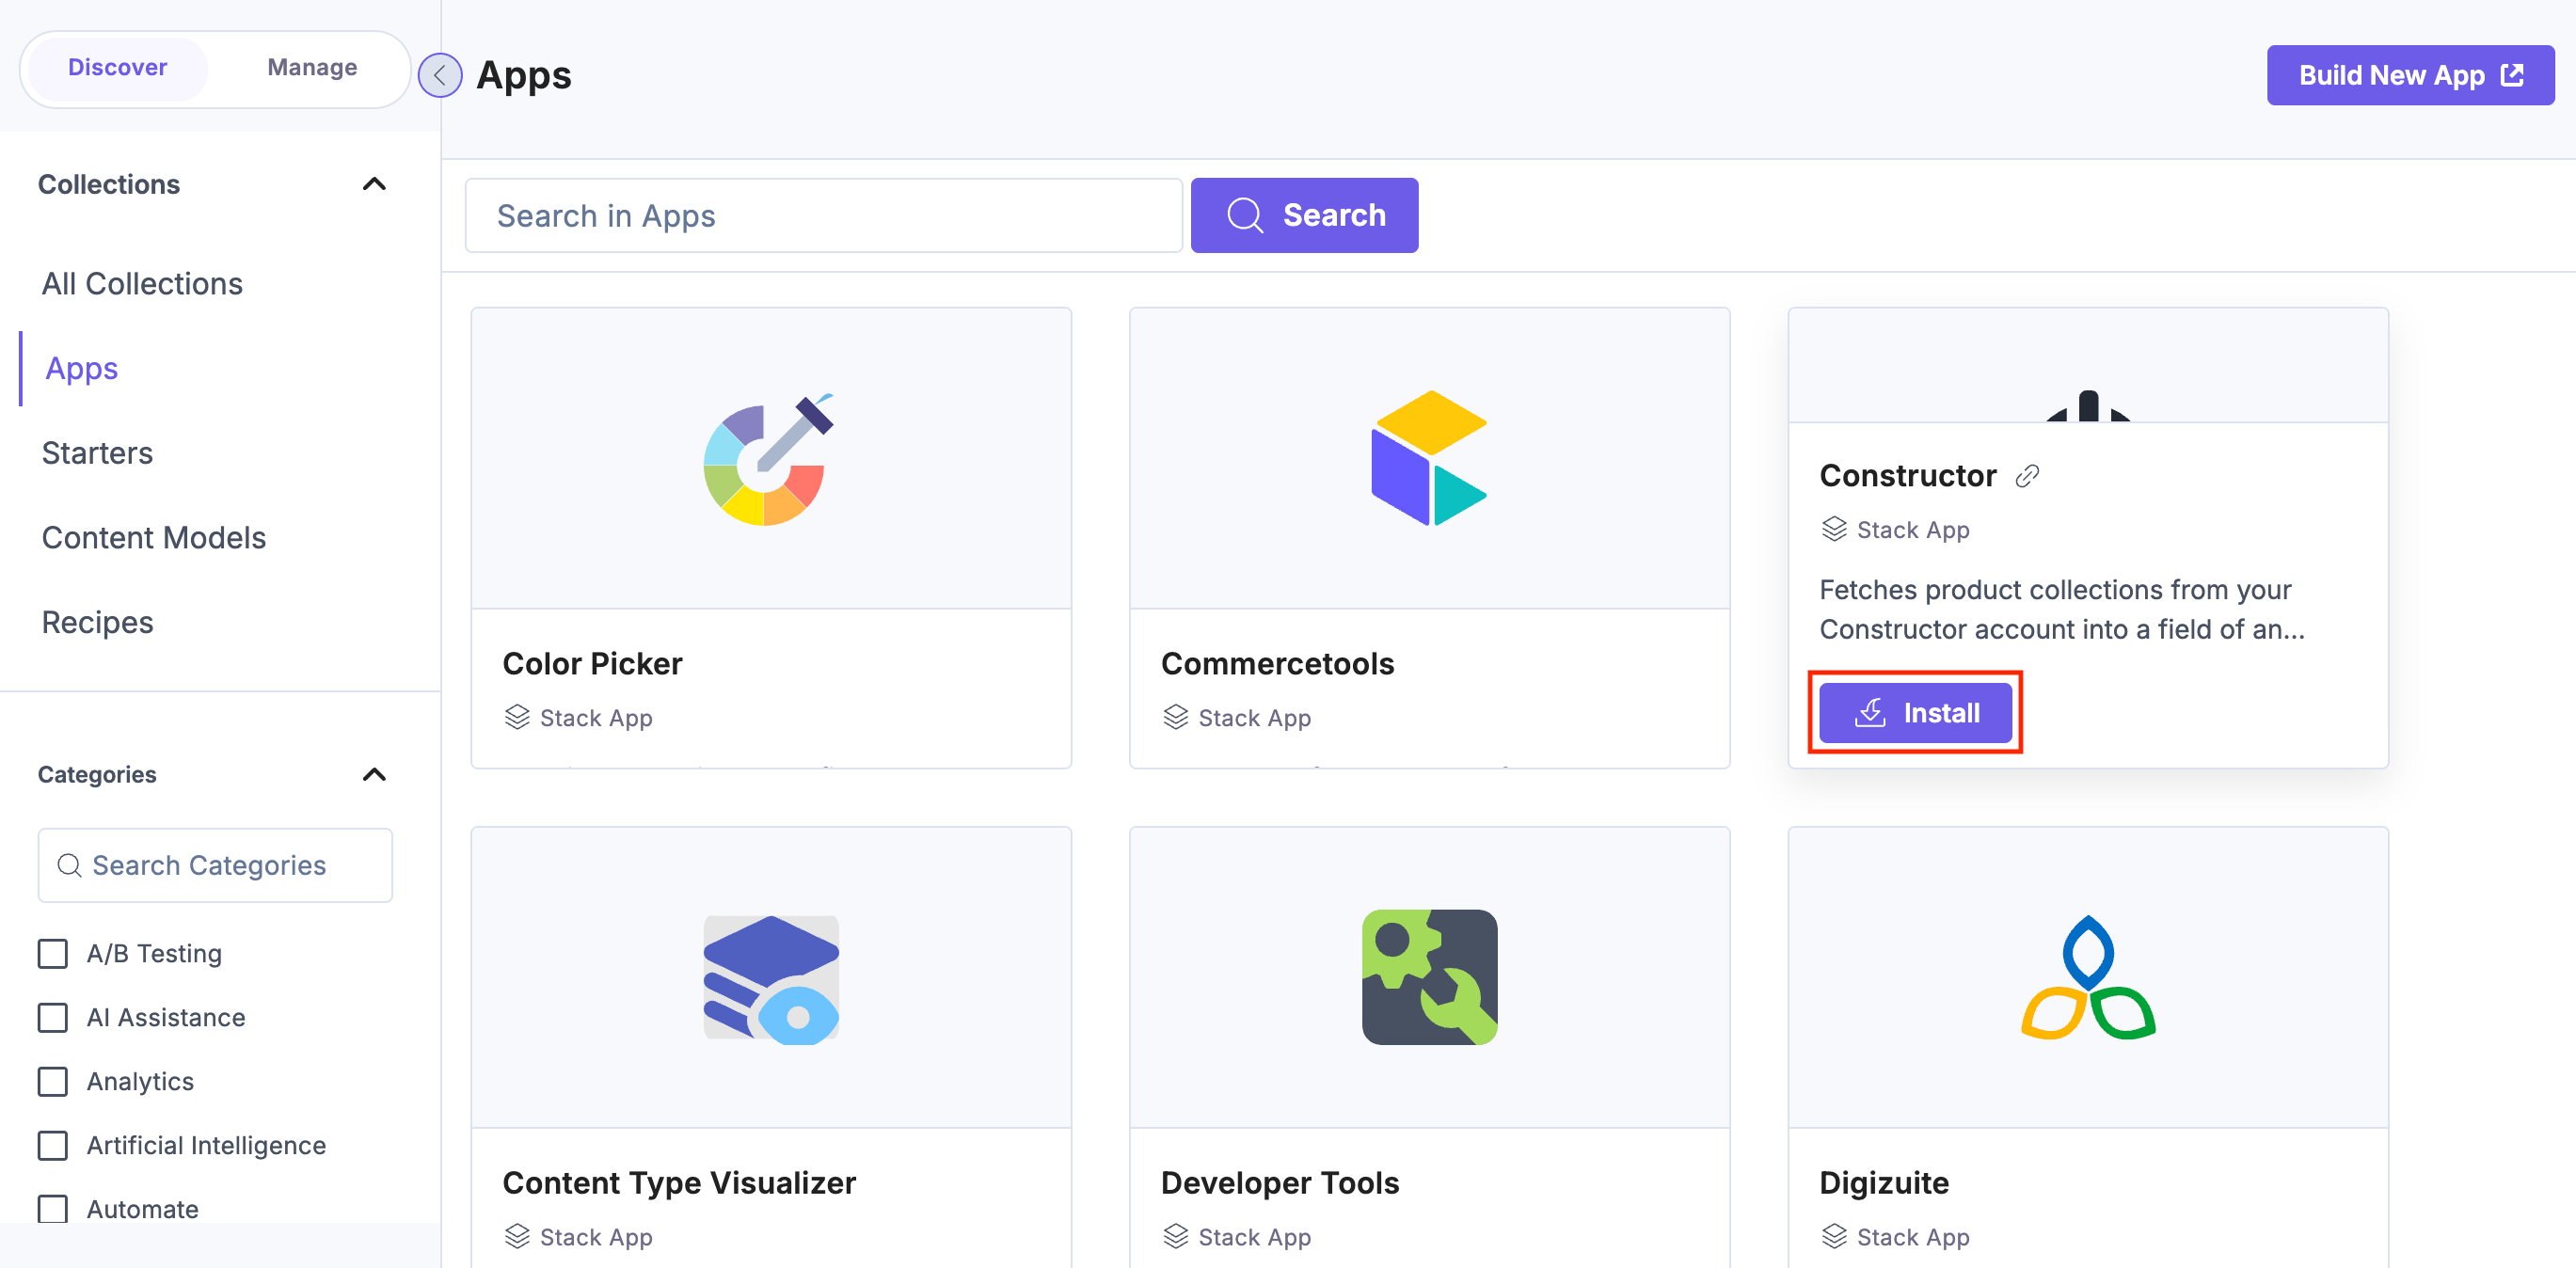
- In the left-hand side primary navigation, click the Marketplace icon.
- Click Apps from the left panel.
- Within the Marketplace, you can see the available apps. Hover over the Constructor app and click Install.
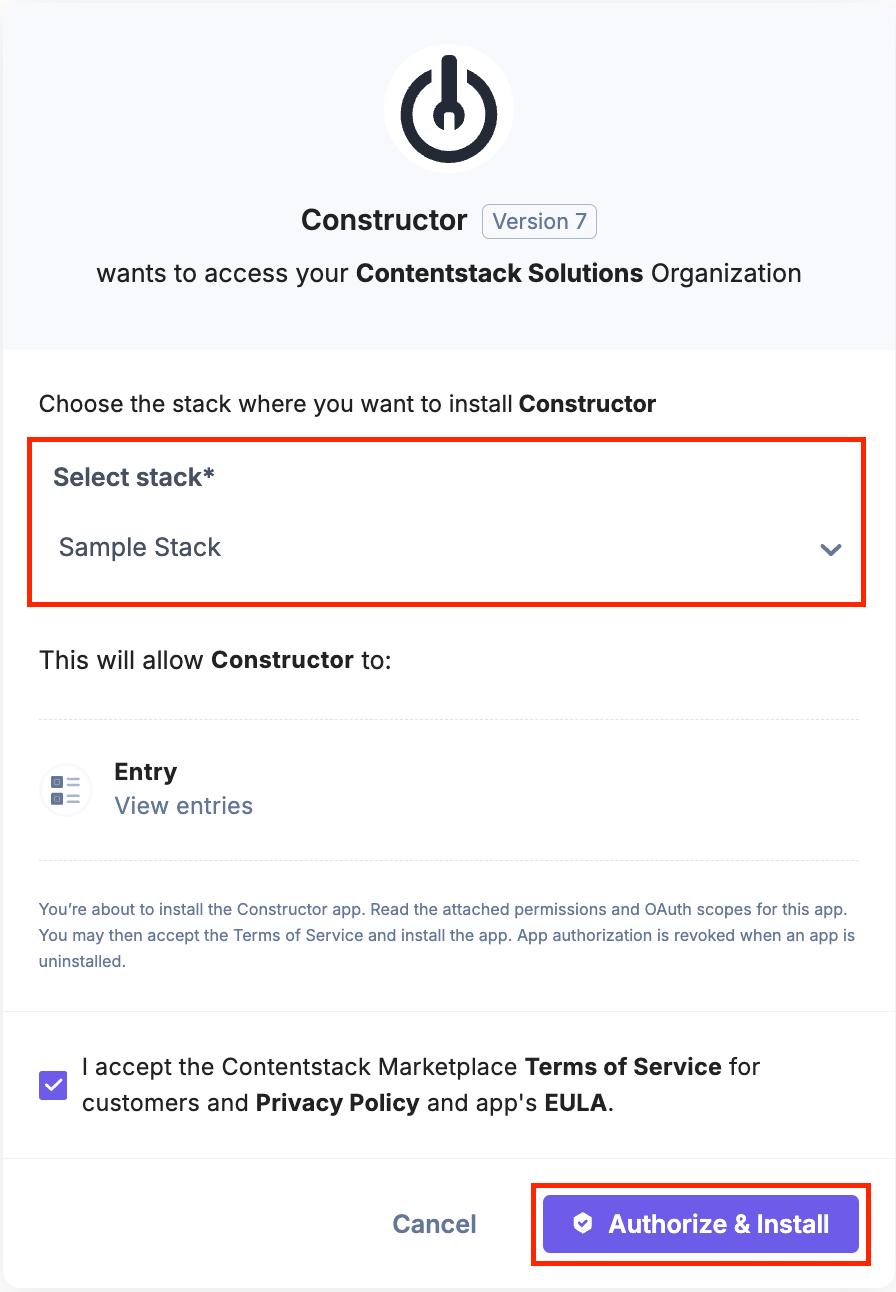
- In the pop-up window, select the stack where you want to install the Constructor app, accept the Terms of Service, and click the Authorize & Install button.
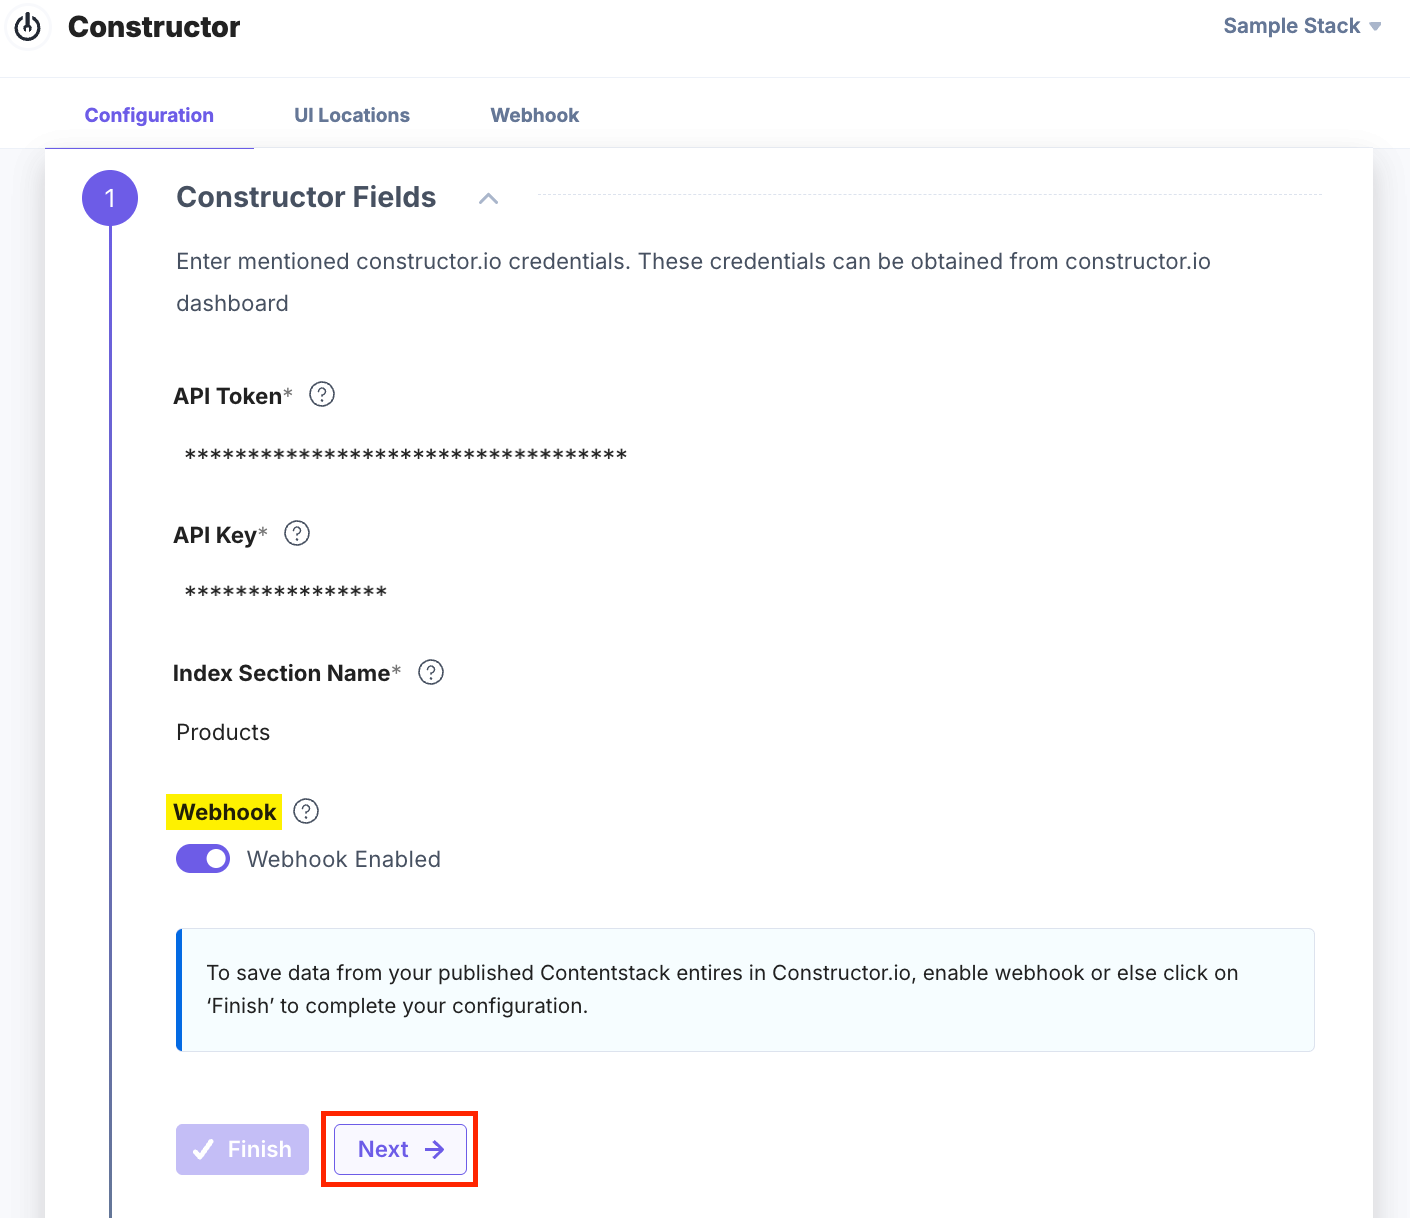
- On the Configuration screen, enter the API Token, API Key, and Index Section Name retrieved in step 1, and then click Finish.
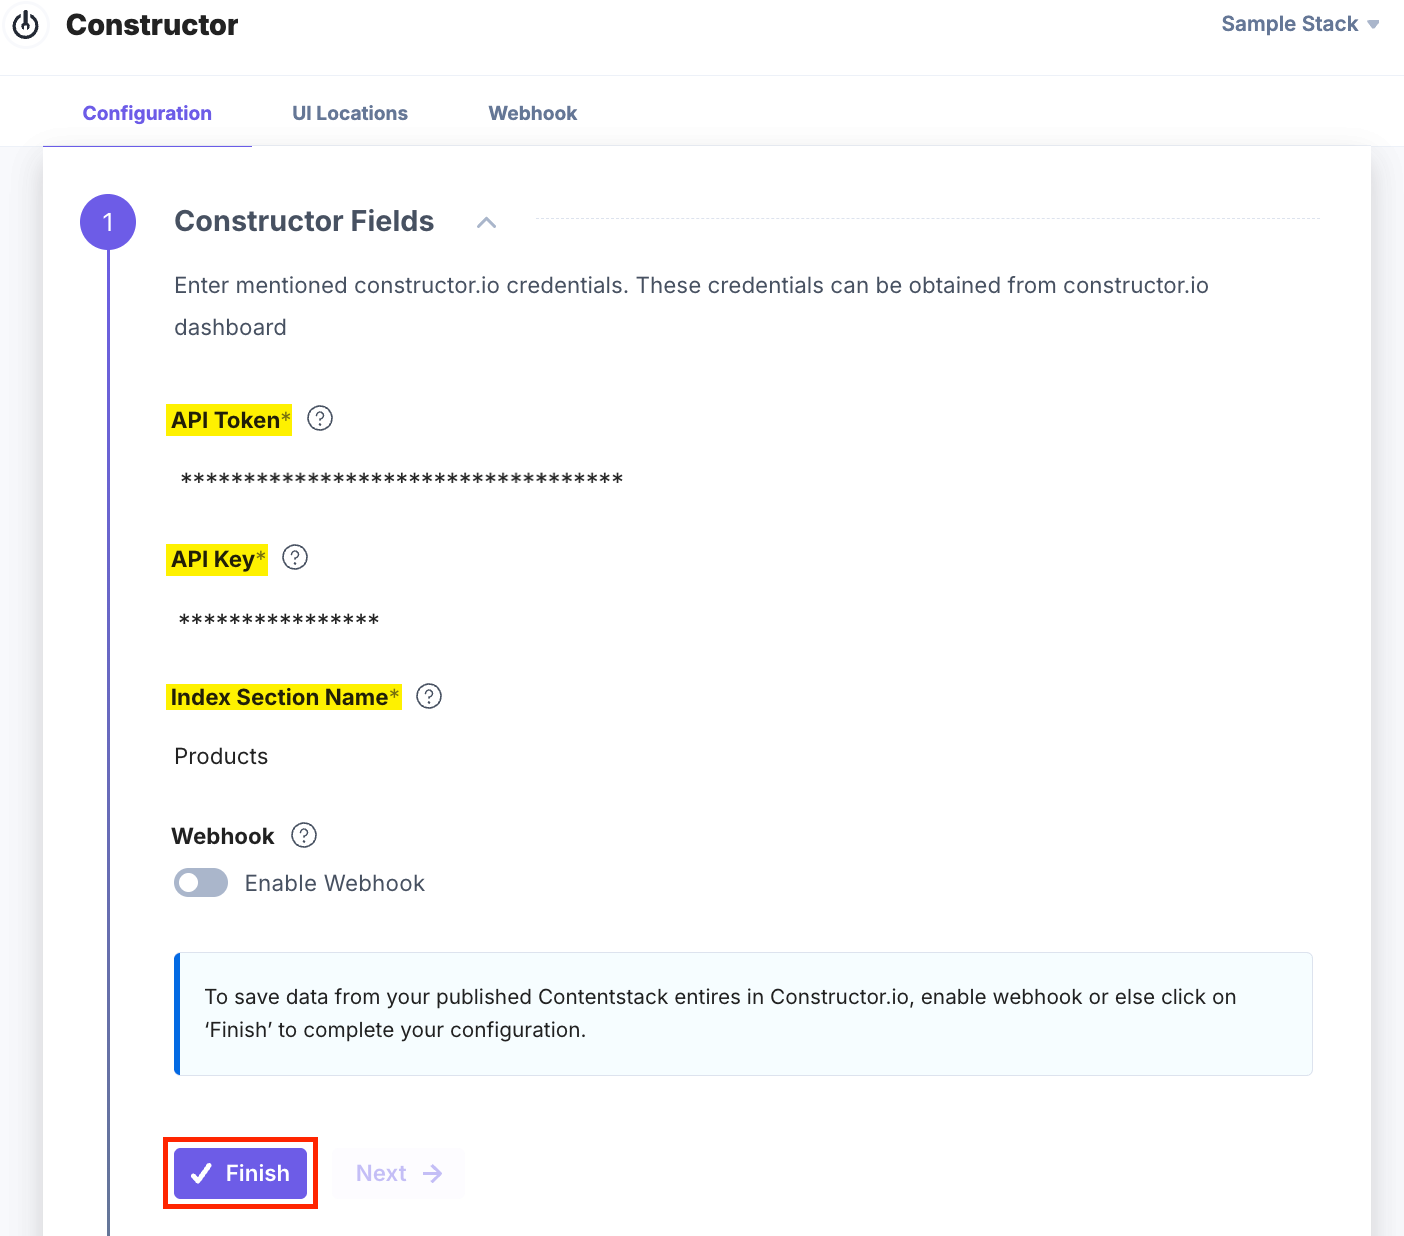
Additional Resource: If you want to save your published Contentstack entries in Constructor, then refer to the Map and Save Entries from Contentstack to Constructor section.
- After adding the configuration details, click the Save button.
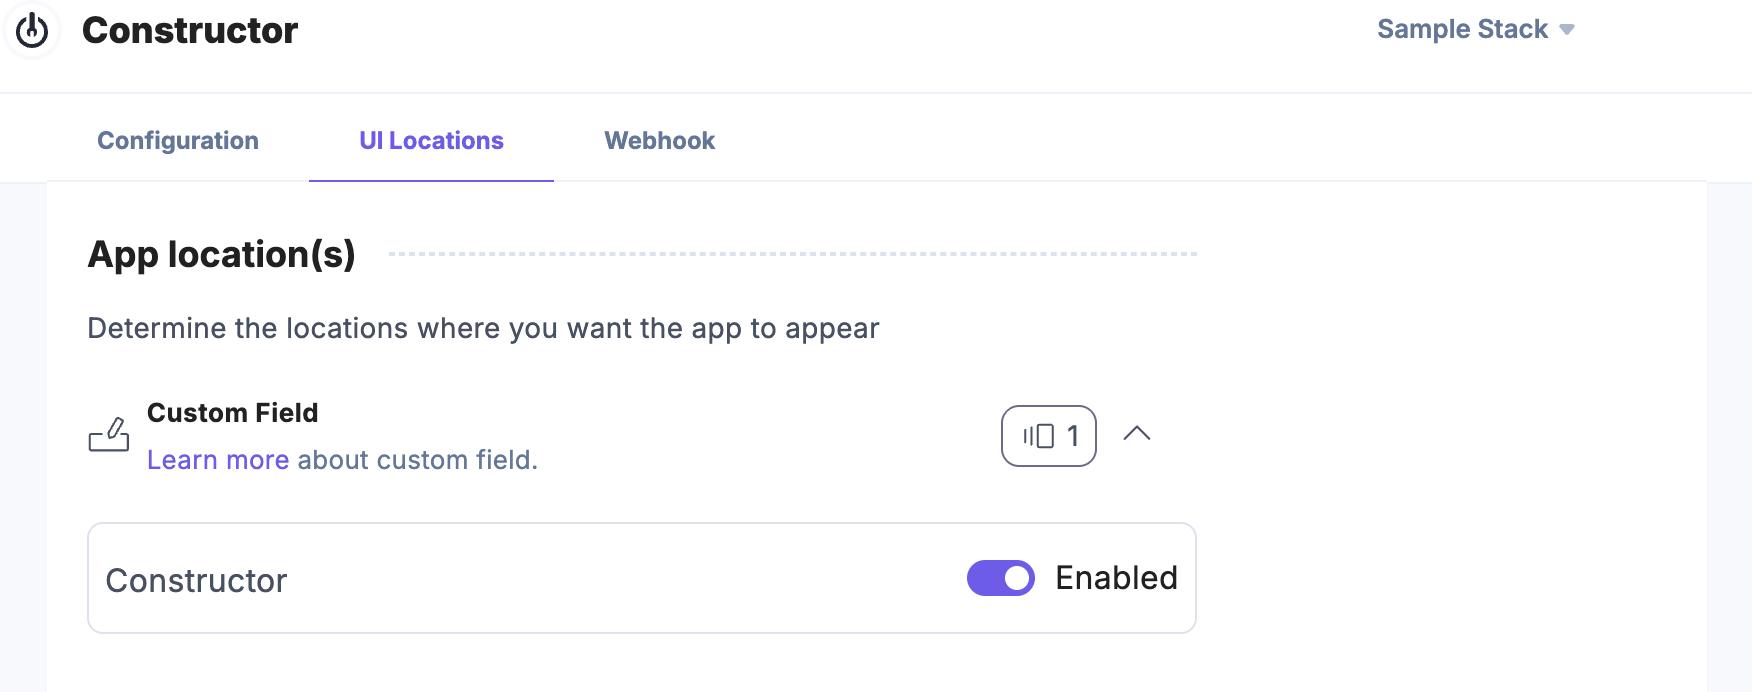
- On the UI Locations tab, you can see the predefined app location (Custom Field Location). You can use the toggle button to enable or disable it based on your requirements.
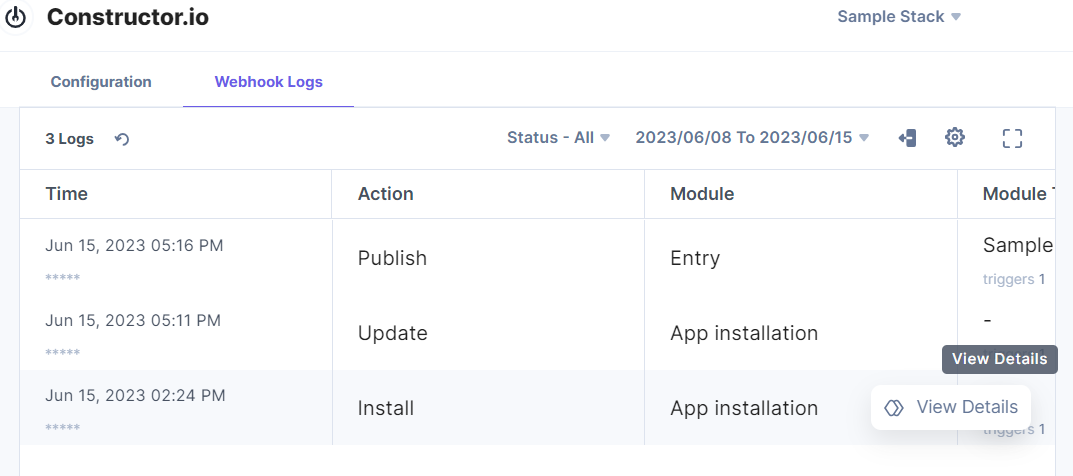
- If the webhook is enabled for your app, you can view the webhook logs under the Webhook tab.
Additional Resource: For more information on UI location and webhooks, please refer to the Installed Apps guide.
- Click Open Stack to start using the Constructor app.
- In the left-hand side primary navigation, click the Marketplace icon.
Map and Save Entries from Contentstack to Constructor
Data mapping aligns fields from one database with their corresponding fields in another, establishing a connection that links the two sources.
Mapping Without Using the Mapper
To save data in Constructor without using a mapper, your content type schema in Contentstack must match the Constructor schema. Add fields to your content type with UIDs that match the field names listed in the BODY PARAMS section of the Create or replace items document.
Note: If you provide data that does not match the supported data types in Constructor fields, an error appears in the webhook logs and the published entry will not be saved.
Your content type must include the name field, matching the Constructor's name field. If this field is missing, the entry data cannot be saved in the Constructor.
Warning: The item_name field UID is deprecated and renamed as name.
Mapping Using the Mapper
When your content type schema does not match the Constructor schema, map each field in your content type to the corresponding field in Constructor.
To map and save data from your published Contentstack entries in Constructor, follow the steps:
- On the Configuration screen, after adding the credentials in step 3, enable Webhook using the toggle button and click Next.
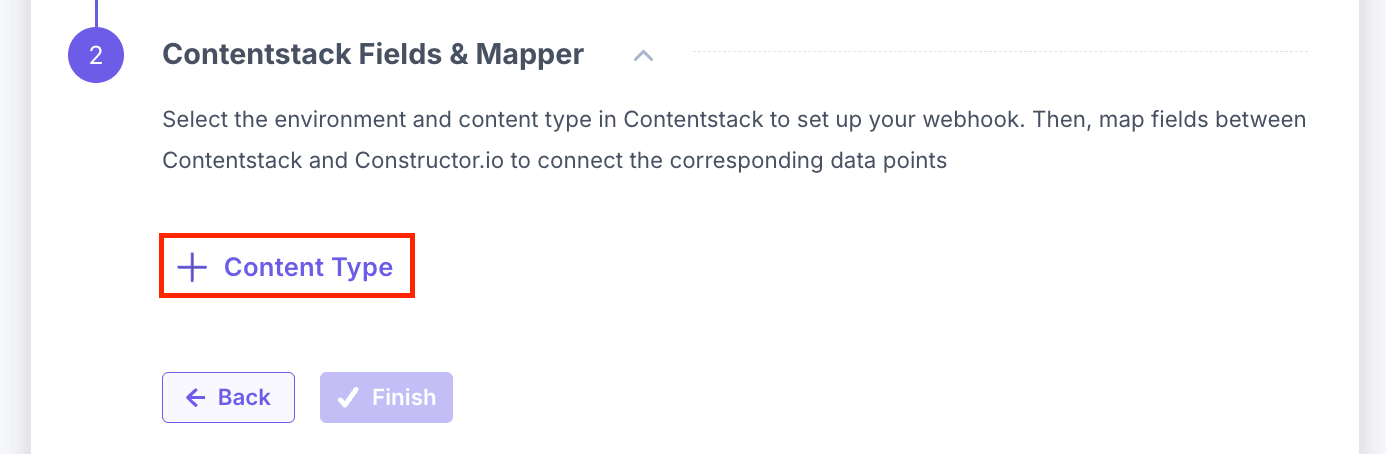
- In the Contentstack Fields & Mapper, you can add multiple content types by clicking + Content Type to map fields between Contentstack and Constructor.
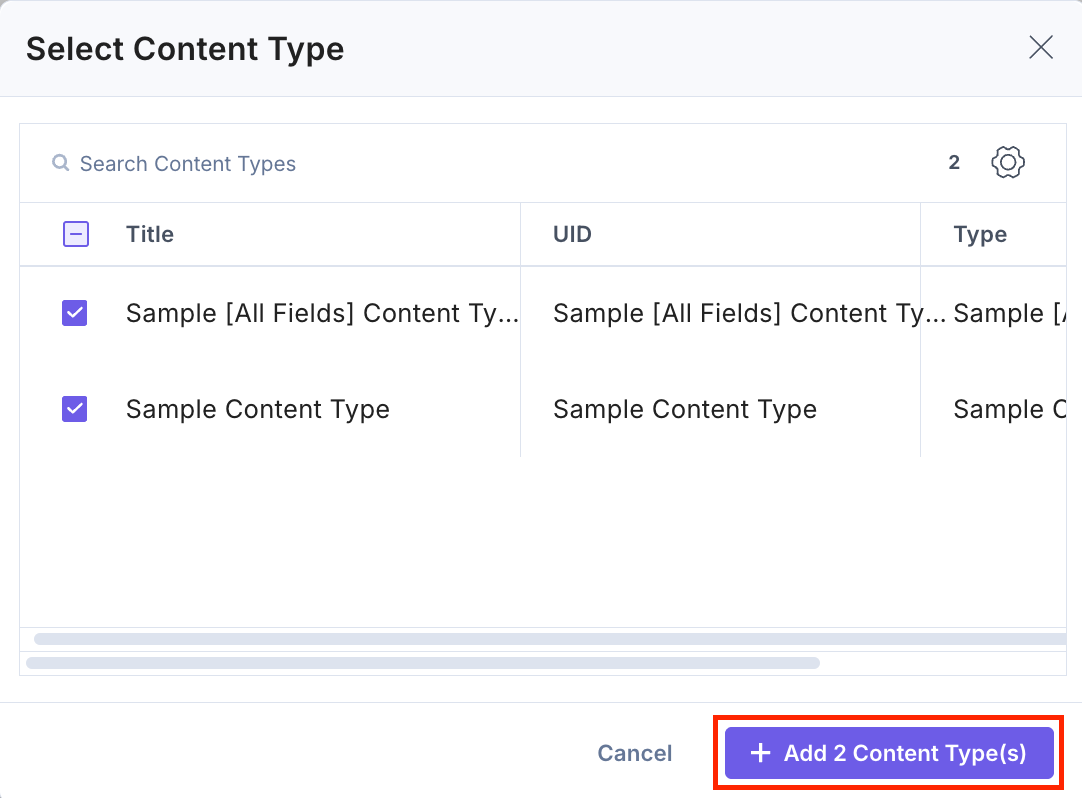
- In the Select Content Type modal, select the content types and click the + Add Content Type(s) button.
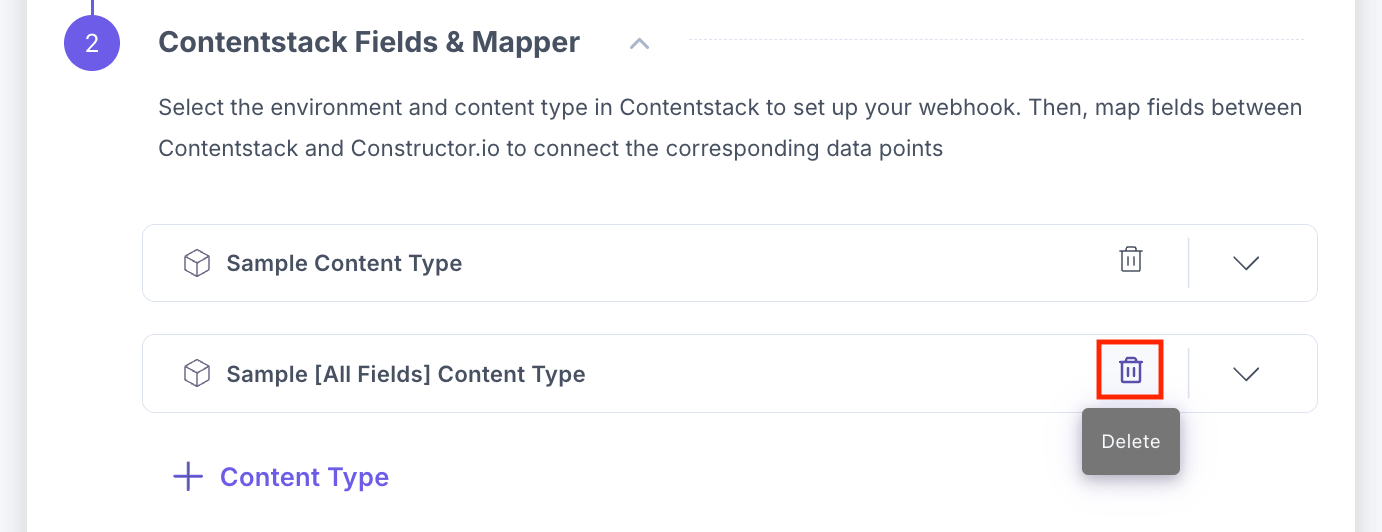
Content types are added to the configuration screen.
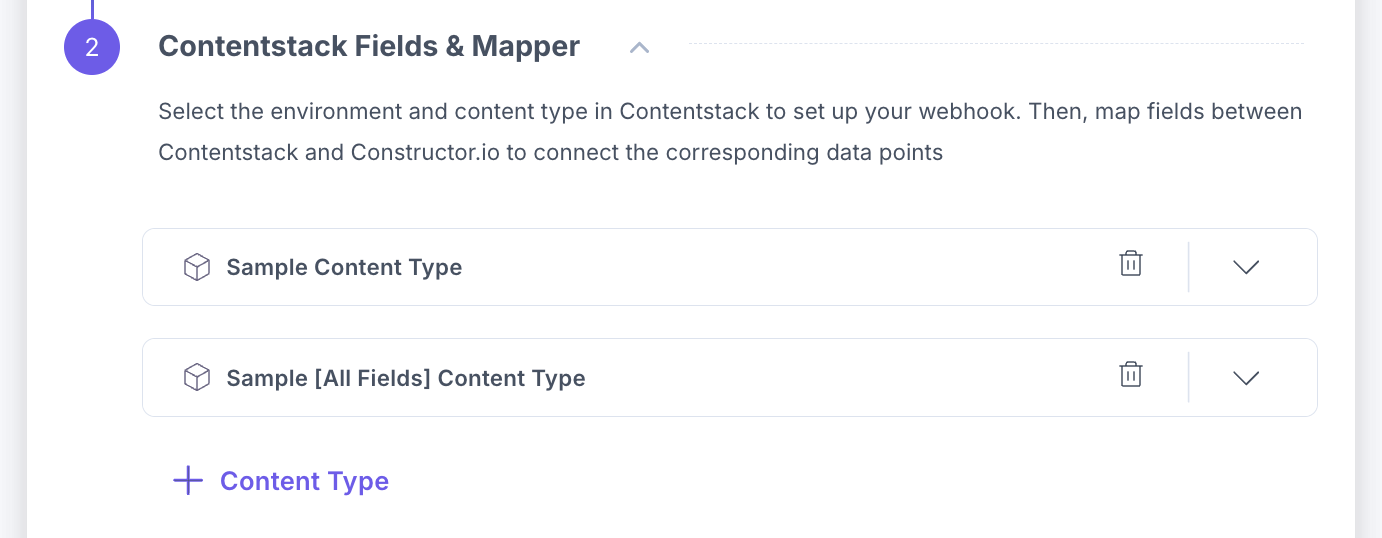
You can delete the content type by clicking the “Delete” icon.
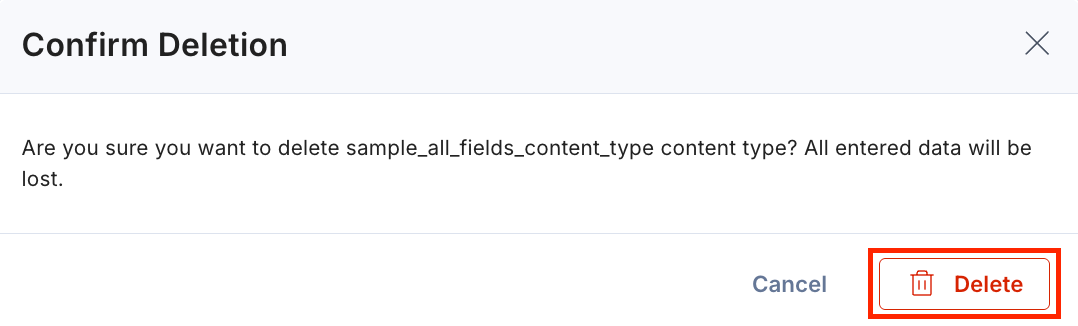
In the Confirm Deletion modal, click the Delete button to finally delete the selected content type.
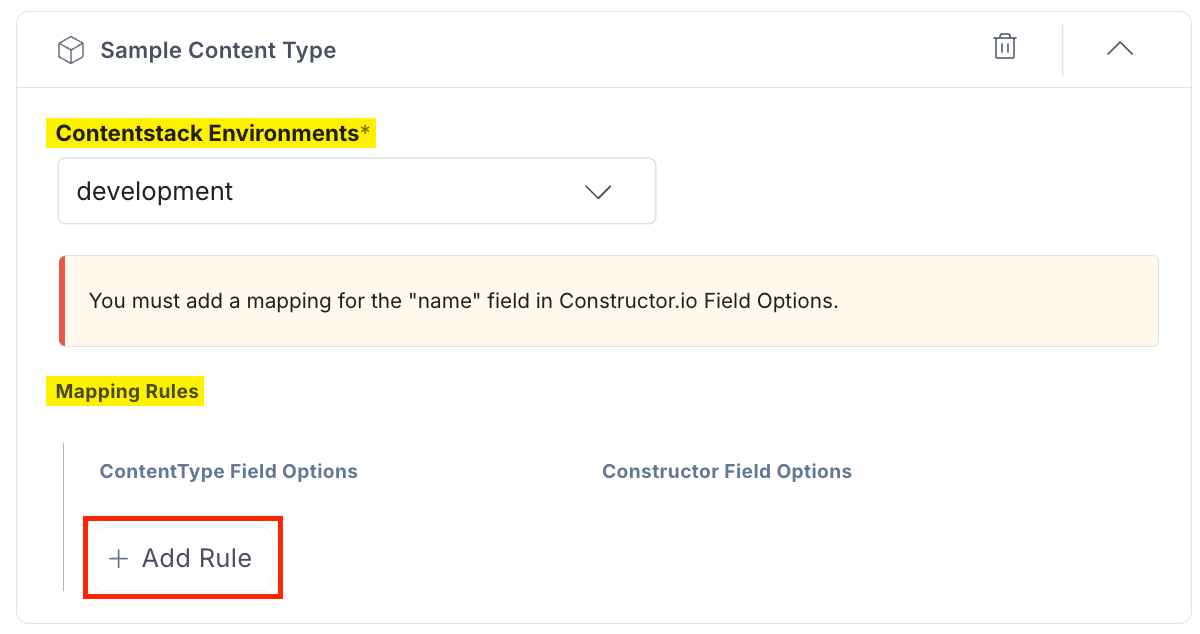
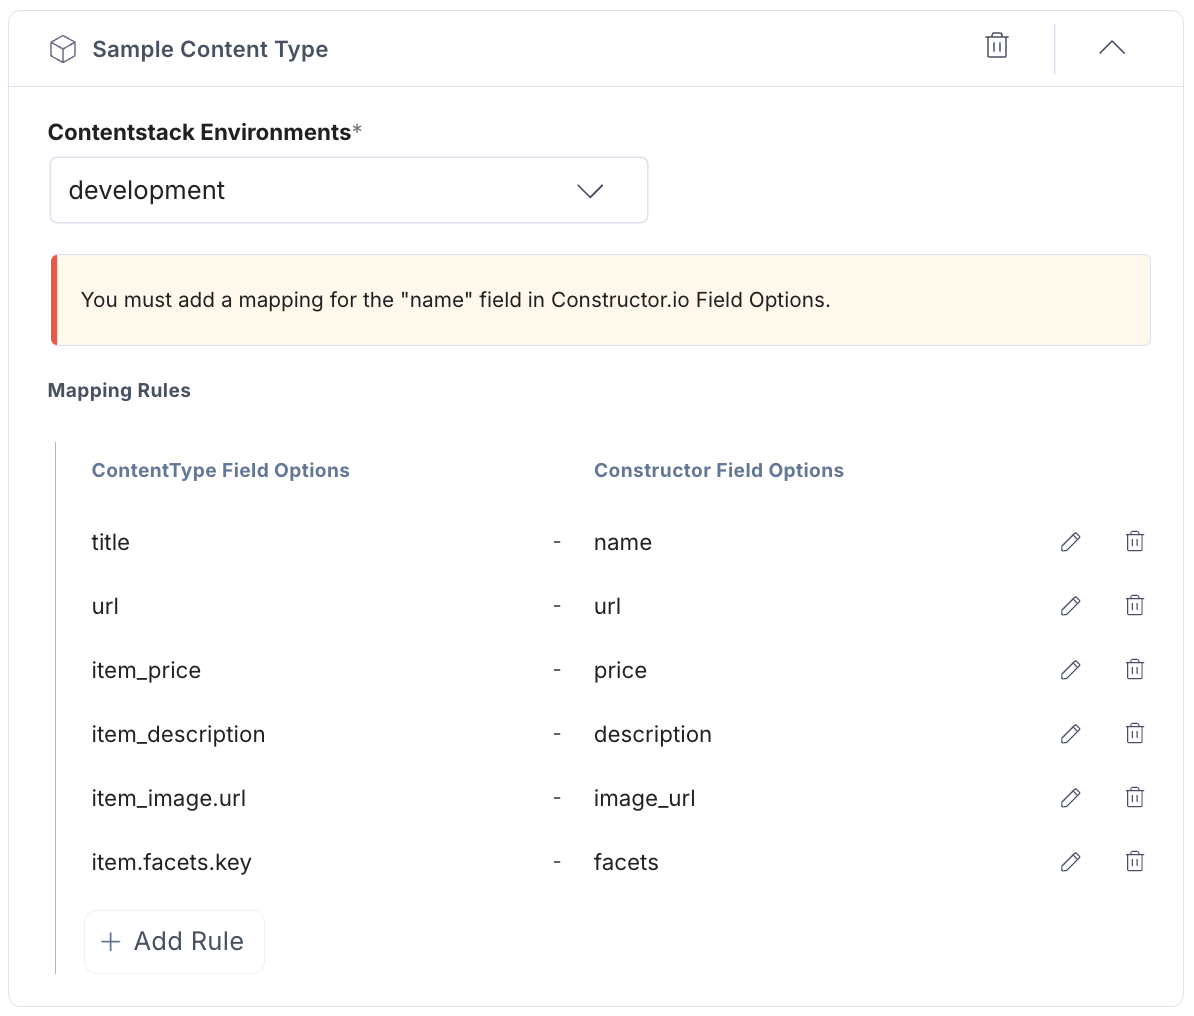
- Now, select the Contentstack Environments from the drop-down, and click + Add Rule to configure the Mapping Rules.
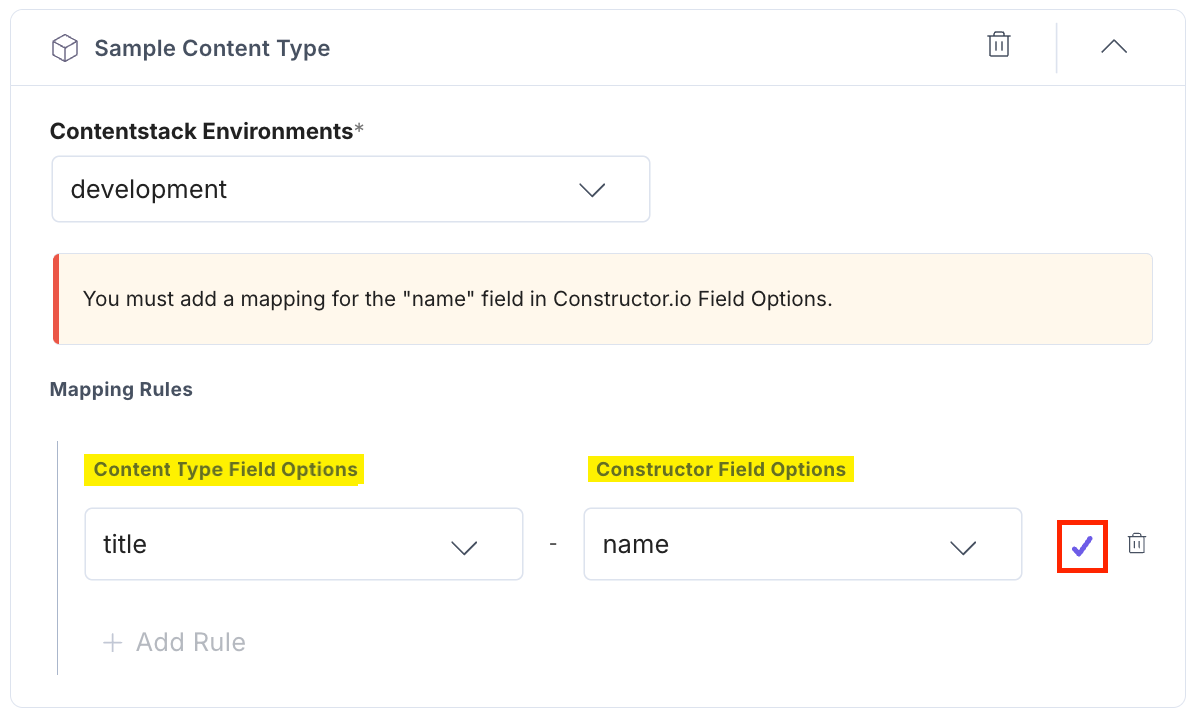
- Select the field in the Content Type Field Options, choose the corresponding field in the Constructor Field Options, and then click the “Check” icon to add the rule.
Note:
- When you add a mapping rule, it is mandatory to map Contentstack fields to the Constructor's name field. The Contentstack entry data will not be saved in Constructor if the field is not mapped.
- The Constructor item_name field is deprecated and renamed as name. New users can see the field name as name, but existing users can see item_name until the app is updated.
- You can also map nested or complex fields by clicking the + New Field option.
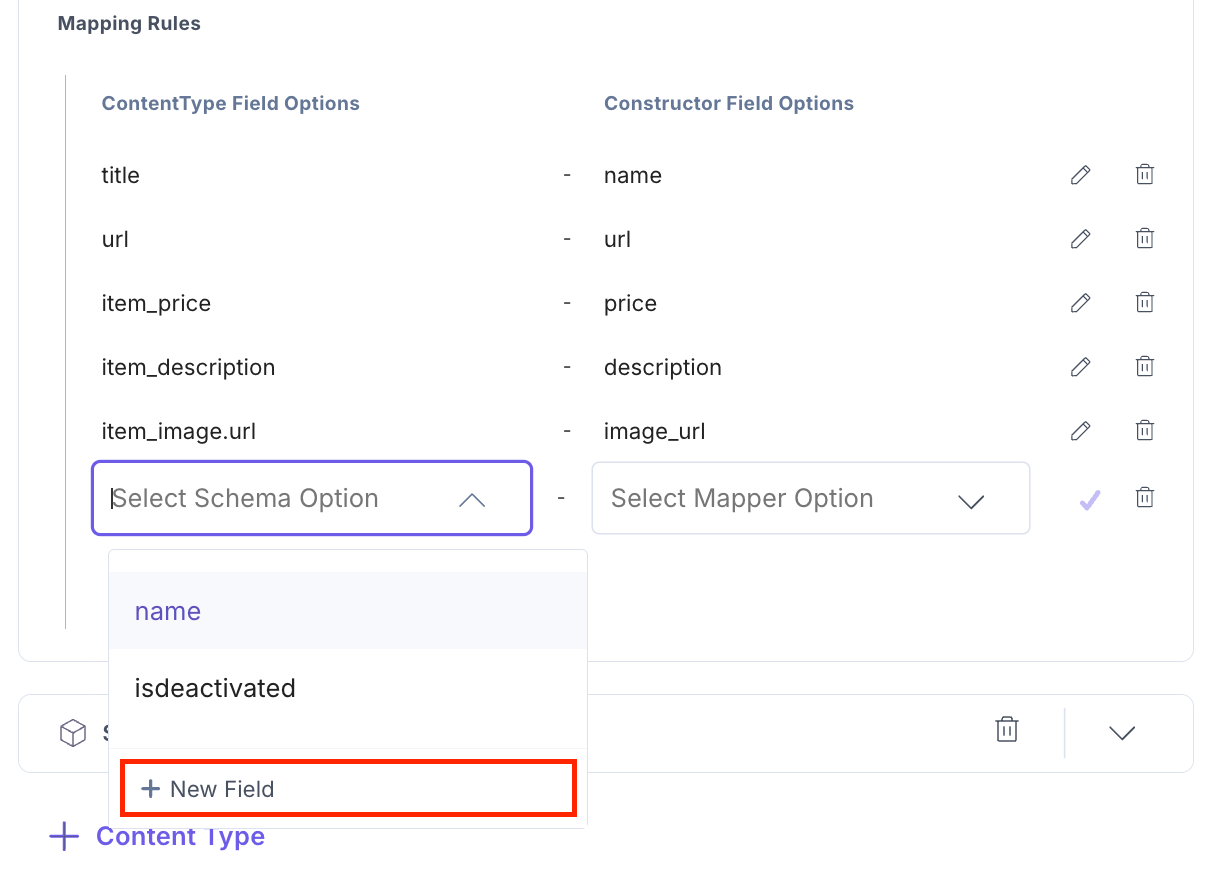
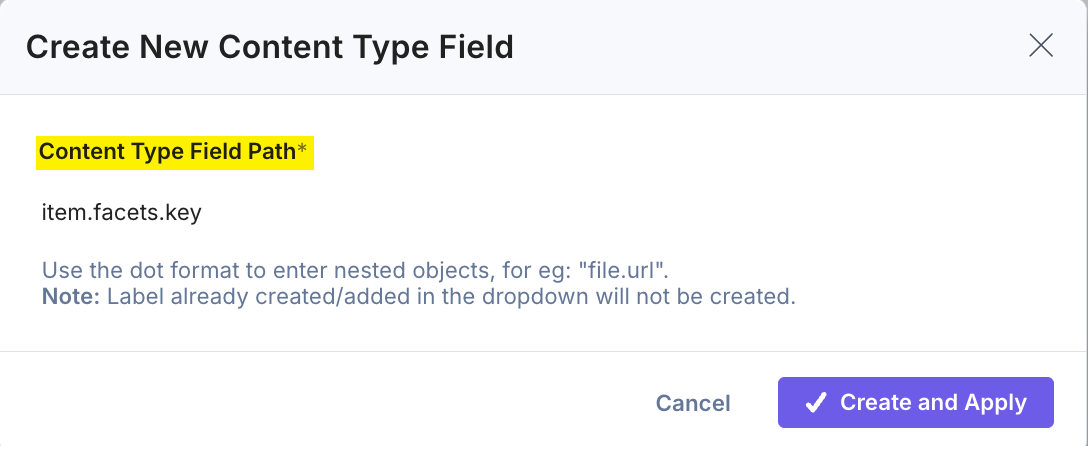
- In the Create New Content Type Field modal, add the key in the Content Type Field Path textbox and click Create and Apply to add the field in the mapper.
Tip:
- While mapping nested fields, you must specify the object and its field using the dot (.) notation. For example, Object.age for accessing the age field within the object.
- While mapping arrays, use indexing. For example, Array[1] for accessing the second value of an array.
- You can use the above rules to create mapping rules for complex structures that include objects and arrays.
Note: Similarly, you can also add new fields within Constructor by navigating to Workspace > Indexes. Select your index and click the corresponding Manage Searchability & Displayability option, and then click the + Add New button.
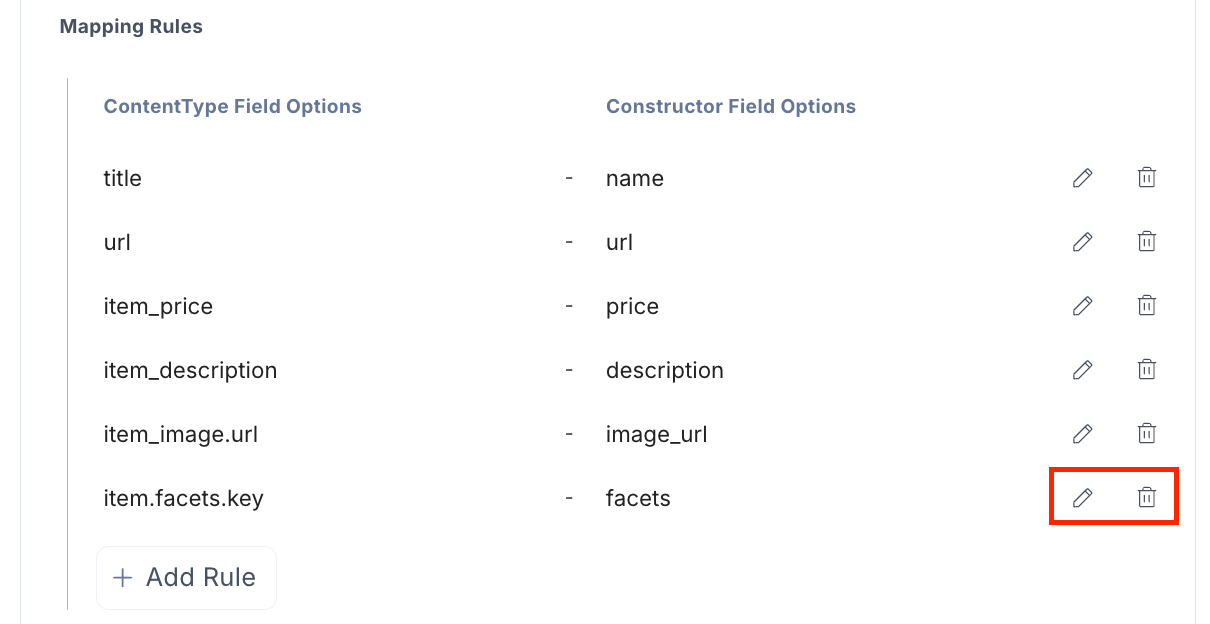
Content types are configured.
- You can edit or delete the rule by clicking the “Edit” or “Delete” icon.
Warning: Unpublishing or deleting an entry of the specified content type in Contentstack also removes its saved data from Constructor.
- After successfully setting up the fields and mapper, click Finish.
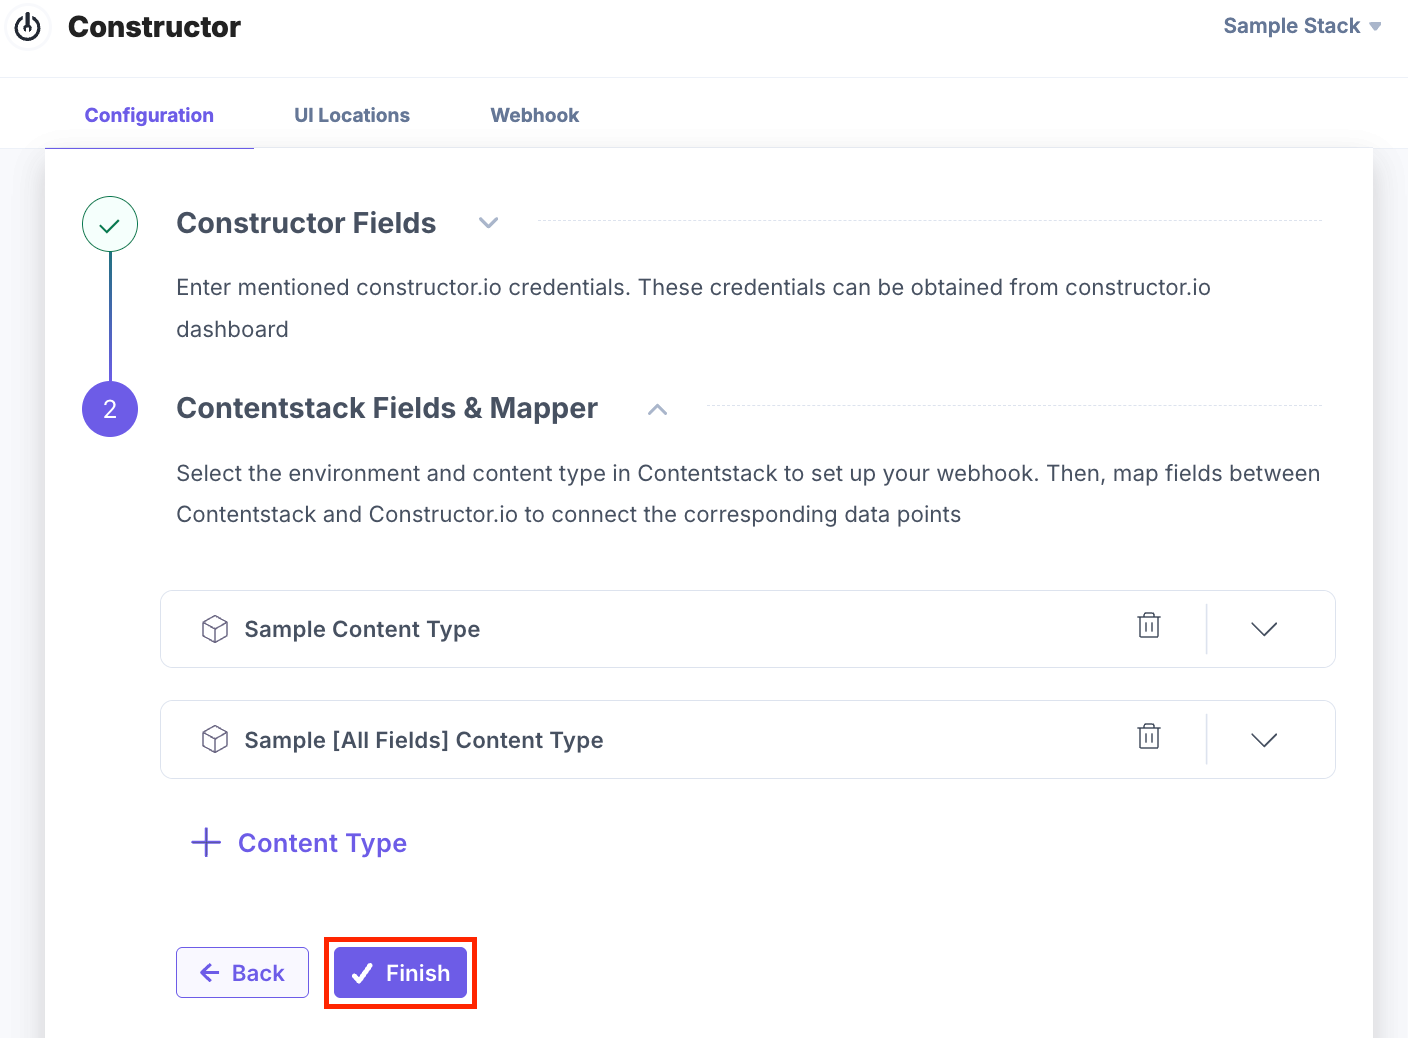
- Click Reset Configuration to reset the credentials and mapping.
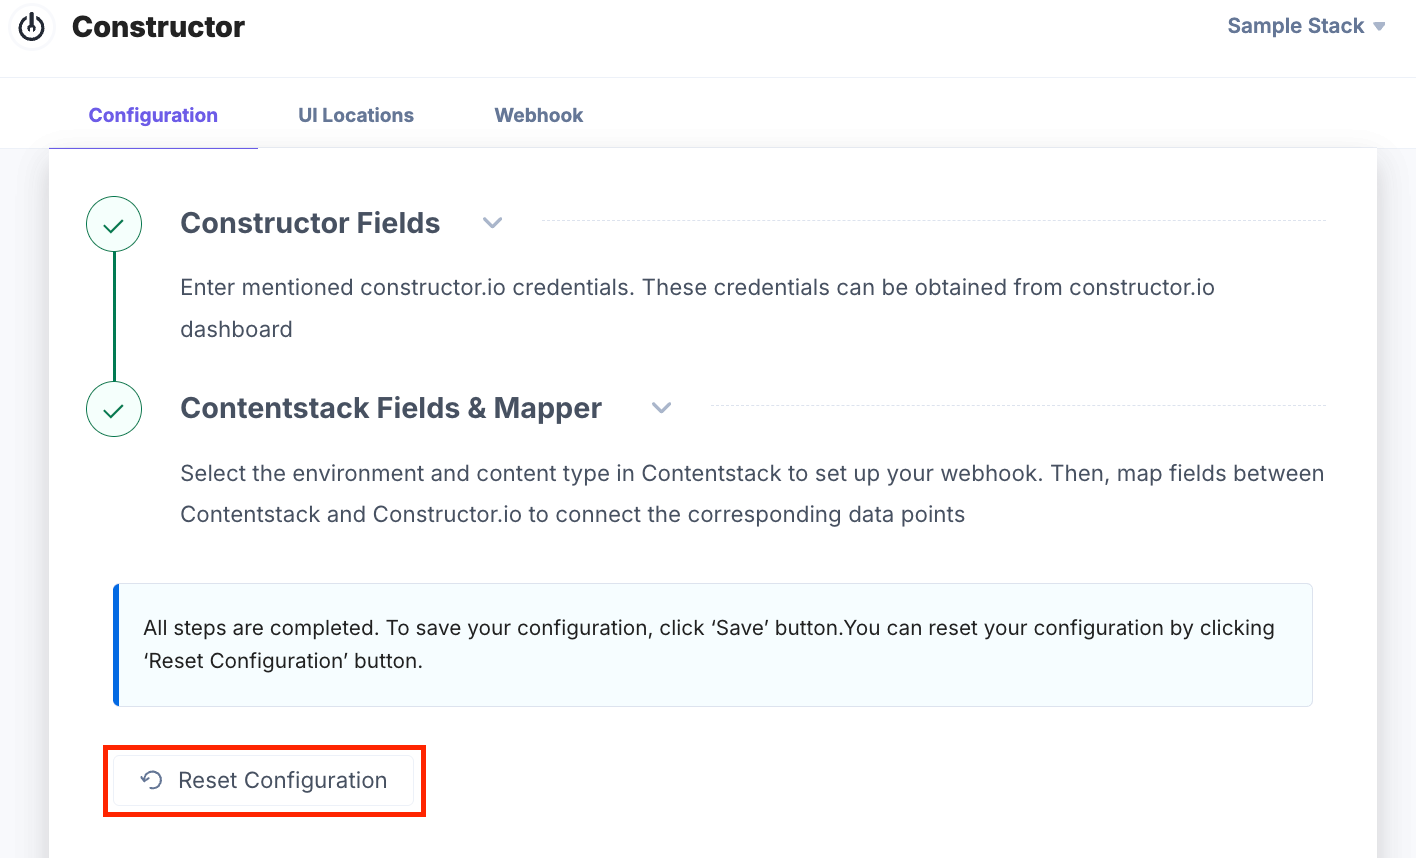
- Click Save to apply these configurations and start publishing entries from Contentstack to store them in Constructor.
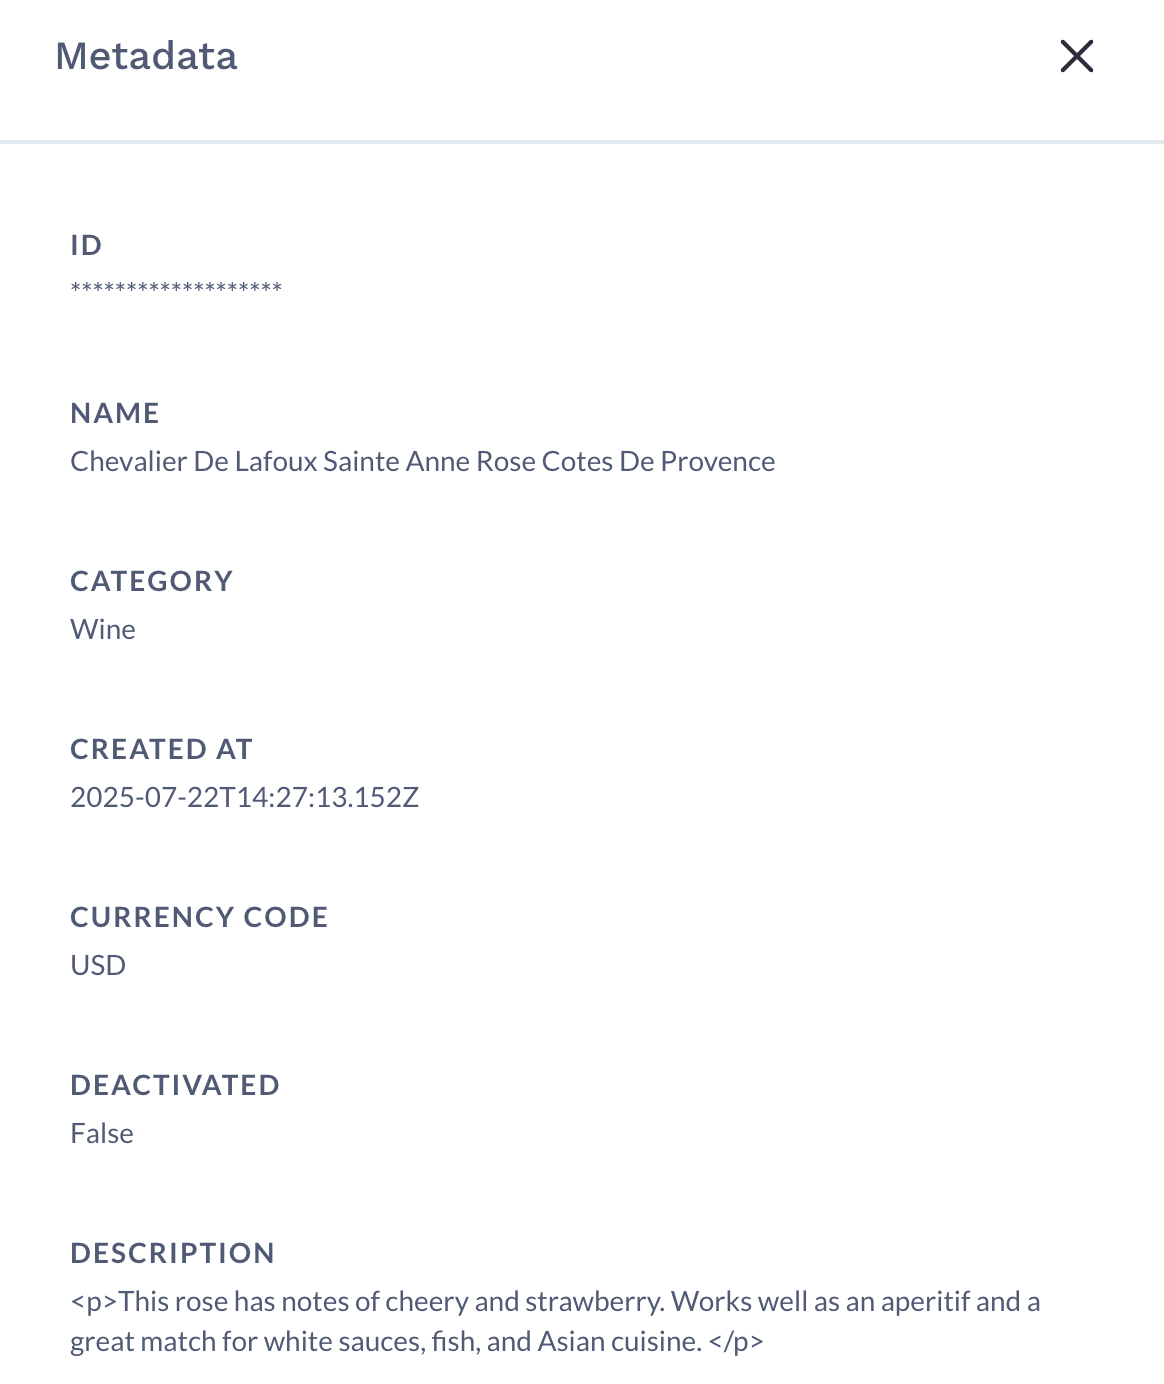
You can view your entry in the Constructor account.
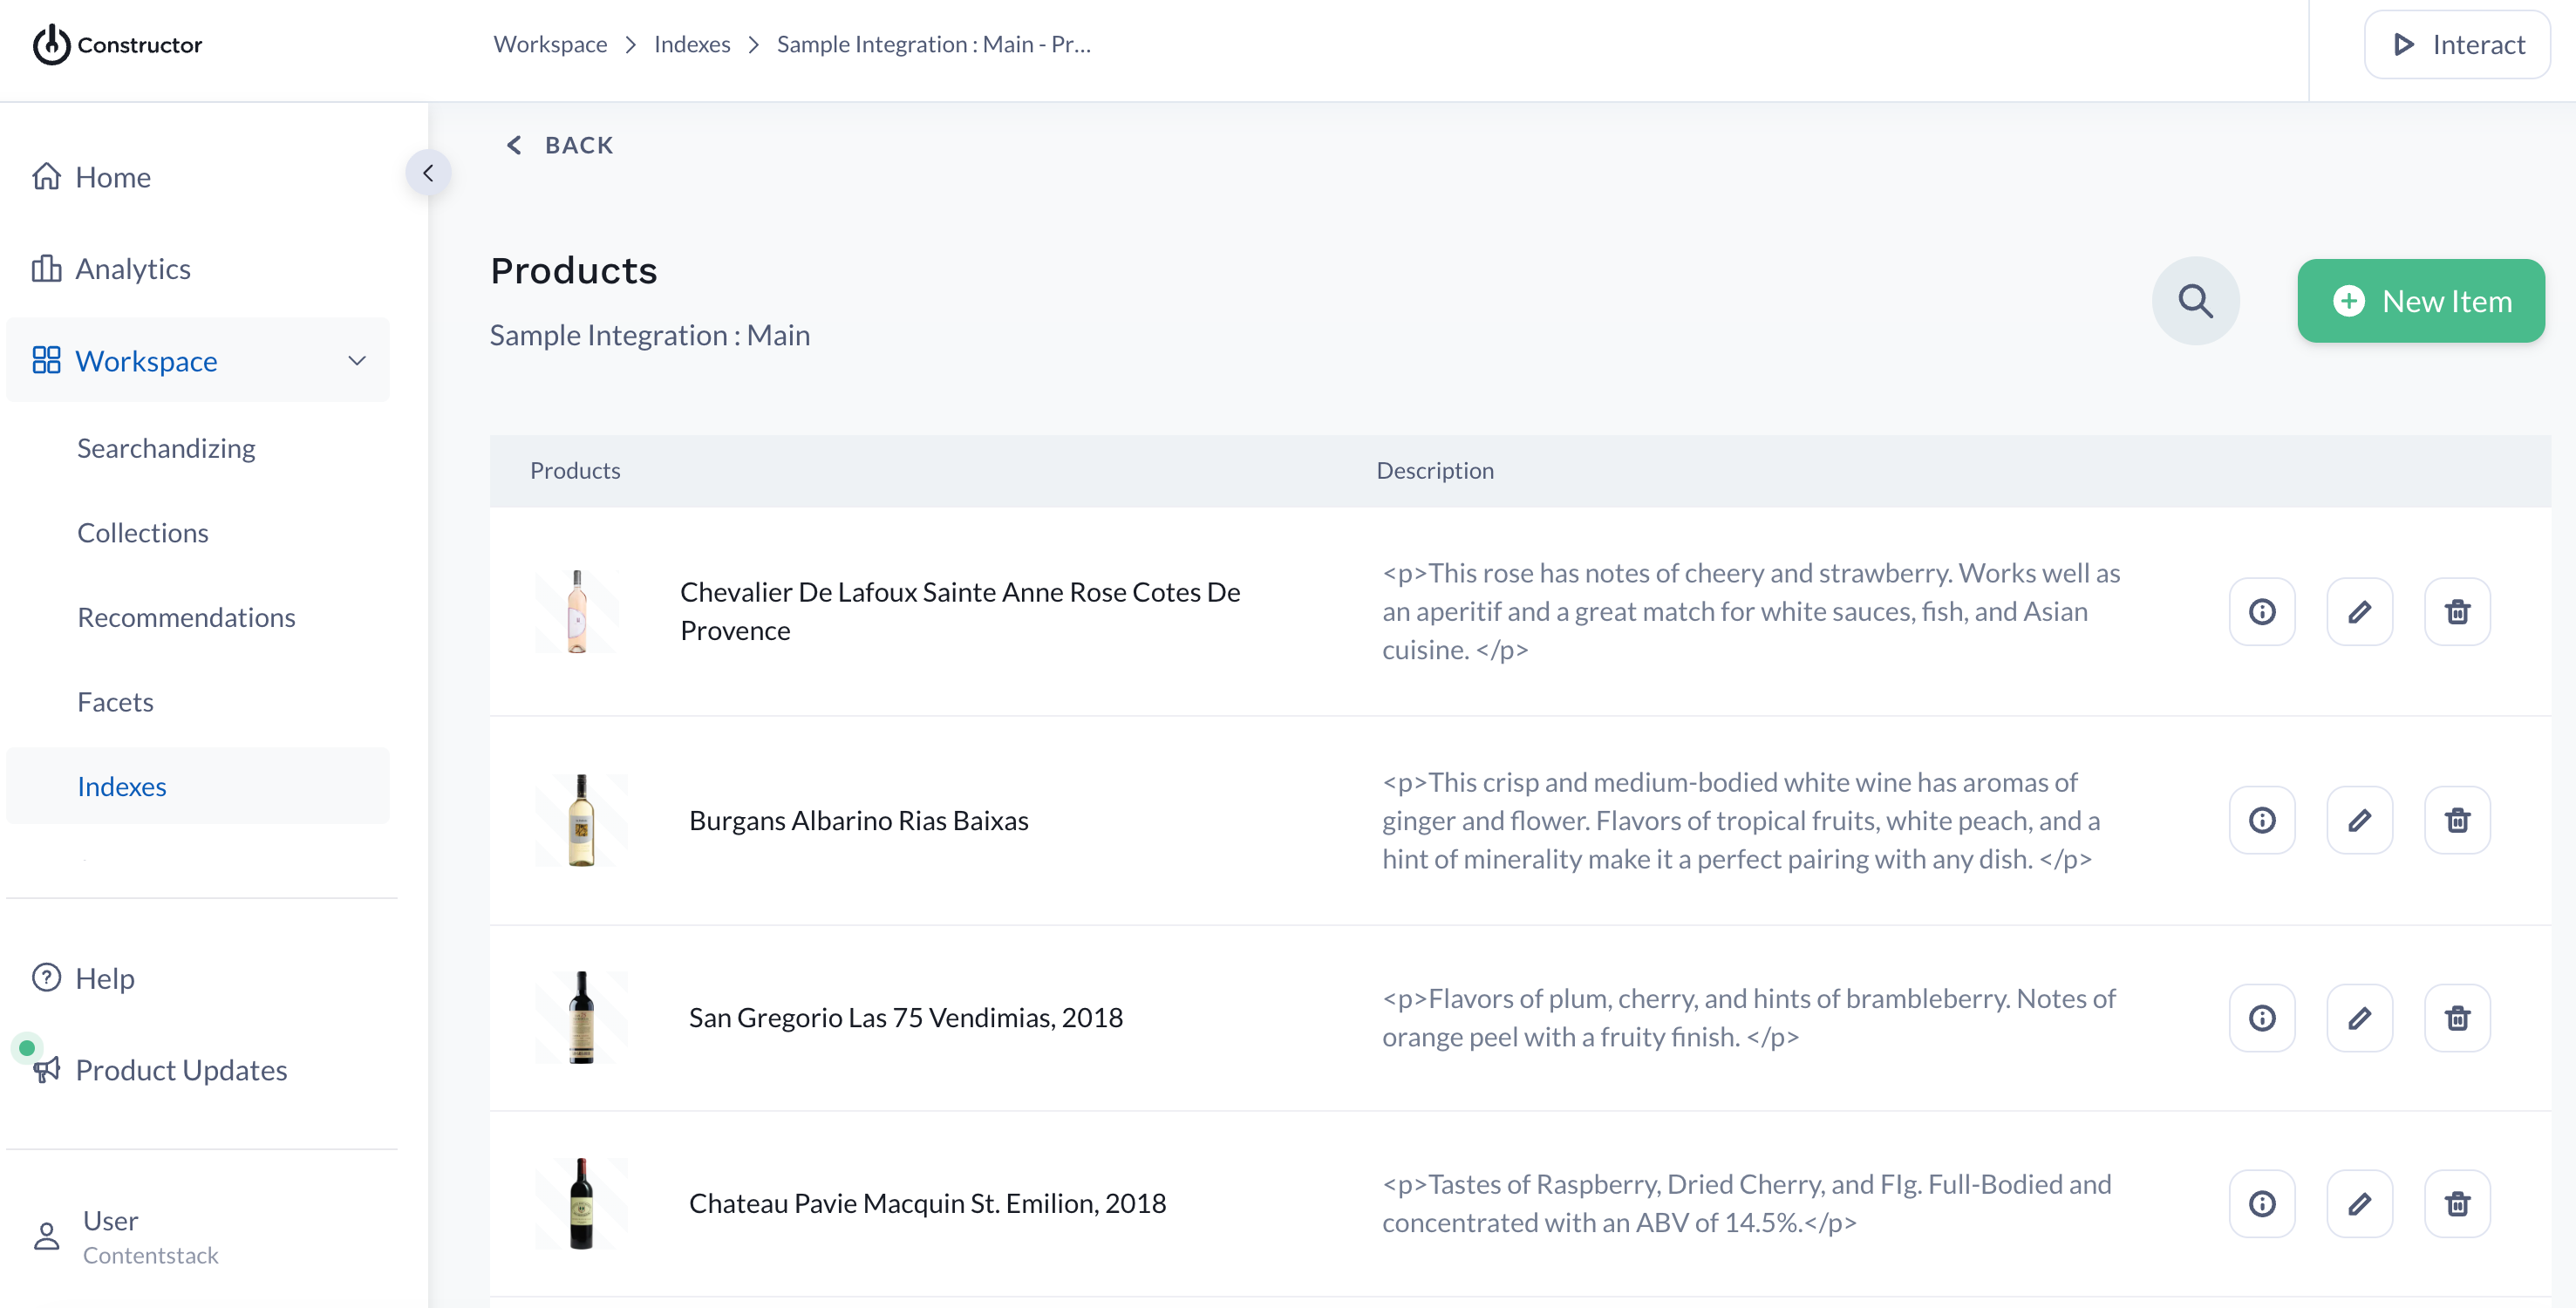
To view the entry metadata, click the "Info" icon.
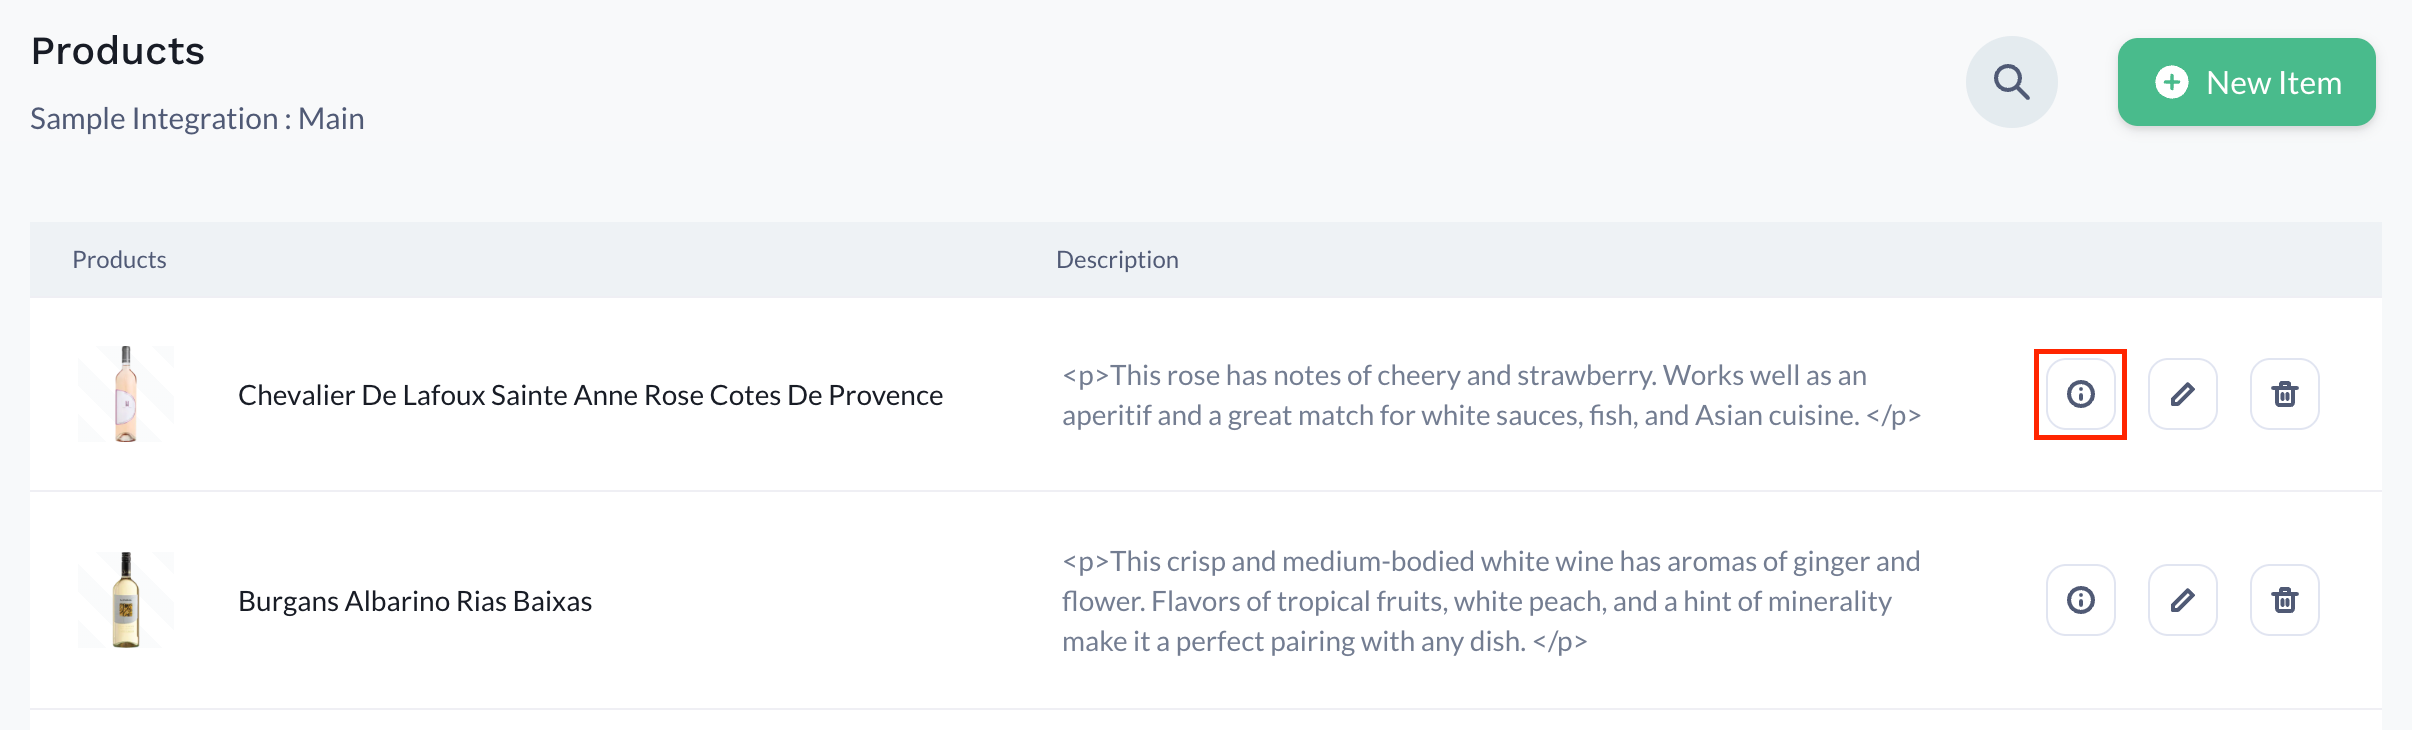
Metadata is displayed on the screen.
You can track the status of published, unpublished, or deleted entries in the webhook logs. The webhook logs also confirm if your credentials were saved successfully.
- On the Configuration screen, after adding the credentials in step 3, enable Webhook using the toggle button and click Next.
Use the Constructor App within your Stack
To use the Constructor app within an entry of your stack, follow the steps given below:
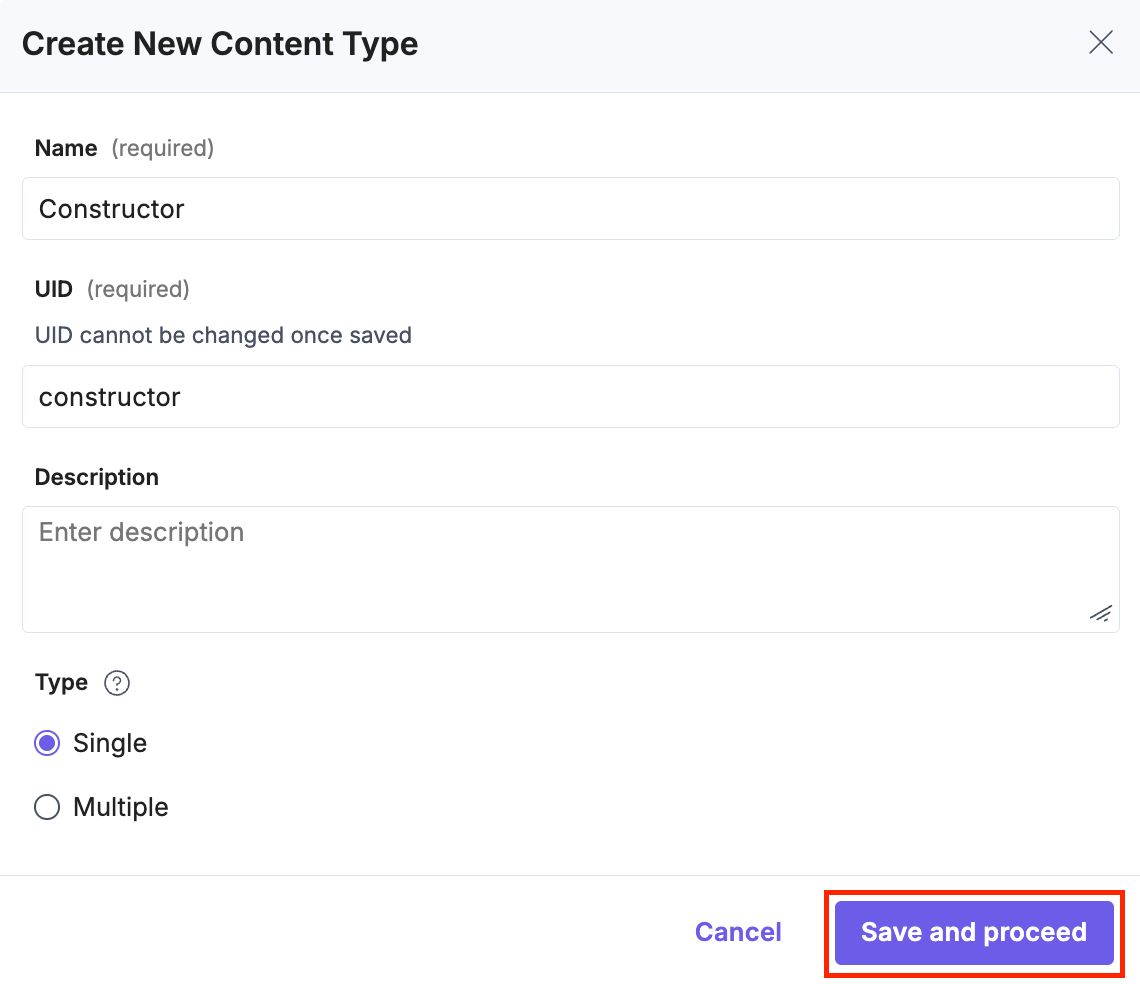
- Go to your stack, click the Content Models icon in the left navigation panel, and click the + New Content Type button.
- Create a content type by adding relevant details as displayed below:
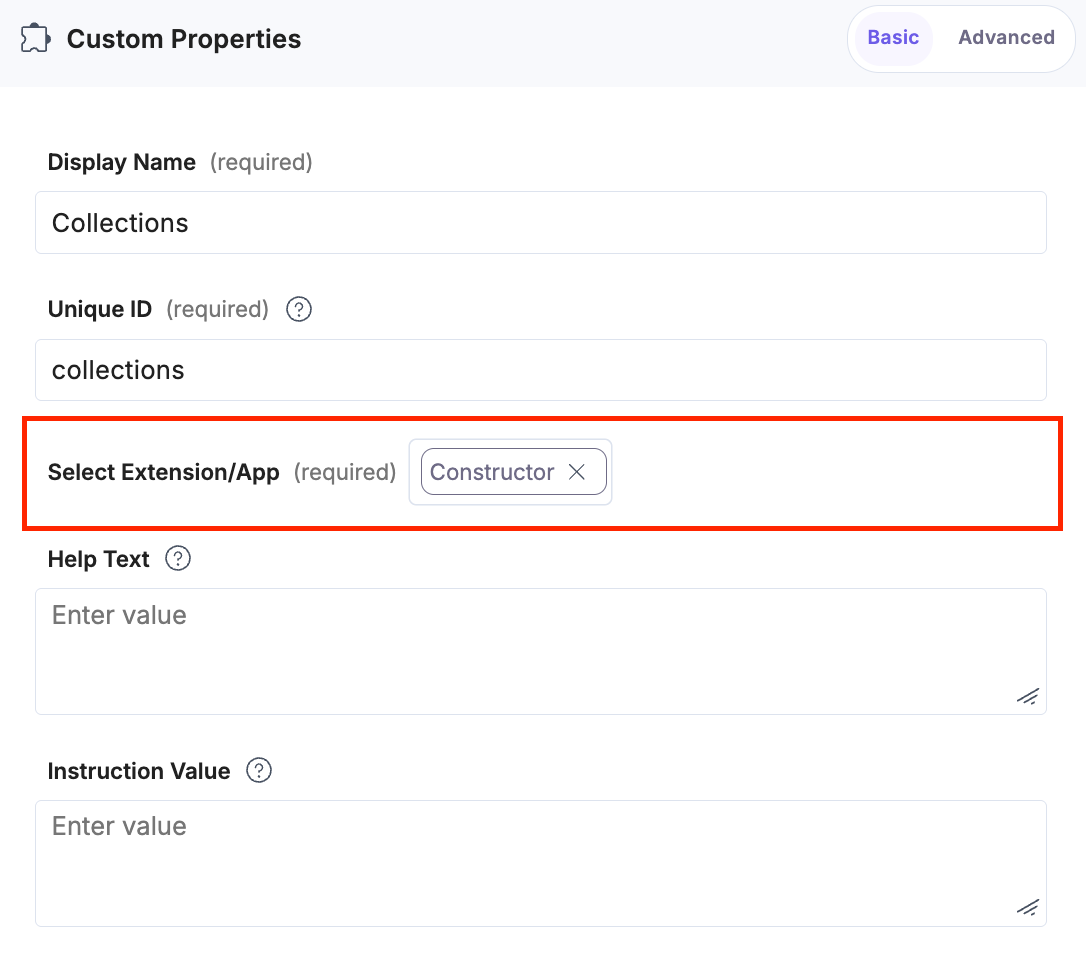
- In the Content Type Builder page, add a Custom field in your content type by clicking the Insert a field link represented by a + sign.
- Under Select Extension or App, select Constructor and click Proceed.
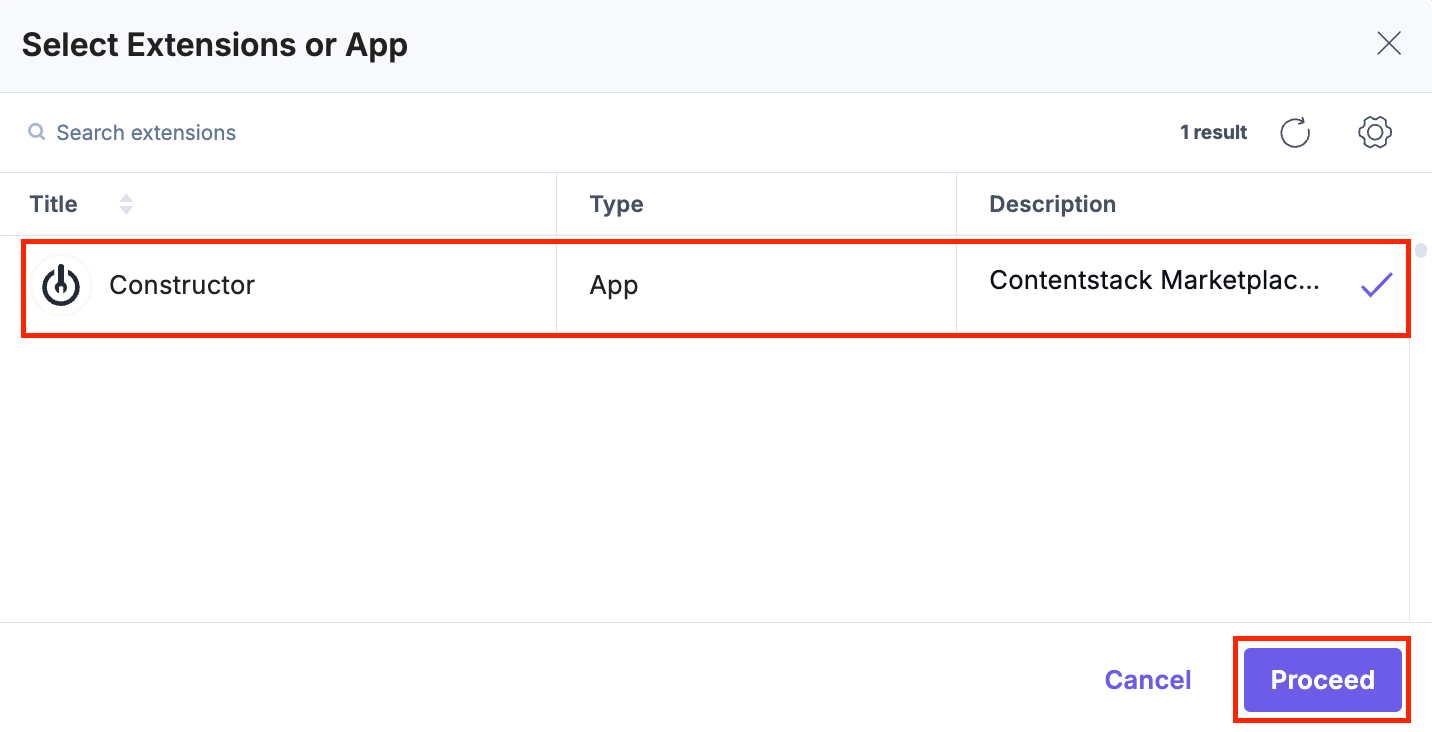
This adds Constructor in the custom field.
- After adding the app, click Save or Save and Close to save your changes.
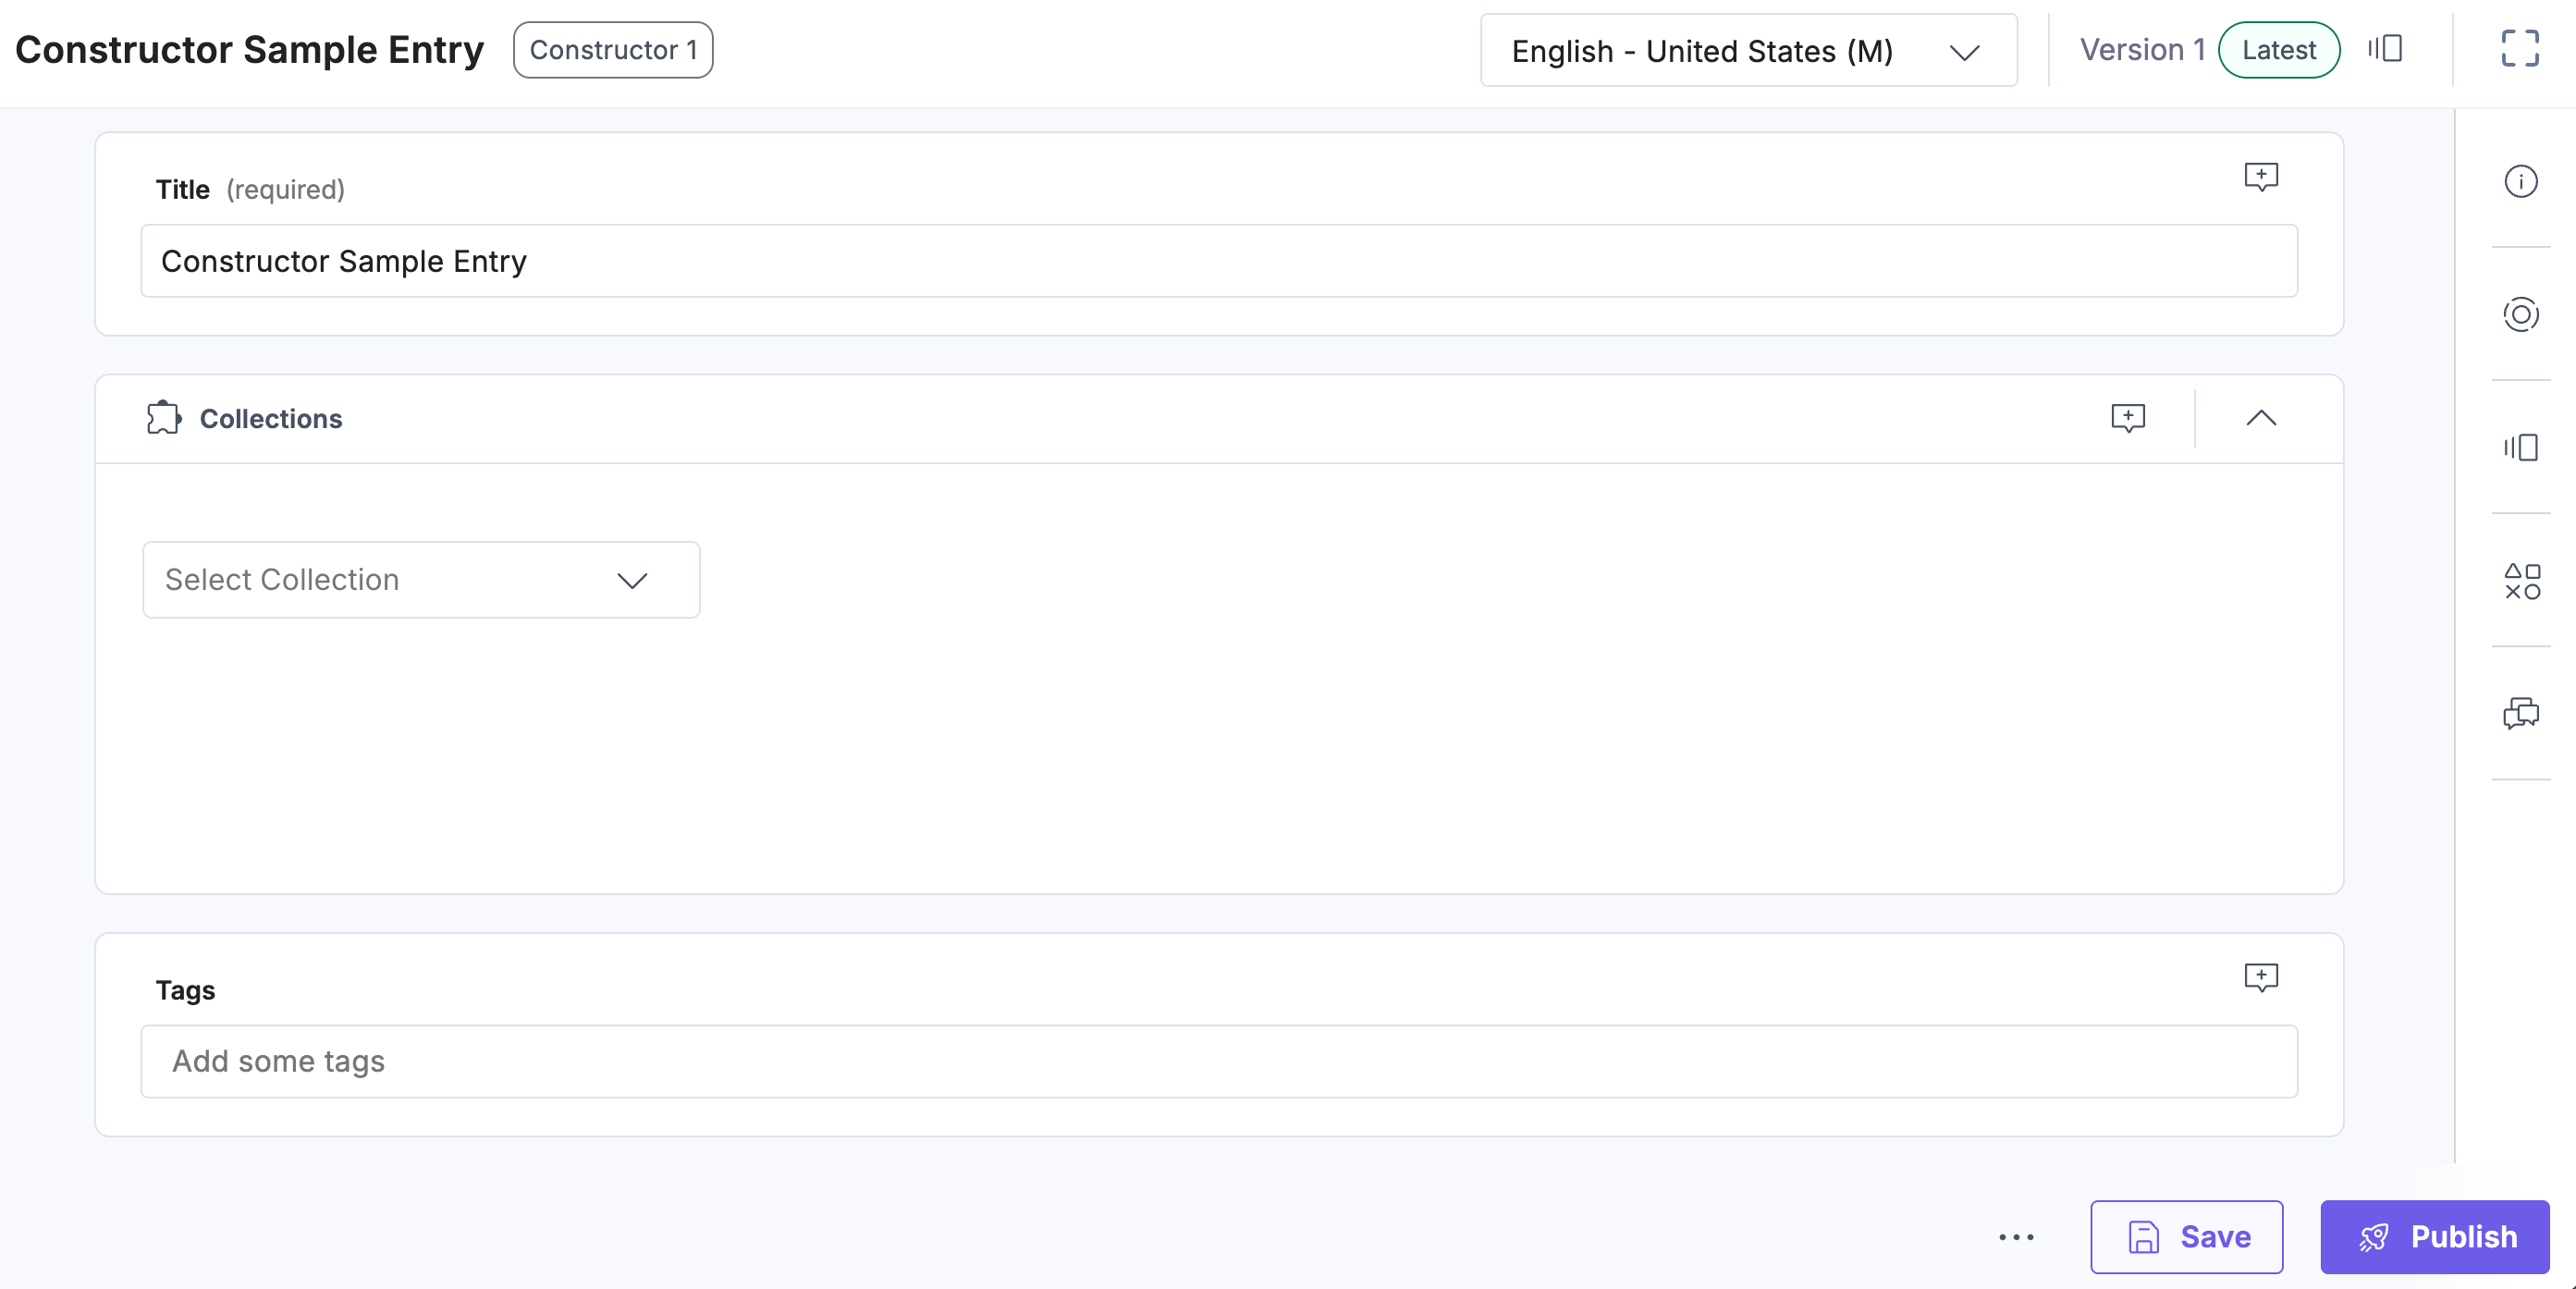
- In the left navigation panel, navigate to the Entries page and click + New Entry to create a new entry for the above content type, and then click Proceed.
You can see the Constructor custom fields on your entry page.
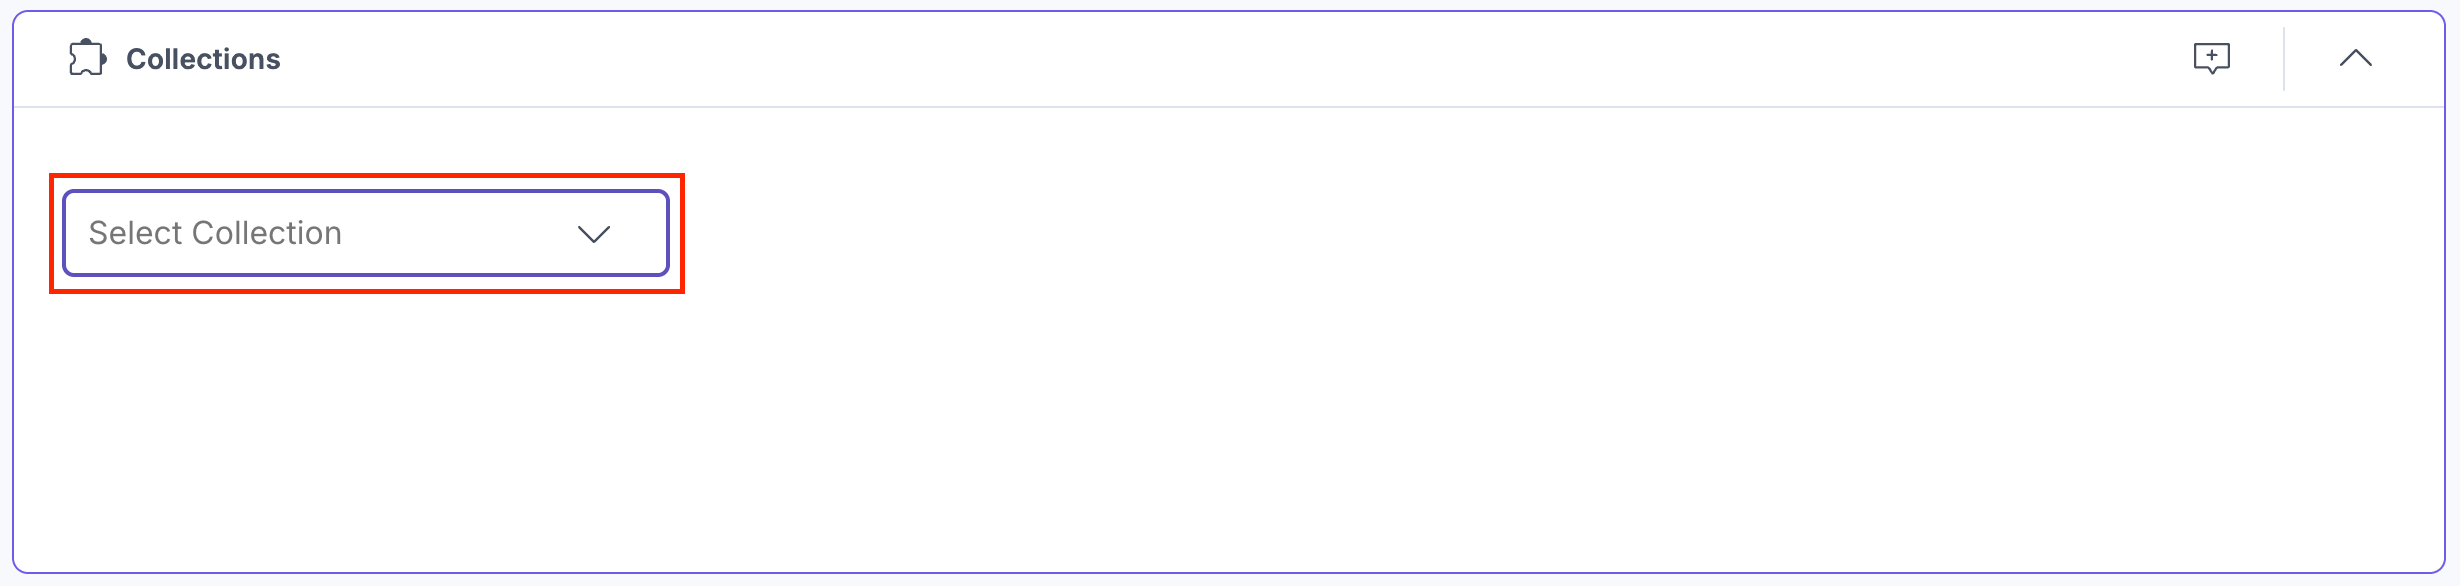
- Under the Collections custom field, select the collection from your Constructor account and link them to your entry.
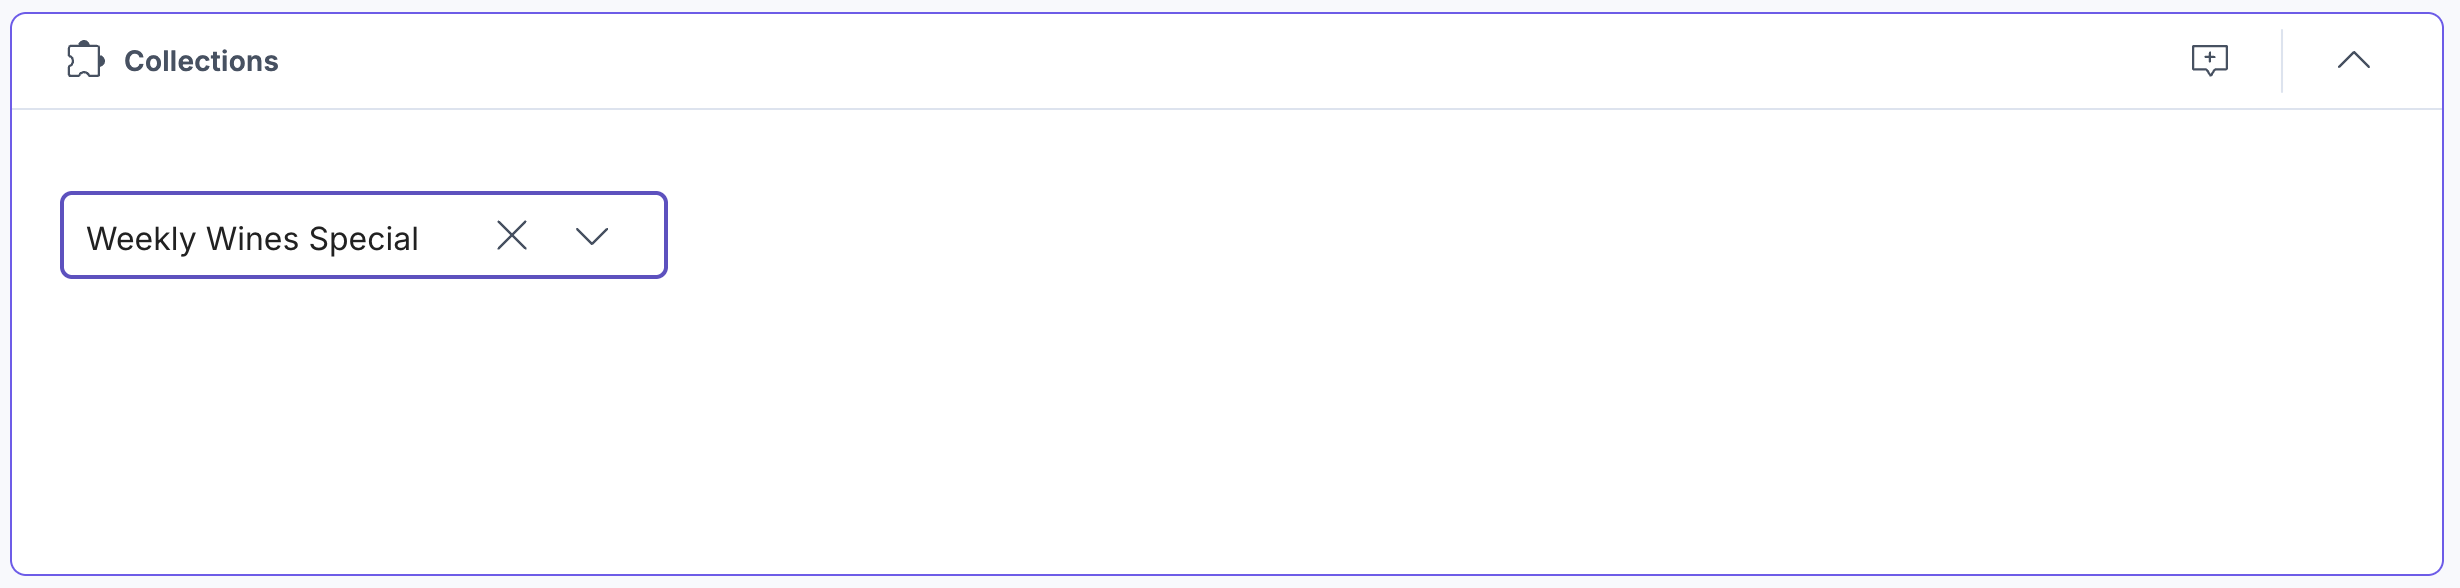
The collection you selected is linked to your entry.
- You can now Save and Publish your entry.
More articles in "Search"
