Aprimo App Installation Guide
Aprimo is a digital asset management (DAM) platform used by many brands to organize all digital assets in one place. For a collaborative workflow, you can upload, store, and manage images, videos, icons, logos, and documents. Using asset personalization, you can control and set the accessibility of certain assets within your team.
Contentstack Marketplace lets you install the Aprimo application and use it within your stack to fetch and display images from Aprimo within your entries.
Prerequisites
- Aprimo account
- Unique login URL provided by Aprimo with a tenant name (For example, https://<sometenant>.dam.aprimo.com)
- Contentstack account
- Access to the Contentstack Organization/Stack as the Owner/Admin
Let's follow this step-by-step guide to install and configure the Aprimo app within your stack.
Steps for Execution
- Fetch your Aprimo Credentials
- Install and Configure the Aprimo app from Marketplace
- Use the Aprimo app within your Stack
-
Fetch your Aprimo Credentials
- You can fetch Aprimo Account Tenant Name from the URL shared by Aprimo. For example, in the URL https://<sometenant>.dam.aprimo.com/, <sometenant> is the Tenant name.
- To fetch the Client ID and Client Secret required during app configuration in step 2, follow the steps:
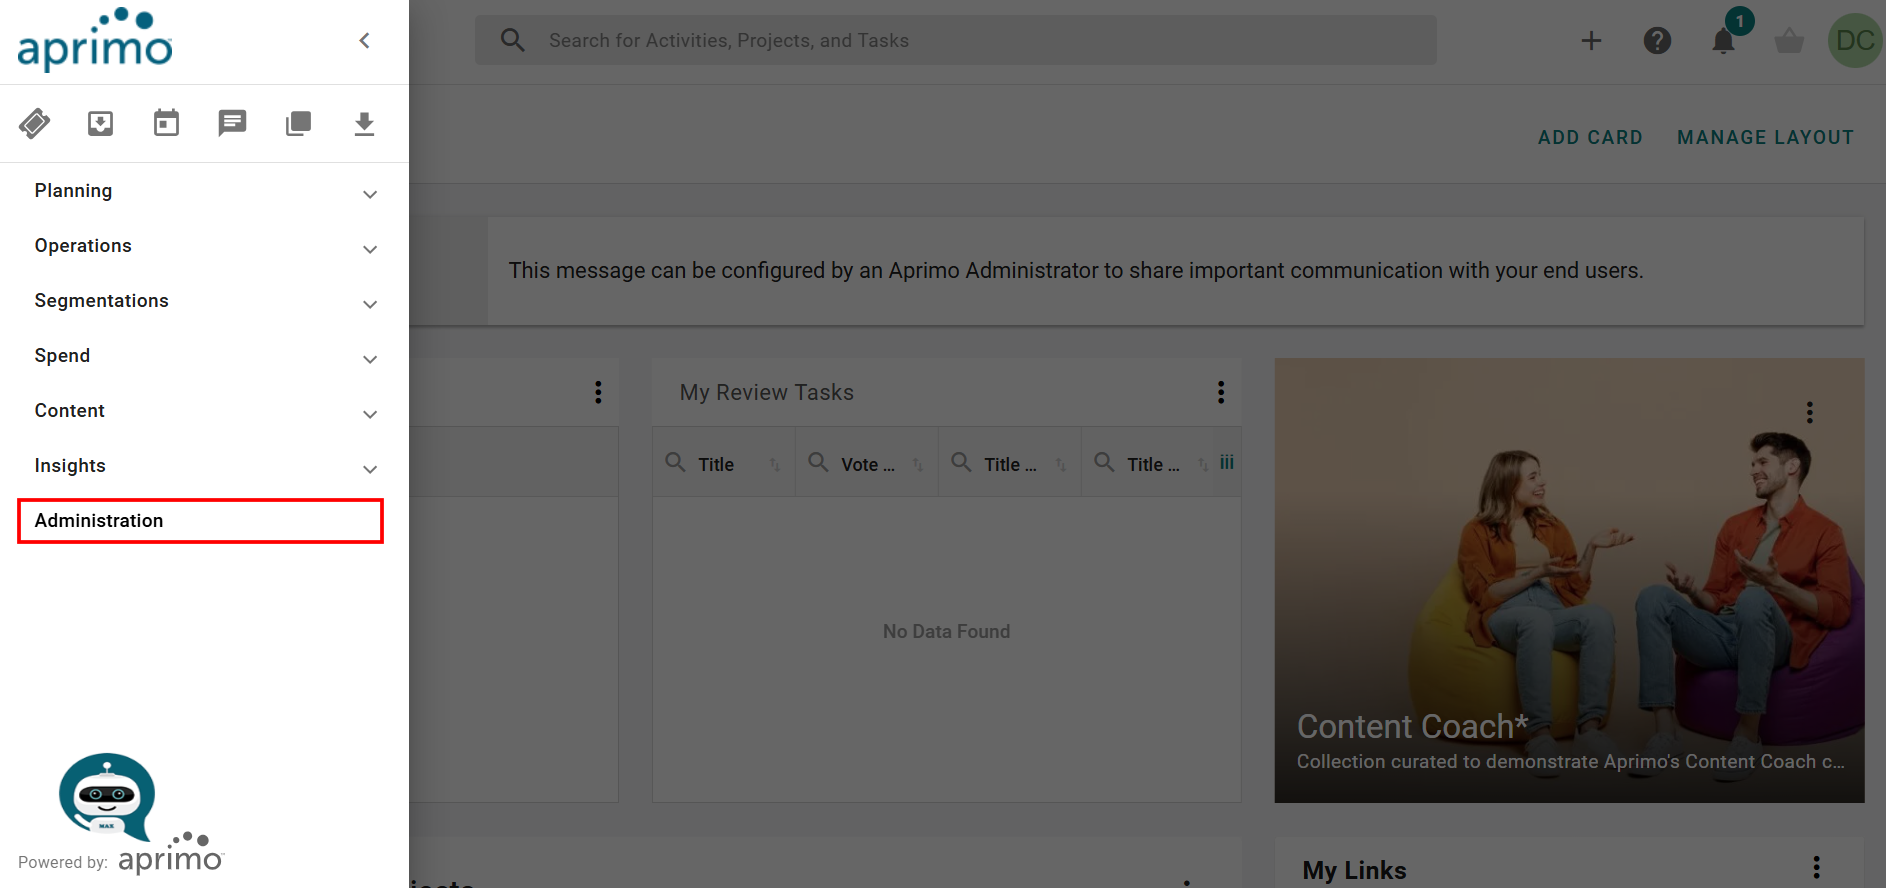
- Log in to your Aprimo account and select Administration from the left navigation panel.
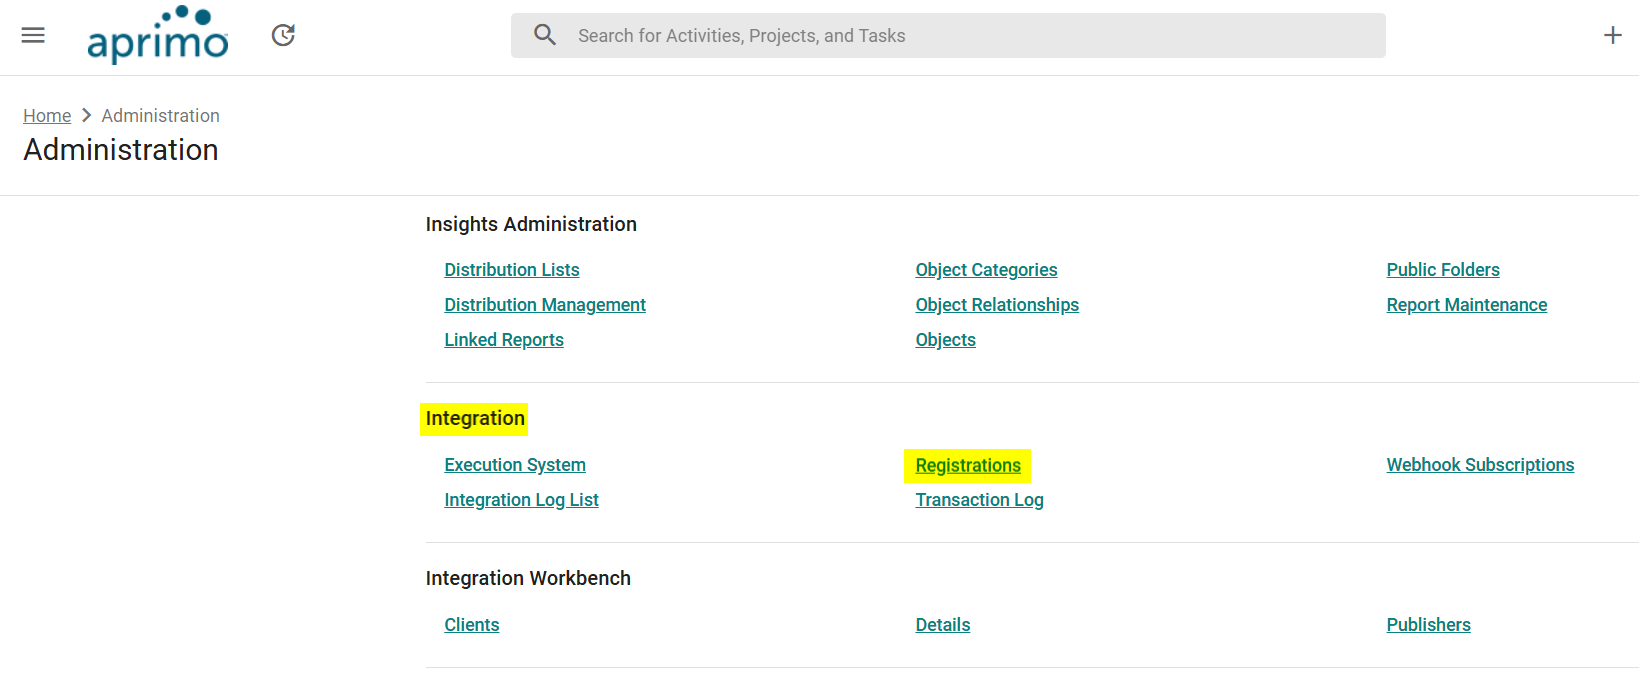
- Go to Registrations under the Integration section.
- On the right side, click NEW to add a new registration.

- Fill up the details and click SAVE to generate the Client ID.
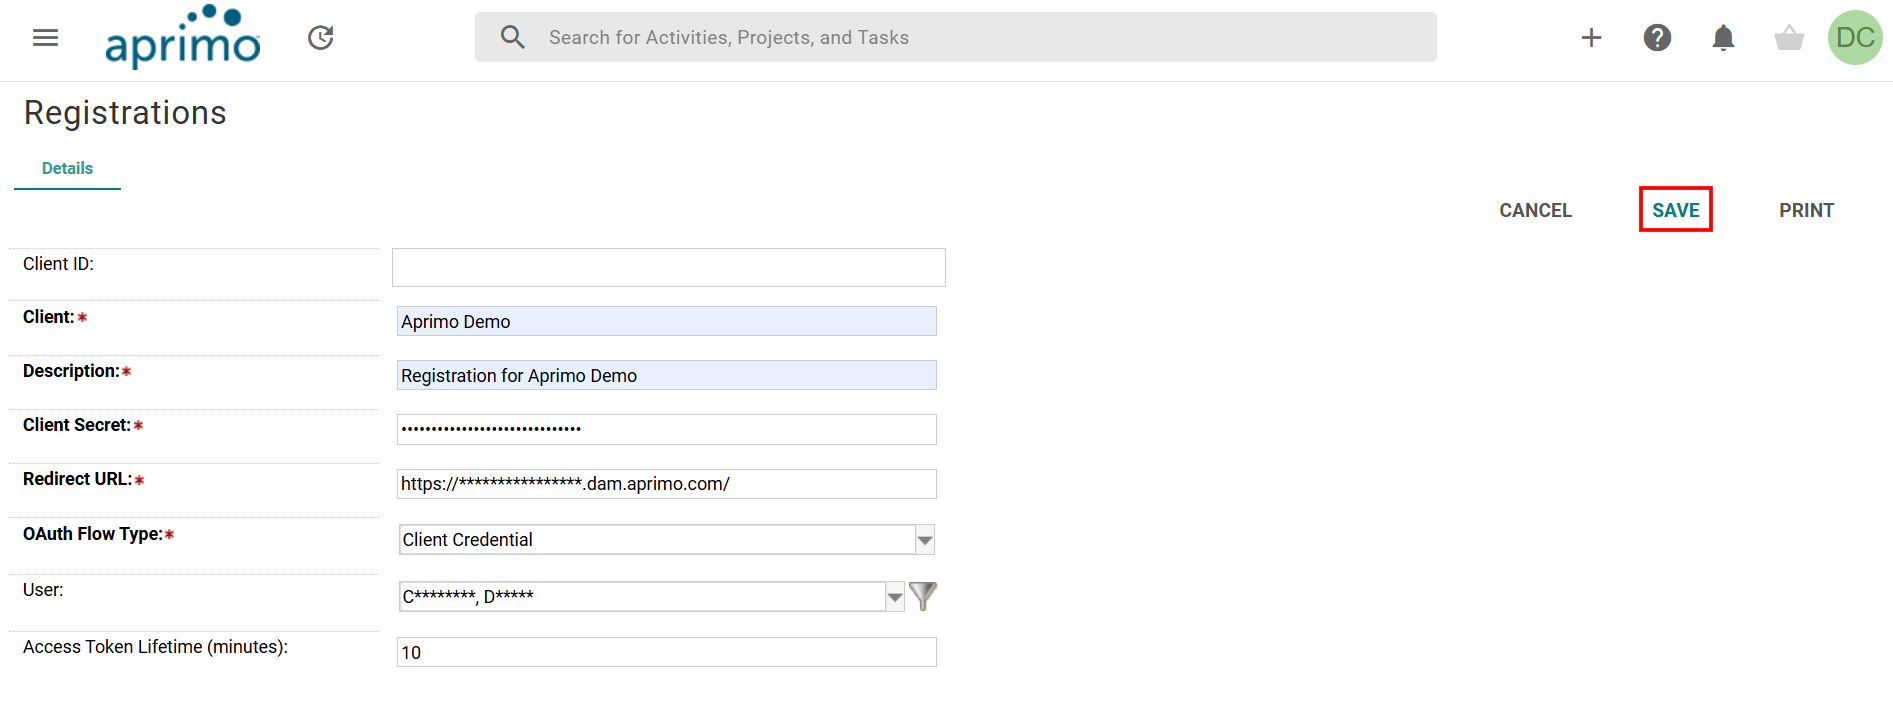
Note: Copy the Client Secret to the clipboard. You'll not be able to view it again.
- You can get the Client ID after registration.

- Log in to your Aprimo account and select Administration from the left navigation panel.
-
Install and Configure the Aprimo app from Marketplace
Log in to your Contentstack account and follow the steps below:
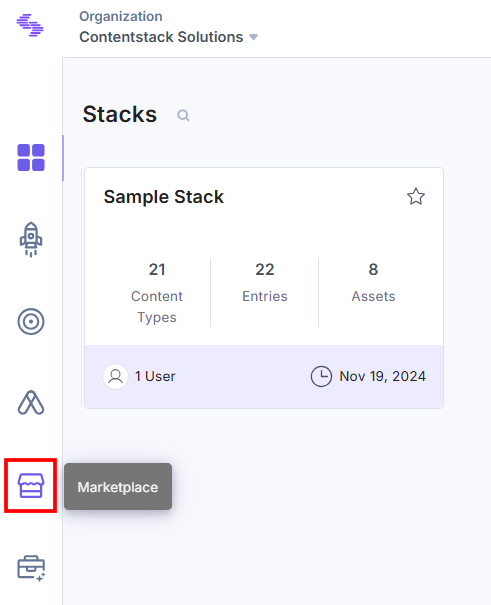
- In the left navigation panel, click the Marketplace icon.
- Click Apps from the left panel.
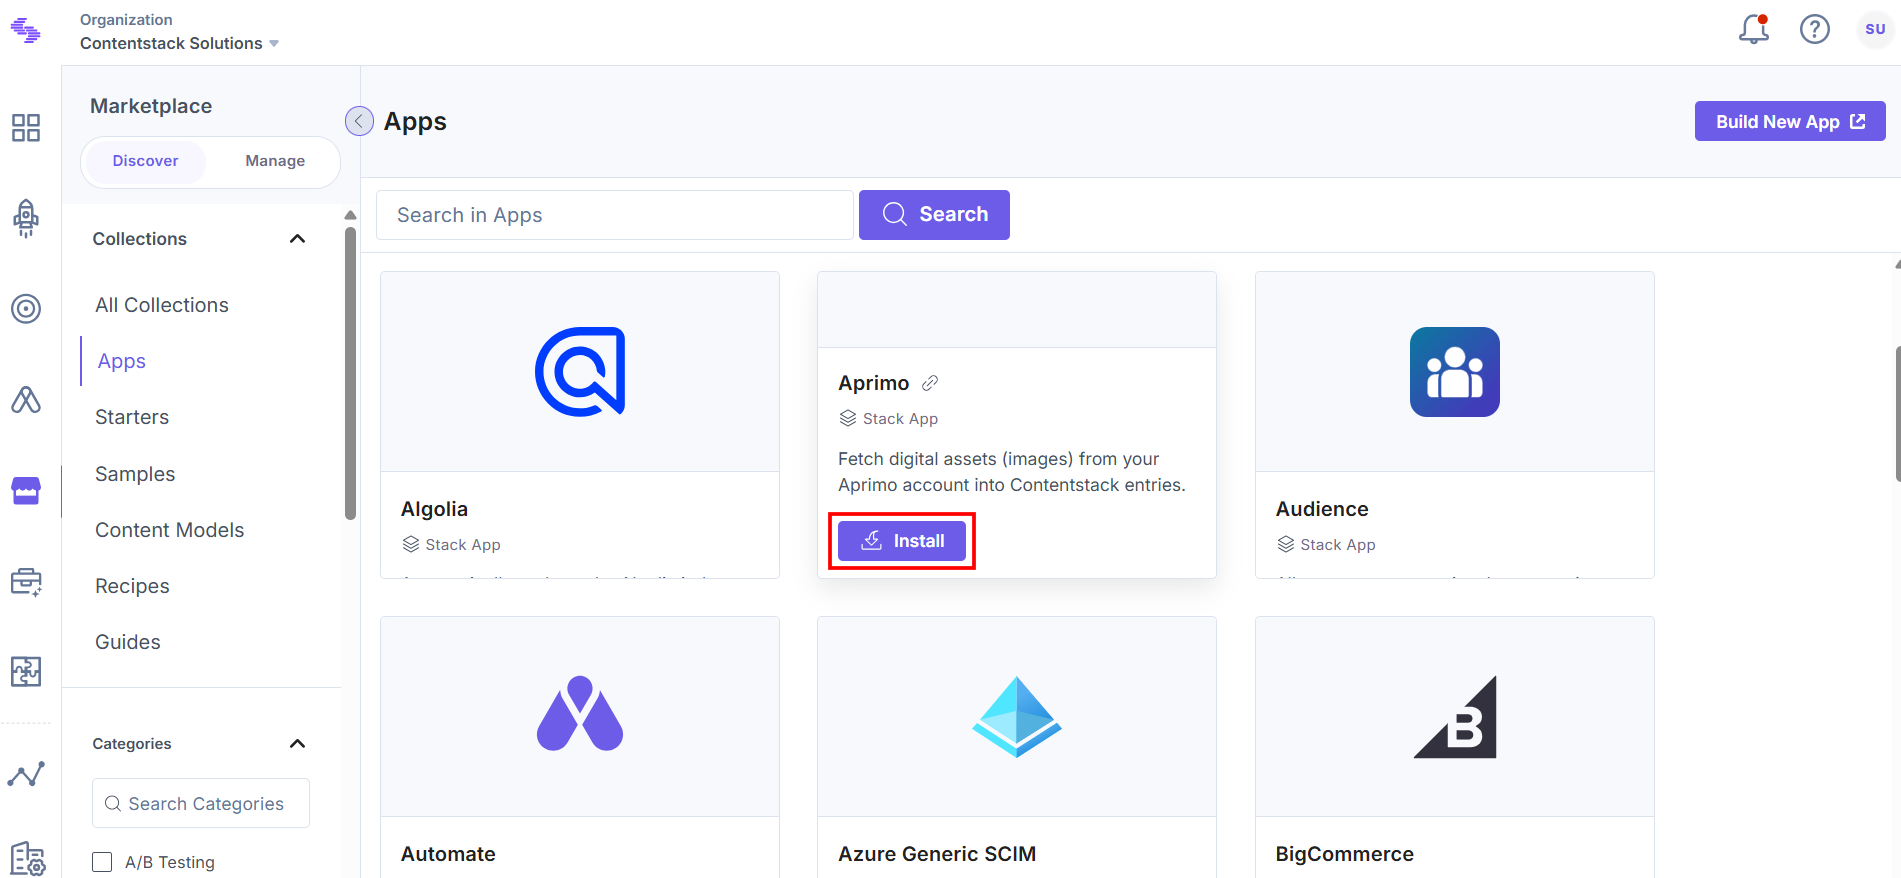
- Within the Marketplace, you can see the available apps. Hover over the Aprimo app click Install.
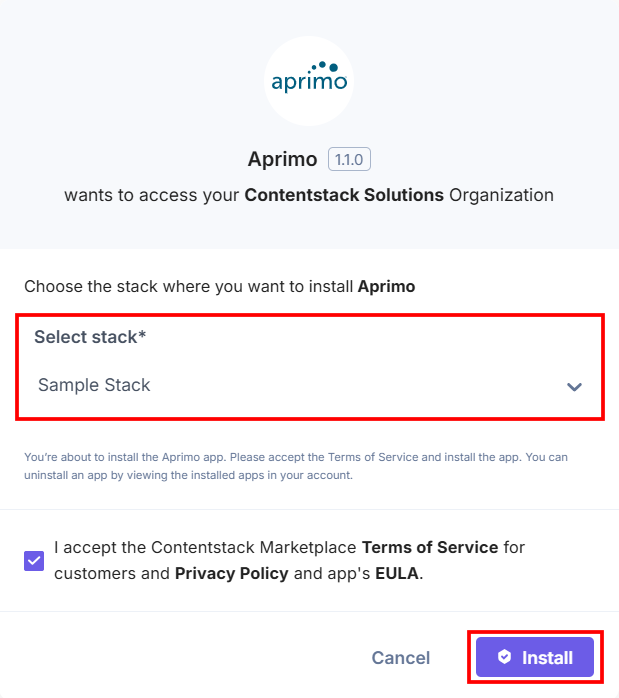
- In the pop-up window, select the stack where you want to install the Aprimo app, accept the Terms of Service, and click the Install button.
- On the Configuration screen, you can add multiple configurations for Aprimo. To do so, follow the steps given below:
- Click the + New Configuration button to add new configuration details.

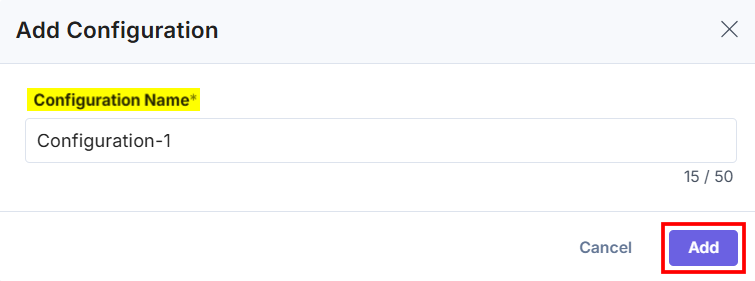
- In the Add Configuration modal, enter the configuration Name and click Add.
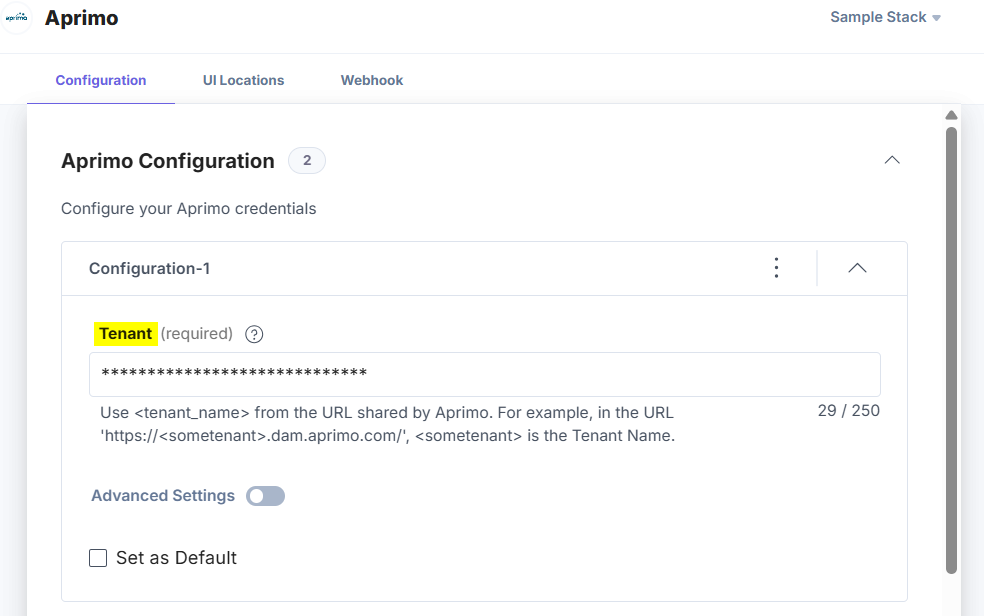
- After adding the configuration, enter the following details:
- Enter the Aprimo Account Tenant Name retrieved in step 1.
- Advanced Settings (Optional): Enter the Client ID and Client Secret retrieved from your Aprimo account in step 1.
Then, under the Mapper section, click + Add rule to map Meta Fields and Languages to Content Types. Click the checkmark icon to confirm and add the rule.
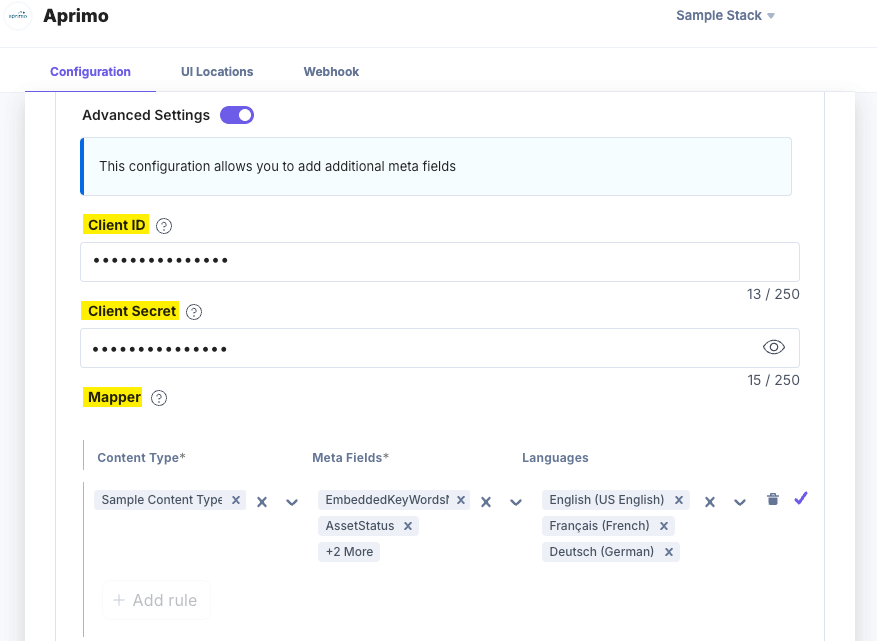
Note:
- You can see the additional Aprimo meta fields added in the assets JSON object within the entry.
- Existing users view the data in the default language. You can add multiple languages by editing the rule.
- If no language is selected in the Mapper, the default language is used to present the meta field data.
- You need to enable the multi-languages support settings for the meta fields in the Aprimo account to map fields with different languages while configuring the app.
- Set as Default: To set this configuration as the default, click this checkbox.
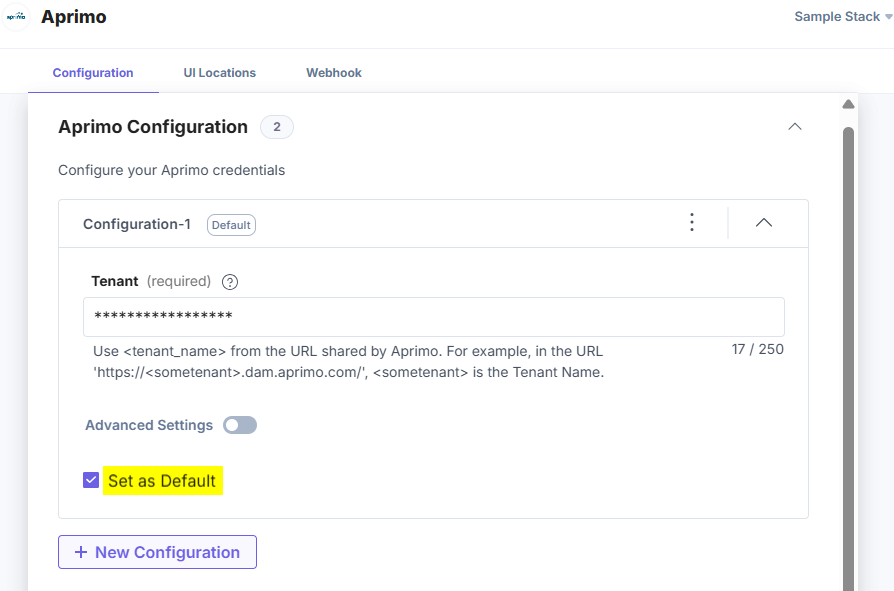
Alternatively, you can set a configuration as the default by clicking the three dots on the top-right side of the configuration section and then selecting Set as Default.
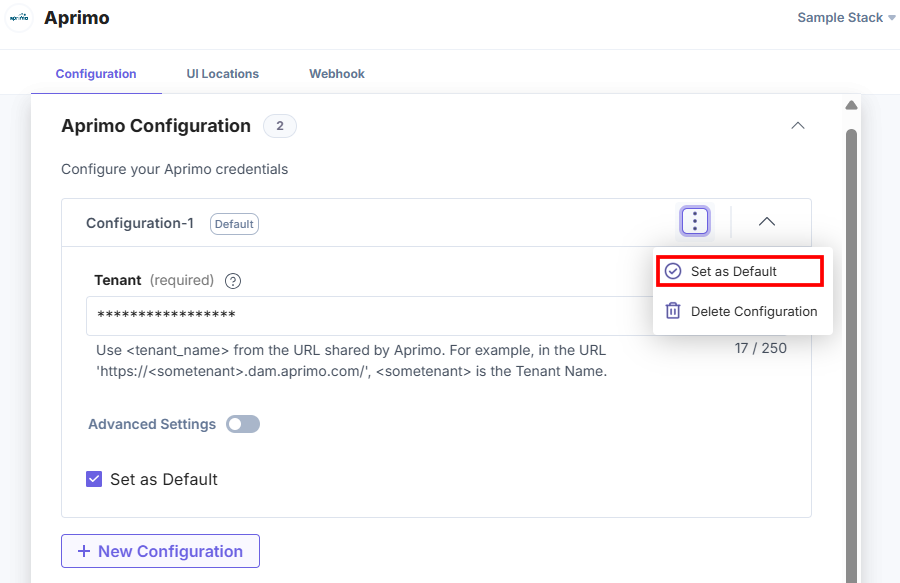
Note: At least one app configuration should be selected as the default.
Similarly, you can add multiple configurations by following the steps discussed above.
- Enter the Aprimo Account Tenant Name retrieved in step 1.
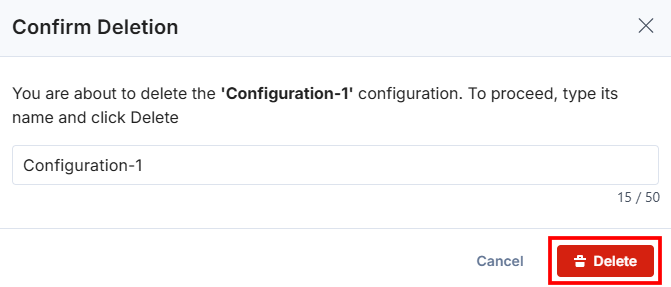
- To delete the configuration, click the three dots and select Delete Configuration.
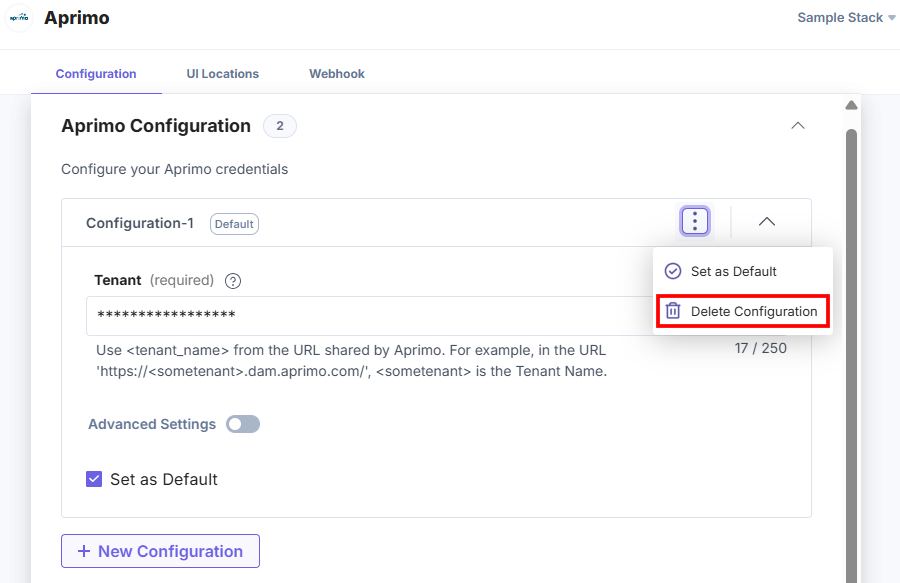
In the Confirm Deletion modal, add the configuration name and click Delete.
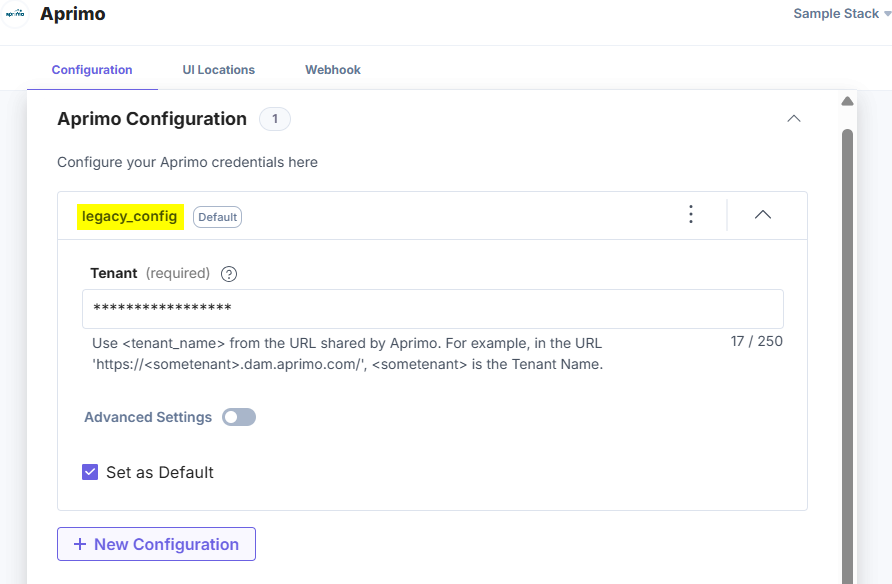
- For an existing user, the credentials will be added as the default configuration, and named as legacy_config.
Warning:
- legacy_config is a reserved keyword and you cannot use it in adding new configurations.
- If you delete the legacy_config configuration, data loss may occur and you will not be able to access the assets from the related accounts.
- Choose the Aprimo Keys to Save in Entry: Choose how to save the data fetched from the Aprimo account in Contentstack entries.
- If you select the All Fields option, you can select only a limited number of products in the entry.
- For Custom Fields, you can search and add specific Aprimo Fields you want to save in entries.
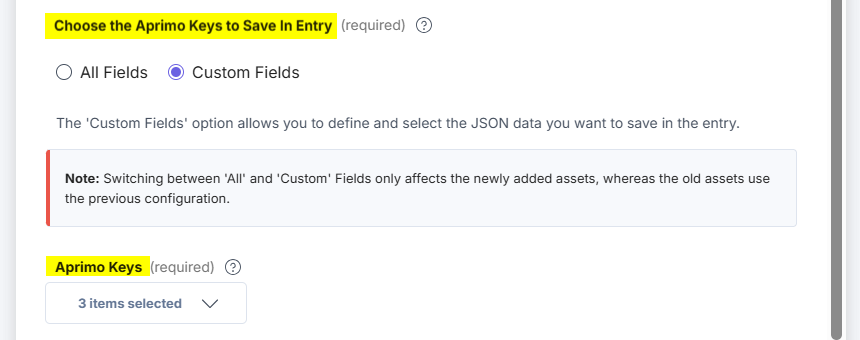
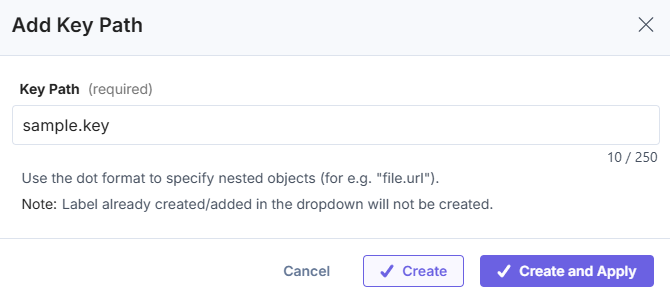
If you select Custom Fields then the Aprimo Keys drop-down appears. By default, id, name, and rendition.publicuri keys are already selected. If you want to create a new key, click the + New Key Field option.
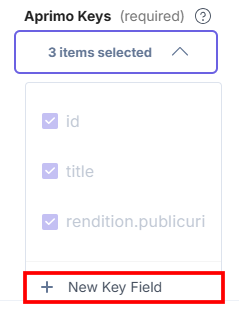
In the Add Key Field modal, enter the Key Path and click the Create or Create and Apply button to create a new key.
- Click the + New Configuration button to add new configuration details.
- After adding the configuration details, click the Save button.
- On the UI Locations tab, you can see the predefined app locations. You can use the toggle button corresponding to each UI location to enable or disable it based on your requirements.
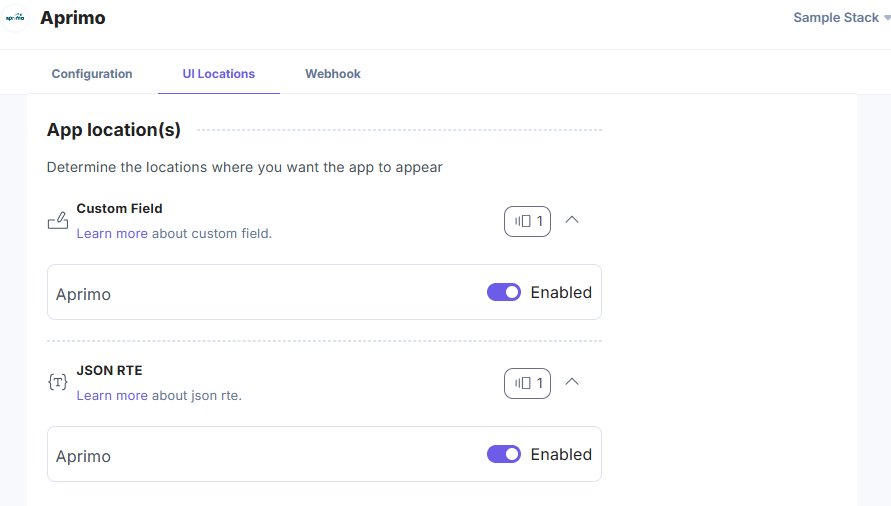
Note: The app requires at least one UI location to be enabled; otherwise, you would not be able to save your app configuration settings.
Additional Resource: For more information on UI locations, please refer to the Installed Apps guide.
- Click Open Stack to start using the Aprimo application.
- In the left navigation panel, click the Marketplace icon.
-
Use the Aprimo App within your Stack
- Go to your stack, and click the Content Models icon in the left navigation panel.
- Click the + New Content Type button to create a new content type.
- Add relevant details and click the Save and proceed button.
There are two ways to use the Aprimo application in your entry.
Steps to use the Aprimo application using a Custom field
- Click the Insert a field link represented by a + sign to add a custom field.
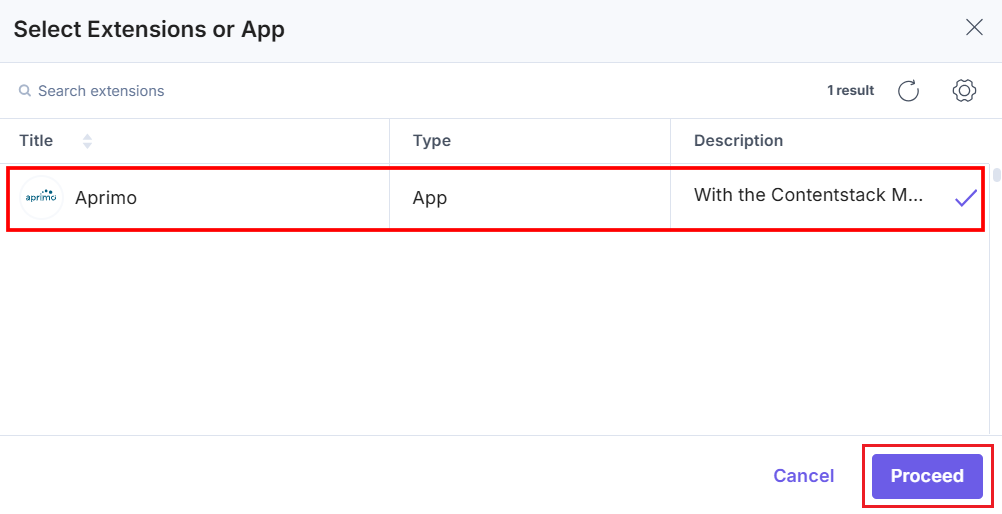
- Under Select Extension/App, select Aprimo, and then click Proceed.
- Under Advanced properties, you have the option to set the Config Parameter for all entries of a particular content type. If you do so, it overrides the default app configuration that you set at the time of app installation on the Configuration screen.
The key:value passed in the configuration object overrides the default app configuration settings.
- Configuration Object (Optional): In case you want to use a different Aprimo configuration for any custom field within the same stack, you need to specify the configuration name in the Config Parameter.
{ "config_label": [ "config2" ] } - Locale Based Configuration Object (Optional): To add a locale-based configuration, add a locale parameter to the additional configuration object which specifies the locale value (for example: en-us) as the object key and the configuration object as the value to the locale.
{ "config_label": [ "config2" ], "locale": { "en-us": { "config_label": [ "config3" ] }, "fr-fr": { "config_label": [ "config1" ] } } } - Max Limit (Optional): You can set the maximum number of assets that can be added in the custom field. In our example, it is 5.
{ "advanced": { "max_limit":5, } - Custom Settings (Optional): We have added an object, named custom_settings,which includes the following keys in the given format:
- limitingSearchExpression: You can filter assets on the selector page.
{
  "custom_settings": {
    "compact_view_options": {
      "limitingSearchExpression": "File.Version.Extension=mp4"
    }
  }
}
Additional Resource: You can add more optional parameters within the compact_view_options object. For detailed description of these optional parameters, refer to the Aprimo Developer Documentation.
- Configuration Object (Optional): In case you want to use a different Aprimo configuration for any custom field within the same stack, you need to specify the configuration name in the Config Parameter.
- After adding the app, click Save or Save and Close to save your changes.
- To use the Aprimo app, create an entry for the above content type, and you will see the Aprimo custom field on your entry page as shown below:
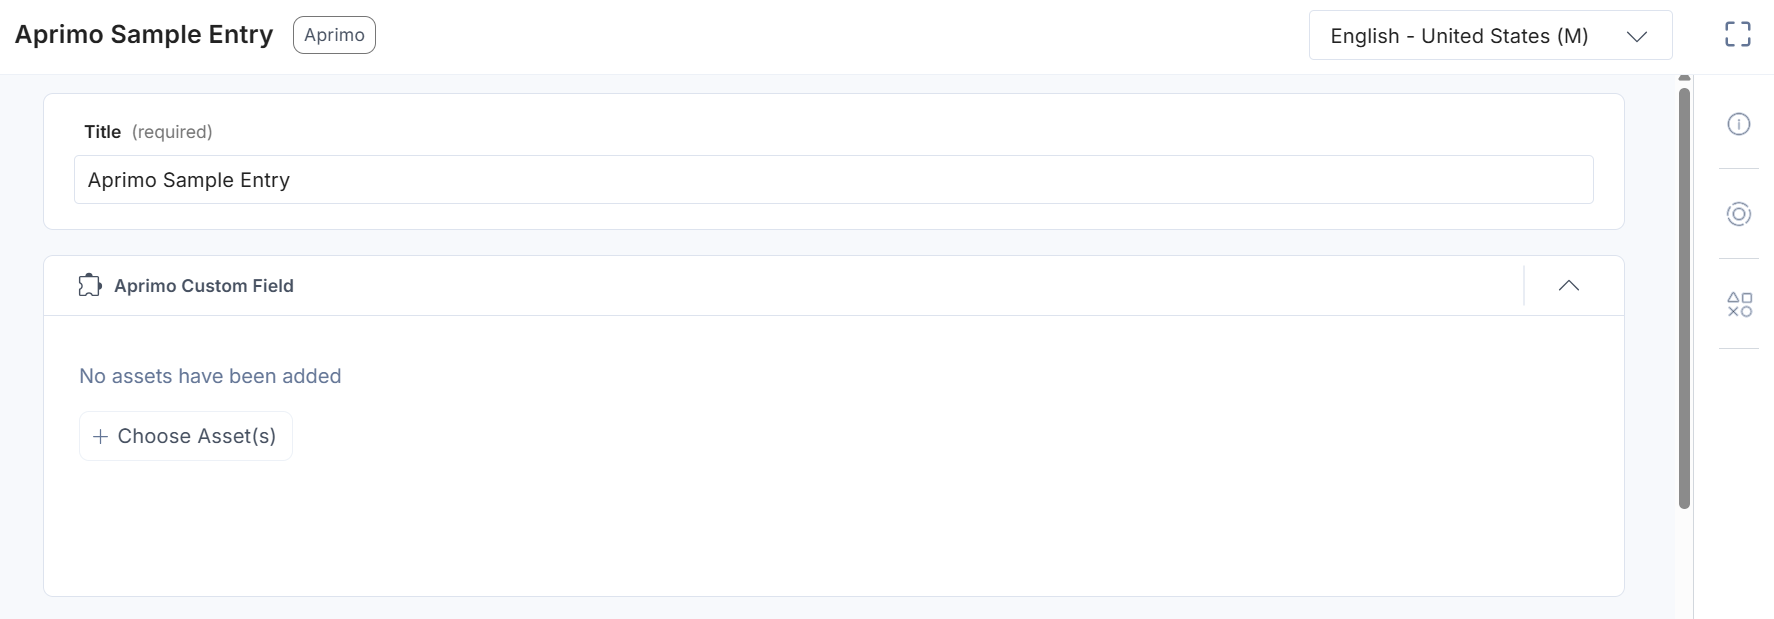
- Click + Choose Asset(s) button.

Note: After clicking the + Choose Asset(s) button, the app redirects you to log in to your Aprimo account if you are using it for the first time. Enter the Login ID and Password provided by Aprimo for fetching assets from your Aprimo account.
Select image(s) from your Aprimo account.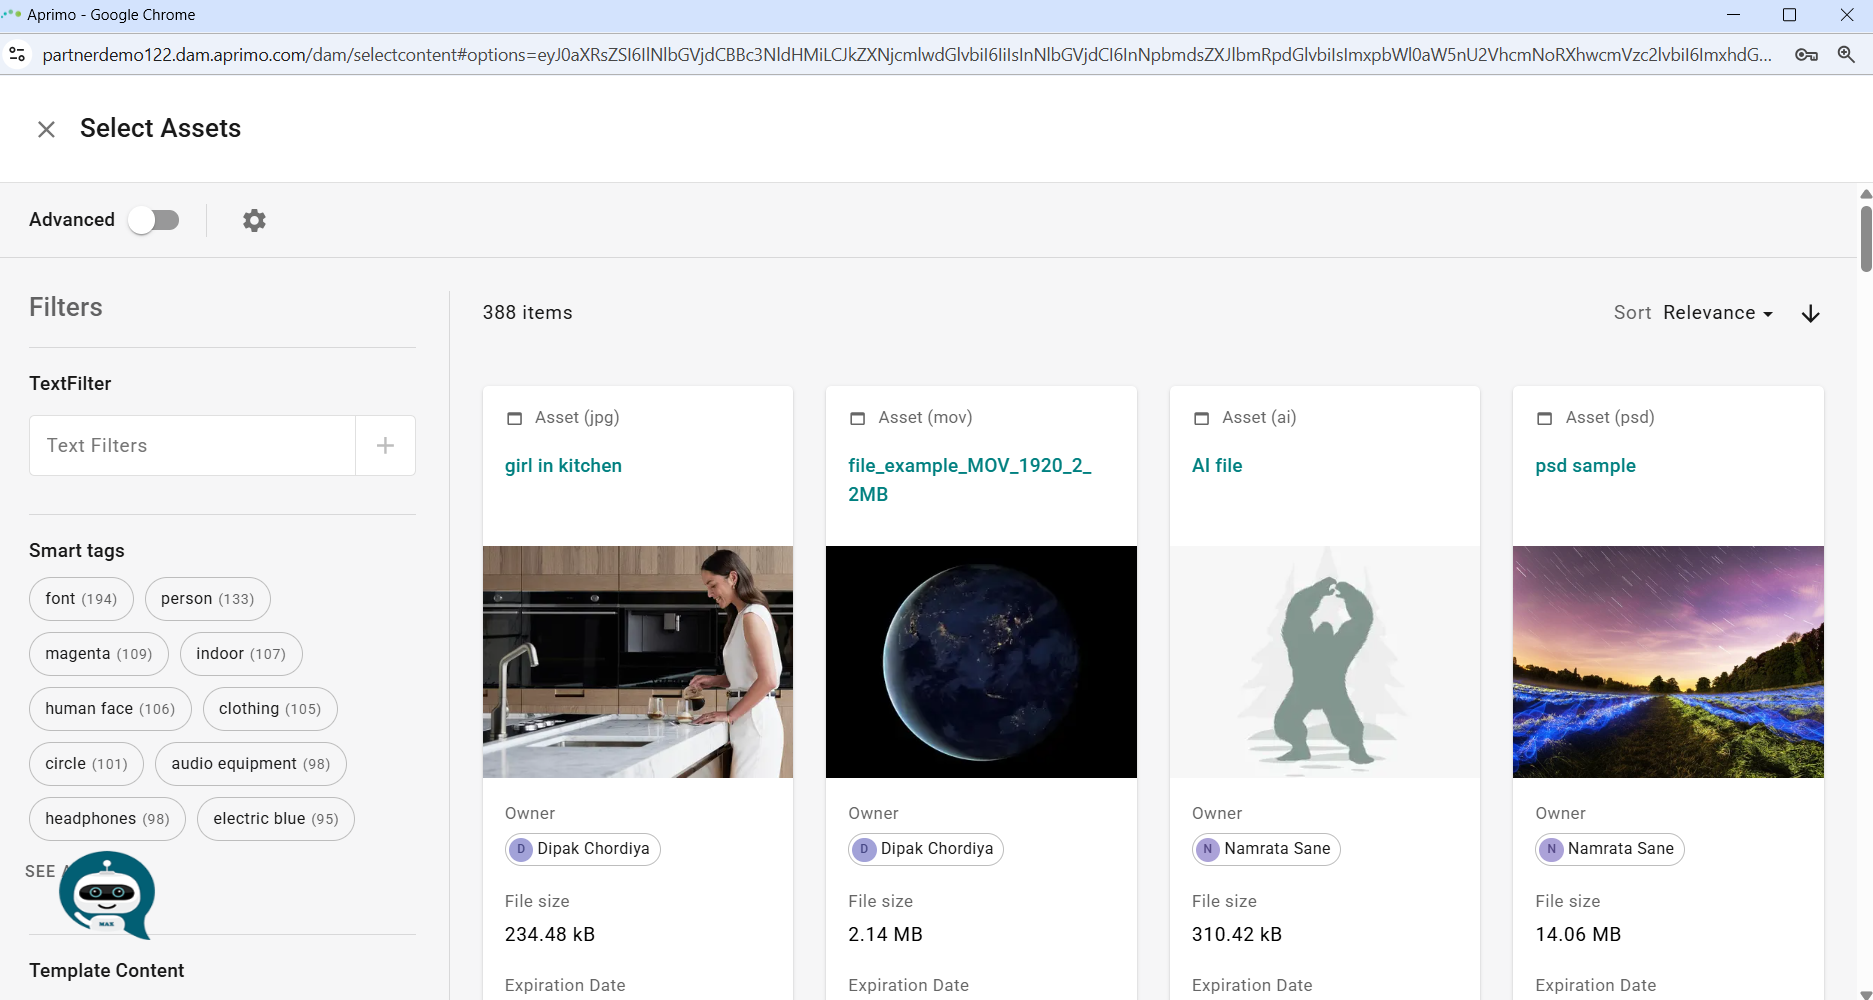
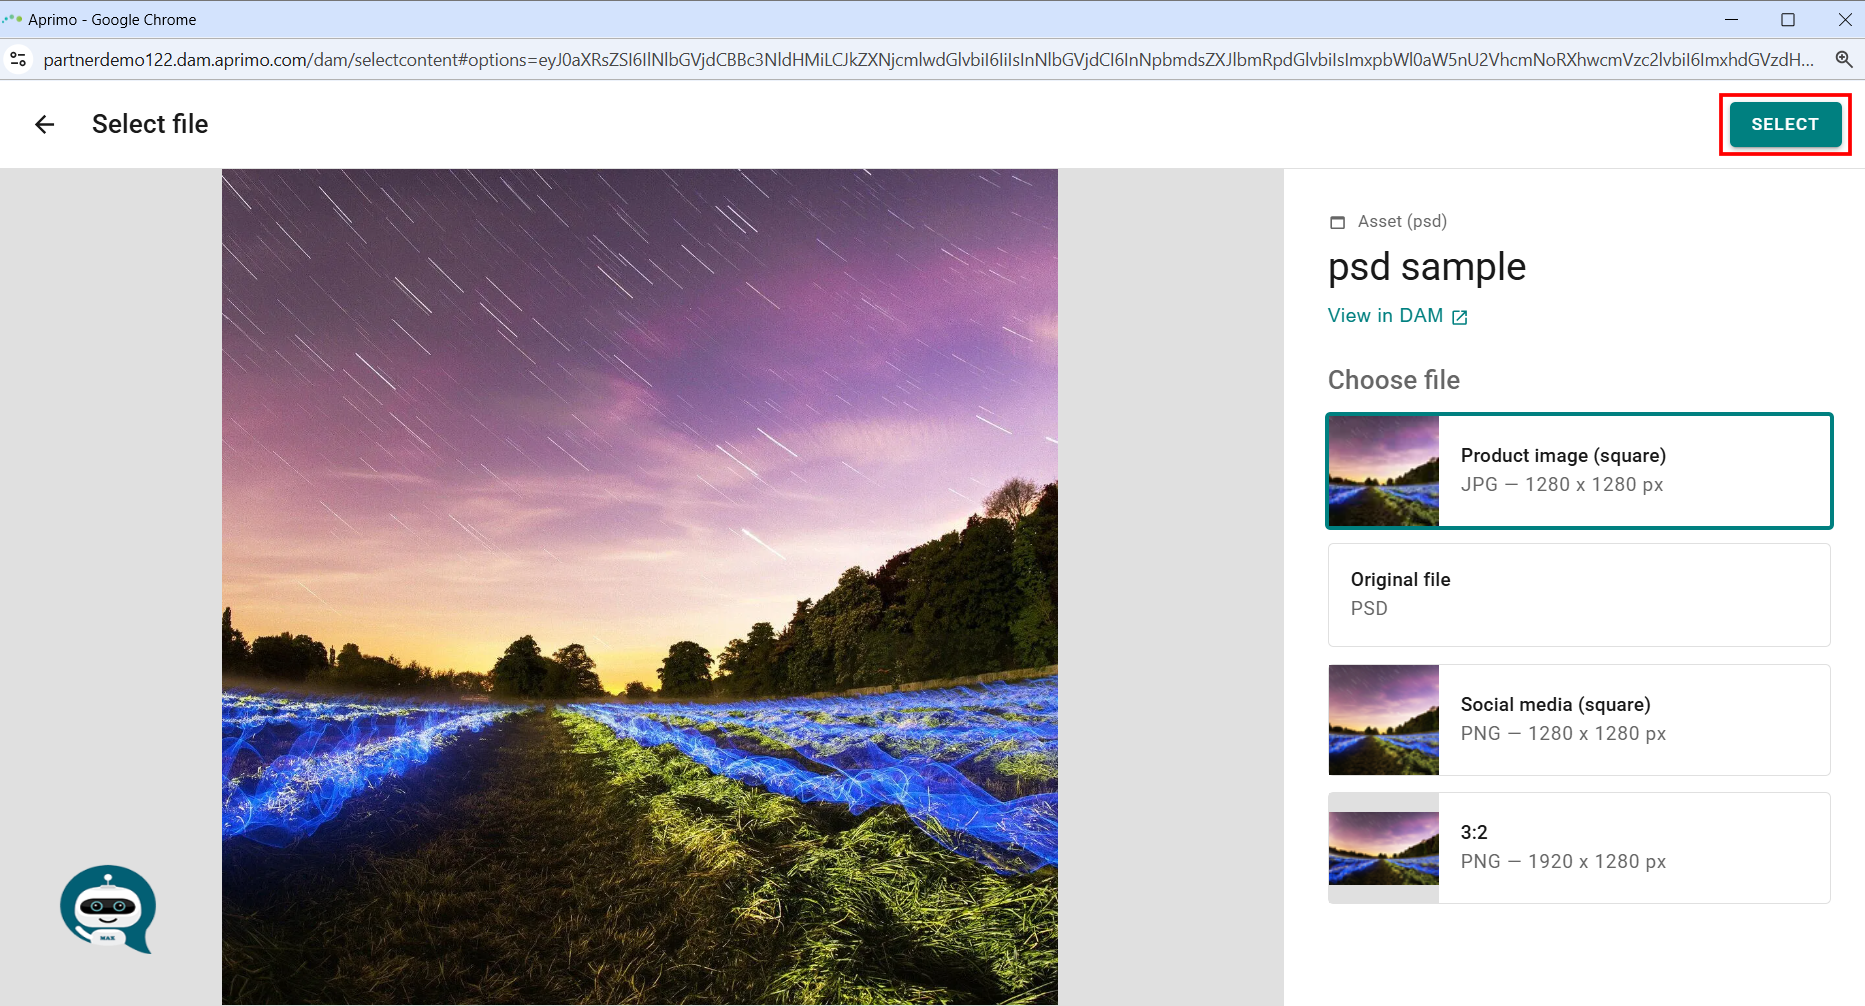
- Choose the rendition and then click Select to add the image to your entry.
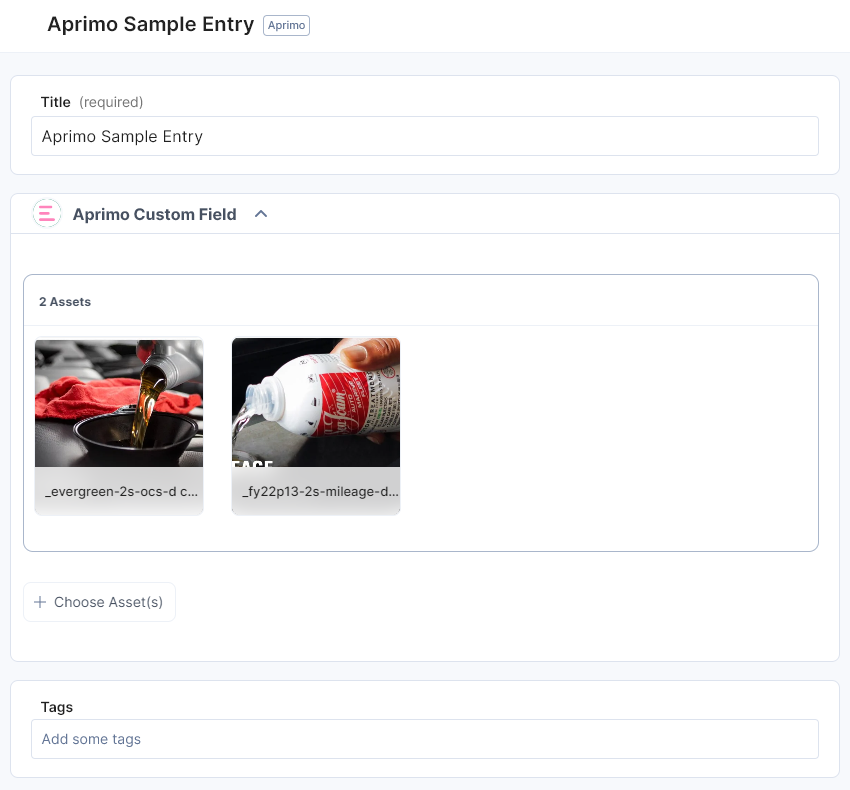
 The assets you select are added within your entry.
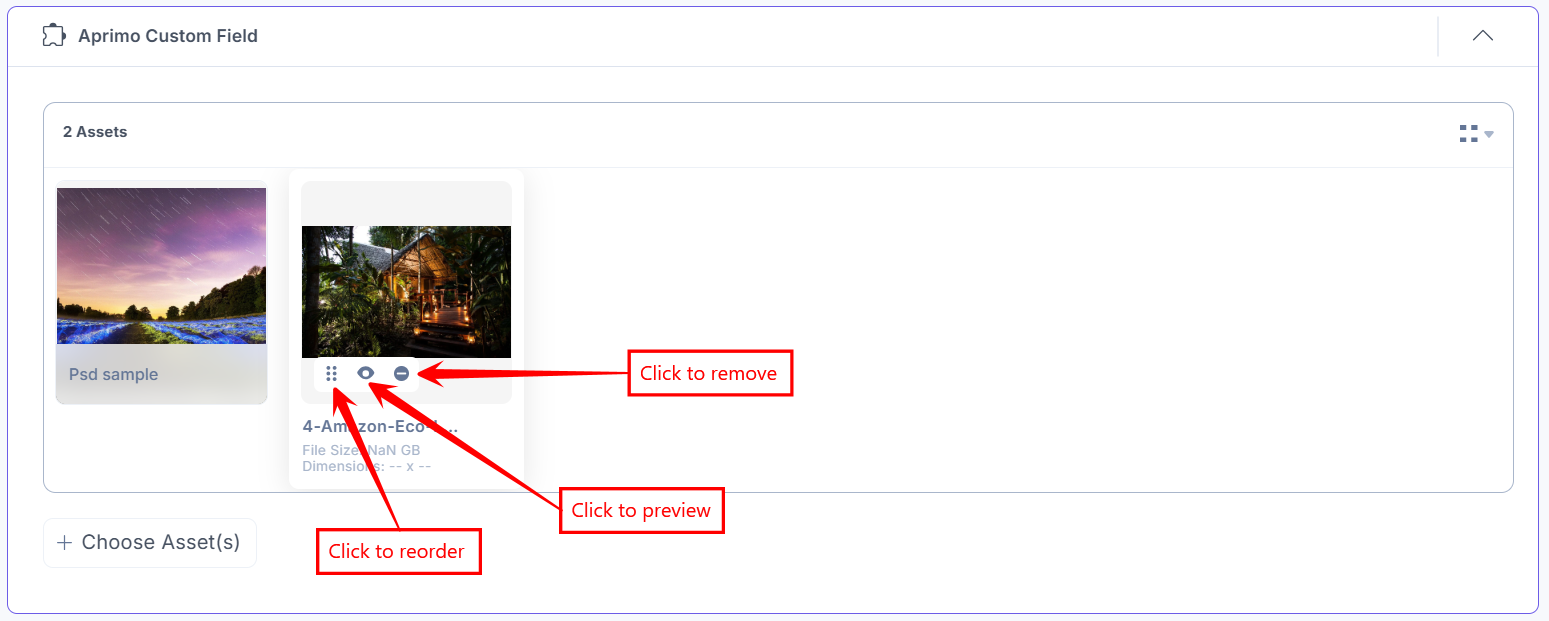
- Hover over the image to view the options to remove or preview the image.
- Click the Preview icon to view the image.
- Click the Remove icon to delete the selected image.
- After adding the asset(s), Save and Publish your entry.
Steps to use the Aprimo application using a JSON Rich Text Editor field
- In the Content Type Builder page, add JSON Rich Text Editor in your content type by clicking on the Insert a field link represented by a + sign.
- To add the Aprimo plugin in JSON RTE, click the Properties icon of JSON RTE, and under Select JSON RTE Plugin(s), choose the Aprimo app, and then click the Add Plugin(s) button.
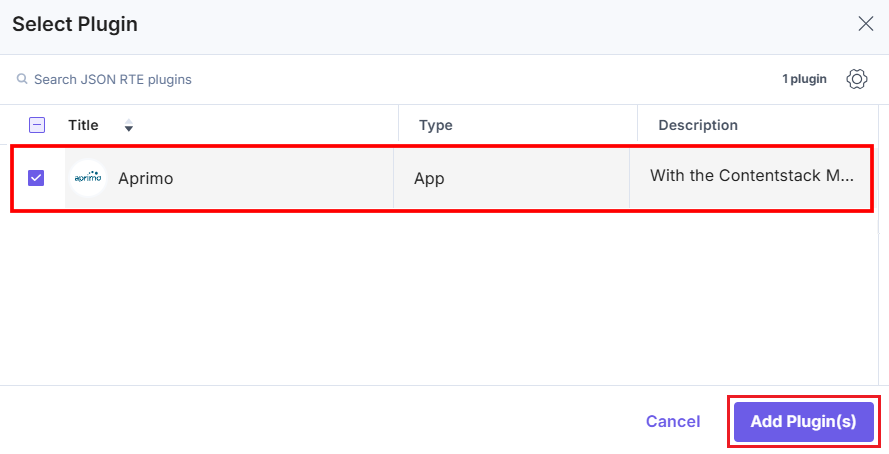
To add the Config Parameter in the JSON RTE field, click the gear icon on the app plugin selector page.
You can set the following validations for the JSON RTE field:
- In case you want to use a different Aprimo configuration for any JSON RTE field within the same stack, you need to specify the configuration name in the Config Parameter.
{ "config_label": [ "config 2" ] } - Custom Settings (Optional): We have added an object, named custom_settings,which includes the following keys in the given format:
- limitingSearchExpression: You can filter assets on the selector page.
{
  "custom_settings": {
    "compact_view_options": {
      "limitingSearchExpression": "File.Version.Extension=mp4"
    }
  }
}
Additional Resource: You can add more optional parameters within the compact_view_options object. For detailed description of these optional parameters, refer to the Aprimo Developer Documentation.
- In case you want to use a different Aprimo configuration for any JSON RTE field within the same stack, you need to specify the configuration name in the Config Parameter.
- After adding the plugin, click Save or Save and Close to save your changes.
- To use the Aprimo app as a JSON RTE plugin, create an entry for this content type, and you will see the Aprimo app icon in the JSON RTE field on your entry page, as shown below:
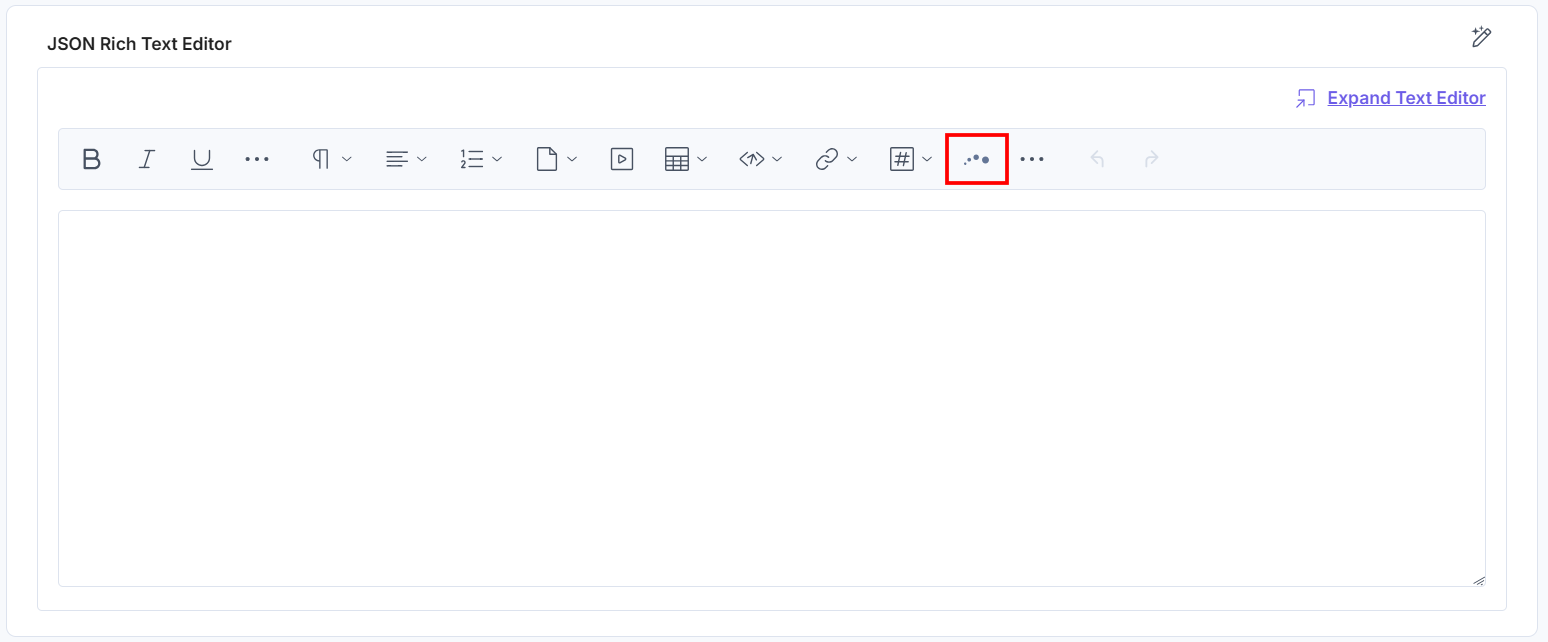
- Click the Aprimo app icon to open the Media Library.

- Choose the rendition and then click Select to add the image to your entry.
 The selected asset(s) is displayed in the JSON RTE editor:
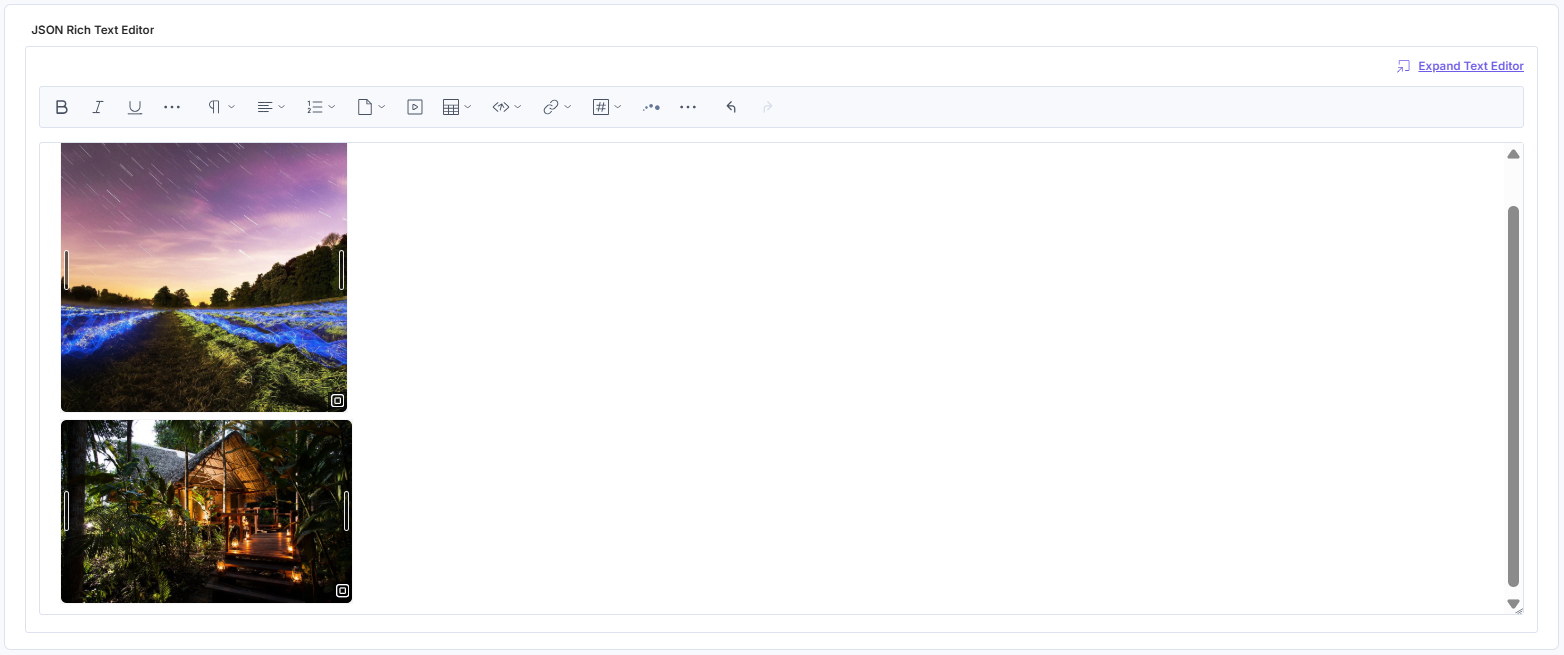
- To resize the image, drag the corner of the image and adjust the size as required.
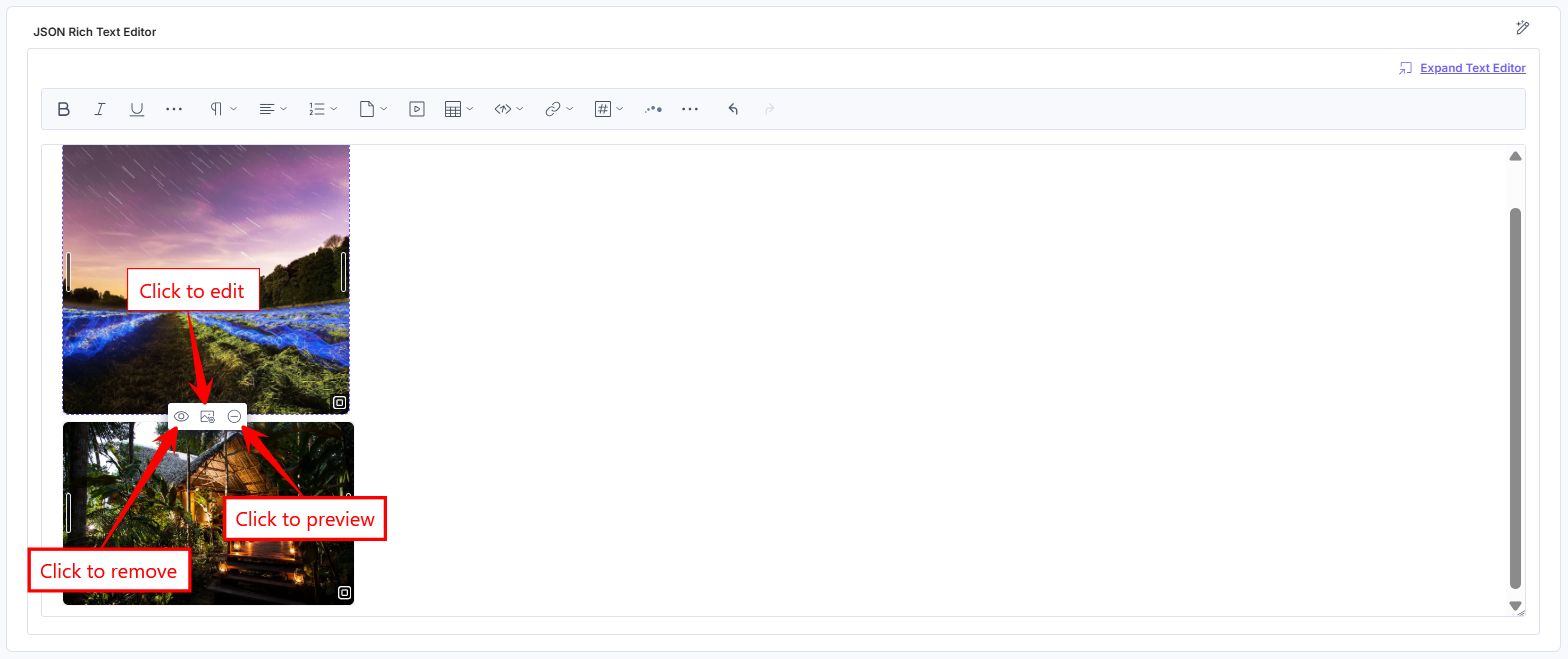
- Hover over the image to view, edit or delete it.
- Click the View icon to view the image.
- Click the Edit icon to edit the image. Make the necessary changes and click the Save button.
- Click the Delete icon to delete the selected image.
- After adding the asset(s), Save and Publish your entry.
Note: For a deleted configuration, the associated assets are not removed from the entry. Instead, a warning icon is displayed on the assets.
