Custom Domains
By default, Launch generates a unique URL of the form example.contentstackapps.com for every environment. Each environment is assigned to a unique subdomain at contentstackapps.com.
To make your site easy to access and remember, you need a human-friendly domain name. Contentstack Launch allows you to add custom domains to your environment. Follow the steps below to configure your custom domain.
Note: Custom subdomains must not exceed 255 characters in total length, as per the RFC 1035 specification. For example, www.example.com, www.example.org, subdomain.example.in
Tip: After setting up a custom domain, the default *.contentstackapps.com domain remains accessible. To prevent it from appearing in search results and avoid duplicate content issues for your site, refer to the Blocking Default Launch Domains From Google Search guide.
Adding a Custom Domain
Contentstack Launch lets you add custom apex domains and subdomains to your environments for more flexible domain management.
Follow the steps below to add a custom domain to an existing domain. In this example, we will configure a subdomain for example.com.
- Click the project card to open your project from the Launch landing page.
- In the Environments screen, click an existing environment or create a new environment. We will add a custom domain to the Default environment for this tutorial.
- In the Default environment, click the vertical ellipses under Actions and then click Settings to go to the Settings page.

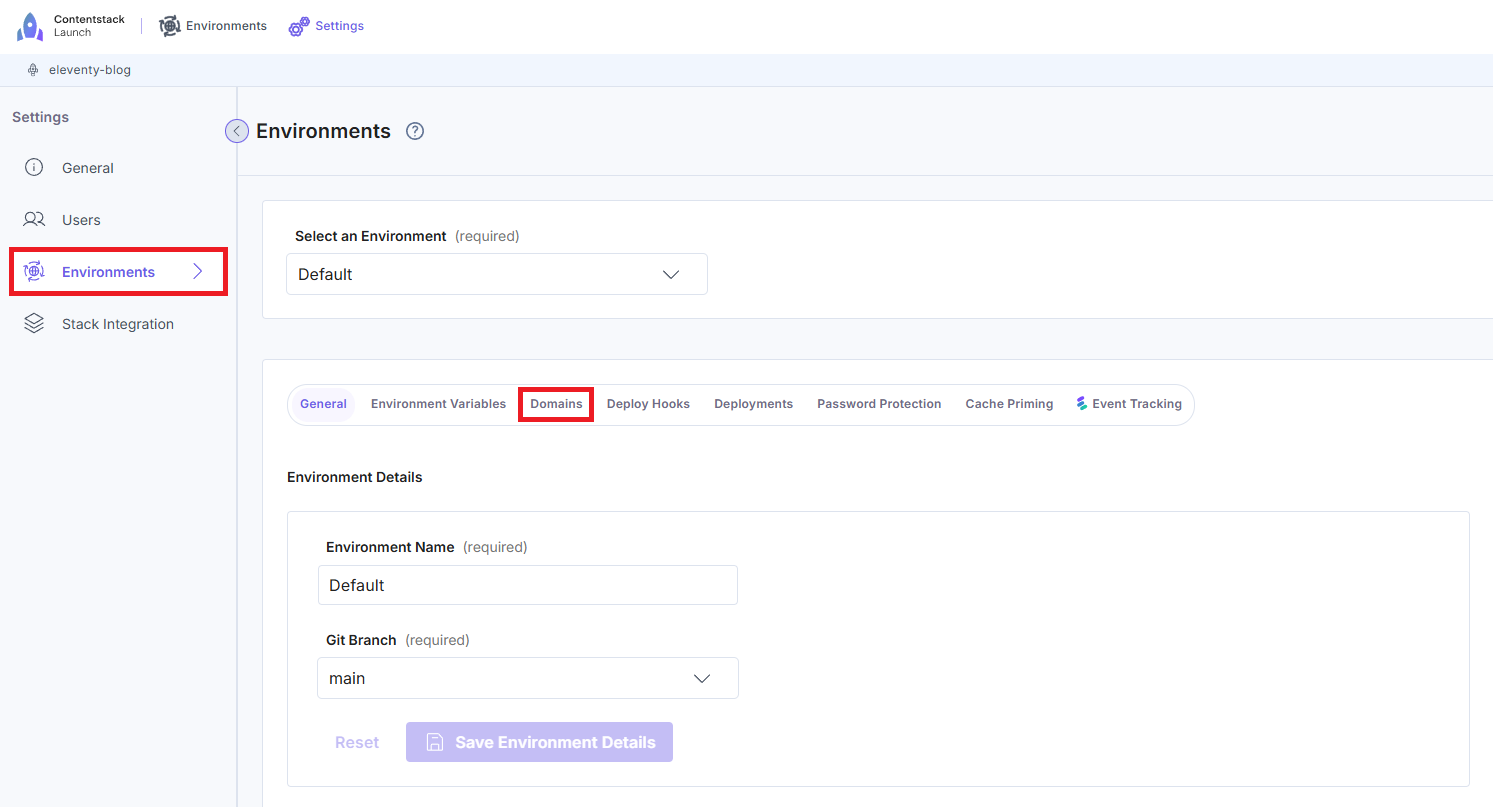
- In Environments under Settings, click Domains.
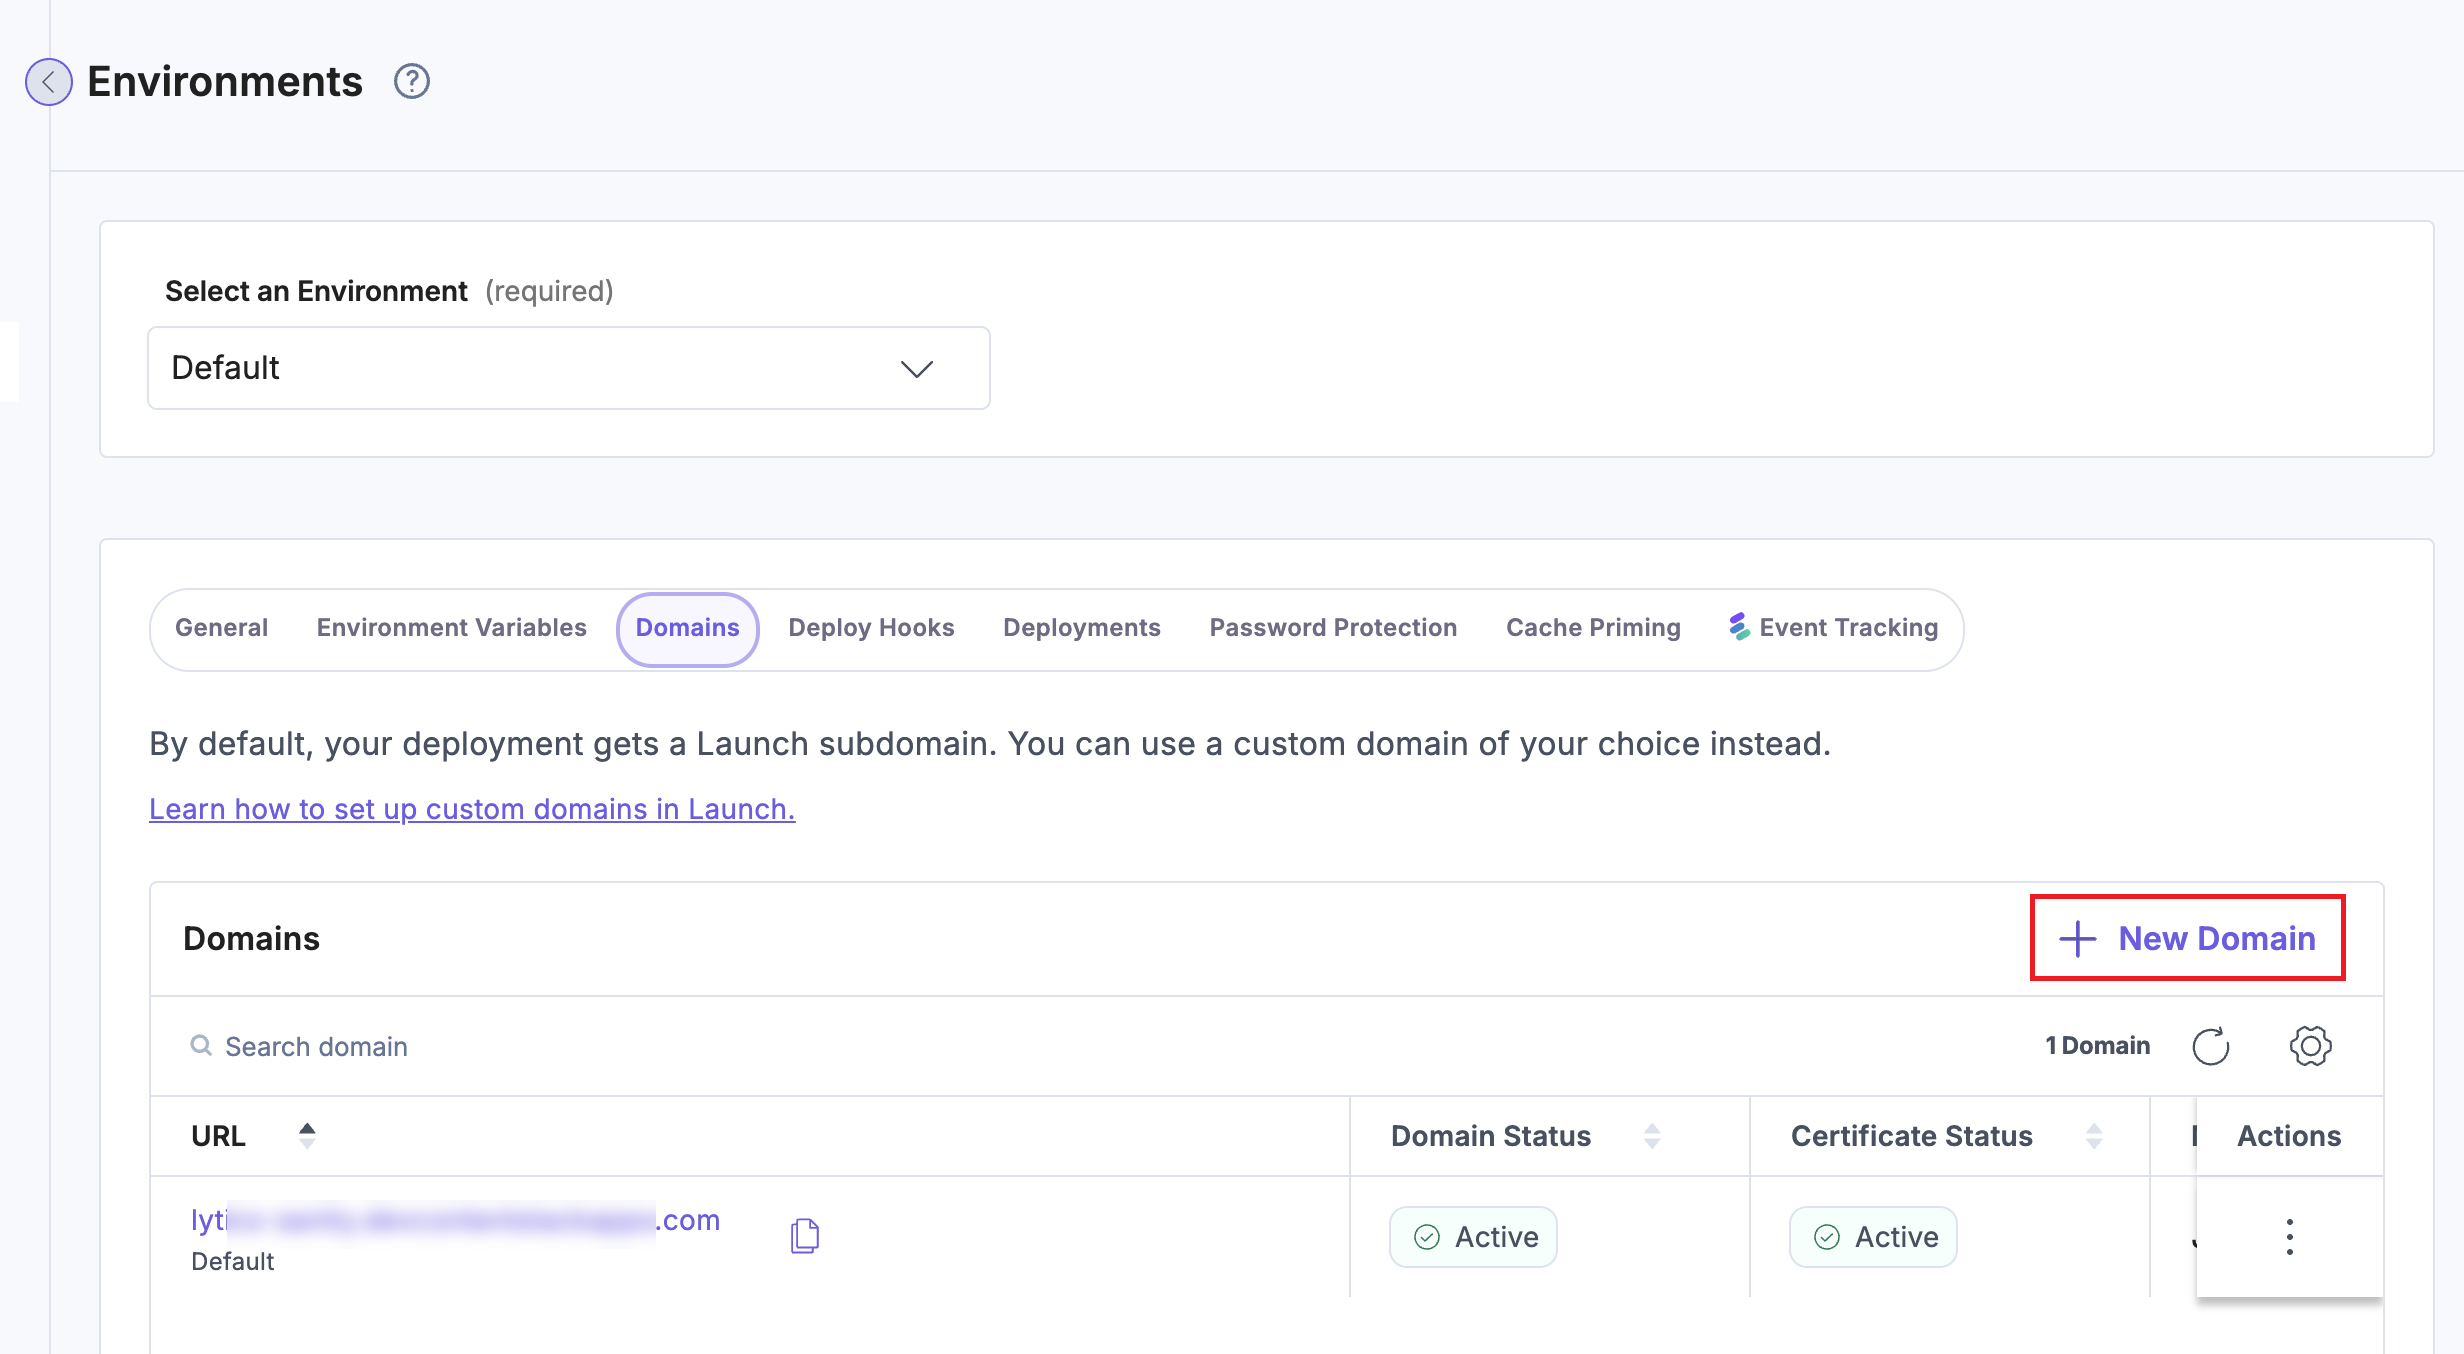
- Click the + New Domain button.
- In the Domain Name field, enter the subdomain name in the following format: <name>.<apex domain>
For example: www.example.com, domain.example.com
If you are creating an apex domain instead, enter only the <apex domain>, such as example.com
After entering the subdomain name, the DNS Details section gets auto-populated as shown below: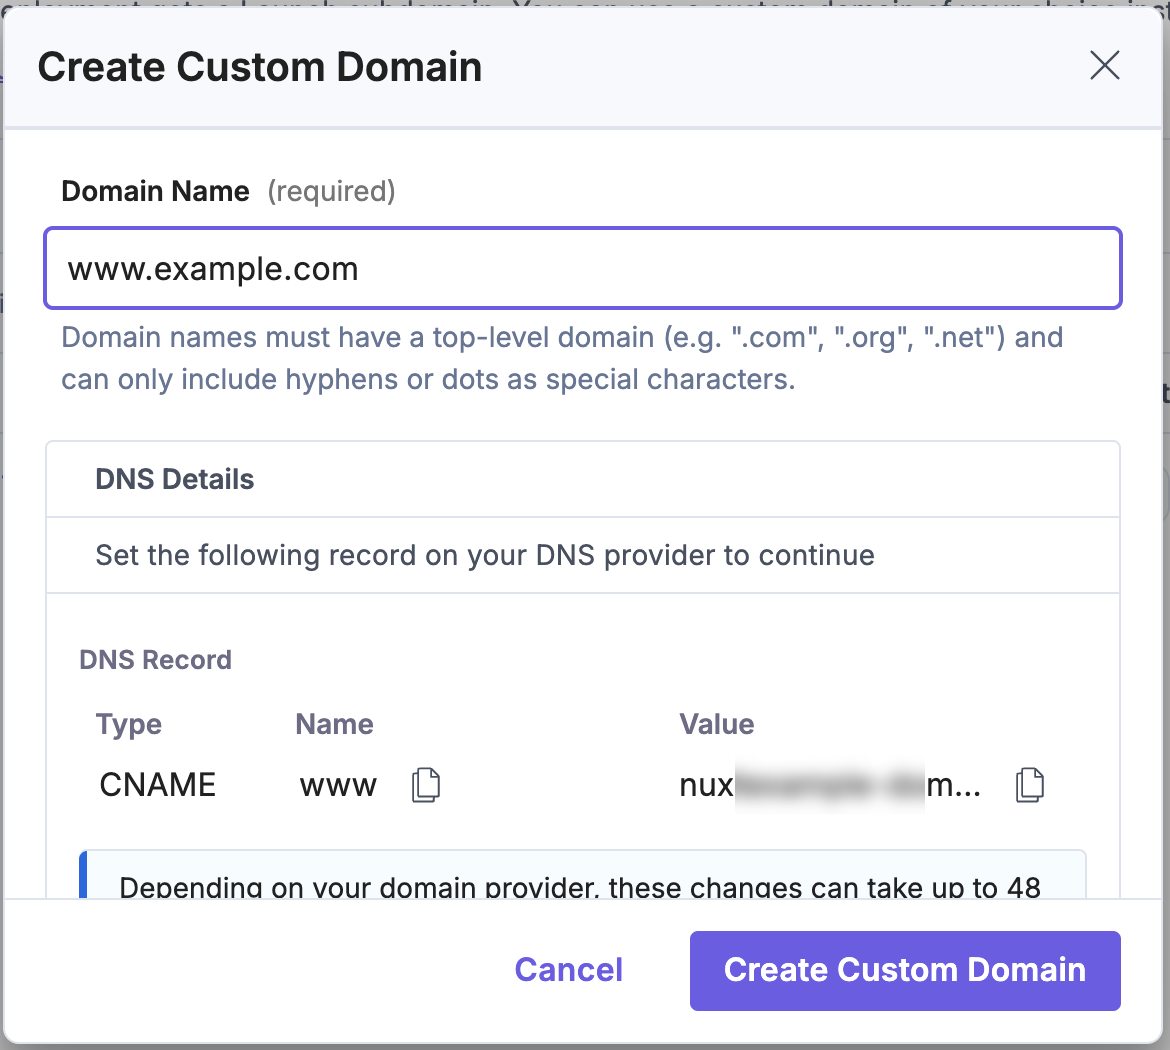 The Value field displays the default subdomain.Note:
- If you create an apex domain instead, an A record appears in the DNS section, instead of the CNAME record shown above.
- When you create an apex domain, No Redirection is selected by default. To enable redirection, learn how to add apex domains with redirects.
- Click the Create Custom Domain button.
You can see the newly created domain listed in the Domains page.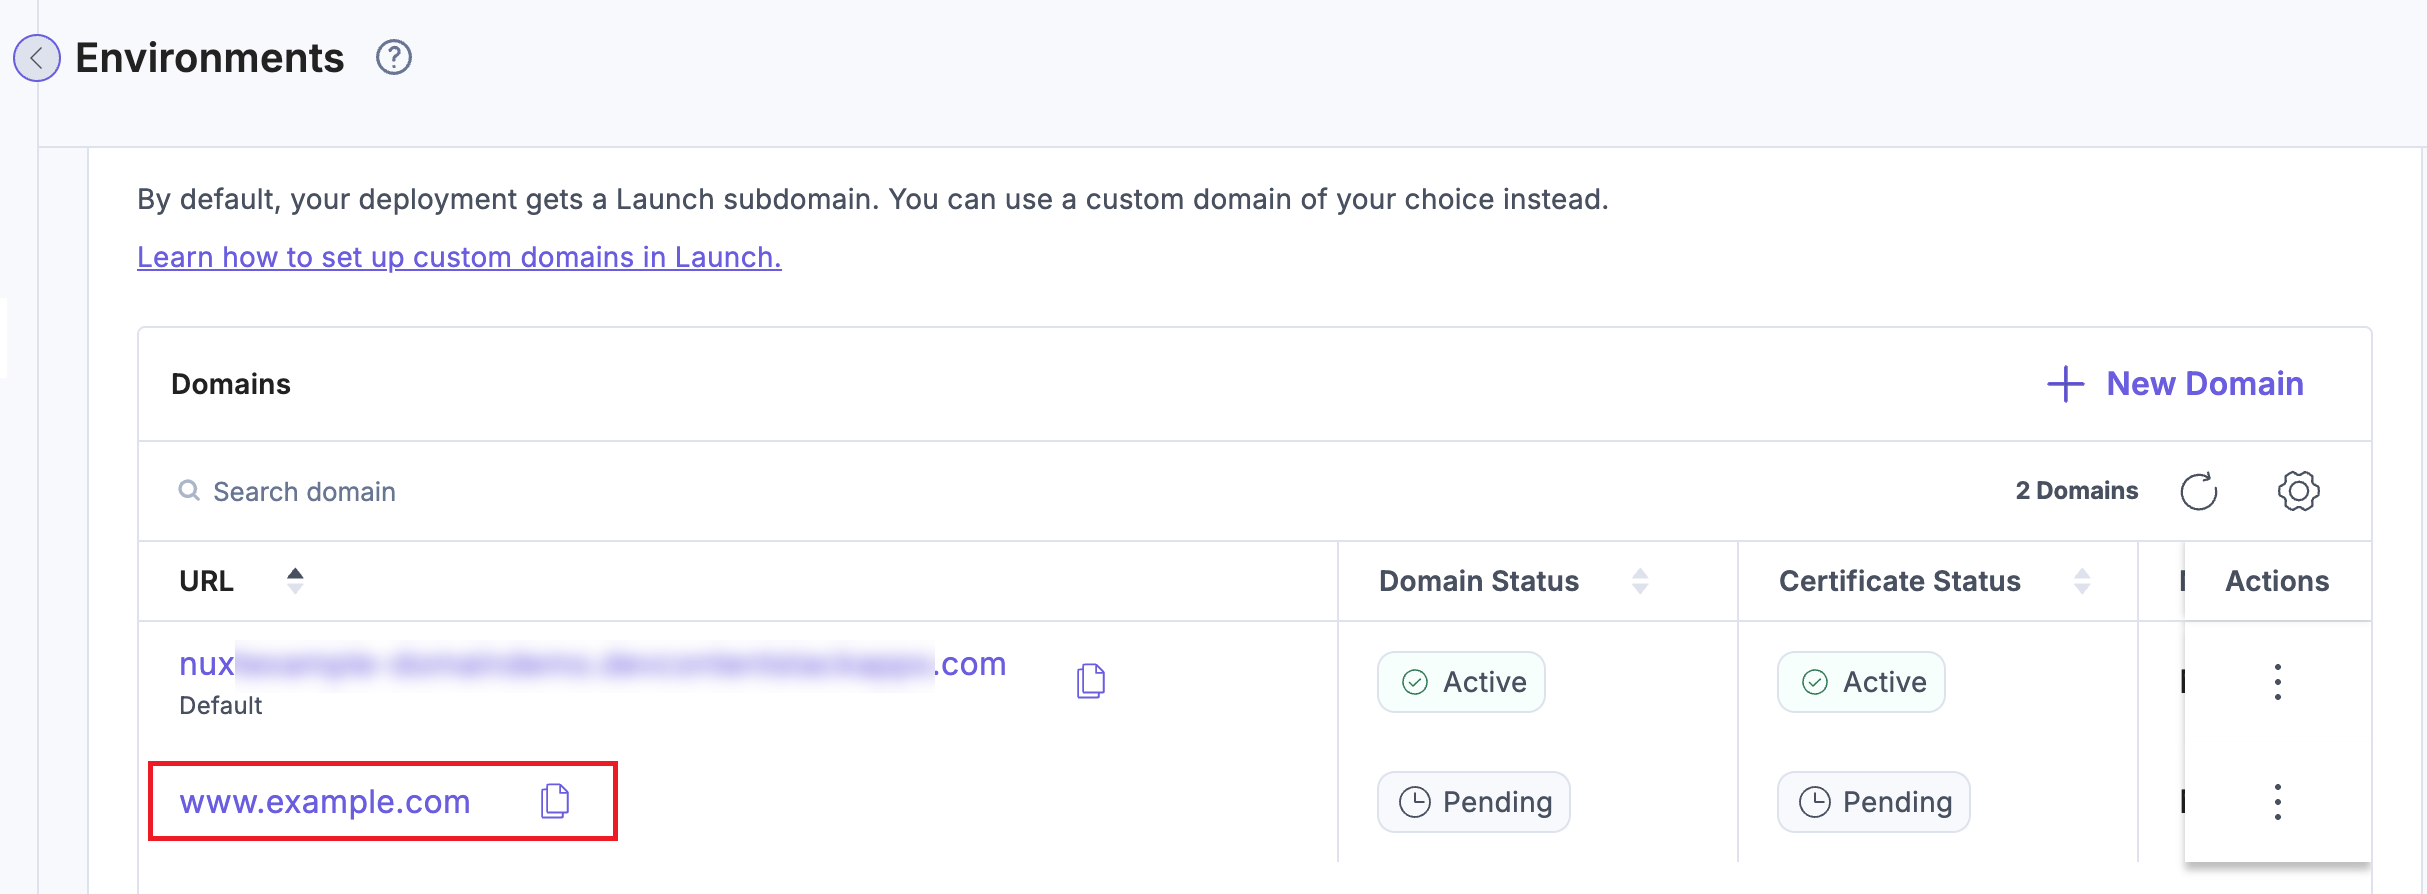
Adding Apex Domains with Redirects
Contentstack Launch supports redirection-only services for apex domains, following industry best practices. Rather than serving traffic directly from the apex domain (e.g., example.com), many top websites redirect users to a subdomain like www.example.com.
This approach offers several key advantages:
- Improved Security: Segregating content delivery and domain management helps reduce the attack surface and enhances overall security.
- Enhanced Flexibility: Easily switch infrastructure or hosting setups without impacting the user-facing subdomain.
- Consistent User Experience: Delivering content via a subdomain ensures better structure, brand consistency, and trust.
- Improved Performance: Subdomains support CNAMEs, enabling CDNs to route traffic across multiple geolocations for faster content delivery.
- Better Cookie Handling: Cookies set on the apex domain apply to all subdomains, which can pose a security risk in multi-tenant systems. Redirecting helps isolate this behavior.
- SEO Benefits: Redirecting to a single subdomain helps avoid duplicate content issues, supporting cleaner SEO practices.
In this setup, Launch ensures that all content is exclusively served from the designated subdomain, providing users with a seamless and efficient hosting solution for their websites.
To configure redirection for an apex domain, choose from the following options when creating the domain:
- No Redirection: This option allows you to add an apex domain without redirecting it to another subdomain or apex domain. Use this when you want the apex domain (e.g., example.com) to serve content directly.
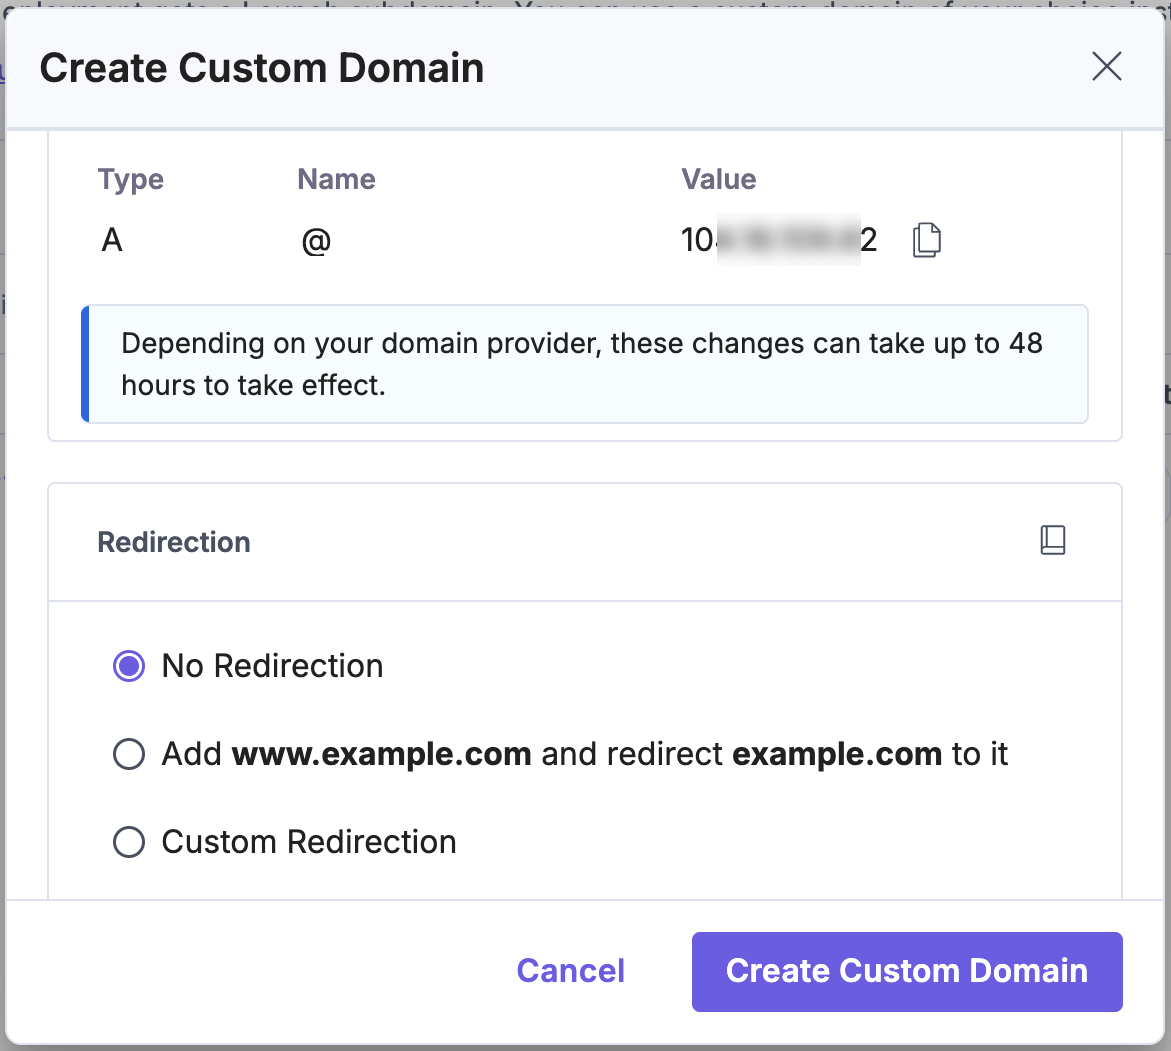
- Add www.apex.com (subdomain) and redirect apex domain to it: This option allows you to add an apex domain (e.g., example.com) and redirect it to a subdomain (e.g., www.example.com). As a result, traffic to the apex domain is redirected to the www subdomain, rather than being served directly from the apex domain.
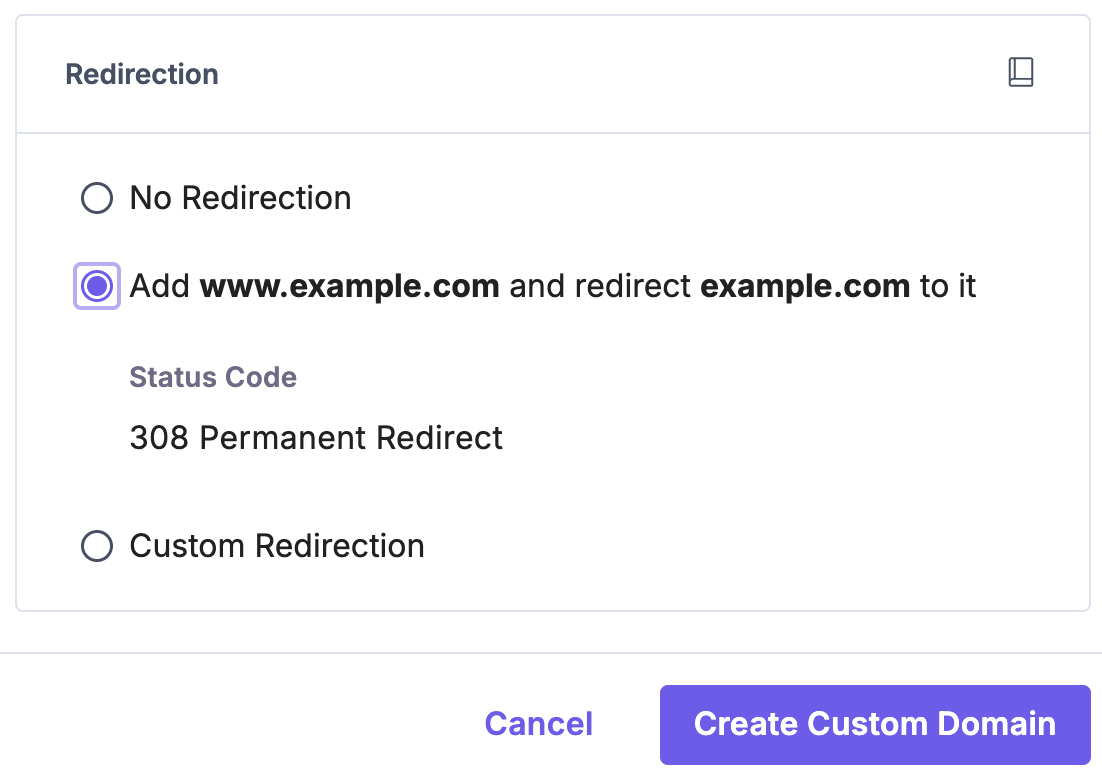
Note: When you select this option, two domains are created. An apex domain and a www subdomain.
- Custom Redirection: This option allows you to add an apex domain (e.g., example.com) and redirect it to an existing subdomain (e.g., blog.example.com), or another apex domain within the same environment.
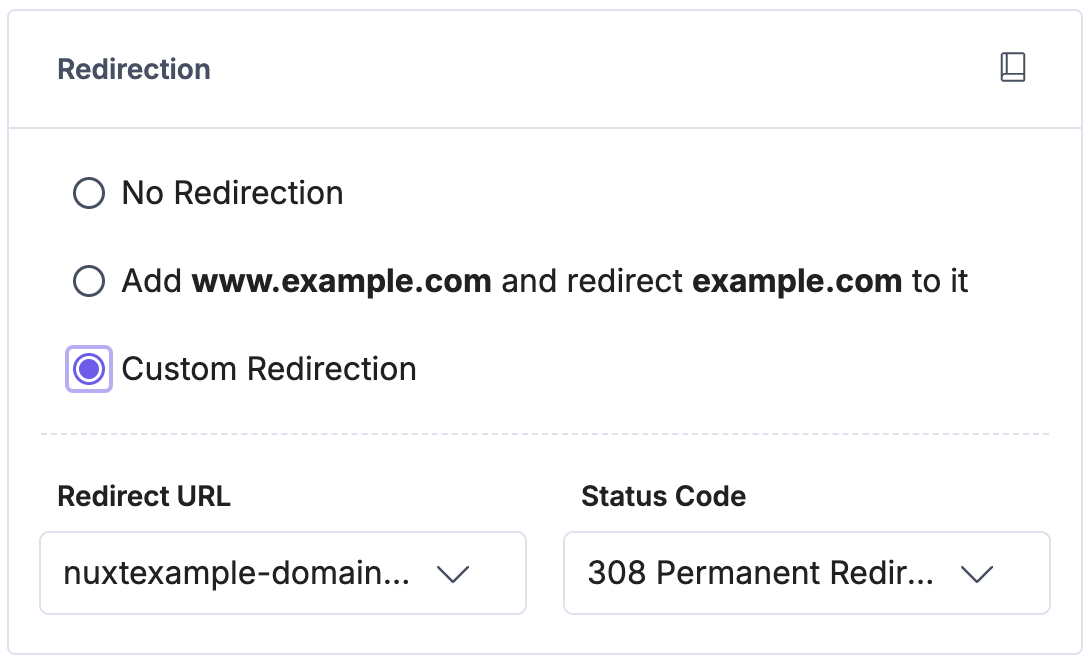
You can also choose a redirection status code from the following options:
- 308: Permanent Redirect
- 307: Temporary Redirect
- 301: Moved Permanently
- 302: Found
Domain Ownership Verification and Automatic SSL Provisioning
Domain validation confirms your ownership or control of a domain. This helps prevent unauthorized use and ensures secure traffic routing through your platform. Contentstack Launch uses TXT record validation to verify domain ownership and DCV records to provision SSL certificates. This method is secure, easy to set up, and widely supported.
Use these methods before adding A or CNAME records and routing traffic to Launch, especially for existing live sites migrating to Launch.
After successfully creating an apex or subdomain, you must validate both the hostname and the associated SSL certificate. To do so, perform the following steps:
- Click the vertical ellipses under Actions for the domain you have added, and then click Edit.
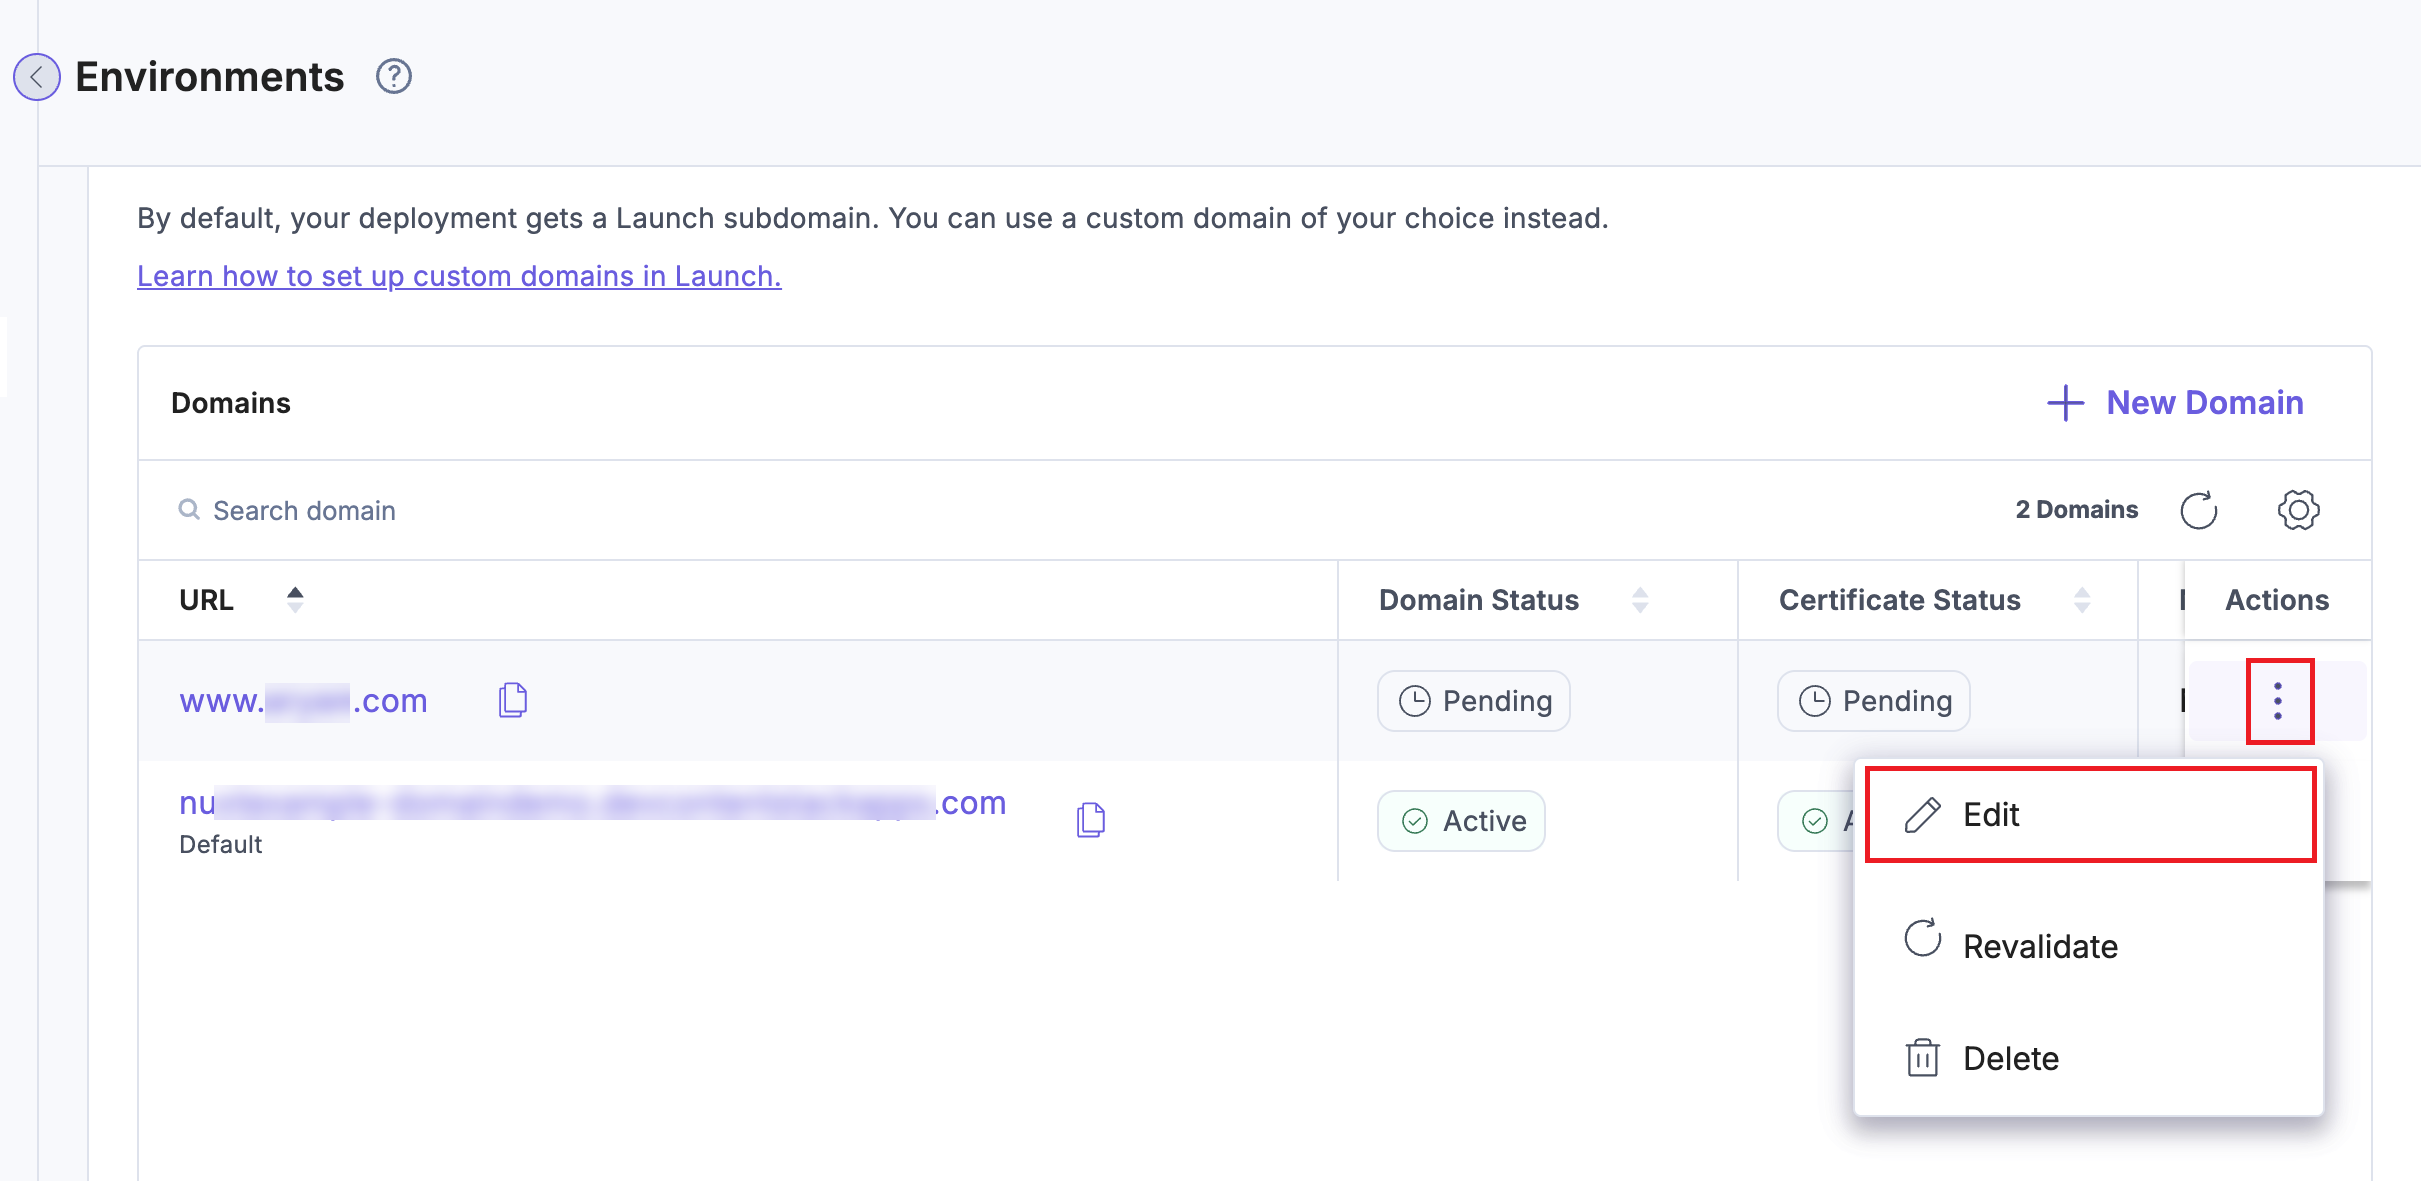
- In the DNS Details section, perform the following steps to validate:
- Hostname Validation Record:
- Locate the Hostname Validation Record section to view the TXT records required for validation.
- Click the copy icon next to the Name and Value fields to copy the TXT record details.
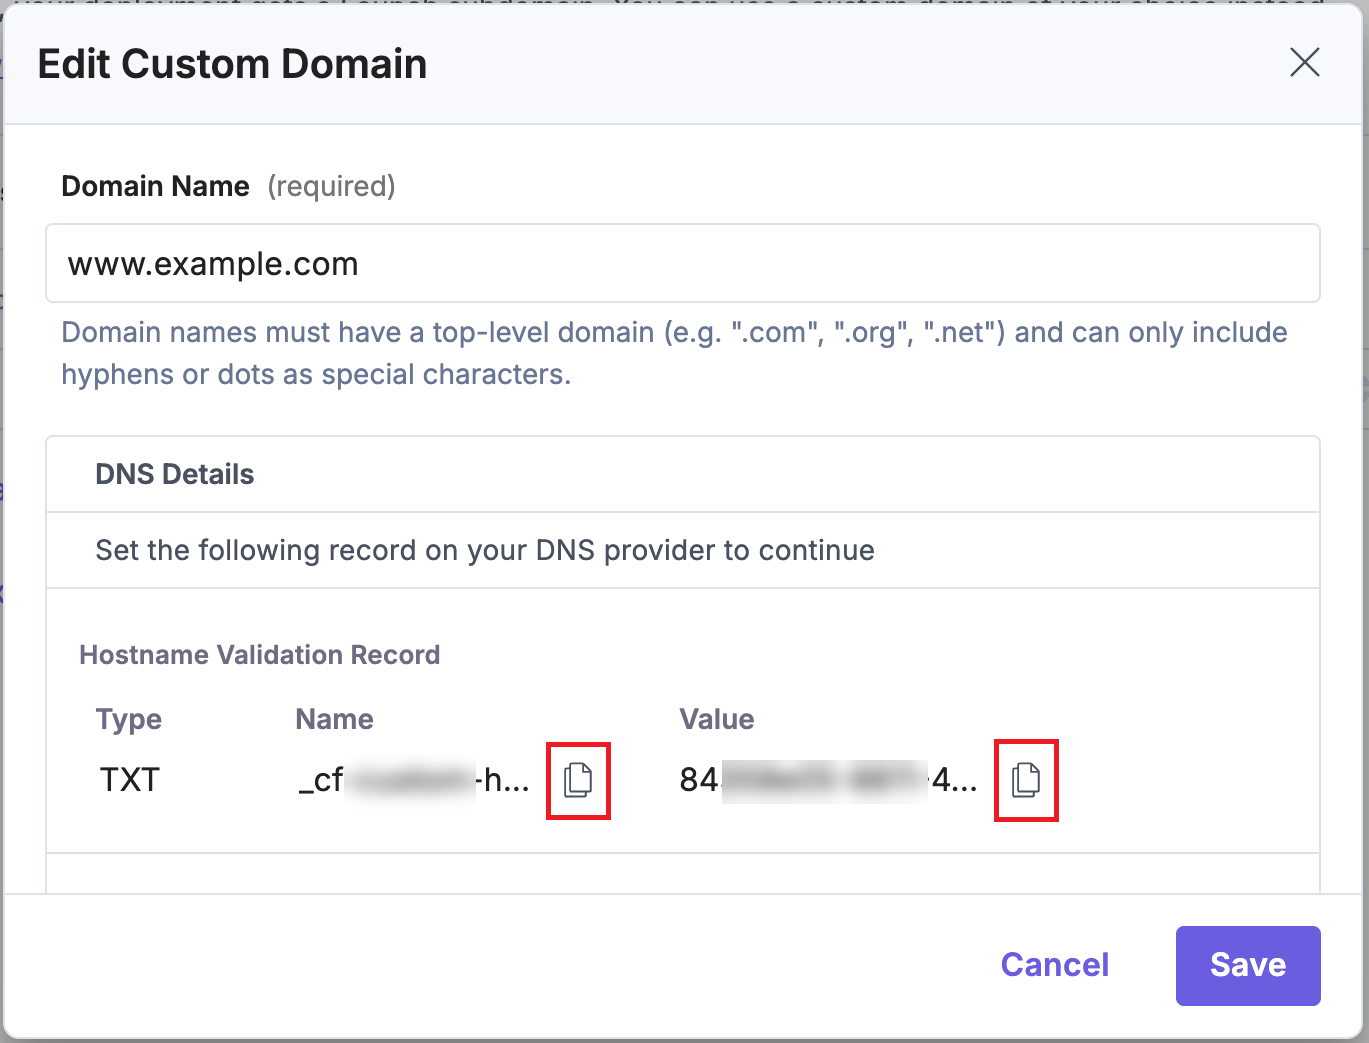
- Paste the copied details into your domain provider platform.
Below are the documentation links to common DNS providers for adding TXT records.
- Certificate Validation Record:
- Locate the Certificate Validation Record section.
- Click the copy icon next to the Name and Value fields to copy the DCV CNAME record details.
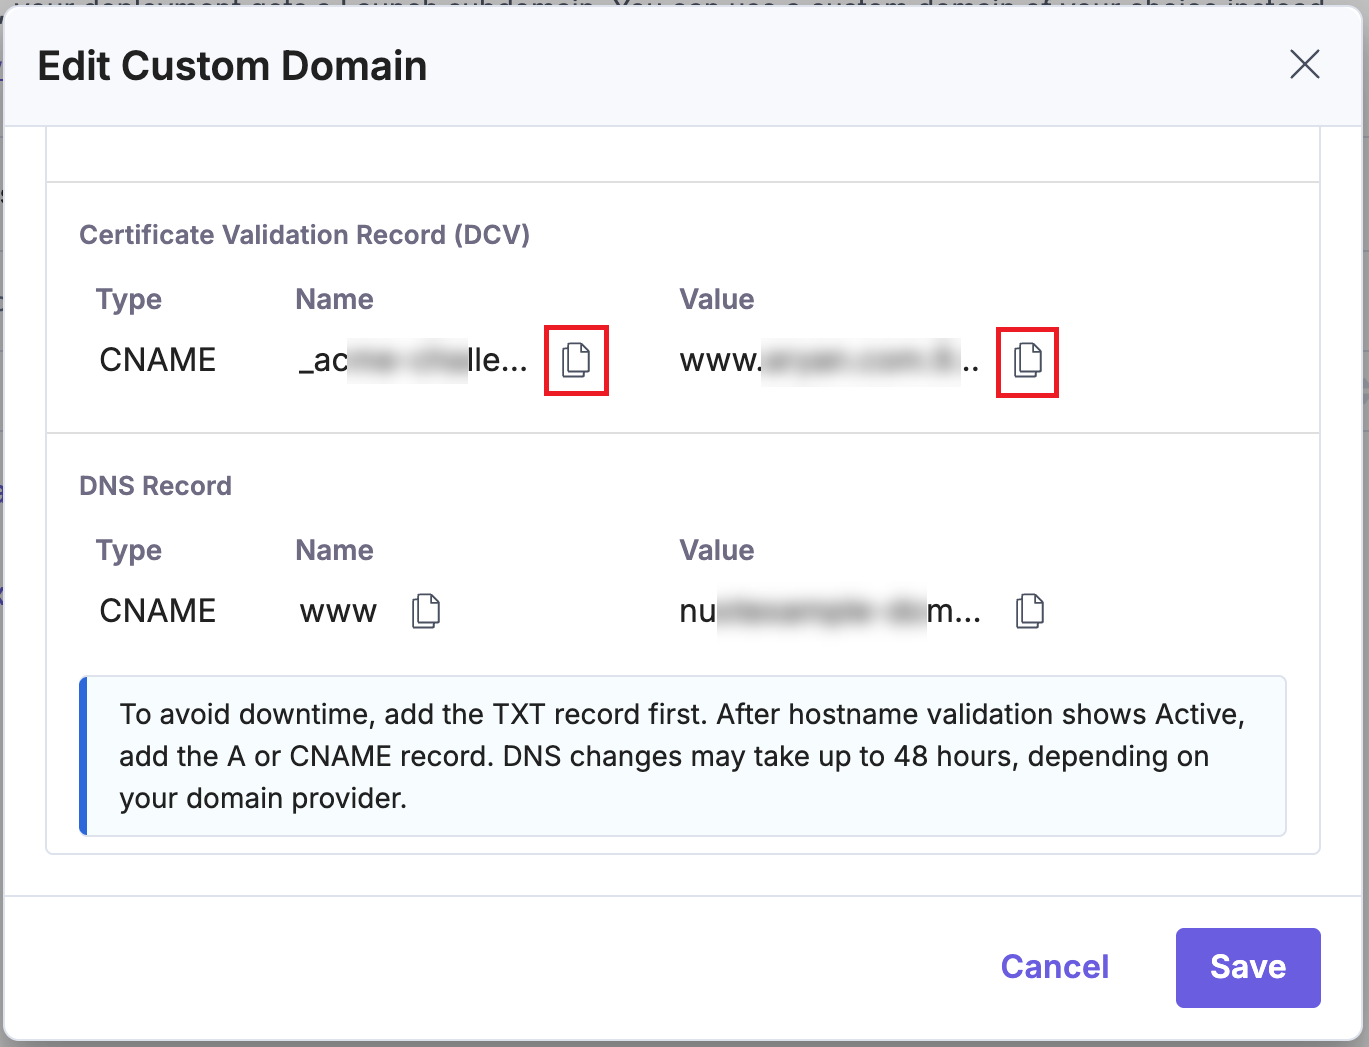
- Create a new CNAME record in your domain provider and add these DCV name and values.
Below are the documentation links to common DNS providers for adding DCV records.
- Hostname Validation Record:
- After adding the records, check your domain status in the Domain Status section.
- DNS changes may take up to 48 hours, depending on your domain provider and your TTL settings.
- Click the Refresh button at the top if the records are not visible.
- Once you’ve added the TXT and DCV records, Launch automatically validates the hostname and provision the SSL certificate, updating the status to Active. If the process takes longer than expected, you can use the Revalidate option in the Actions menu for your domain to trigger the validation again.
After both the domain and certificate statuses are active, add an A record or CNAME record under DNS Record section with your DNS provider:
- In the Edit modal, locate the DNS Record section below the Certificate Validation Record (DCV) section.
- Copy the provided Name and Value, then paste them into your DNS provider's settings.
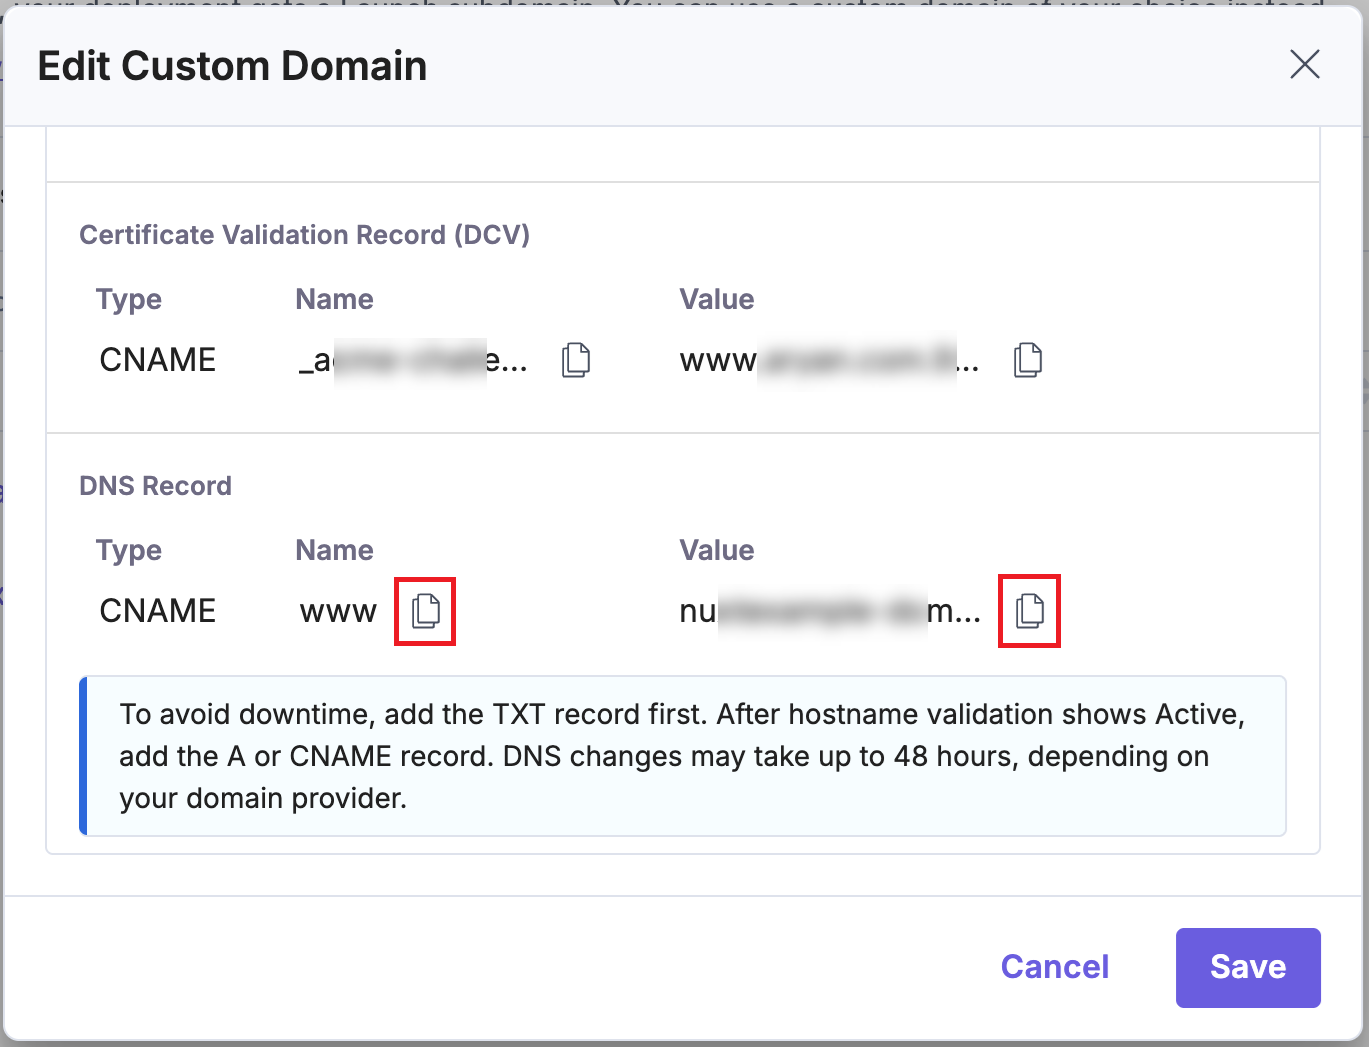
Note: The TXT record will no longer be visible once your hostname status is active.
Domain and Certificate Statuses:
- Active: The custom domain has successfully completed validation and is active.
- Pending: The custom domain is awaiting validation.
- Error: The custom domain could not be validated. Review the DNS settings and try again.
Note: Hover over the Pending or Error status to view the error message and error code in a tooltip. Copy the message for further troubleshooting.
Note: If your DNS is managed through a Cloudflare zone, an additional Orange-to-Orange (O2O) setup is required. The detailed steps for this configuration are outlined in the Contentstack Go-Live Guide, which can be referred for the implementation guidance.
Delete a Custom Domain
Launch allows you to delete a custom domain that you no longer require.
Follow the steps below to delete a custom domain:
- In the Environments screen, go to the environment for which you want to delete the domain.
- In the selected environment, click the vertical ellipses under Actions, and then click Settings.
- In the Settings page, click Domains under Environments.
- In the selected domain, click the vertical ellipses under Actions and then click Delete.
- A confirmation modal appears. Click Yes, Delete to confirm.
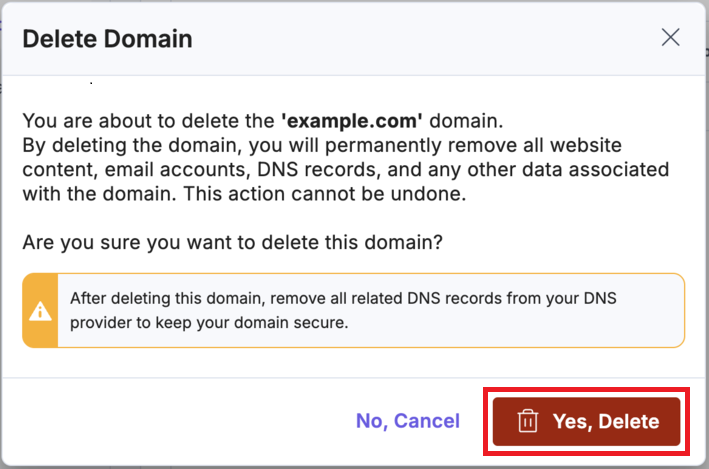
Warning: After deleting this domain, remove all related DNS records from your DNS provider to keep your domain secure.
