

Kickstart Nuxt
This guide walks you through setting up and running a Nuxt project integrated with Contentstack. It's designed for developers who are new to Nuxt or Contentstack.
Prerequisites
- Node.js version > 22 installed on your machine
- Basic understanding of JavaScript and/or TypeScript
- Contentstack account
Project Setup
1. Clone the Repository
Clone the project repository from GitHub:
git clone https://github.com/contentstack/kickstart-nuxt.git
cd kickstart-nuxt
Github for Frontend Nuxt App: Contentstack Kickstart - Nuxt
2. Install Dependencies
Install the required dependencies and packages:
npm install
Project Structure
After you clone the repo and install dependencies, your project should resemble the following structure:
#kickstart-nuxt
- 📁 composables/
  - 📄 useGetPage.ts
- 📁 plugins/
  - 📄 contentstack.ts
- 📁 public/
  - 📄 favicon.ico
  - 📄 robots.txt
- 📁 server/
  - 📄 tsconfig.json
- 📄 .env.example
- 📄 app.vue
- 📄 nuxt.config.ts
- 📄 package-lock.json
- 📄 package.json
- 📄 tsconfig.json
- 📄 types.ts
- 📄 README.md
3. Create a Stack
Log in to your Contentstack account and create a new Stack. Follow these steps to seed your Stack with the necessary data:
- Download the Stack seed data from GitHub.
- Install the Contentstack CLI:
npm install -g @contentstack/cli
- If you are running the CLI for the first time, set your region:
csdx config:set:region AWS-EUNote:- AWS North America: Set the region as AWS-NA.
- AWS Europe: Set the region as AWS-EU.
- AWS Australia: Set the region as AWS-EU.
- Azure North America: Set the region as AZURE-NA.
- Azure Europe: Set the region as AZURE-EU.
- Google Cloud Platform North America: Set the region as GCP-NA.
- Google Cloud Platform Europe: Set the region as GCP-EU.
- Log in via the CLI:
csdx auth:loginThis command will ask you to provide your Contentstack’s account credentials (email and password).
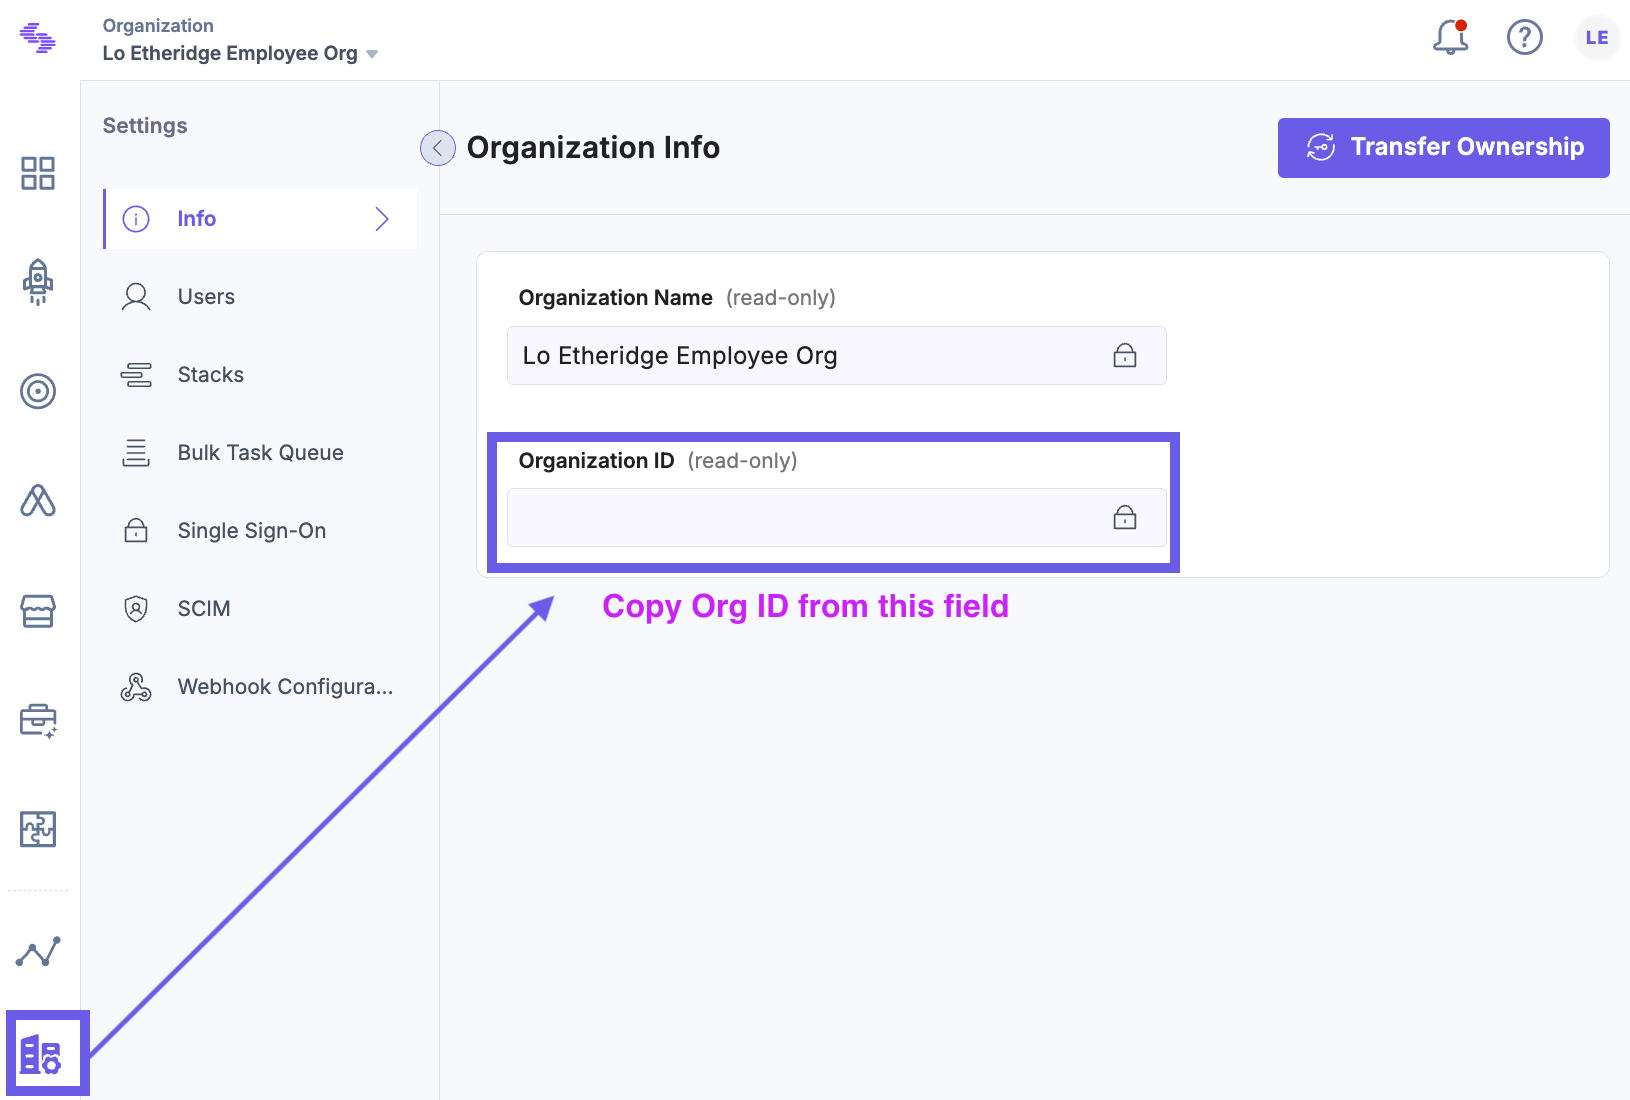
- Get your Organization ID from the Contentstack dashboard: Go to Org Admin > Info and copy the Org ID
- Seed your Stack:
csdx cm:stacks:seed --repo "contentstack/kickstart-stack-seed" --org "<YOUR_ORG_ID>" -n "CS Kickstart Nuxt"
Need more information, watch a quick video on how to seed a stack in the CLI.
4. Create a Delivery Token
In you stack, go to Settings > Tokens in your Contentstack dashboard and create a delivery token with the preview setting toggled to On.
Alternatively, watch a quick step-by-step tutorial on How to create delivery tokens.
5. Setup environment variables
Create a .env file in the root of your project and add your Contentstack credentials:
NUXT_PUBLIC_CONTENTSTACK_API_KEY=<YOUR_API_KEY>
NUXT_PUBLIC_CONTENTSTACK_DELIVERY_TOKEN=<YOUR_DELIVERY_TOKEN>
NUXT_PUBLIC_CONTENTSTACK_PREVIEW_TOKEN=<YOUR_PREVIEW_TOKEN>
NUXT_PUBLIC_CONTENTSTACK_REGION=<YOUR_REGION_NAME>
NUXT_PUBLIC_CONTENTSTACK_ENVIRONMENT=<ENVIRONMENT_NAME>
NUXT_PUBLIC_CONTENTSTACK_PREVIEW=true
#By default the live preview feature is enabled for this project.
For more information on environments and setting up delivery tokens, watch the Understanding Environments Contentstack Academy video.
6. Turn on Live Preview
Go to Settings > Live Preview in your Contentstack dashboard. Enable it and select the Preview environment.
7. Run Your Nuxt App
Start the development server from your kickstart-nuxt project directory in the terminal:
npm run dev
Open http://localhost:3000 in your browser to see your app in action.
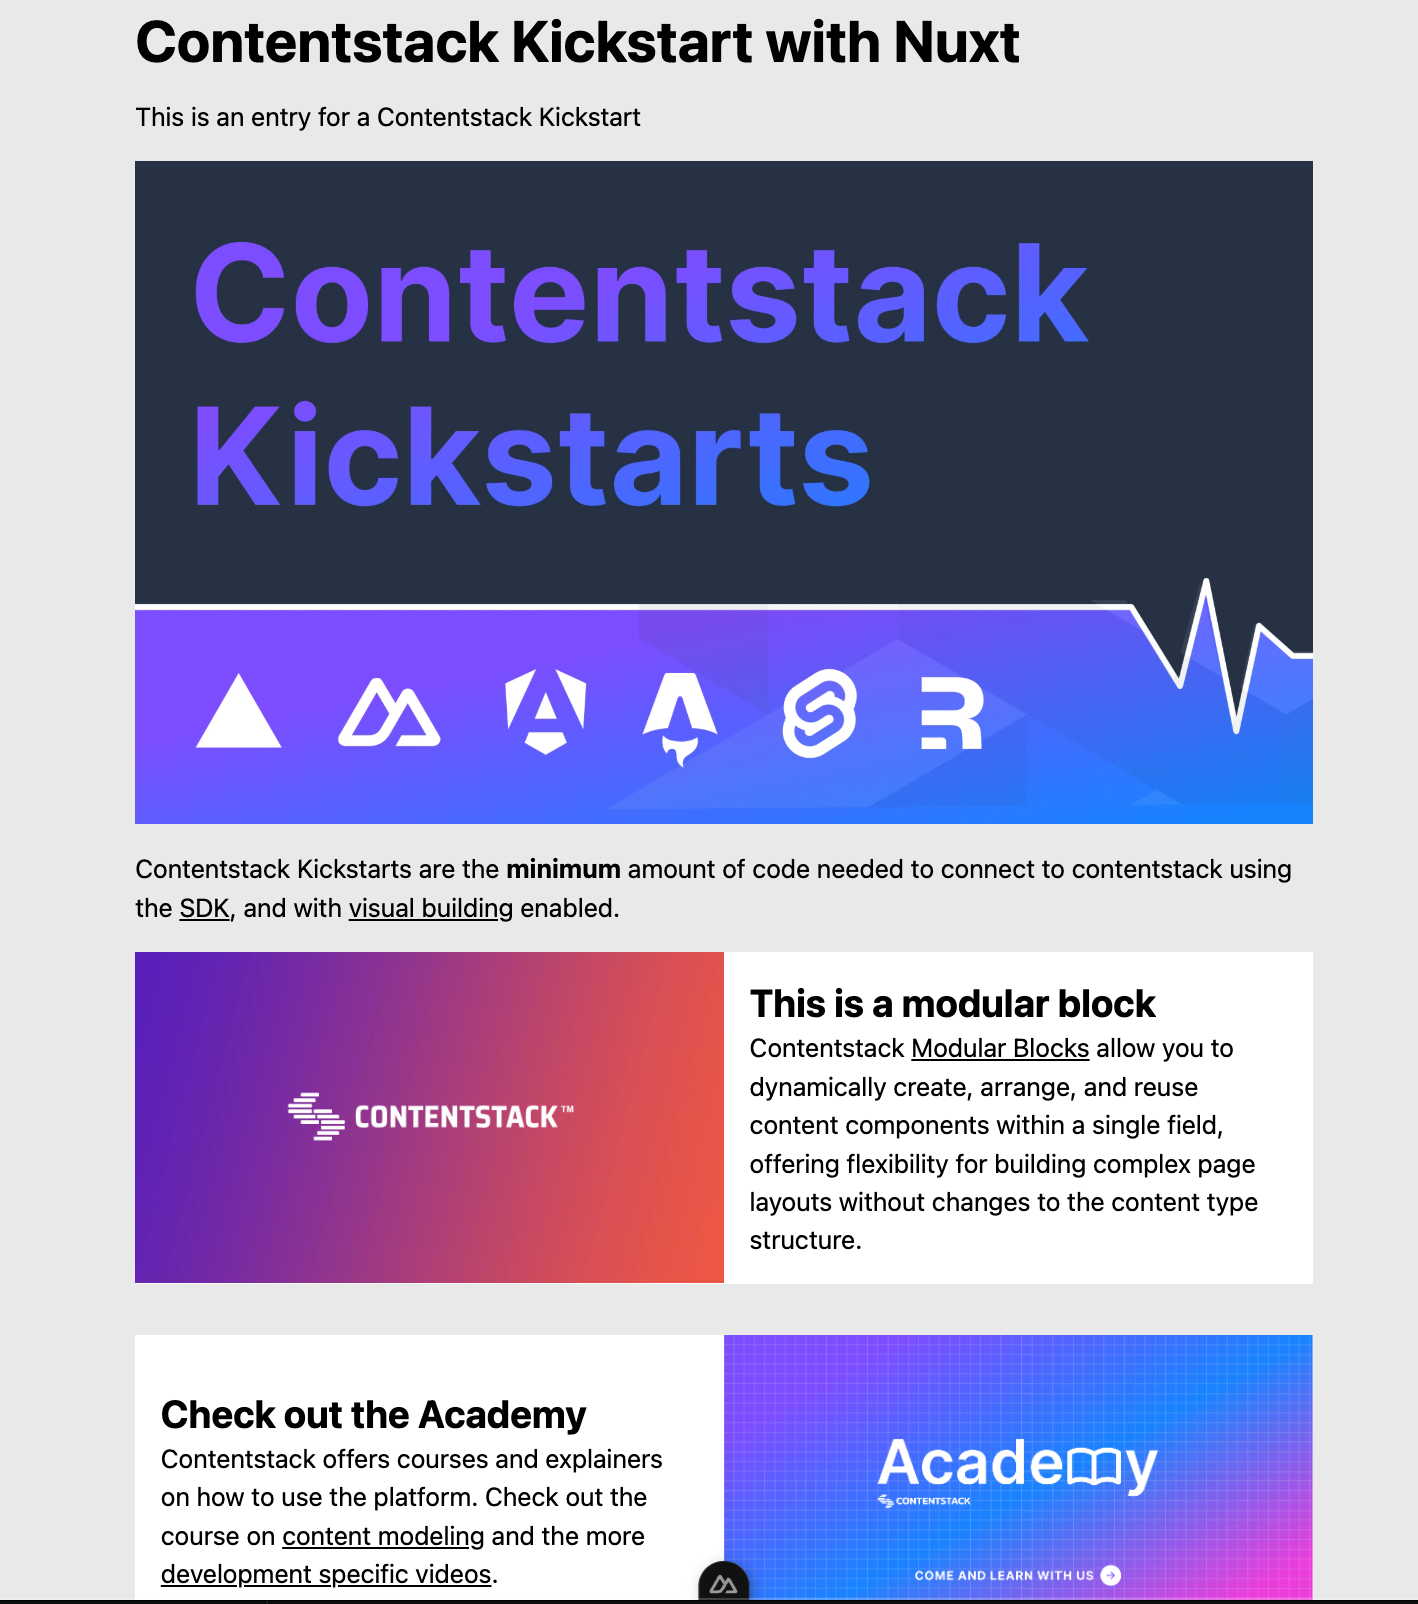
Tip: You can Command + Click or Enter to open up the Localhost URL in the browser. You Nuxt app should resemble the following:
Kickstart guide video
Want to see this Nuxt guide in action? Check out this kickstart video!
Key Files and Code Breakdown
Let's quickly go over a few key files and the code.
Contentstack SDK
File name: plugins/contentstack.ts
This file initializes the Contentstack Delivery SDK and provides helper functions to fetch data:
/**
 * Contentstack Delivery SDK plugin
 *
 * This plugin initializes the Contentstack Delivery SDK and Live Preview functionality
 * Key Features:
 * 1. Sets up the Contentstack stack instance with provided configuration
 * 2. Configures live preview with edit button functionality
 * 3. Provides the stack instance and preview utilities to the application
 *
 * Configuration is loaded from the Nuxt public config and includes:
 * - API Key
 * - Delivery Token
 * - Preview Token
 * - Region
 * - Environment
 * - Preview mode flag
 */

// Imports
import contentstack, { Region } from "@contentstack/delivery-sdk"
import ContentstackLivePreview, { type IStackSdk } from "@contentstack/live-preview-utils";
import { getContentstackEndpoints, getRegionForString } from "@timbenniks/contentstack-endpoints";

export default defineNuxtPlugin((nuxtApp) => {
  const {
    apiKey,
    deliveryToken,
    previewToken,
    region,
    environment,
    preview
  } = nuxtApp.$config.public;

  const regionEnum: Region = getRegionForString(region)
  const endpoints = getContentstackEndpoints(regionEnum, true)

  const stack = contentstack.stack({
    apiKey,
    deliveryToken,
    environment,
    region: regionEnum,
    live_preview: {
      enable: preview ? true : false,
      preview_token: previewToken,
      host: endpoints.preview
    }
  });

  if (preview && import.meta.client) {
    ContentstackLivePreview.init({
      ssr: false,
      mode: "builder",
      enable: preview ? true : false,
      stackSdk: stack.config as IStackSdk,
      stackDetails: {
        apiKey: apiKey,
        environment: environment,
      },
      clientUrlParams: {
        host: endpoints.application
      },
      editButton: {
        enable: true,
        exclude: ["outsideLivePreviewPortal"]
      }
    });
  }

  return {
    provide: {
      stack,
      preview,
      ContentstackLivePreview
    },
  };
});
Contentstack Data Query
File name: composables/getPageData.ts
This file contains the async function that queries Contentstack to fetch all page data. In addition, a conditional is added to check if you are in preview mode and if so, add editable tags to the fetched entry.
/**
 * Retrieve Contentstack Page Data
 *
 * This composable fetches and manages page data from Contentstack using Nuxt's composables.
 * It supports both regular content delivery and live preview functionality.
 *
 * Features:
 * - Fetches page content based on URL parameter
 * - Supports Contentstack Live Preview mode
 * - Handles data fetching with Nuxt's useAsyncData
 * - Implements type-safe Contentstack queries
 * - Adds editable tags for content management
 *
 * Note: This composable automatically handles preview mode when the 'live_preview' query parameter is present.
 */

// Imports
import contentstack, { QueryOperation, type LivePreviewQuery } from "@contentstack/delivery-sdk";
import type { Page } from "~/types";

// Define an asynchronous function to fetch page data based on the URL
export const useGetPage = async (url: string) => {
  // Use the useAsyncData hook to fetch data and manage its state
  const { data, status, refresh } = await useAsyncData(`page-${url}`, async () => {
    // Get the Nuxt app instance and the current route
    const { $preview, $stack } = useNuxtApp()
    const route = useRoute()
    const qs = { ...toRaw(route.query) } // Convert the route query to a raw object

    // Check if preview mode is enabled and if live preview query parameter is present
    if ($preview && qs?.live_preview) {
        $stack.livePreviewQuery(qs as unknown as LivePreviewQuery)
    }
    // Fetch the page data from Contentstack
    const result = await $stack
       // Specify the content type as 'page'
      .contentType("page")
       // Access the entries of the content type
      .entry()
      // Create a query to filter the entries
      .query()
      // Filter entries where the 'url' field matches the provided URL
      .where("url", QueryOperation.EQUALS, url)
      // Execute the query and cast the result to the Page type
      .find<Page>();

    // Check if there are any entries in the result
    if (result.entries) {
       // Get the first entry from the result
      const entry = result.entries[0]
       // If preview mode is enabled, add editable tags to the entry
      if ($preview) {
        contentstack.Utils.addEditableTags(entry as Page, 'page', true);
      }
     // Return the entry as the data
      return entry;
    }

  });
  // Return the data, status, and refresh function from useAsyncData
  return { data, status, refresh }
}
Quick Tip: API Endpoint helper package
You can use the Contentstack Endpoints NPM package to gather all the API endpoints you need to deliver content. For more details on how the package works, check out this explainer video!
Now, let's jump into how the main Nuxt component works.
Main Nuxt component
File name: app.vue
The app.vue is the main Nuxt application file where live preview is integrated and fetched data from Contentstack is populated into your markup inside the template tag.
You now have a basic understanding of how to set up and run a Nuxt project integrated with Contentstack. If you have any questions or run into an error, join the Contentstack Community in Discord for further support.
Kickstart Nuxt (Server-Side Rendering – SSR Mode)
The Nuxt SSR Kickstart is a variant configured for Server-Side Rendering. In SSR mode, pages are rendered on the server on each request (rather than purely in the browser), which ensures that the latest content is delivered without needing client-side fetching. This Kickstart still uses Contentstack's REST Delivery API under the hood, but it initializes Live Preview in SSR mode. In SSR Live Preview, Contentstack will append preview query parameters to the page URL and trigger full page reloads upon content edits (as opposed to dynamically updating content in place). This is useful for scenarios where you want the server to always fetch fresh data (e.g., highly dynamic content or personalized pages).
1. Clone the Repository
Clone the Nuxt SSR Kickstart repository and enter it:
git clone https://github.com/contentstack/kickstart-nuxt-ssr.git
cd kickstart-nuxt-ssr
GitHub Repository: Kickstart Nuxt SSR
2. Install Dependencies
Install the dependencies as usual:
npm install
3. Create or Reuse a Contentstack Stack
You can use the same Stack created earlier ("CS Kickstart Next") since the content structure is identical. If you haven't created one, follow the stack seeding steps under the CSR section to seed a new stack with the Kickstart content.
4. Create a Delivery Token
If reusing the existing stack, ensure you have a Delivery Token with Preview enabled (as created in the earlier steps). Otherwise, create a new Delivery/Preview token pair in Settings > Tokens for this stack.
5. Set Up Environment Variables
Configure the .env in the kickstart-next-ssr project with your stack's API Key, Delivery Token, Preview Token, Region, Environment, and preview flag. It uses the same environment variables as the base Kickstart:
NEXT_PUBLIC_CONTENTSTACK_API_KEY=<YOUR_API_KEY>
NUXT_PUBLIC_CONTENTSTACK_DELIVERY_TOKEN=<YOUR_DELIVERY_TOKEN>
NUXT_PUBLIC_CONTENTSTACK_PREVIEW_TOKEN=<YOUR_PREVIEW_TOKEN>
NUXT_PUBLIC_CONTENTSTACK_REGION=<YOUR_REGION_NAME>
NUXT_PUBLIC_CONTENTSTACK_ENVIRONMENT=<YOUR_ENV_NAME>
NUXT_PUBLIC_CONTENTSTACK_PREVIEW=true
6. Enable Live Preview in Stack Settings
Make sure Live Preview is enabled in your stack (as done previously) for the environment you're using (e.g., Preview).
7. Run the Nuxt App (SSR)
Run the development server:
npm run dev
Open http://localhost:3000 to verify the site is working. The SSR Kickstart's output will look similar to the base Kickstart (since it's the same content), but it's rendered server-side. If you edit content in Contentstack, the page refreshs automatically to show updates (the Contentstack Live Preview system will reload the page via the query parameters mechanism).
How SSR Mode Differs
In the code for this Kickstart, the Contentstack Live Preview utility is initialized with ssr: true (instead of false) to accommodate server-side rendering. Contentstack's preview system will add a query string (e.g., ?contentstack={{entry_id}}) to the URL when content is edited, which the app uses to fetch the updated content on the server before responding. This means on each change, you'll see the browser refresh the page. The benefit is that no client-side fetching is needed on navigation – the content is always up-to-date on initial load. However, unlike the CSR mode, you won't see inline editing overlays in real-time; instead, the page fully reloads with new content on edits.
Kickstart Nuxt (SSR) Video Walkthrough
Watch this video to see the SSR Kickstart implementation:
More articles in "Set up with GraphQL"
