

Kickstart Next.js
Kickstarts are pre-built, minimal code templates designed to help you integrate a Next.js project with Contentstack. Each section below provides step-by-step instructions and code snippets for setting up a Kickstart, along with pointers on how it differs from others.
This guide covers all Next.js Kickstart variants – from the standard client-side setup to advanced modes such as SSR, Middleware, GraphQL, and SSG.
Prerequisites
- Node.js (v19 or higher) installed on your machine
- Basic understanding of JavaScript and/or TypeScript
- Contentstack account with access to create a stack
Kickstart Next.js (Client-Side Rendering – CSR)
The standard Next.js Kickstart uses client-side data fetching with Contentstack's Delivery SDK. It's a lightweight Next.js 13+ app (using the App Router) set up with Live Preview and Visual Editor support. This is ideal for developers new to Next.js or Contentstack, providing a live preview of content changes directly in the browser.
1. Clone the Repository
Start by cloning the Next.js Kickstart repository and navigating into it:
git clone https://github.com/contentstack/kickstart-next.git
cd kickstart-next
This repository contains a minimal Next.js project already wired up to use Contentstack's SDK and Live Preview utilities.
Github for Frontend Next App: Kickstart Next.js
2. Install Dependencies
Install the required dependencies and packages:
npm install
Project Structure
After you clone the repo and install dependencies, your Next project should resemble the following structure:
#kickstart-next

├── 📂 app
│   ├── 📄 favicon.ico
│   ├── 📄 globals.css
│   ├── 📄 layout.tsx
│   └── 📄 page.tsx
├── 📂 lib
│   ├── 📄 contentstack.ts
│   ├── 📄 types.ts
│   └── 📄 utils.ts
├── 📄 .env.example
├── 📄 next-env.d.ts
├── 📄 next.config.mjs
├── 📂 node_modules
├── 📄 package-lock.json
├── 📄 package.json
├── 📄 README.md
├── 📄 postcss.config.mjs
└── 📄 tsconfig.json
3. Create a Contentstack Stack
Next, set up a Contentstack Stack loaded with sample content for the Kickstart. Log in to your Contentstack account and create a new Stack. Follow these steps to seed your Stack with the necessary data:
- Download the Stack seed data from GitHub.
- Install the Contentstack CLI (if not already installed):
npm install -g @contentstack/cli
- If you are running the CLI for the first time, set your region:
csdx config:set:region AWS-EUNote:- AWS North America: Set the region as AWS-NA.
- AWS Europe: Set the region as AWS-EU.
- AWS Australia: Set the region as AWS-EU.
- Azure North America: Set the region as AZURE-NA.
- Azure Europe: Set the region as AZURE-EU.
- Google Cloud Platform North America: Set the region as GCP-NA.
- Google Cloud Platform Europe: Set the region as GCP-EU.
- Log in via the CLI:
csdx auth:loginThis command will ask you to provide your Contentstack's account credentials (email and password).
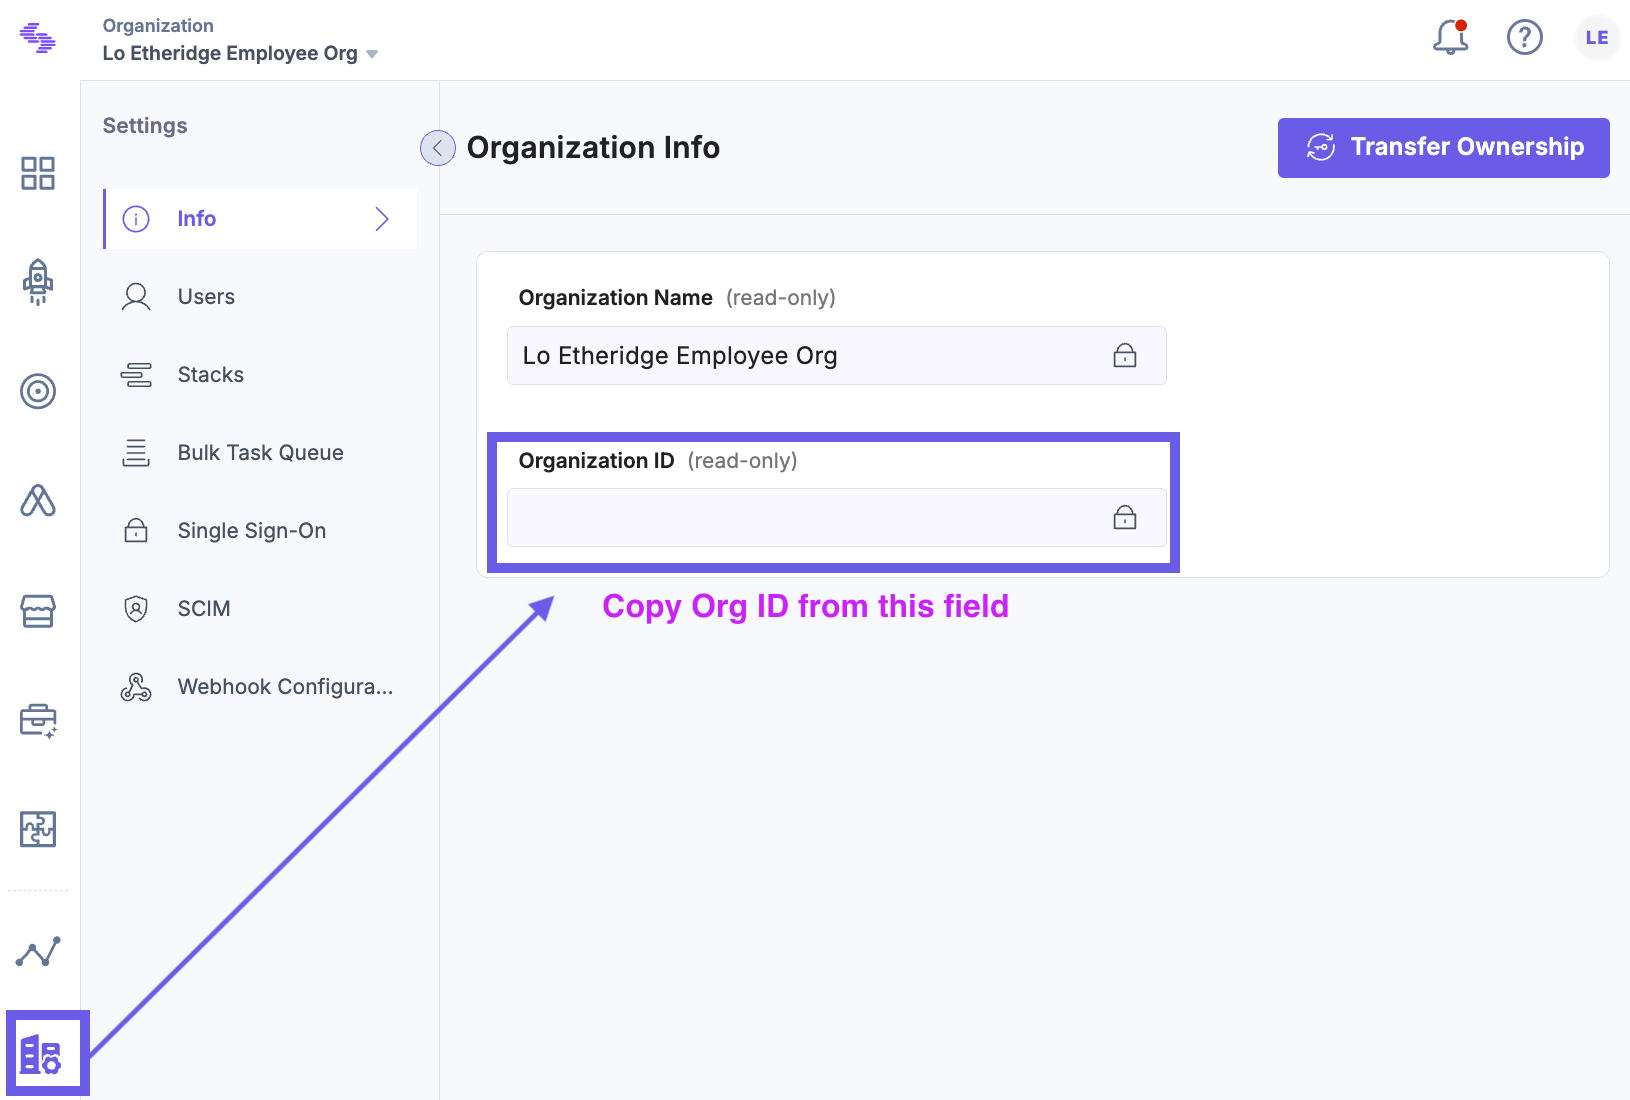
- Get your Organization ID from the Contentstack dashboard: Go to Org Admin > Info and copy the Org ID:
- Seed your Stack:
csdx cm:stacks:seed --repo "contentstack/kickstart-stack-seed" --org "<YOUR_ORG_ID>" -n "CS Kickstart Next"This command creates a new Stack (named "CS Kickstart Next") in your organization and populates it with the content types and entries needed for the Kickstart. (If you've already set up a Kickstart Stack earlier, you can reuse it and skip this step.)
Need more information, watch a quick video on how to seed a stack in the CLI.
Bootstrap with the CLI
If you want to run the code locally, and get set up in under a minute, you can also use the CLI bootstrap command.
4. Create a Delivery Token
In your Contentstack stack, go to Settings > Tokens and create a new Delivery Token. Enable the Preview option for this token (toggle Create Preview Token on) so that it comes with an associated Preview token. Name it something like "Next Kickstart Token".
Why? The Delivery Token allows the Next.js app to fetch published content from Contentstack. The Preview Token, when enabled, allows the app to fetch unpublished changes for Live Preview.
Alternatively, watch a quick step-by-step tutorial on How to create delivery tokens.
For more information on environments and setting up delivery tokens, watch the Understanding Environments Contentstack Academy video.
5. Setup Environment Variables
Rename the provided .env.example to .env (in the project root), and add your Contentstack stack's details and tokens. Create a .env file in the root of your project and add your Contentstack credentials:
NEXT_PUBLIC_CONTENTSTACK_API_KEY=<YOUR_API_KEY>
NEXT_PUBLIC_CONTENTSTACK_DELIVERY_TOKEN=<YOUR_DELIVERY_TOKEN>
NEXT_PUBLIC_CONTENTSTACK_PREVIEW_TOKEN=<YOUR_PREVIEW_TOKEN>
NEXT_PUBLIC_CONTENTSTACK_REGION=<YOUR_REGION_NAME>
NEXT_PUBLIC_CONTENTSTACK_ENVIRONMENT=<ENVIRONMENT_NAME>
NEXT_PUBLIC_CONTENTSTACK_PREVIEW=true
#By default the live preview feature is enabled for this project.
These correspond to your stack's API Key, Delivery Token, Preview Token, the region of your stack (e.g., AWS-NA, AWS-EU, AZURE-NA, etc.), and the target publishing environment (e.g., development or preview). Setting NEXT_PUBLIC_CONTENTSTACK_PREVIEW=true enables Contentstack's Live Preview in this development build.
Beware, free Contentstack developer accounts are bound to the AWS-EU region. We still use the CDN so the API responds quickly.
6. Turn on Live Preview
In your Contentstack stack, navigate to Settings > Live Preview. Enable Live Preview and select the environment that your app is using for preview content (for example, if you set NEXT_PUBLIC_CONTENTSTACK_ENVIRONMENT=preview, choose the "Preview" environment in the dropdown). Save the settings. This allows Contentstack to inject Live Preview updates into your app.
7. Run Your Next App
Now, start the development server:
npm run dev
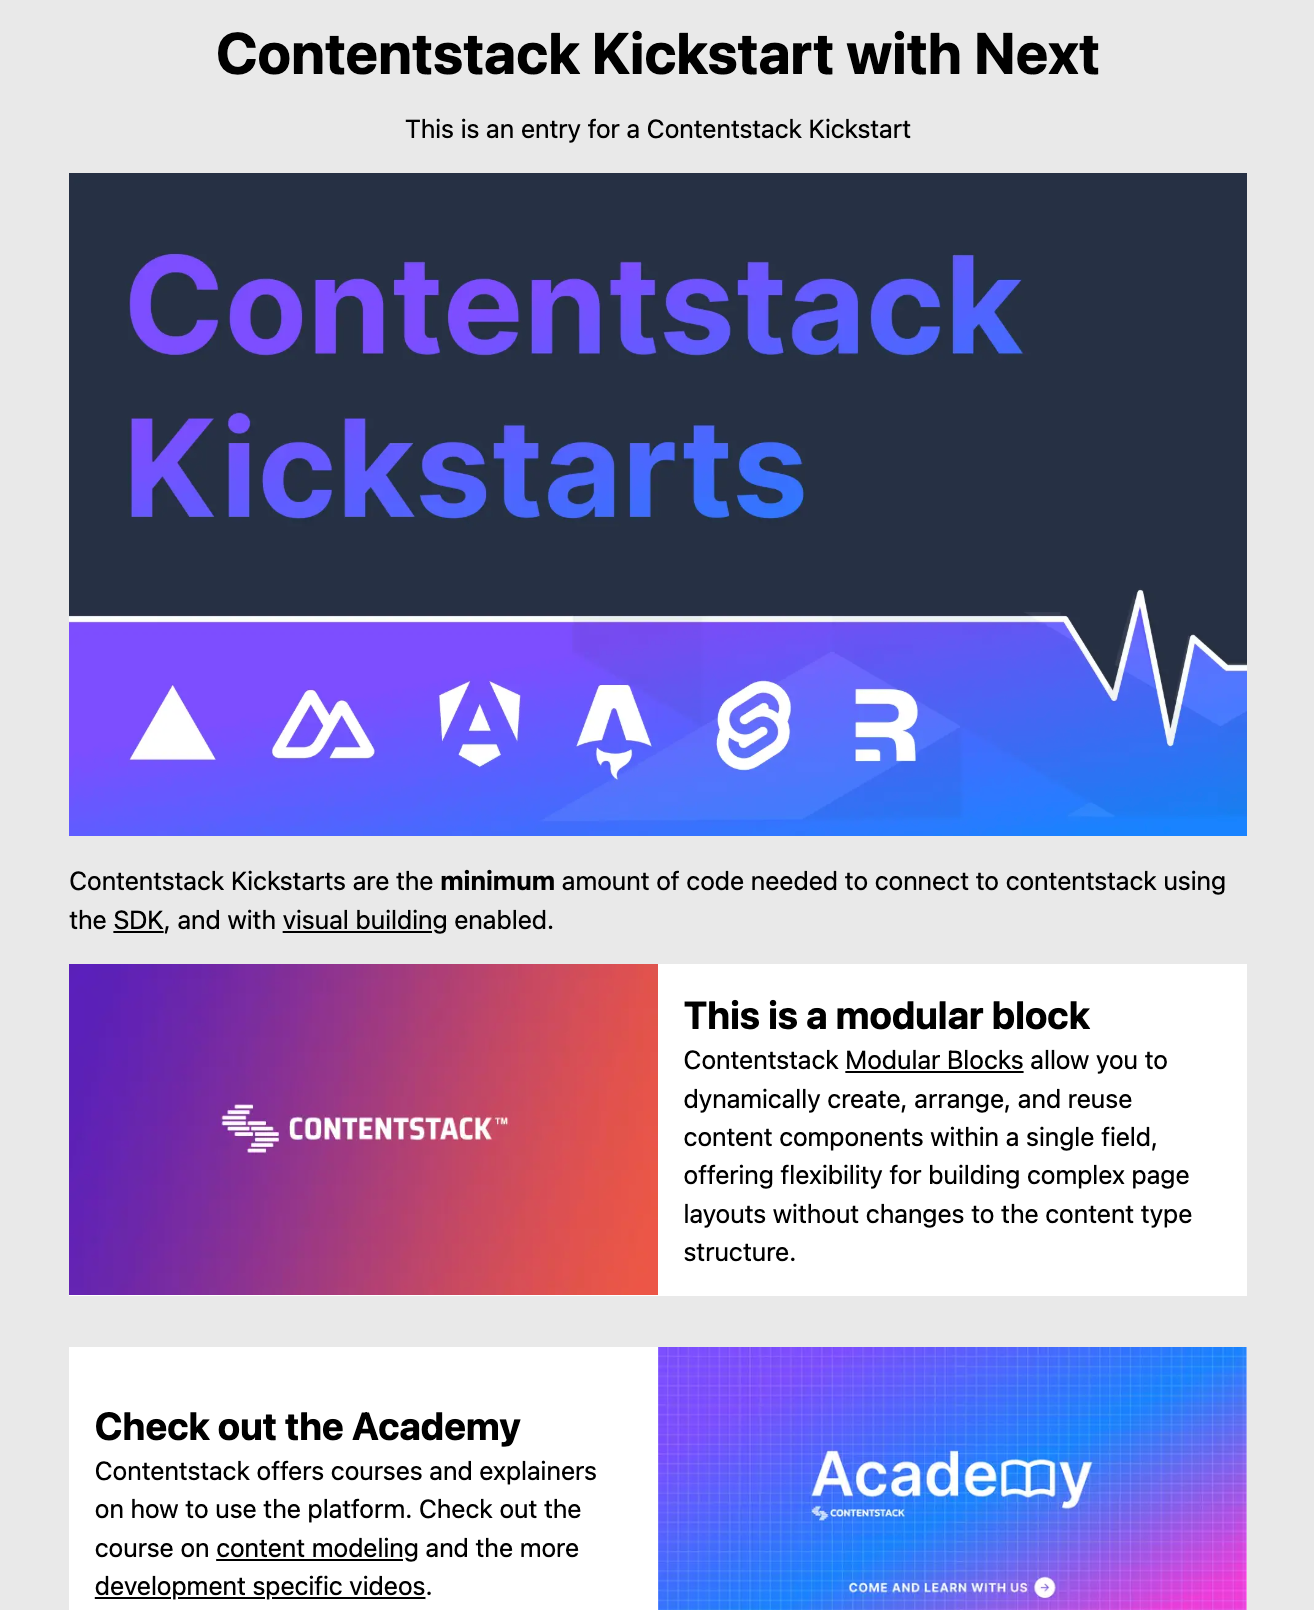
Open http://localhost:3000 in your browser to see your app in action. You should see a homepage with content such as a title, description, an image, and some example modular content fetched from your Contentstack stack. If everything is set up correctly, editing content in Contentstack (with Live Preview on) will instantly update this page.
Tip: You can Command + Click or Enter to open up the Localhost URL in the browser.
Key Files and Code
Now that your app is running, let's briefly look at how the integration works:
Contentstack SDK
File name: contentstack.ts
This file initializes the Contentstack SDK and provides helper functions to fetch data. It configures the Contentstack Delivery SDK and Live Preview:
// Importing Contentstack SDK and specific types for region and query operations
import contentstack, { QueryOperation } from "@contentstack/delivery-sdk";

// Importing Contentstack Live Preview utilities and stack SDK
import ContentstackLivePreview, { IStackSdk } from "@contentstack/live-preview-utils";

// Importing the Page type definition
import { Page } from "./types";

// helper functions from private package to retrieve Contentstack endpoints in a convienient way
import { getContentstackEndpoints, getRegionForString } from "@timbenniks/contentstack-endpoints";

// Set the region by string value from environment variables
const region = getRegionForString(process.env.NEXT_PUBLIC_CONTENTSTACK_REGION || "AWS-EU");

// object with all endpoints for region.
const endpoints = getContentstackEndpoints(region, true)

export const stack = contentstack.stack({
  // Setting the API key from environment variables
  apiKey: process.env.NEXT_PUBLIC_CONTENTSTACK_API_KEY as string,

  // Setting the delivery token from environment variables
  deliveryToken: process.env.NEXT_PUBLIC_CONTENTSTACK_DELIVERY_TOKEN as string,

  // Setting the environment based on environment variables
  environment: process.env.NEXT_PUBLIC_CONTENTSTACK_ENVIRONMENT as string,

  // Setting the region based on environment variables
  region: region,
  live_preview: {
    // Enabling live preview if specified in environment variables
    enable: process.env.NEXT_PUBLIC_CONTENTSTACK_PREVIEW === 'true',

    // Setting the preview token from environment variables
    preview_token: process.env.NEXT_PUBLIC_CONTENTSTACK_PREVIEW_TOKEN,

    // Setting the host for live preview based on the region
    host: endpoints.preview,
  }
});

// Initialize live preview functionality
export function initLivePreview() {
  ContentstackLivePreview.init({
    ssr: false, // Disabling server-side rendering for live preview
    enable: process.env.NEXT_PUBLIC_CONTENTSTACK_PREVIEW === 'true', // Enabling live preview if specified in environment variables
    mode: "builder", // Setting the mode to "builder" for visual builder
    stackSdk: stack.config as IStackSdk, // Passing the stack configuration
    stackDetails: {
      apiKey: process.env.NEXT_PUBLIC_CONTENTSTACK_API_KEY as string, // Setting the API key from environment variables
      environment: process.env.NEXT_PUBLIC_CONTENTSTACK_ENVIRONMENT as string, // Setting the environment from environment variables
    },
    clientUrlParams: {
      host: endpoints.application
    },
    editButton: {
      enable: true, // Enabling the edit button for live preview
      exclude: ["outsideLivePreviewPortal"] // Excluding the edit button from the live preview portal
    },
  });
}
// Function to fetch page data based on the URL
export async function getPage(url: string) {
  const result = await stack
    .contentType("page") // Specifying the content type as "page"
    .entry() // Accessing the entry
    .query() // Creating a query
    .where("url", QueryOperation.EQUALS, url) // Filtering entries by URL
    .find(); // Executing the query and expecting a result of type Page

  if (result.entries) {
    const entry = result.entries[0]; // Getting the first entry from the result

    if (process.env.NEXT_PUBLIC_CONTENTSTACK_PREVIEW === 'true') {
      contentstack.Utils.addEditableTags(entry, 'page', true); // Adding editable tags for live preview if enabled
    }

    return entry; // Returning the fetched entry
  }
}
Quick breakdown of the code
The Contentstack Delivery SDK and Live Preview utilities are used to connect your Next project to Contentstack and use Live Preview. The Delivery SDK allows you to query, initialize live preview functionality, and fetch content from Contentstack.
In the above code, stack is the Contentstack Stack SDK instance used to fetch data. The live_preview config is provided with the Preview token and enabled if preview mode is on. We initialize Live Preview via initLivePreview() with ssr: false and mode: "builder", which means the app will use Contentstack's Visual Editor overlay and update content dynamically without a full page reload. The getPage() function fetches a page entry by URL and, if preview is enabled, adds editable tags so that the Visual Editor can highlight editable content regions.
First, the necessary imports are made from the Contentstack SDK and Live Preview utilities, as well as a custom Page type from. The stack constant is then defined, which configures the Contentstack stack using environment variables for the API key, delivery token, and environment.
Tim Benniks' contentstack-endpoints package is used for a convenient way to get all needed endpoint URLs based on a given region as a string.
// Importing Contentstack SDK and specific types for region and query operations
import contentstack, { QueryOperation } from "@contentstack/delivery-sdk";

// Importing Contentstack Live Preview utilities and stack SDK
import ContentstackLivePreview, { IStackSdk } from "@contentstack/live-preview-utils";

// Importing the Page type definition
import { Page } from "./types";

// helper functions from @timbenniks private package to retrieve Contentstack endpoints in a convenient way
import { getContentstackEndpoints, getRegionForString } from "@timbenniks/contentstack-endpoints";

// Set the region by string value from environment variables
const region = getRegionForString(process.env.NEXT_PUBLIC_CONTENTSTACK_REGION || "AWS-EU");

// object with all endpoints for region.
const endpoints = getContentstackEndpoints(region, true)
The initLivePreview function initializes the Contentstack Live Preview functionality. It sets up the live preview with various options, including whether server-side rendering (SSR) is enabled, the preview mode, stack SDK configuration, stack details, client URL parameters, and an edit button. This function ensures that the live preview is properly configured and ready to use.
export const stack = contentstack.stack({
  // Setting the API key from environment variables
  apiKey: process.env.NEXT_PUBLIC_CONTENTSTACK_API_KEY as string,

  // Setting the delivery token from environment variables
  deliveryToken: process.env.NEXT_PUBLIC_CONTENTSTACK_DELIVERY_TOKEN as string,

  // Setting the environment based on environment variables
  environment: process.env.NEXT_PUBLIC_CONTENTSTACK_ENVIRONMENT as string,

  // Setting the region based on environment variables
  region: region,
  live_preview: {
    // Enabling live preview if specified in environment variables
    enable: process.env.NEXT_PUBLIC_CONTENTSTACK_PREVIEW === 'true',

    // Setting the preview token from environment variables
    preview_token: process.env.NEXT_PUBLIC_CONTENTSTACK_PREVIEW_TOKEN,

    // Setting the host for live preview based on the region
    host: endpoints.preview,
  }
});

// Initialize live preview functionality
export function initLivePreview() {
  ContentstackLivePreview.init({
    ssr: false, // Disabling server-side rendering for live preview
    enable: process.env.NEXT_PUBLIC_CONTENTSTACK_PREVIEW === 'true', // Enabling live preview if specified in environment variables
    mode: "builder", // Setting the mode to "builder" for visual builder
    stackSdk: stack.config as IStackSdk, // Passing the stack configuration
    stackDetails: {
      apiKey: process.env.NEXT_PUBLIC_CONTENTSTACK_API_KEY as string, // Setting the API key from environment variables
      environment: process.env.NEXT_PUBLIC_CONTENTSTACK_ENVIRONMENT as string, // Setting the environment from environment variables
    },
    clientUrlParams: {
      host: endpoints.application
    },
    editButton: {
      enable: true, // Enabling the edit button for live preview
      exclude: ["outsideLivePreviewPortal"] // Excluding the edit button from the live preview portal
    },
  });
}
The getPage function is an asynchronous function that fetches your content from Contentstack based on a given URL. It queries the specified content type for an entry with a matching URL. If a matching entry is found, and live preview is enabled, editable tags are added to the entry using Contentstack utilities. The function then returns the fetched entry.
export async function getPage(url: string) {
  const result = await stack
    .contentType("page") // Specifying the content type as "page"
    .entry() // Accessing the entry
    .query() // Creating a query
    .where("url", QueryOperation.EQUALS, url) // Filtering entries by URL
    .find(); // Executing the query and expecting a result of type Page

  if (result.entries) {
    const entry = result.entries[0]; // Getting the first entry from the result

    if (process.env.NEXT_PUBLIC_CONTENTSTACK_PREVIEW === 'true') {
      contentstack.Utils.addEditableTags(entry, 'page', true); // Adding editable tags for live preview if enabled
    }

    return entry; // Returning the fetched entry
  }
}
Quick Tip: API Endpoint helper package
You can use the Contentstack Endpoints NPM package to gather all the API endpoints you need to deliver content. For more details on how the package works, check out this explainer video!
Now, Lets jump into how the Next Home component works.
Home Page Component
File name: page.tsx
This file contains the Home page component that fetches and displays data from Contentstack:
"use client";

import Image from "next/image";
import ContentstackLivePreview from "@contentstack/live-preview-utils";
import { getPage, initLivePreview } from "@/lib/contentstack";
import { useEffect, useState } from "react";
import { Page } from "@/lib/types";

export default function Home() {
  const [page, setPage] = useState<Page>();

  const getContent = async () => {
    const page = await getPage("/");
    setPage(page);
  };

  useEffect(() => {
    initLivePreview();
    ContentstackLivePreview.onEntryChange(getContent);
  }, []);

  return (
    <main className="max-w-screen-2xl mx-auto">
      <section className="p-4">
        {page?.title ? (
          <h1
            className="text-4xl font-bold mb-4"
            {...(page?.$ && page?.$.title)}
          >
            {page?.title}
          </h1>
        ) : null}
        {page?.description ? (
          <p className="mb-4" {...(page?.$ && page?.$.description)}>
            {page?.description}
          </p>
        ) : null}
        {page?.image ? (
          <Image
            className="mb-4"
            width={640}
            height={360}
            src={page?.image.url}
            alt={page?.image.title}
            {...(page?.image?.$ && page?.image?.$.url)}
          />
        ) : null}
        {page?.rich_text ? (
          <div
            {...(page?.$ && page?.$.rich_text)}
            dangerouslySetInnerHTML={{ __html: page?.rich_text }}
          />
        ) : null}
        <div
          className="space-y-8 max-w-screen-sm mt-4"
          {...(page?.$ && page?.$.blocks)}
        >
          {page?.blocks?.map((item, index) => {
            const { block } = item;
            const isImageLeft = block.layout === "image_left";
            return (
              <div
                key={block._metadata.uid}
                {...(page?.$ && page?.$[`blocks__${index}`])}
                className={`flex flex-col md:flex-row items-center space-y-4 md:space-y-0 md:space-x-4 ${
                  isImageLeft ? "md:flex-row" : "md:flex-row-reverse"
                }`}
              >
                <div className="w-full md:w-1/2">
                  {block.image ? (
                    <Image
                      src={block.image.url}
                      alt={block.image.title}
                      width={200}
                      height={112}
                      className="w-full"
                      {...(block?.$ && block?.$.image)}
                    />
                  ) : null}
                </div>
                <div className="w-full md:w-1/2">
                  {block.title ? (
                    <h2
                      className="text-2xl font-bold"
                      {...(block?.$ && block?.$.title)}
                    >
                      {block.title}
                    </h2>
                  ) : null}
                  {block.copy ? (
                    <div
                      {...(block?.$ && block?.$.copy)}
                      dangerouslySetInnerHTML={{ __html: block.copy }}
                      className="prose"
                    />
                  ) : null}
                </div>
              </div>
            );
          })}
        </div>
      </section>
    </main>
  );
}
Quick breakdown of the Home page Next component
At the top of the file, several imports are made. These include Image from next/image for optimized image rendering, ContentstackLivePreview for live preview functionality, and custom functions getPage and initLivePreview from a local library. Additionally, the useEffect and useState hooks from React are imported to manage side effects and state within the component. The Page type is also imported to ensure type safety.
The Home component initializes a state variable page using the useState hook to store the page data.
export default function Home() {
  const [page, setPage] = useState<Page>();
 }; // code continues...
The getContent function is defined as an asynchronous function that fetches the page data by calling getPage with the root URL ("/") and updates the page state with the fetched data.
const getContent = async () => {
  const page = await getPage("/");
  setPage(page);
};
// code continues...
The useEffect hook is used to initialize the live preview functionality by calling initLivePreview and setting up an event listener for content changes using ContentstackLivePreview.onEntryChange, which triggers the getContent function to refresh the page data whenever there are changes.
useEffect(() => {
  initLivePreview();
  ContentstackLivePreview.onEntryChange(getContent);
}, []);
// code continues...
The return statement of the component renders the main content of the page. It uses conditional rendering to display various elements based on the presence of corresponding data in the page state. These elements include the page title, description, image, and rich text content. Additionally, it renders a list of blocks, each of which can contain an image, title, and copy. The layout of these blocks is dynamically adjusted based on the layout property of each block.
return (
  <main className="max-w-screen-2xl mx-auto">
    <section className="p-4">// Markup continues...</section>
  </main>);
When the component mounts, it calls initLivePreview() and registers an event handler so that any content change in Contentstack triggers onEntryChange and refreshes the content by calling getContent. The JSX renders the fields of the page object. Notice the {...(page?.$?.field)} spread attributes – these attach Contentstack's metadata to the elements for the Visual Editor (so you can click to edit in Contentstack). With this setup, editing an entry in Contentstack will update the page content in real-time, and the Visual Editor mode will highlight components like title, description, etc., making them clickable for quick editing.
The Home component displays fetched data and integrates Contentstack's live preview and visual builder capabilities with your Next.js application, ensuring that content updates are reflected in real-time on the homepage.
Kickstart Next.js (CSR) Video Walkthrough
Want to see the CSR Kickstart in action? Watch this comprehensive video guide:
Kickstart Next.js (Server-Side Rendering – SSR Mode)
The Next.js SSR Kickstart is a variant configured for Server-Side Rendering. In SSR mode, pages are rendered on the server on each request (rather than purely in the browser), which ensures that the latest content is delivered without needing client-side fetching. This Kickstart still uses Contentstack's REST Delivery API under the hood, but it initializes Live Preview in SSR mode. In SSR Live Preview, Contentstack will append preview query parameters to the page URL and trigger full page reloads upon content edits (as opposed to dynamically updating content in place). This is useful for scenarios where you want the server to always fetch fresh data (e.g., highly dynamic content or personalized pages).
1. Clone the Repository
Clone the Next.js SSR Kickstart repository and enter it:
git clone https://github.com/contentstack/kickstart-next-ssr.git
cd kickstart-next-ssr
This repository's codebase is tailored for SSR – for example, it may use Next.js server components or Next's pages router with getServerSideProps to fetch data on each request.
GitHub Repository: Kickstart Next.js SSR
2. Install Dependencies
Install the dependencies as usual:
npm install
3. Create or Reuse a Contentstack Stack
You can use the same Stack created earlier ("CS Kickstart Next") since the content structure is identical. If you haven't created one, follow the stack seeding steps under the CSR section to seed a new stack with the Kickstart content.
4. Create a Delivery Token
If reusing the existing stack, ensure you have a Delivery Token with Preview enabled (as created in the earlier steps). Otherwise, create a new Delivery/Preview token pair in Settings > Tokens for this stack.
5. Set Up Environment Variables
Configure the .env in the kickstart-next-ssr project with your stack's API Key, Delivery Token, Preview Token, Region, Environment, and preview flag. It uses the same environment variables as the base Kickstart:
NEXT_PUBLIC_CONTENTSTACK_API_KEY=<YOUR_API_KEY>
NEXT_PUBLIC_CONTENTSTACK_DELIVERY_TOKEN=<YOUR_DELIVERY_TOKEN>
NEXT_PUBLIC_CONTENTSTACK_PREVIEW_TOKEN=<YOUR_PREVIEW_TOKEN>
NEXT_PUBLIC_CONTENTSTACK_REGION=<YOUR_REGION_NAME>
NEXT_PUBLIC_CONTENTSTACK_ENVIRONMENT=<YOUR_ENV_NAME>
NEXT_PUBLIC_CONTENTSTACK_PREVIEW=true
6. Enable Live Preview in Stack Settings
Make sure Live Preview is enabled in your stack (as done previously) for the environment you're using (e.g., Preview).
7. Run the Next.js App (SSR)
Run the development server:
npm run dev
Open http://localhost:3000 to verify the site is working. The SSR Kickstart's output will look similar to the base Kickstart (since it's the same content), but it's rendered server-side. If you edit content in Contentstack, the page refreshs automatically to show updates (the Contentstack Live Preview system will reload the page via the query parameters mechanism).
How SSR Mode Differs
In the code for this Kickstart, the Contentstack Live Preview utility is initialized with ssr: true (instead of false) to accommodate server-side rendering. Contentstack's preview system will add a query string (e.g., ?contentstack={{entry_id}}) to the URL when content is edited, which the app uses to fetch the updated content on the server before responding. This means on each change, you'll see the browser refresh the page. The benefit is that no client-side fetching is needed on navigation – the content is always up-to-date on initial load. However, unlike the CSR mode, you won't see inline editing overlays in real-time; instead, the page fully reloads with new content on edits.
The SSR Kickstart uses Next.js SSR features. For instance, if it uses the App Router, components might be marked as dynamic or use a special handler to fetch data on each request. In an older Pages Router approach, it would use getServerSideProps to fetch contentstack data for each request. In either case, the logic ensures getPage() (or equivalent) runs at request time, not just on the client.
Kickstart Next.js (SSR) Video Walkthrough
Watch this video to see the SSR Kickstart implementation:
Kickstart Next.js (Using Middleware)
The Next.js Middleware Kickstart demonstrates how to integrate Contentstack in a Next.js app that uses custom Middleware. Next.js Middleware runs code before the request is processed by the route, enabling use-cases like redirects, authentication checks, personalization, and more. In a Contentstack context, you might use middleware to handle things like personalization tokens or to serve different content variants. This Kickstart shows how to maintain Contentstack's Live Preview and Visual Editor functionality even when adding your own middleware logic.
1. Clone the Repository
Clone the Next.js Middleware Kickstart repository:
git clone https://github.com/contentstack/kickstart-next-middleware.git
cd kickstart-next-middleware
Inside this project, you will find a Next.js setup similar to the standard Kickstart, plus a middleware.ts file at the root (or under app/) implementing custom logic. For example, the middleware might read cookies or query params and modify the request or response headers before reaching your pages.
GitHub Repository: Kickstart Next.js Middleware
2. Install Dependencies
Install the project's dependencies:
npm install
3. Prepare a Contentstack Stack
As with other Kickstarts, use the seeded "CS Kickstart Next" stack (or create a new one using the CLI if needed). The content model is the same. Ensure you have the necessary tokens (API Key, Delivery Token, Preview Token).
4. Create a Delivery/Preview Token
If you haven't already, create a Delivery Token with Preview enabled for the stack (see Settings > Tokens in Contentstack). This provides the credentials for the app to fetch content.
5. Configure Environment Variables
Edit the .env file and add your Contentstack credentials and settings (API key, Delivery/Preview token, region, environment, etc.) just like in the previous setups. The required environment variables are the same ones listed earlier for the CSR/SSR Kickstart.
6. Enable Live Preview in Contentstack
Make sure Live Preview is turned on for your environment in the stack's settings.
7. Run the App
Start the development server:
npm run dev
Open http://localhost:3000 and verify the content loads.
What the Middleware Does
In this Kickstart, the Next.js middleware might intercept requests to, say, inject personalization context or handle routing for preview URLs. For instance, if a user's session or cookie indicates a certain personalization segment, the middleware could adjust which content entry (or which Contentstack environment) to fetch. The key challenge with custom middleware is ensuring it doesn't break Live Preview. The Kickstart's code ensures that the special preview query parameters from Contentstack are recognized in the middleware and passed along so that Live Preview continues to function normally. Essentially, this Kickstart serves as a reference for adding your own logic between Contentstack and Next.js without losing the Live Preview/Visual Editor capabilities.
If Contentstack Live Preview adds ?contentstack=[[entryId]] to the URL, the middleware must allow this through (or even use it to fetch specific data) and not redirect or alter it incorrectly. The Kickstart's middleware shows how to handle such scenarios gracefully.
Kickstart Next.js (Middleware) Video Walkthrough
See how to integrate middleware with Contentstack Live Preview:
Kickstart Next.js (GraphQL Mode)
The Next.js GraphQL Kickstart uses Contentstack's GraphQL Content Delivery API instead of the REST Delivery SDK for fetching data. This variant is also configured for SSR mode by default (so that it can always fetch the latest content, similar to the SSR Kickstart above, but using GraphQL queries). Choosing GraphQL can be advantageous if you want to retrieve multiple content types in a single request or prefer GraphQL's query structure.
1. Clone the Repository
Clone the Next.js GraphQL Kickstart repository:
git clone https://github.com/contentstack/kickstart-next-graphql.git
cd kickstart-next-graphql
This project contains a setup for querying Contentstack with GraphQL. Notably, you'll see a gql/ directory or similar, which may contain GraphQL query definitions and (optionally) generated TypeScript types for the schema.
GitHub Repository: Kickstart Next.js GraphQL
2. Install Dependencies
Install all dependencies:
npm install
The project likely includes packages like Apollo Client or other GraphQL helpers. It might also use a code generation tool (like GraphQL Code Generator) to create types from your Contentstack GraphQL schema – if so, an initial generation might run during npm install or you can run it via an NPM script if provided (check the README).
3. Set Up a Contentstack Stack
Use the same CS Kickstart Next stack as before or create a new one with the seed data. No special schema changes are required for GraphQL; the stack's content types are already GraphQL-enabled by default in Contentstack.
Note: Ensure the stack's environment is set up and has some published entries (the seed script does this). Contentstack's GraphQL API will be accessible at an endpoint like https://graphql.contentstack.com/stacks/<API_KEY>?environment=<ENV_NAME> for your stack.
4. Create a Delivery/Preview Token
Create or reuse a Delivery Token (with Preview enabled) for your stack, the same as in prior steps. The GraphQL API uses the same Delivery/Preview tokens for authorization.
5. Configure Environment Variables
In the .env file of this project, set the environment variables. The GraphQL Kickstart uses the same variables (API key, Delivery Token, Preview Token, Region, Environment, etc.). It may also have a specific variable for the GraphQL endpoint URL if not constructed programmatically – check the documentation, though typically the endpoint can be derived from the API Key and region.
For example:
NEXT_PUBLIC_CONTENTSTACK_API_KEY=<YOUR_API_KEY>
NEXT_PUBLIC_CONTENTSTACK_DELIVERY_TOKEN=<YOUR_DELIVERY_TOKEN>
NEXT_PUBLIC_CONTENTSTACK_PREVIEW_TOKEN=<YOUR_PREVIEW_TOKEN>
NEXT_PUBLIC_CONTENTSTACK_REGION=<YOUR_REGION_NAME>
NEXT_PUBLIC_CONTENTSTACK_ENVIRONMENT=<YOUR_ENV_NAME>
NEXT_PUBLIC_CONTENTSTACK_PREVIEW=true
6. Enable Live Preview
Verify Live Preview is enabled in your stack's settings for the chosen environment (as done in previous sections).
7. Run the App
Run the development server:
npm run dev
Open http://localhost:3000 to see the application. It should fetch content via GraphQL queries. The page output will be the same kind of content (homepage with title, description, etc.), but behind the scenes the data was fetched using a GraphQL query to Contentstack.
How the GraphQL Kickstart Works
In this variant, instead of calling stack.contentType('page').entry().query()... as the REST SDK does, the code executes a GraphQL query to fetch the page content. For example, it might use Apollo Client or fetch() to post a GraphQL query like:
query {
  page(where: { url: "/" }) {
    title, description, image { url, title }, rich_text, blocks { ... }
  }
}
The Kickstart likely includes a pre-written query and uses the Preview API endpoint for unpublished changes when NEXT_PUBLIC_CONTENTSTACK_PREVIEW=true. The Live Preview setup is similar to the SSR mode: the Live Preview Utils SDK is initialized with ssr: true so that content changes trigger a reload. The main difference is just the data fetching layer. If you inspect the code, you may find a GraphQL utility file (possibly with a generated SDK or simple fetch wrapper) that executes the query and returns data. The rest of the Next.js integration (React components, useEffect for preview events, etc.) is analogous to the other Kickstarts.
Kickstart Next.js (GraphQL) Video Walkthrough
Learn how to use GraphQL with Contentstack in Next.js:
Kickstart Next.js (Static Site Generation – SSG Mode)
The Next.js SSG Kickstart showcases using Contentstack with Next.js Static Site Generation. In SSG mode, the pages are pre-built at build time (or incrementally) rather than on each request. This yields extremely fast page loads since content is served as static files via a CDN. The trade-off is that content changes require a rebuild (or use of Preview Mode/ISR) to be reflected. This Kickstart is configured to integrate Contentstack's Live Preview with an SSG approach, so you can still preview changes before rebuilding.
Unlike the previous variants which use the App Router, this SSG Kickstart uses Next.js's Pages Router (the older file-based routing). You will find a pages/ directory with traditional Next.js pages and likely a getStaticProps function to fetch data at build time.
1. Clone the Repository
Clone the Next.js SSG Kickstart repository:
git clone https://github.com/contentstack/kickstart-next-ssg.git
cd kickstart-next-ssg
Notice this project structure includes a pages folder (instead of app), indicating it's using Next.js's Pages Router for static generation.
GitHub Repository: Kickstart Next.js SSG
2. Install Dependencies
Install all required packages:
npm install
3. Set Up a Contentstack Stack
Use the existing "CS Kickstart Next" stack (or seed a new one as described before). Ensure it has the content (the homepage entry, etc.) available.
4. Create a Delivery/Preview Token
Obtain a Delivery Token with Preview enabled for your stack (if not already done).
5. Configure Environment Variables
Add the environment variables in the .env file for this project, similar to previous ones:
NEXT_PUBLIC_CONTENTSTACK_API_KEY=<YOUR_API_KEY>
NEXT_PUBLIC_CONTENTSTACK_DELIVERY_TOKEN=<YOUR_DELIVERY_TOKEN>
NEXT_PUBLIC_CONTENTSTACK_PREVIEW_TOKEN=<YOUR_PREVIEW_TOKEN>
NEXT_PUBLIC_CONTENTSTACK_REGION=<YOUR_REGION_NAME>
NEXT_PUBLIC_CONTENTSTACK_ENVIRONMENT=<YOUR_ENV_NAME>
NEXT_PUBLIC_CONTENTSTACK_PREVIEW=true
These will be used by the Contentstack SDK at build time and (for preview) at runtime.
6. Enable Live Preview
Enable Live Preview in the stack settings for your environment, as in prior setups.
7. Run the App (SSG)
Run the development server:
npm run dev
Open http://localhost:3000 to view the site. Because this is an SSG setup, Next.js pre-renders the page at build time. In development (npm run dev), Next.js will still fetch data on each request (to simulate the build step), so Live Preview will work similarly to CSR mode during development.
How SSG Live Preview Works
When you edit content in Contentstack, you should see updates appear in the page if the Preview Mode is being utilized. In an SSG context, Contentstack's Live Preview can leverage Next.js Preview Mode. The Kickstart likely calls ContentstackLivePreview.init() with ssr: false (client-side mode) because the page is static. It might also include Next.js Preview Mode hooks – for example, a /api/preview route that sets preview cookies so that unpublished content can be fetched in development.
With purely static sites, once you build, the content won't change until a rebuild. However, during development or when using Next.js Preview Mode, the app can still fetch draft content. The Kickstart ensures that when NEXT_PUBLIC_CONTENTSTACK_PREVIEW=true, the Contentstack SDK uses the Preview API endpoint to retrieve even unpublished content. In Live Preview, Contentstack might open the site with a special preview query or using Next's preview cookies. The Kickstart SSG example handles this by checking the preview token and enabling Contentstack's Live Preview script in builder mode (like the CSR Kickstart) so that it can overlay edits. Essentially, it's static, but with a client-side overlay to reflect content changes temporarily.
When you're satisfied with changes, you would rebuild/deploy the site to update the public static version. This approach is great for marketing sites or blogs where you want the performance of static pages but still need an editing preview for content authors.
Kickstart Next.js (SSG) Video Walkthrough
Watch how to build static sites with Contentstack and Next.js:
Conclusion and Next Steps
By exploring these Kickstart variants, you've seen multiple ways to integrate Next.js with Contentstack: from a straightforward client-side approach to SSR, GraphQL, and static generation, as well as handling custom middleware. You can choose the approach that best fits your project's needs:
- Use CSR for simplicity and immediate Live Preview with inline editing (great for getting started or for apps where SEO is not critical).
- Use SSR for always-fresh content on each request and SEO-friendly pages, while still enjoying Live Preview (with full-page reloads on edits).
- Use Middleware when you need extra control (like personalization or authentication) – this variant shows you how to plug that in without losing preview functionality.
- Use GraphQL if you prefer to query your content with GraphQL for more complex data needs.
- Use SSG for maximum performance via pre-built pages, while leveraging Contentstack's Preview to review changes before publishing.
Feel free to mix and match ideas from these Kickstarts. For example, you could combine SSR with GraphQL, or add middleware to an SSR project. The core concepts of initializing the SDK, fetching content, and setting up Live Preview/Visual Editor will remain similar.
You now have a comprehensive understanding of how to set up and run Next.js projects integrated with Contentstack across multiple rendering modes. If you have any questions or run into an error, join the Contentstack Community in Discord for further support. Happy coding with Contentstack and Next.js!
More articles in "Set up with GraphQL"
