

Netlify
The Netlify connector helps you build, deploy, and host the frontend of your web applications via Contentstack. For instance, consider a scenario where you update some content in Contentstack. This update triggers a webhook that notifies the Netlify connector to create a production build and deploy the frontend changes.
Set Up Netlify
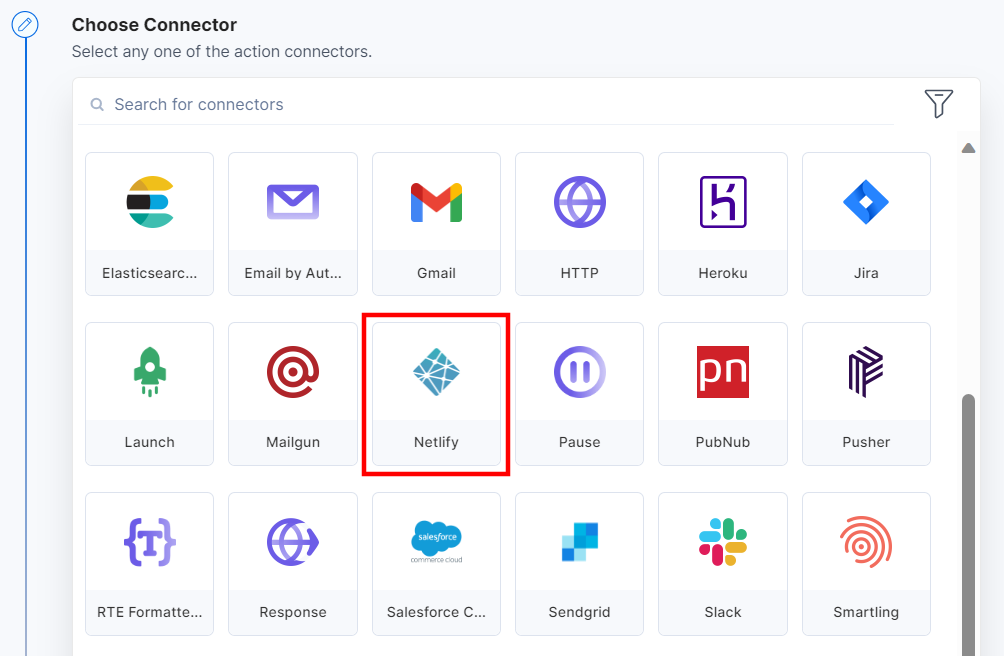
Perform the following steps to set up the Netlify action connector:
- Click Configure Action Step from the left navigation panel.
- Click Action Step to configure third-party services.
- Within the Configure Action Step, click the Netlify connector.
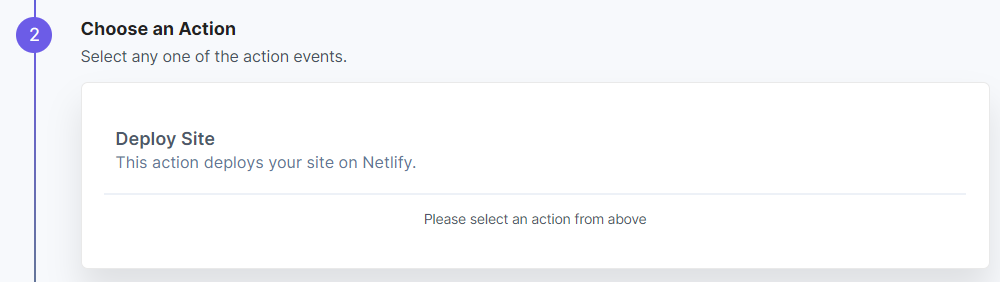
- Under Choose an Action tab, select the Deploy Site action.
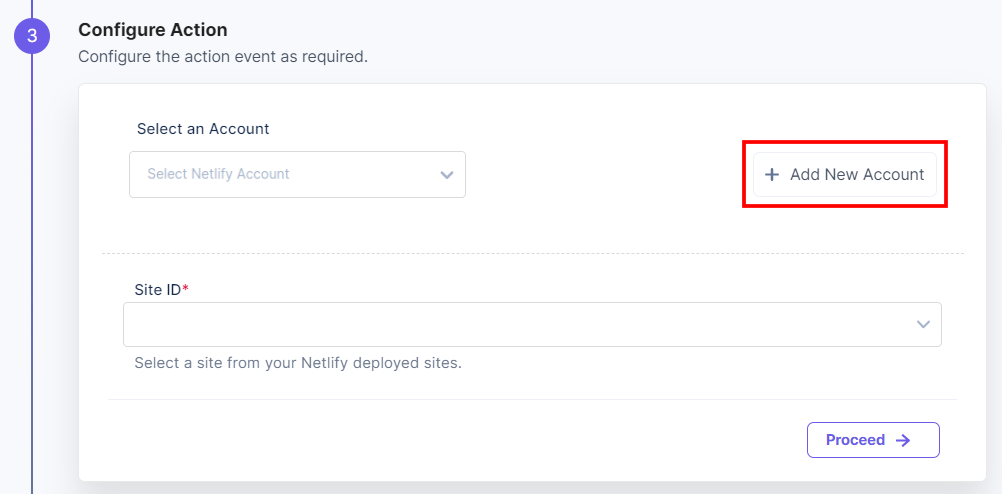
- Click the + Add New Account button to set up your Netlify account (see screenshot in next step).
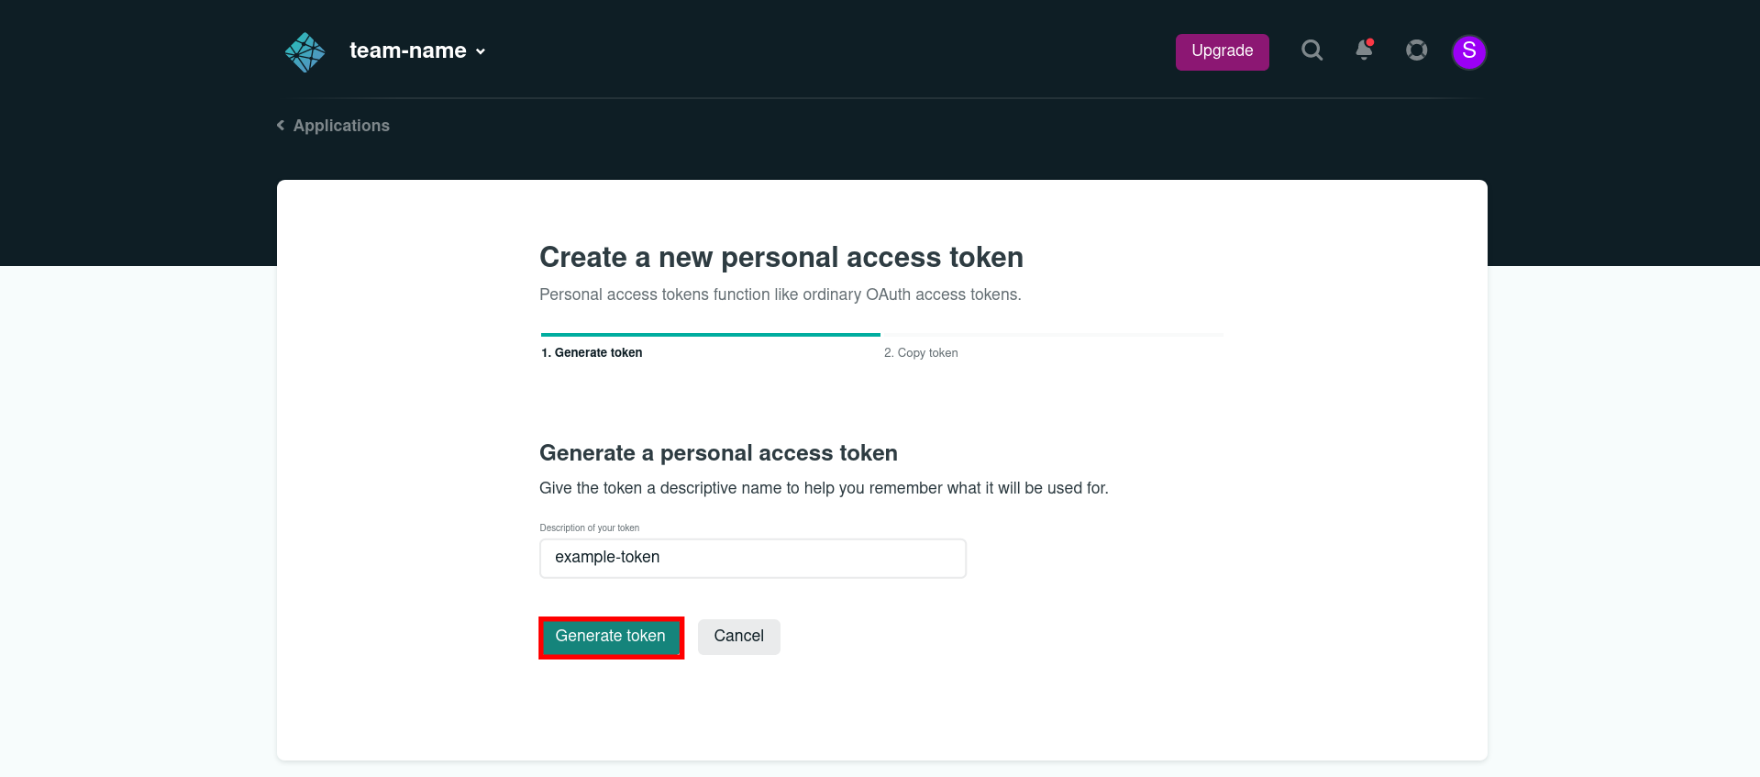
- In the Authorize modal, enter a Title and a Token.
- You can generate a new token from the Personal access token section in your Netlify console. Navigate to User settings > Applications > New access token > Generate token.
Additional Resource: For more information, refer to the Obtain a token in Netlify UI document.
Then click Authorize.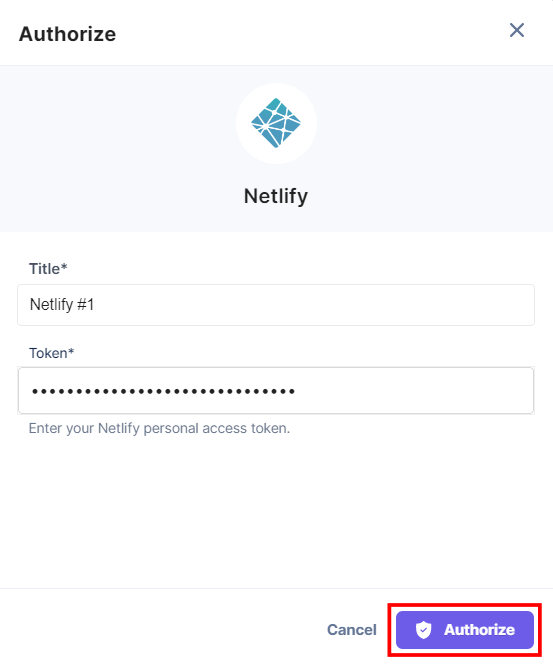
- On the Configure Action page, click the Site ID textbox and select an ID from the Lookup drop-down. The Site ID is a unique identification given to a project configured in Netlify. You can select the desired project for which you want to configure the Netlify connector.
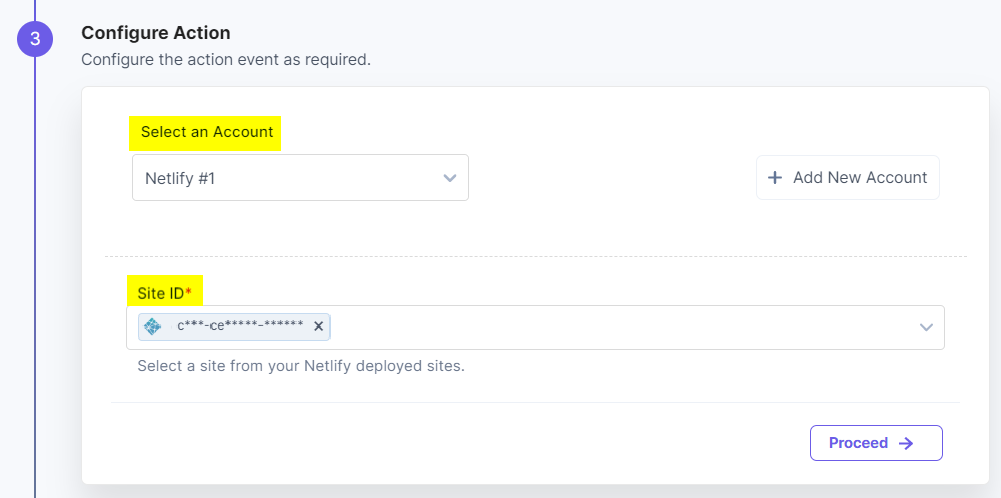
- Click Proceed.
- You will see the input values which you have configured in the Configure Action modal.
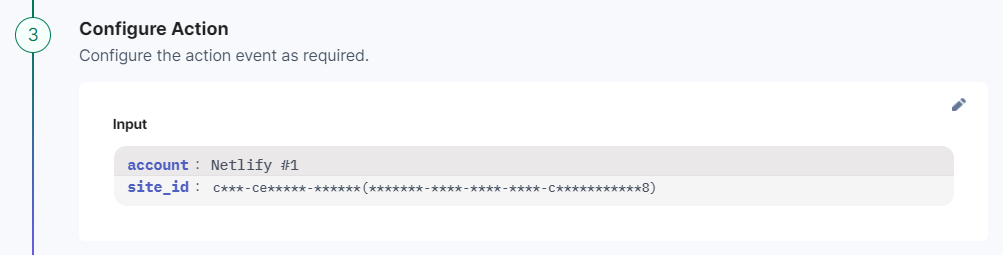
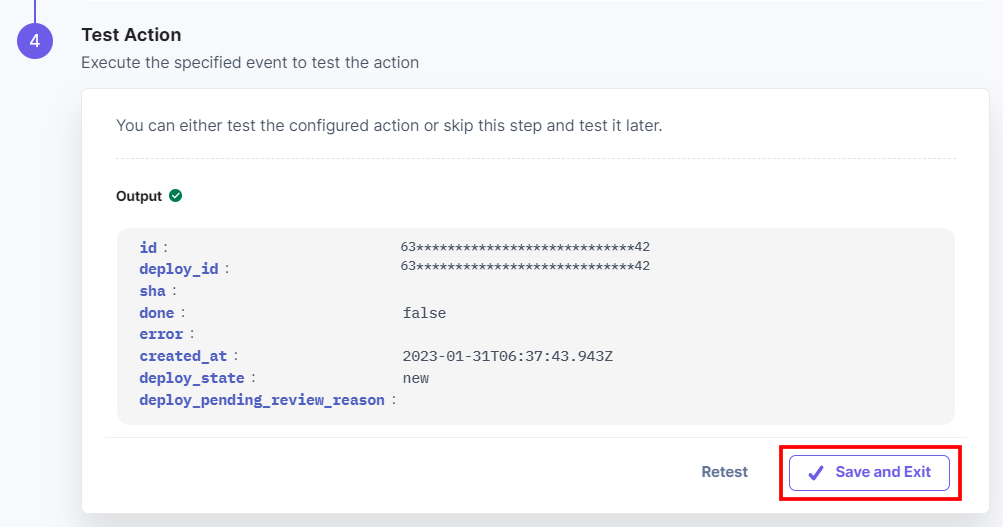
- Check if the details are correct. If yes, click Test Action.
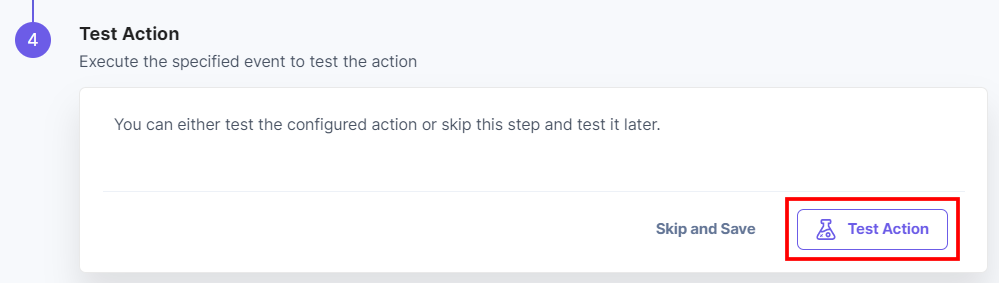
- Once the action is successfully executed, you will get the final output, and the build gets initiated in your Netlify console. Click Save and Exit.
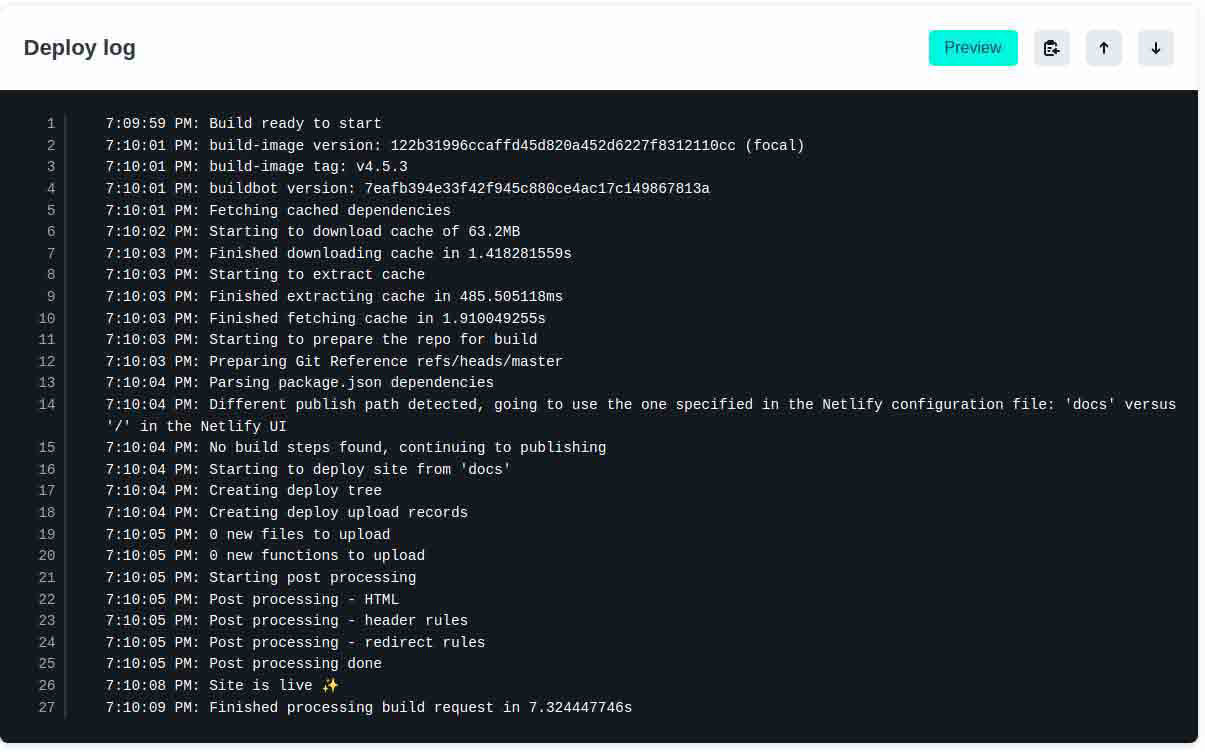
- Log in to your Netlify console and navigate to the Deploy log window to check whether the build has been initiated or not.
This sets up the Netlify action connector.
Was this article helpful?
More articles in "Hosting"
