Anthropic
Anthropic is an AI research company focused on AI safety, reliability, and alignment. Claude is a family of AI Assistants developed by Anthropic, designed for advanced reasoning, safe AI interactions, and intelligent automation, offering capabilities beyond standard chatbot models like ChatGPT.
The Anthropic connector allows you to generate chat responses using Claude models for text and images. The connector currently contains one action: Chat.
Prerequisites
To use the Anthropic connector, you first need to connect your Anthropic Console with Automate using the following steps:
- Log in to your Contentstack account and click the Automate icon from the left navigation panel.
- Select your project and then the automation.
- Click Configure Action Step from the left navigation panel and then Action Step to configure third-party services.
- Within the Choose Connector, click the Anthropic connector.
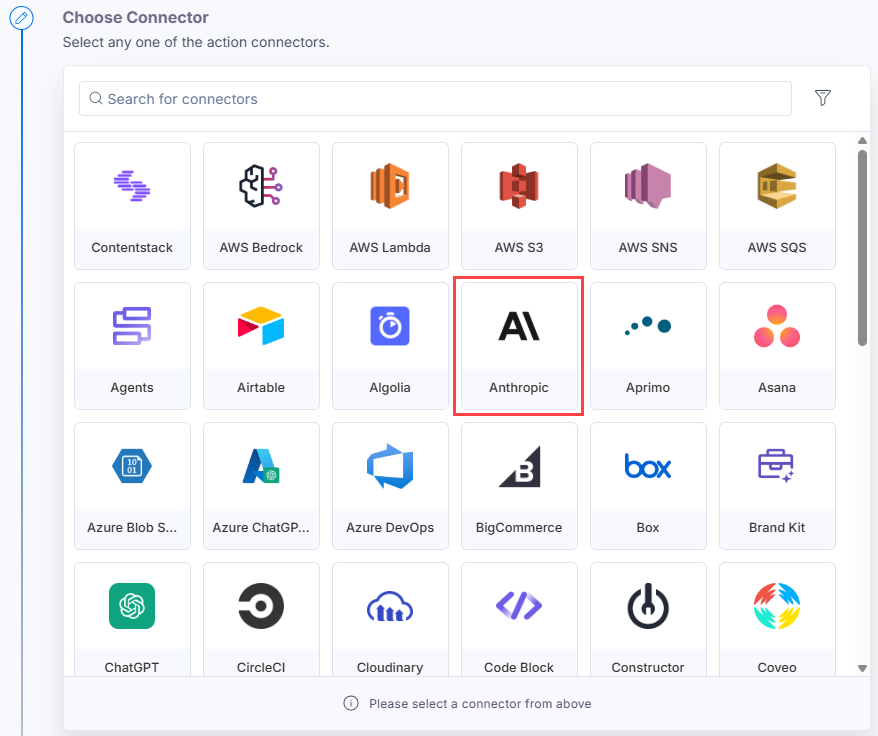
- Under Choose an Action, select the Chat action.

- In the Configure Action section, click + Add New Account to add your Anthropic Console account.
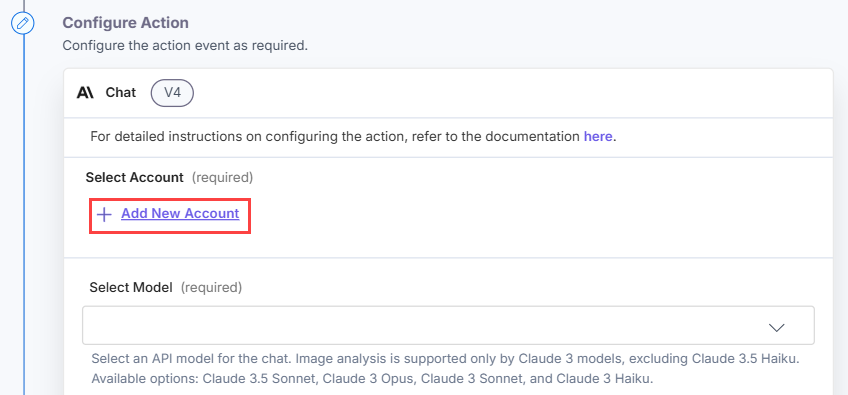
- In the Authorize modal, provide details such as Title, and API Key retrieved from the Anthropic Console.
To generate an API key in Anthropic Console, follow the steps below:
- Go to the Anthropic Console and log in to your account. Once done, the Dashboard appears.
- In the left navigation, click the API keys and then click the + Create Key button.
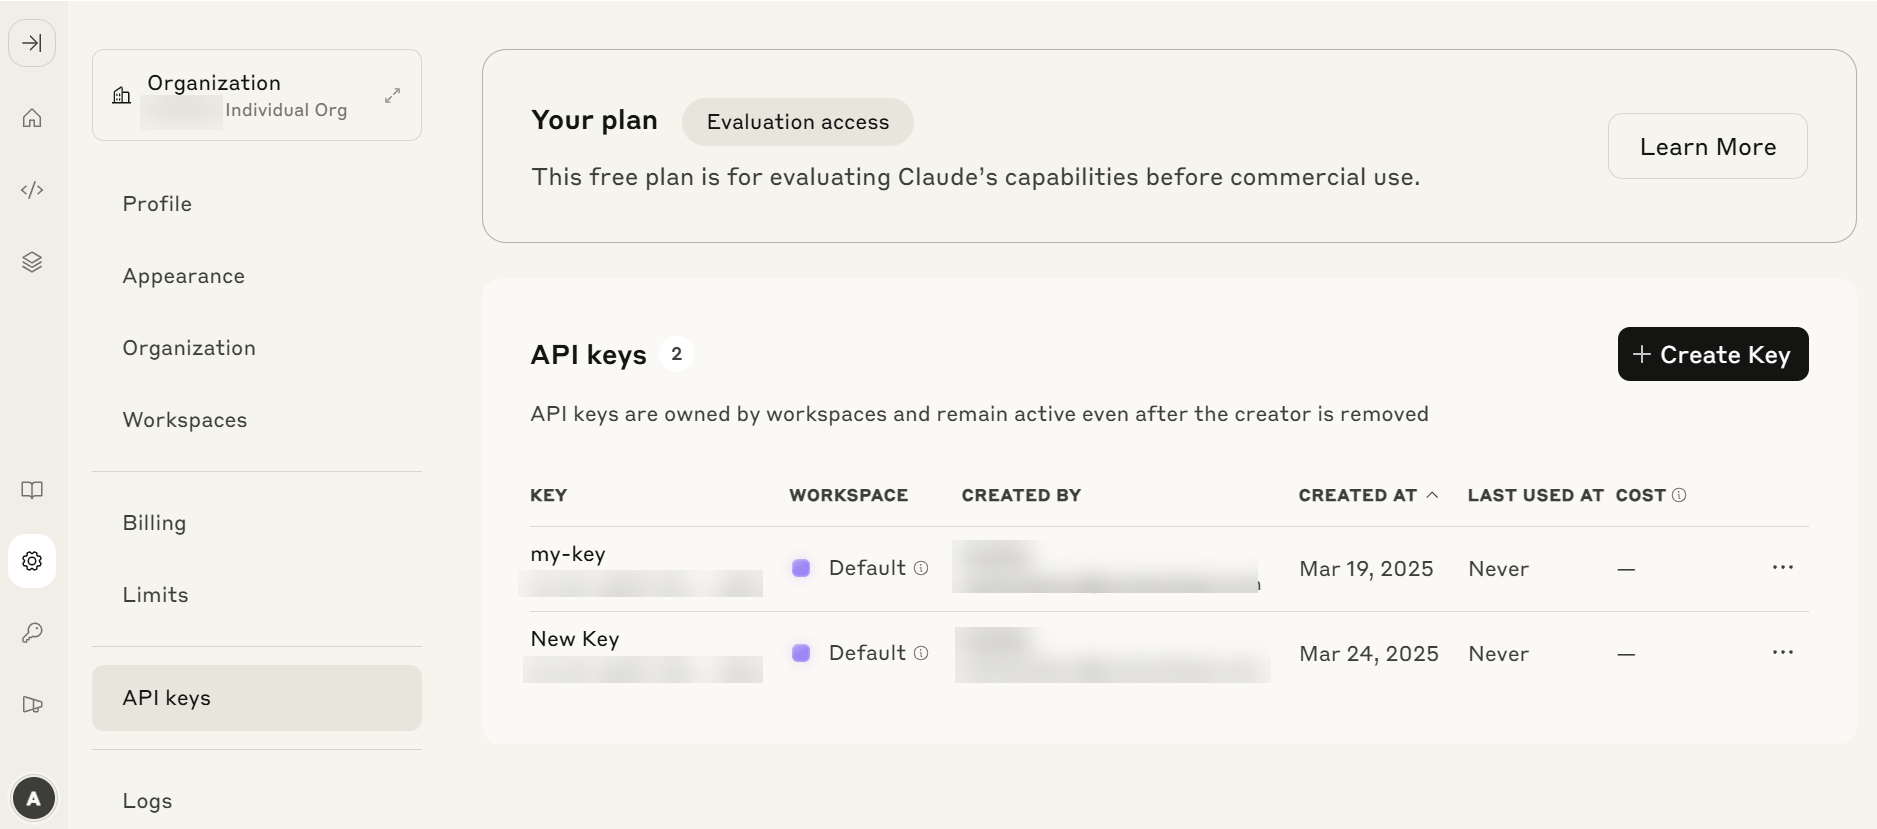
- In the pop-up that appears, select your preferred Workspace, enter the name of your API key and then click Add.
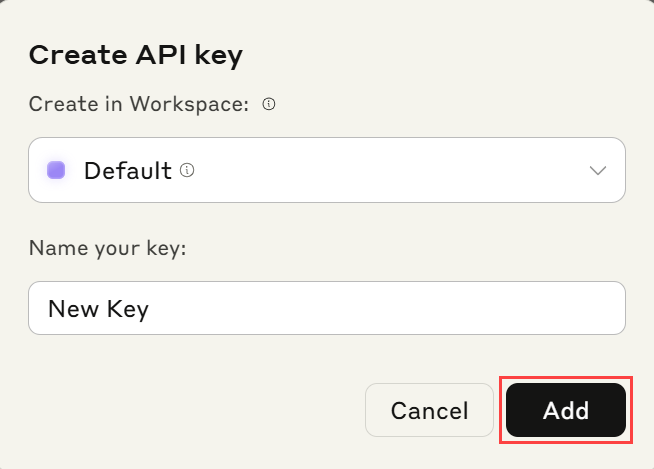
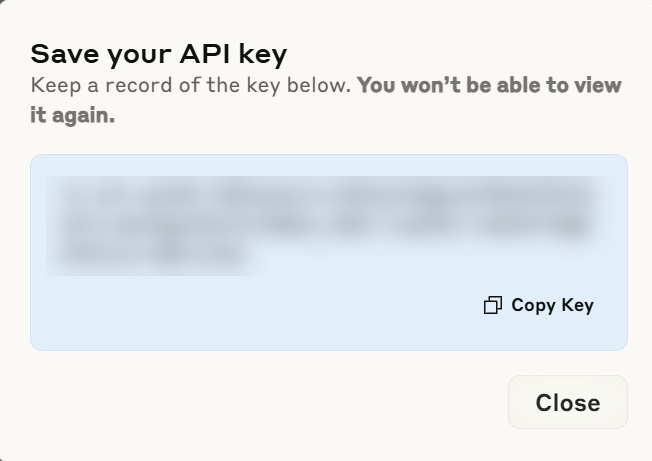
- From the Save your API key modal, click Copy Key to copy the API key to your clipboard. Enter this API key in the Authorize modal.
- Click the Authorize button.
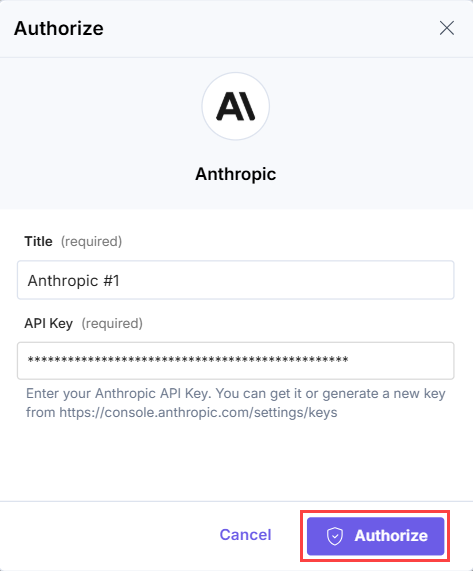
This sets up your Anthropic Console account for the Anthropic connector.
Set up the Anthropic Connector
Perform the following steps to set up the Anthropic connector:
- From the left navigation panel, click Configure Action Step.
- Then, click Action Step to configure third-party services.
- Within the Configure Action Step, click the Anthropic connector.

- Under Choose an Action, you will see the Chat action.

Chat
The Chat action returns the chat response(s) from the Anthropic Claude models. To use the Chat action, follow the steps below:
- Under Choose an Action tab, select the Chat action.
- On the Chat Configure Action page, enter the details given below:
- Click + Add New Account button to connect your Anthropic account as shown in the Prerequisites step.
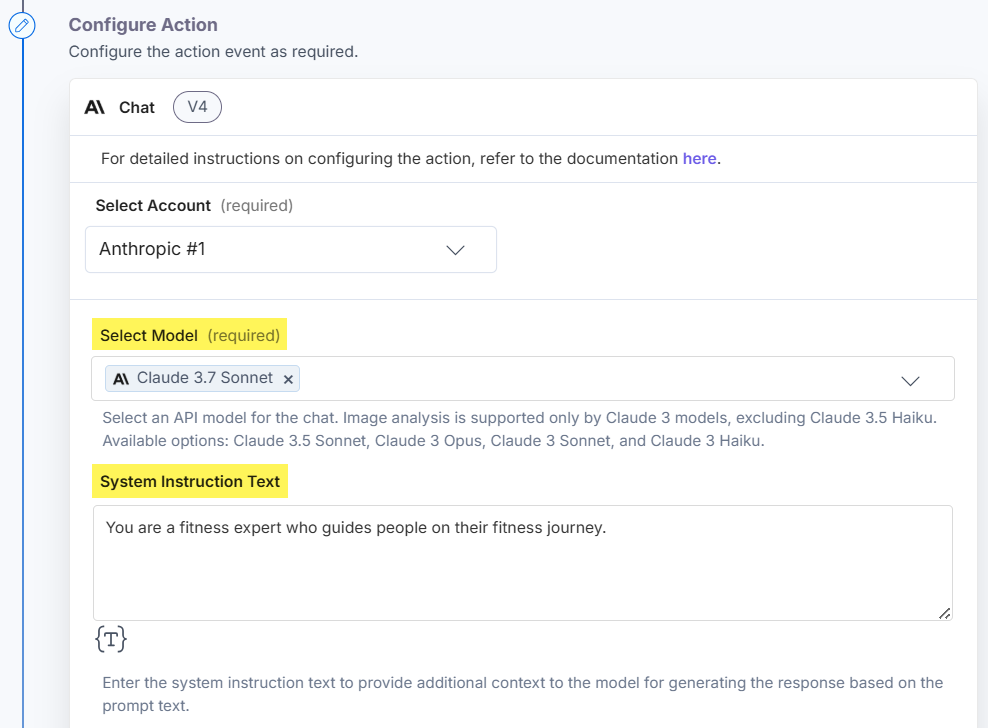
- Select the Model from the dropdown list to generate content for the chat responses. For this guide, we are selecting the Claude 3.7 Sonnet model.
Note: Different models are available to different users, based on the account the user holds such as paid accounts. You must check your account access before selecting the model.
- Enter the System Instruction Text to provide specific guidance or directives to the model to help it understand the context and generate an appropriate response based on the provided prompt text.
- Provide the Prompt Text to generate response(s). Click + Add Prompt Text to enter multiple prompts.
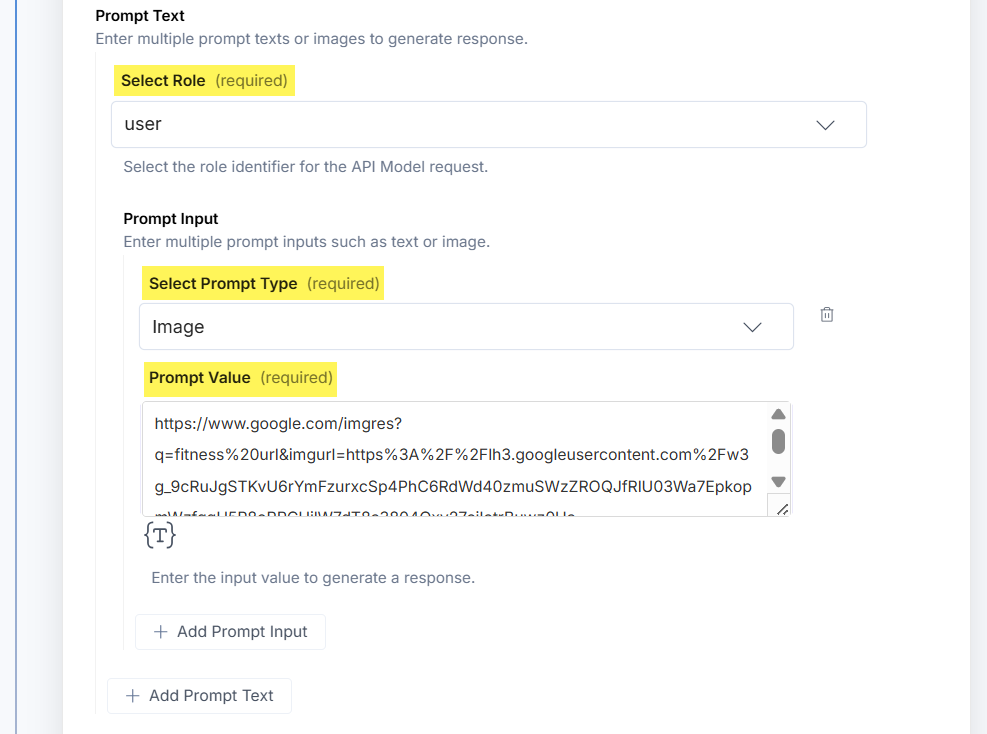
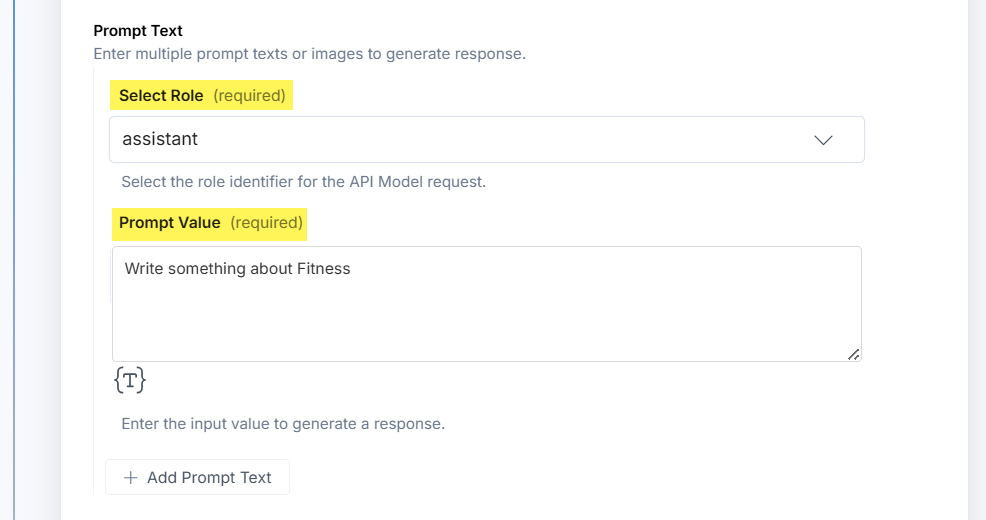
Note: For the Role as assistant, you will see the Prompt Value to enter the text to generate response. If you select the Role as user, you can select the type of prompt content, i.e. Text or Image.
If you select the user Role, follow the below steps:
- Under the Prompt Input section, click + Add Prompt Input button.
- In the Select Prompt Type drop-down, select the type of content for which you want to generate the response, i.e. Text or Image.
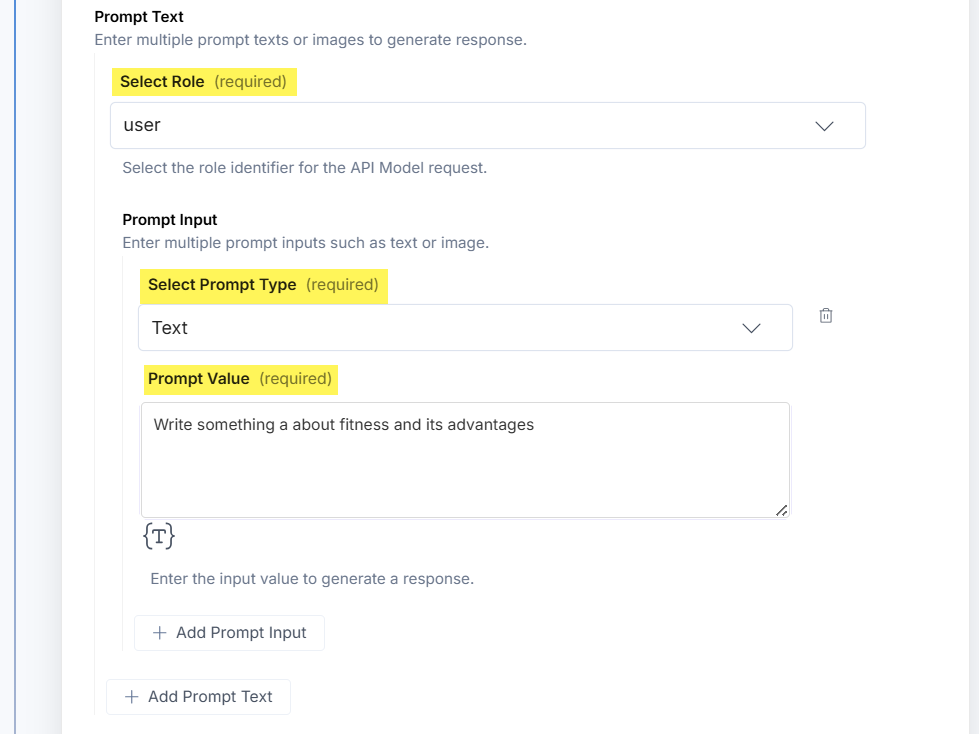
- Enter the Prompt Value. You can enter a text prompt or a valid image URL to generate a response.
If you select the assistant Role, follow the below steps:
- Enter the Prompt Value. You can enter a text prompt or a valid image URL to generate a response.
- Click the Show Optional Fields toggle button to use these optional fields:
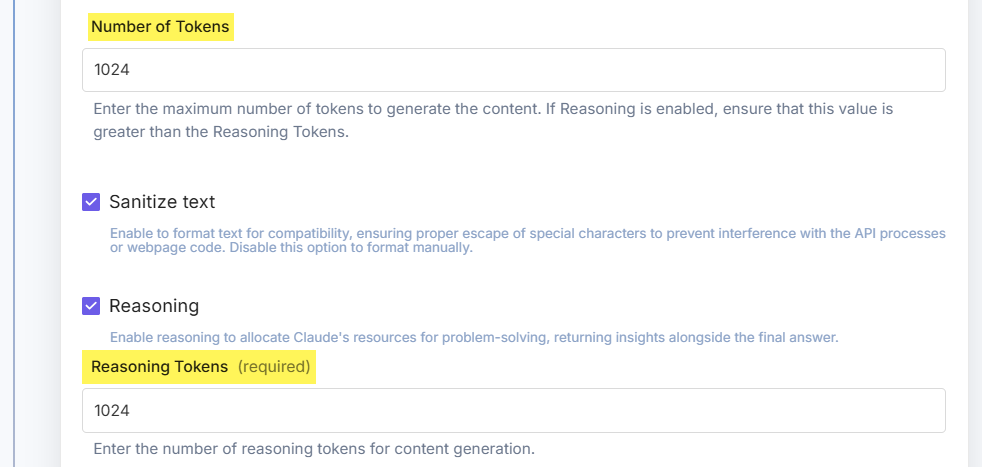
- Enter the Number of Tokens to generate the content.
- Mark the Sanitize text checkbox to remove special characters or spaces from the chat response. Enabling this checkbox, eliminates any special characters or spaces in the chat response, resulting in a clean and compatible text.
- Mark the Reasoning checkbox to enable reasoning to allow Claude to dedicate computational resources to structured problem-solving, enhancing the depth and accuracy of its responses. The reasoning process is provided alongside the final answer, offering insight into how conclusions are reached.
If enabled, enter the number of Reasoning Tokens to be used. Ensure that the Number of Tokens allocated is greater than the Reasoning Tokens value.
Note: If you select the Reasoning checkbox, Randomness of Responses, Top-K, and Top-P fields will not be displayed.
- Enter a value for the Randomness of Responses of the generated content. 0 being the most precise and 1 being the most random content predictions. This must be within the range of 0 to 1.
- Enter the Top-P value to define how the model selects tokens for output. For instance, if tokens A, B, and C have probabilities of 0.3, 0.2, and 0.1; then entering a Top-P value as 0.5, the model chooses either A or B as the next token using temperature and excludes C. This must be within the range of 0 to 1.
- Enter the Top-K value to define how the model selects tokens for output. Entering a Top-K value of 1 implies that the next chosen token is the most likely among all tokens in the model's vocabulary. Top-K value of 3 means that the next token is selected from the three most probable tokens using temperature. This must be within the range of 1 to 40.
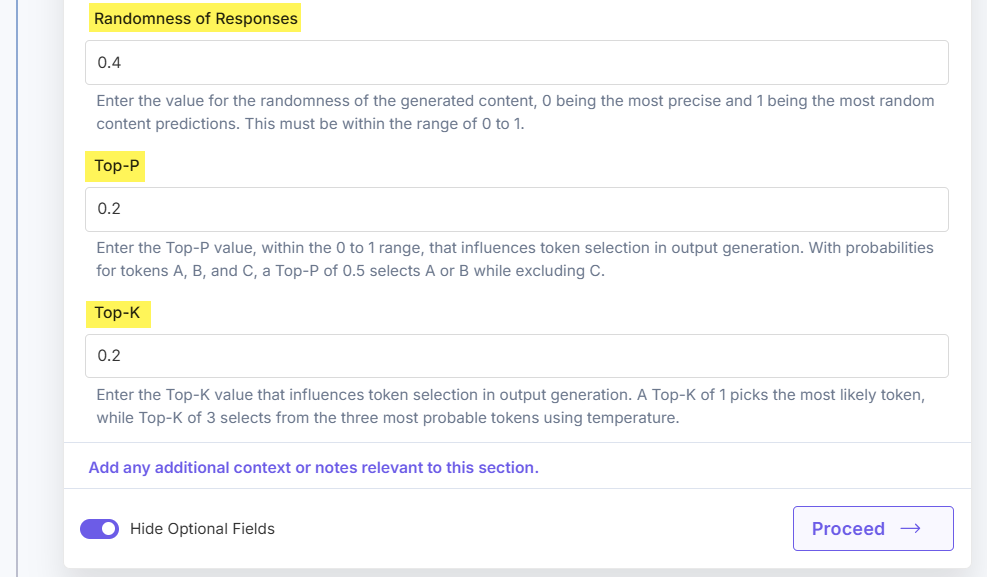
- Click Proceed.
- Check if the details are correct. If yes, then click Test Action.
- You will get the response(s). Once set, click Save and Exit.
This completes the Anthropic connector’s setup.
