

Algolia
The Algolia Connector helps you to create search index entries in your Algolia account.
Prerequisites
To use the Algolia connector, you first need to add your Algolia account. To do so, follow the steps given below:
Connect your Algolia Account to Automate
- Click Configure Action Step from the left navigation panel.
- Click Action Step to configure third-party services.
- Within the Configure Action Step, click the Algolia connector.
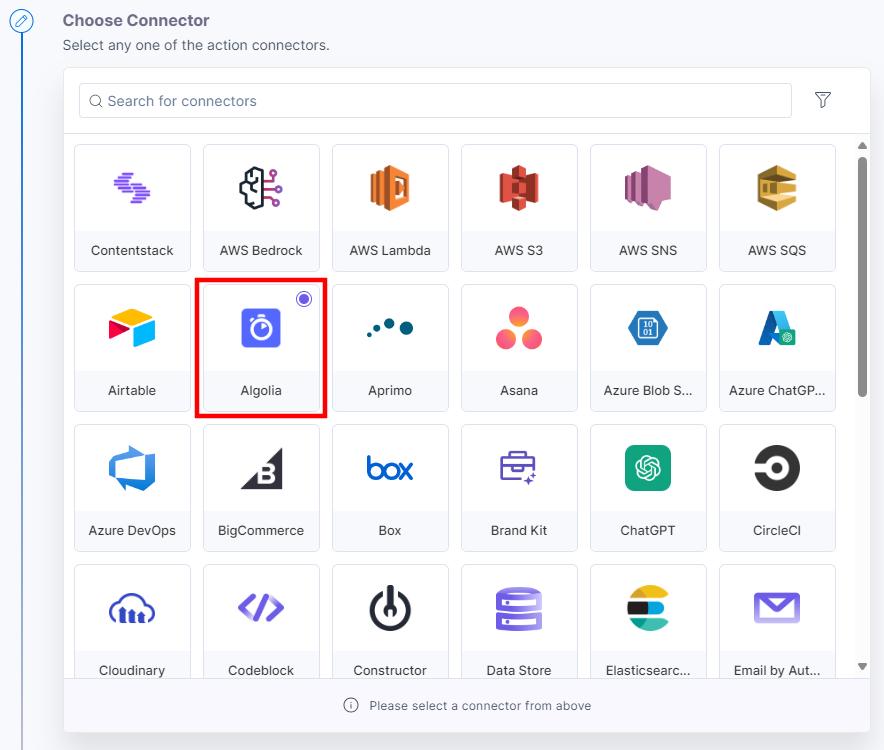
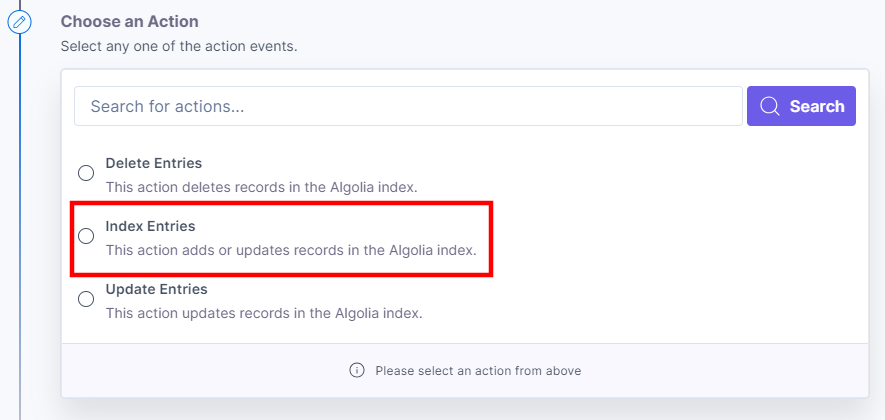
- Under Choose an Action tab, select any one action from the list. Here, we are selecting the Index Entries action.
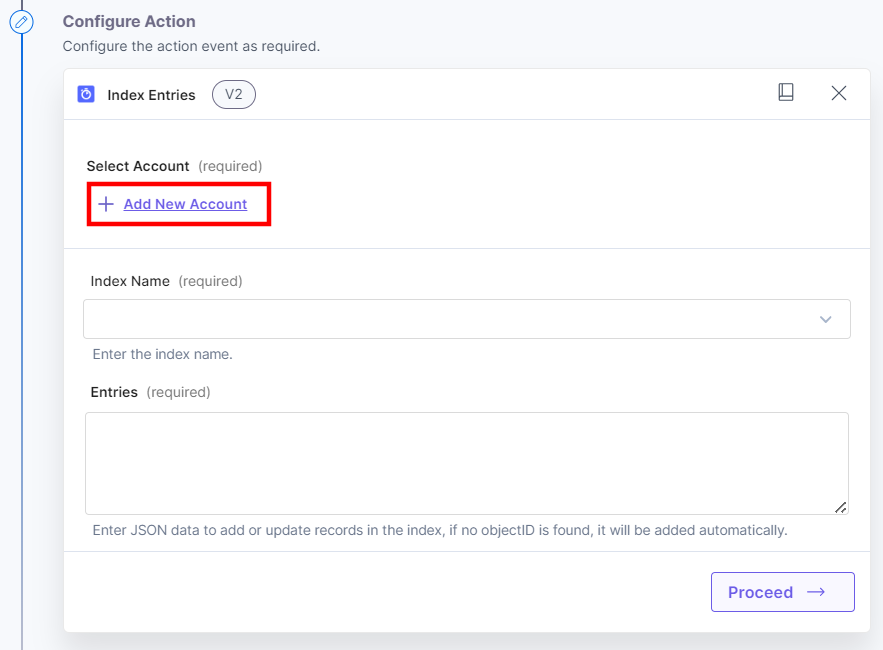
- On the Configure Action page, click the + Add New Account to add your Contentstack account.
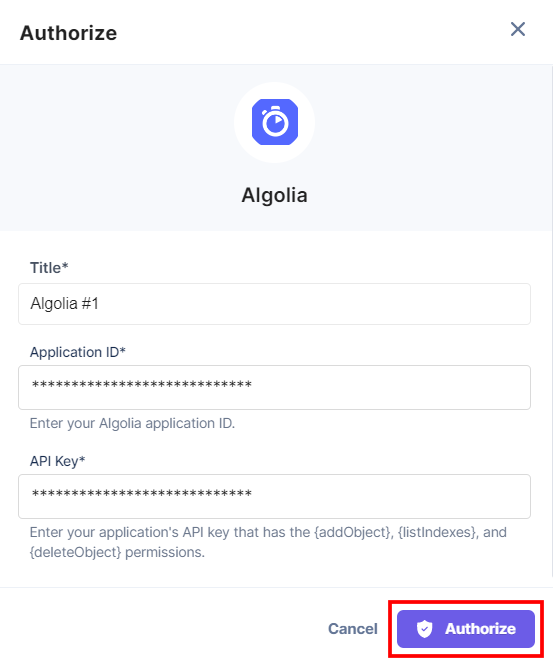
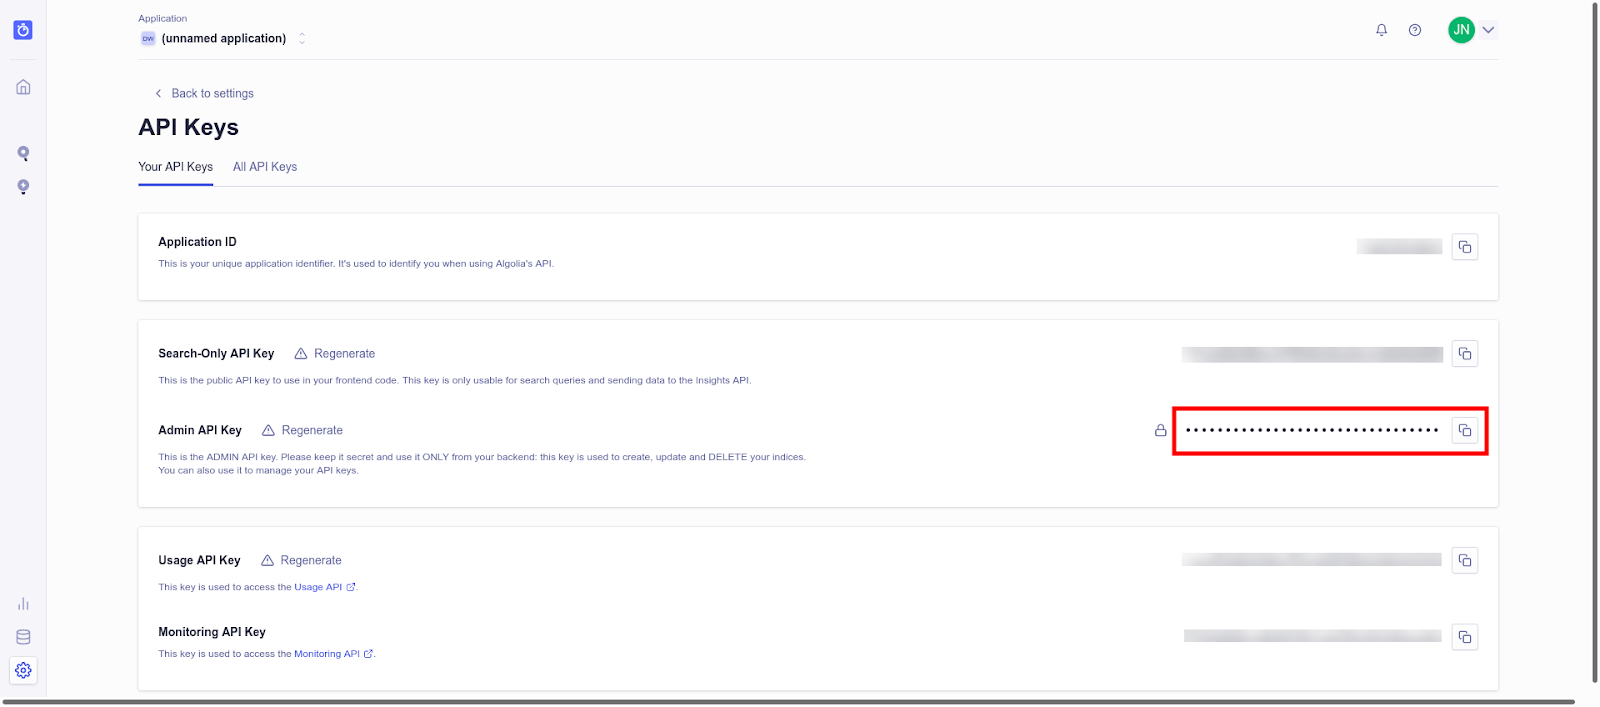
- In the Authorize modal, enter a Title, an Application ID, and an API Key.
To find your Application ID and API Key, log in to the Algolia dashboard and perform the following steps:
Additional Resource: For more details, refer to the Importing with API’s document.
Then, click Authorize.
This sets up your Algolia account for the Algolia connector.
Set up the Algolia Connector
Perform the following steps to set up the Algolia action connector:
- From the left navigation panel, click Configure Action Step.
- Then, click Action Step to configure third-party services.
- Within the Configure Action Step, click the Algolia connector.
Note: You can sort and search the connector(s) based on the filter.
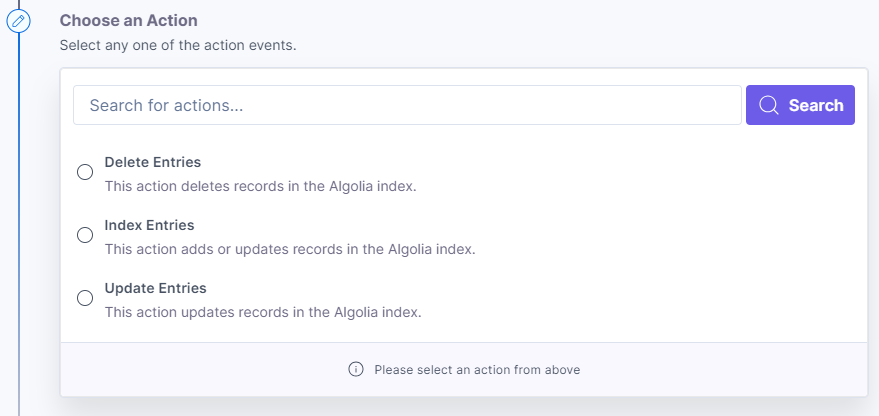
- Under Choose an Action, you will see three actions: Delete Entries, Index Entries, and Update Entries.
Once done, you can go ahead and set up your Algolia connector.
Action 1: Select the Index Entries action:
- Under Choose an Action tab, select the Index Entries action.
- On the Index Entries Configure Action page, enter the details given below:
- Click + Add New Account button to connect your Contentstack account as shown in the Connect your Algolia Account to Automate step.
- Select the Index Name where you want to send the data in the form of a list of objects.
- In the Entries field, enter the data to be included in the index.
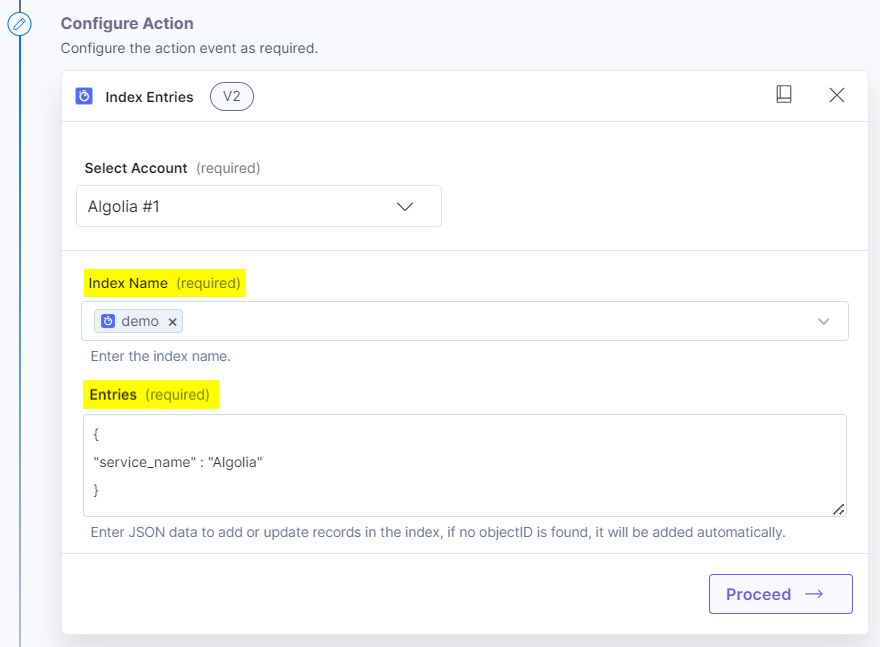
Note: Provide your index data as per your object schema and in JSON format only. You can add a JSON object or an array of JSON objects.
- Click Proceed.
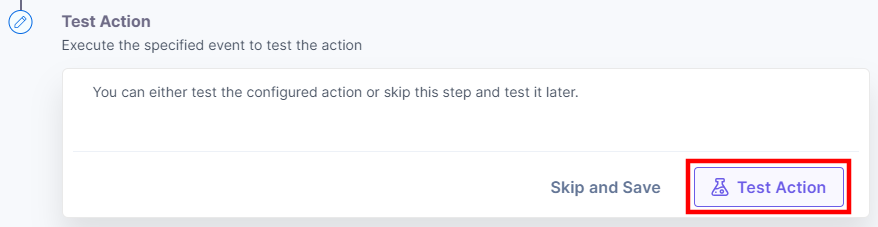
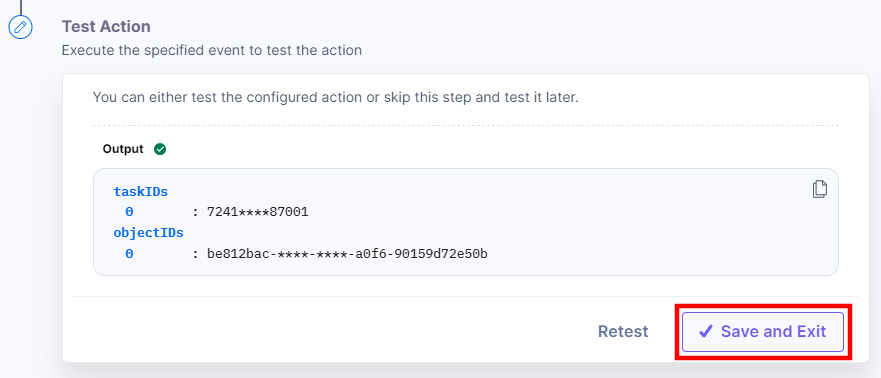
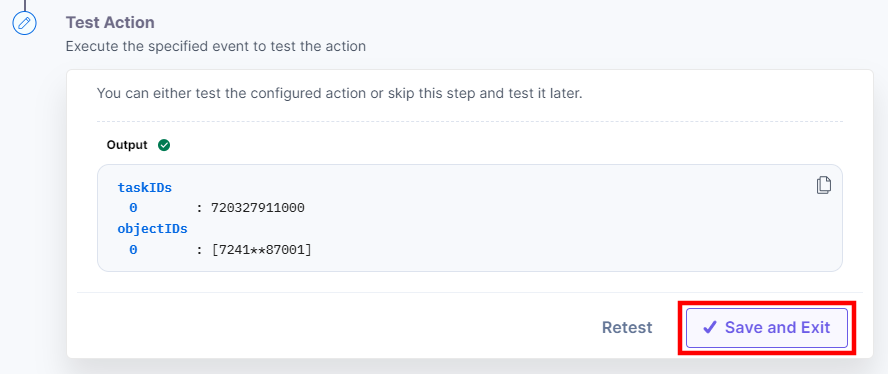
- Check if the details are correct. If yes, click Test Action.
- Once set, click Save and Exit.
- Go to the Algolia Index section and check the latest index entry with the data we passed as objects within the connector configurations.

Action 2: Select the Delete Entries action:
- Under Choose an Action tab, select the Delete Entries action.
- On the Delete Entries Configure Action page, enter the details given below:
- Click + Add New Account button to connect your Contentstack account as shown in the Connect your Algolia Account to Automate step.
- Select the Index Name.
- Enter the object ID to be deleted in the Entries field.
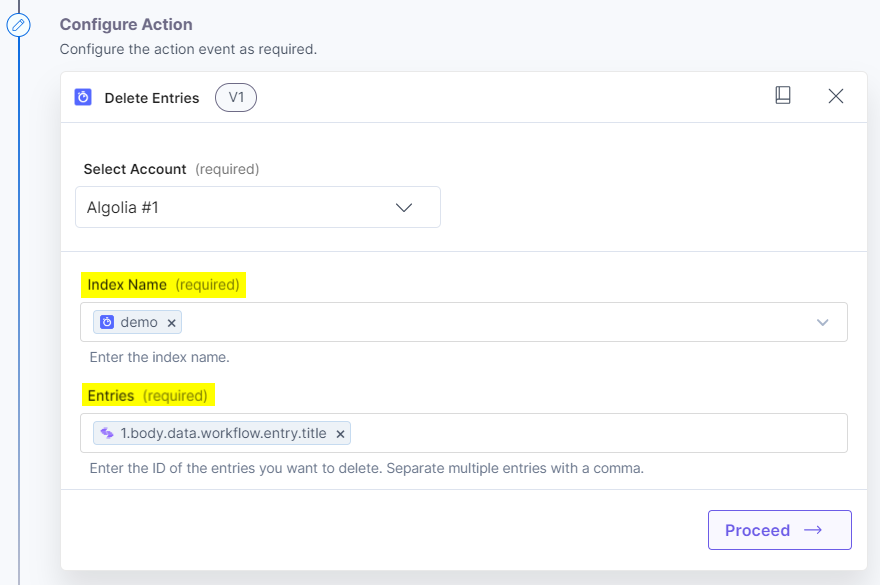
Note: You can add multiple object IDs separated by a comma to delete from the Algolia index.
- Click Proceed.
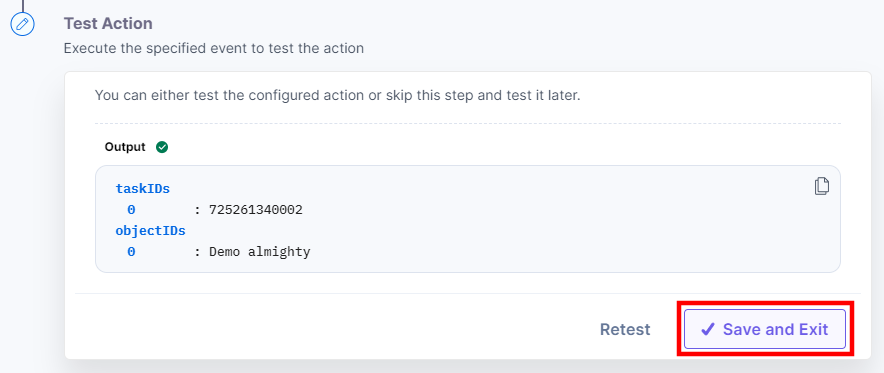
- Check if the details are correct. If yes, click Test Action.

- Once set, click Save and Exit.
Action 2: Select the Update Entries action:
- Under Choose an Action tab, select the Update Entries action.
- On the Update Entries Configure Action page, enter the details given below:
- Click + Add New Account button to connect your Contentstack account as shown in the Connect your Algolia Account to Automate step.
- Select the Index Name where you want to send the data in the form of a list of objects.
- In the Entries field, enter the data to be updated.
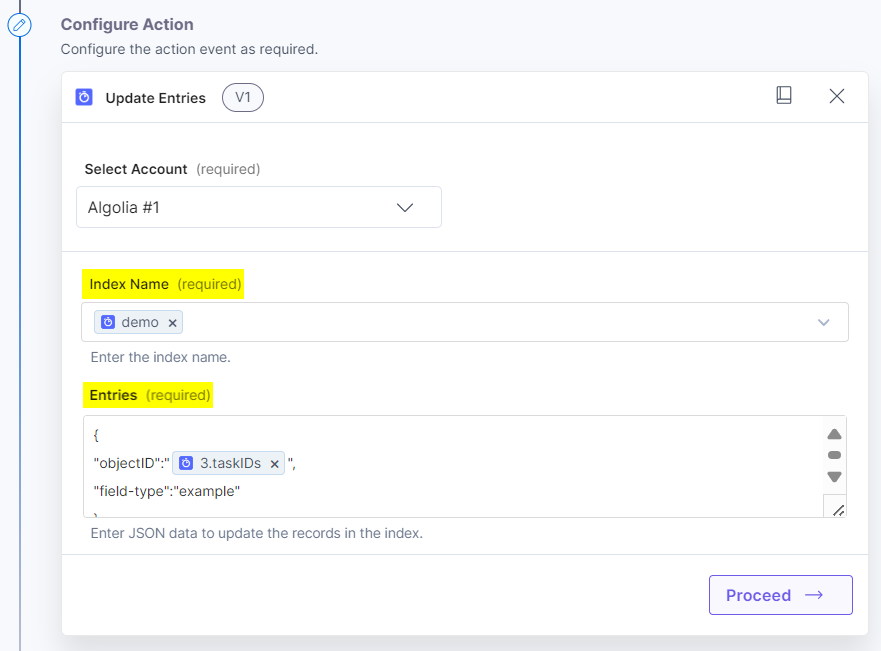
Note: Provide your index data as per your object schema and in JSON format only. You can add a JSON object or an array of JSON objects.
- Click Proceed.
- Check if the details are correct. If yes, click Test Action.

- Once set, click Save and Exit.
- To verify the output, go to the Algolia Index section and check the updated entry.
This sets the Algolia action connector.
More articles in "Search & Discovery"
