

.svg?format=pjpg&auto=webp)
.svg?format=pjpg&auto=webp)
.png?format=pjpg&auto=webp)


.png?format=pjpg&auto=webp)
Create a Job and Authorization for DAL
Create a job in Data & Insights (Lytics) to import and synchronize your Contentstack content (entries and taxonomies), so that it can track how users interact with your content and enrich their audience profiles. This enables Data & Insights (Lytics) to score visitors based on the categories or topics they consume.
This guide provides step-by-step instructions for creating a new 'Import Entries' Job along with the authorization for it. Channel tool authorizations refer to the permissions granted to various integrations that allow the Data & Insights (Lytics) platform to access and use data from third-party channels.
Prerequisites
- Contentstack account with DAL (Data Activation Layer) enabled and created
- Your self-hosted site deployed
- Stack connected to the deployed site
- Personalize project created
Create a New 'Import Entries' Job
Once DAL is enabled and configured for your organization, follow these steps:
- Go to app.lytics.com.
- Navigate to Data Pipeline > Jobs.
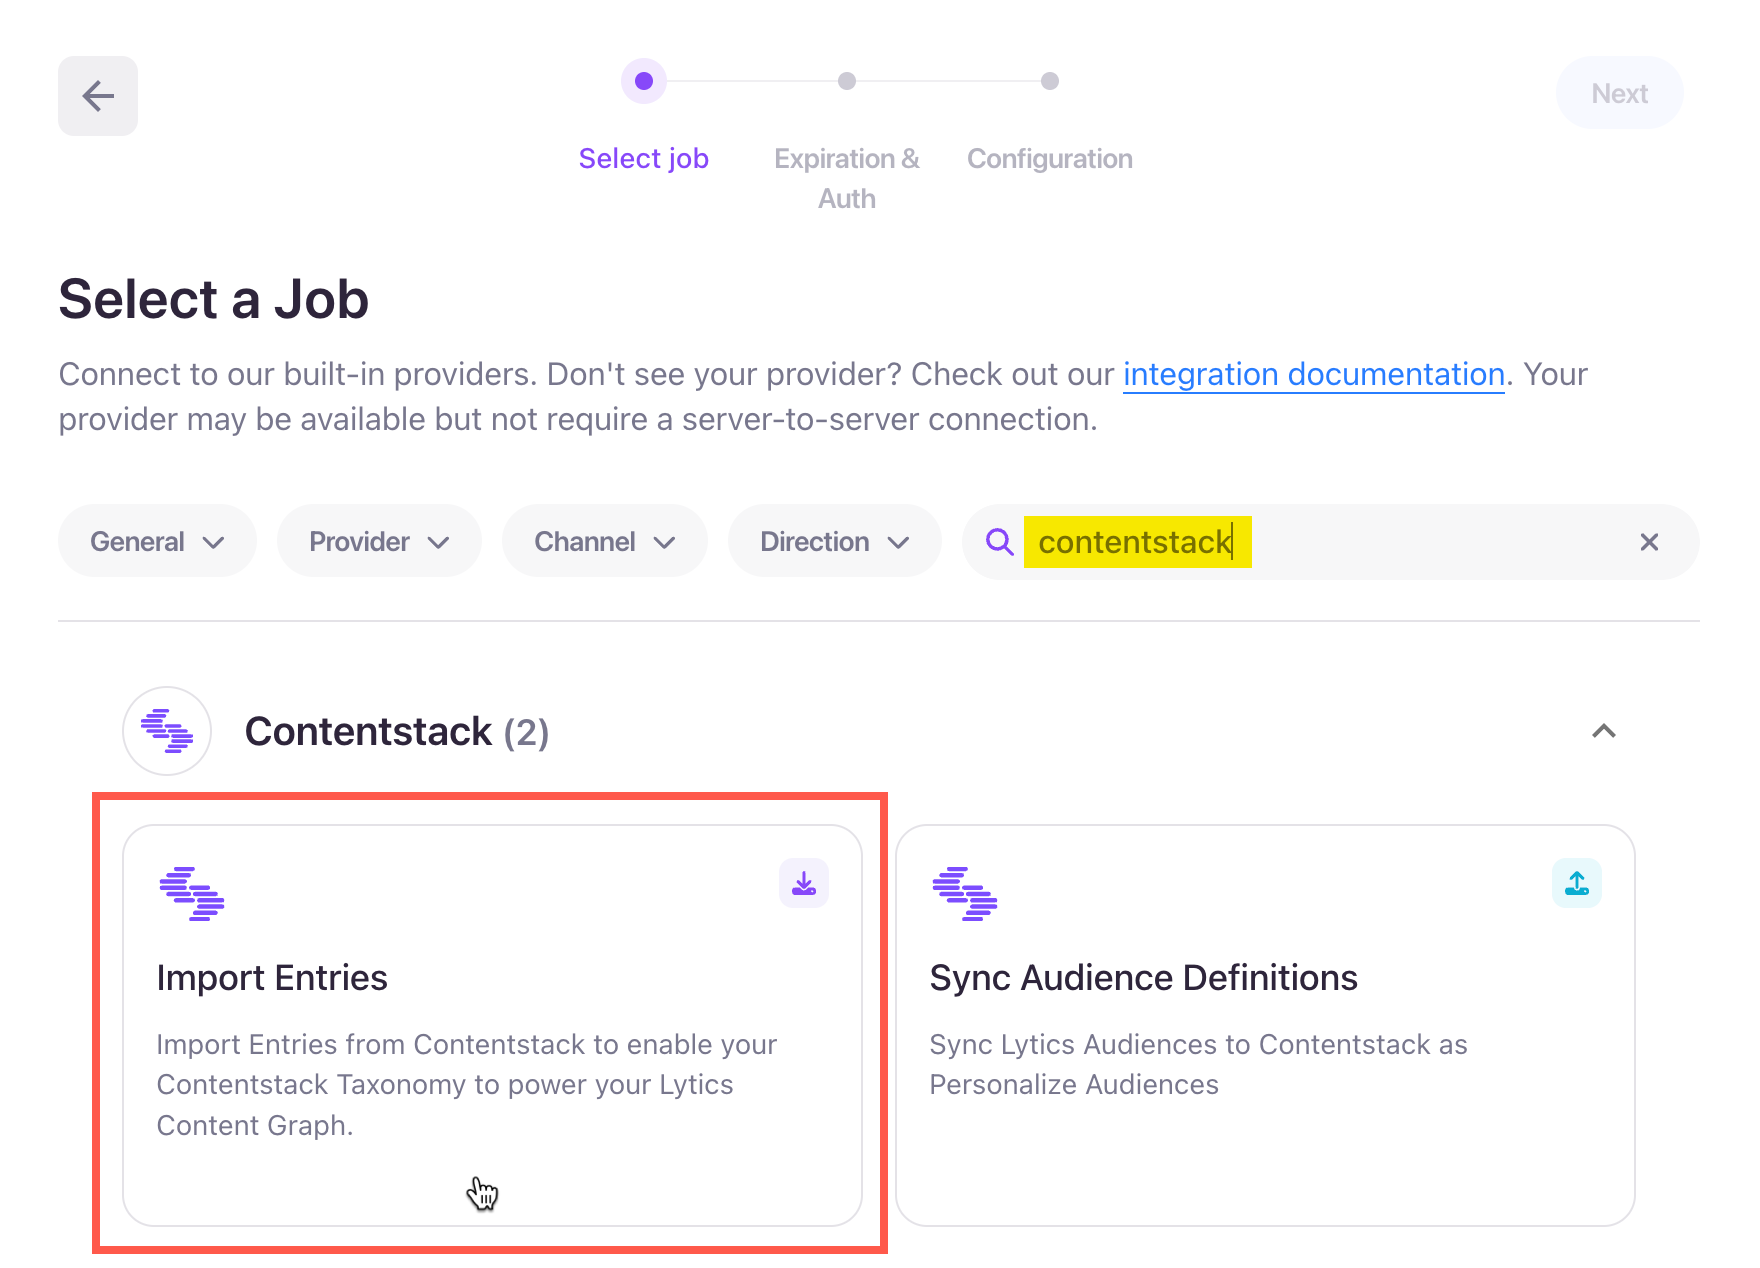
- Click the + Create New button, and then select the appropriate job type card based on your use case.
- In the Set job details section, enter a Label and optional Description for the job.
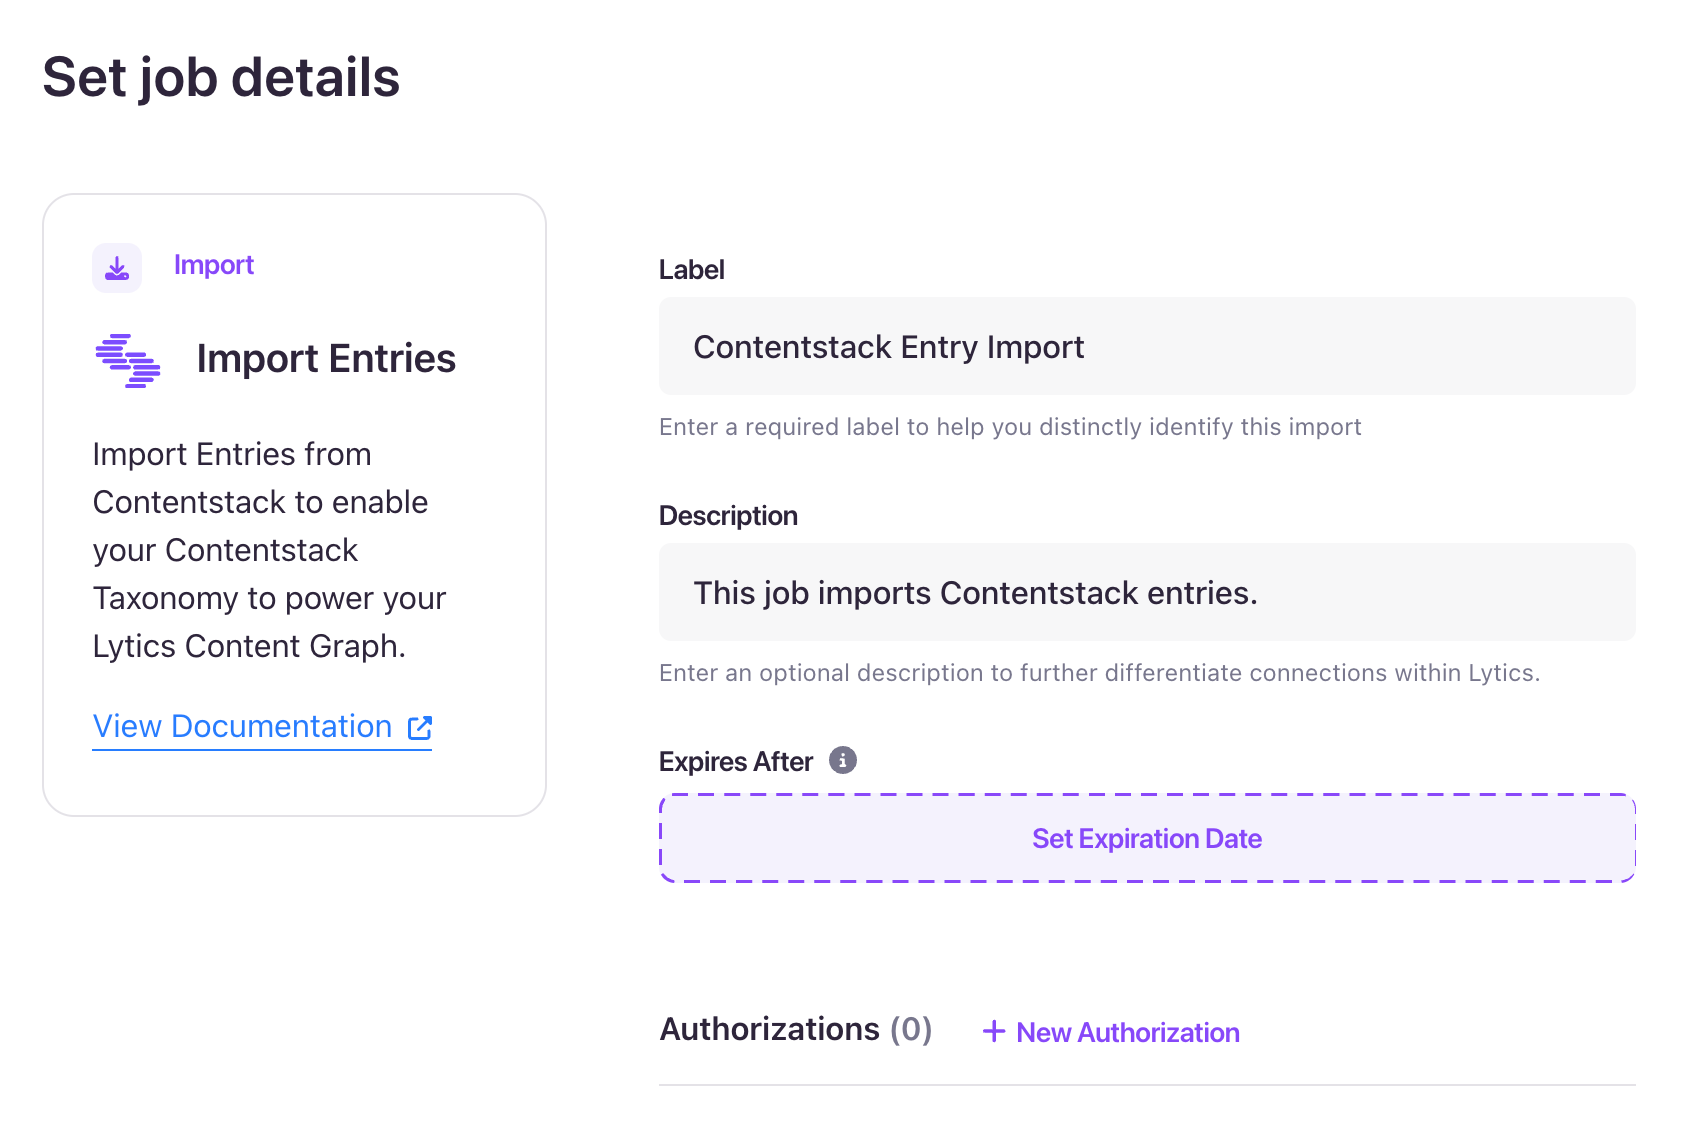
- In the Authorizations section, click the + New Authorization button to manage and maintain the connection to your Contentstack channel tool over time.
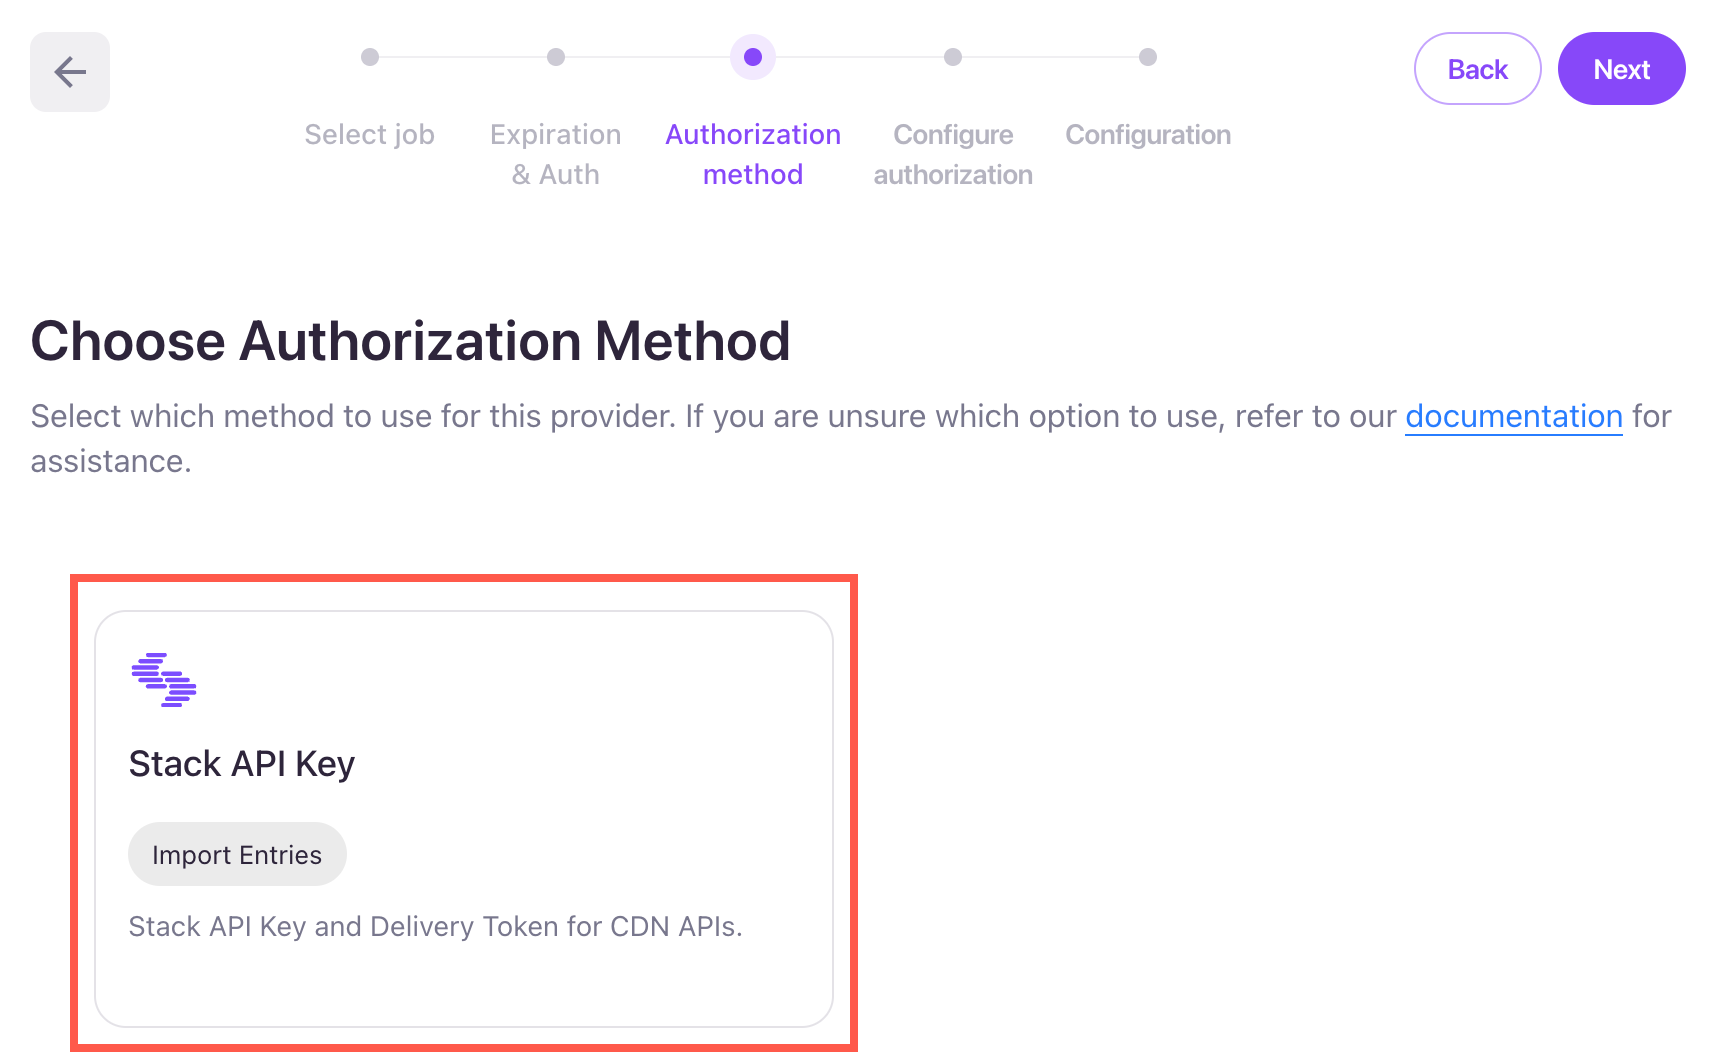
- Choose Stack API Key as the Authorization method.
- In the Configure Authorization Details section, enter a Label and optional Description for the authorization.
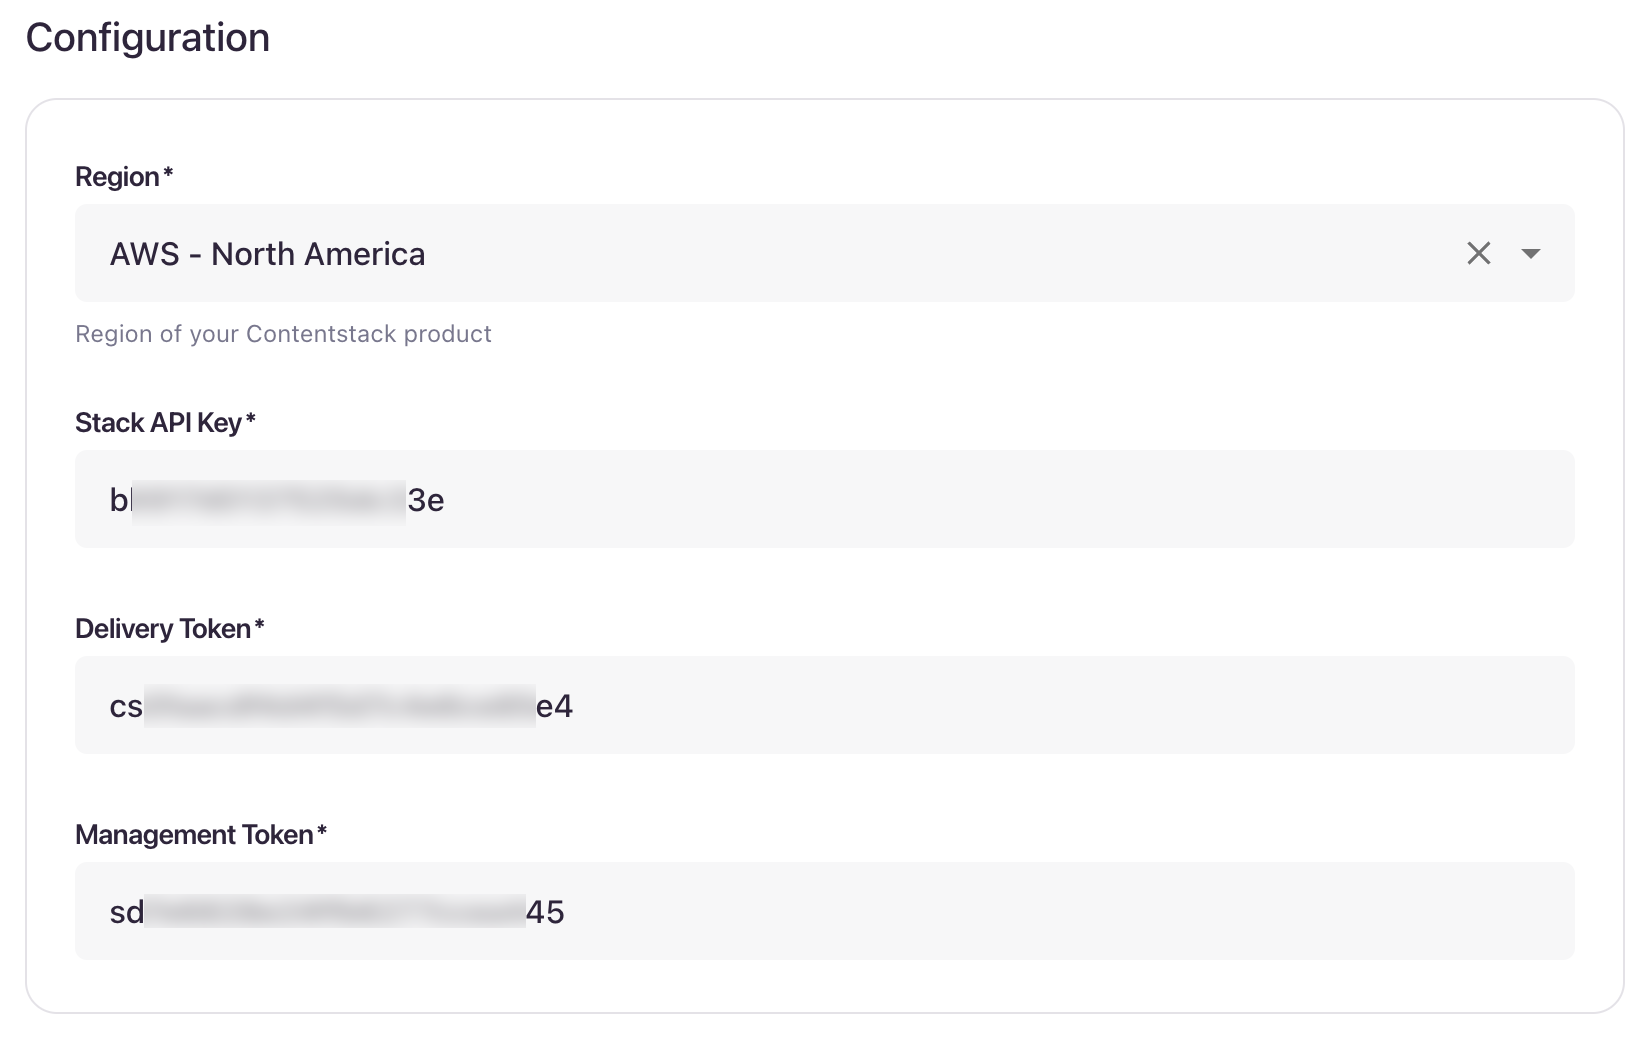
- In the Configuration section,
- Region: Select the region where your organization is located.
- Stack API Key: Enter your stack API key (Stack Settings > API Credentials).
Delivery Token: Enter the delivery token of your stack (Stack Settings > Tokens > Delivery Token).
- Management Token: Enter your stack's management token (Stack Settings > Tokens > Management Token).
Tip: Generate a new management token with Read permissions to avoid issues caused by hidden or obfuscated values. This ensures your sync is correctly tied to the domain and environment you authorized, and avoids misconfiguration due to multiple tokens or domains.
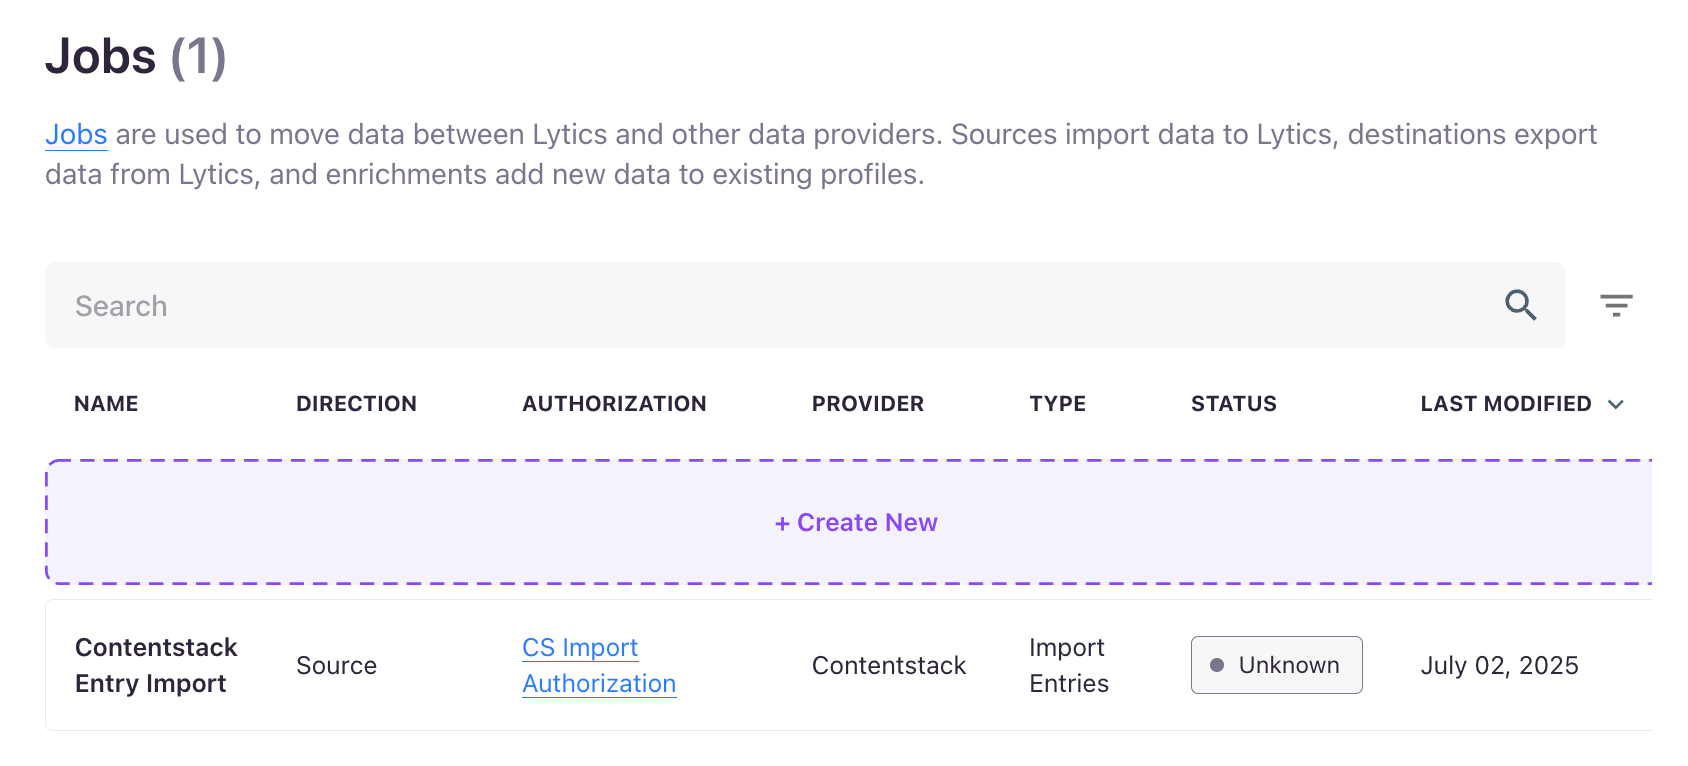
Click the Save and Continue button. You will see a success message pop-up: Authorization saved successfully.
Note: Authorization health can reflect the following statuses:
- Healthy: The authorization is valid.
- Unhealthy: The authorization has failed or is inactive.
- Unknown: The authorization check hasn't completed or the status couldn’t be determined.
- Now, in the Configure Job section, select your Content Types to import (likely "blog_post", "page", etc.). You can select multiple content types to import their entries.
- Select Keep Updated to continuously import the entries for the selected content types.
- Optionally, you can also provide the Domain on which you are serving content (same as your DAL configuration) and have the JavaScript Tag installed.
- Select the Taxonomies you'd like to import for the Context Layer Import. Each taxonomy selected will create a new Context Layer and calculate new scores on profiles for each value in that taxonomy.
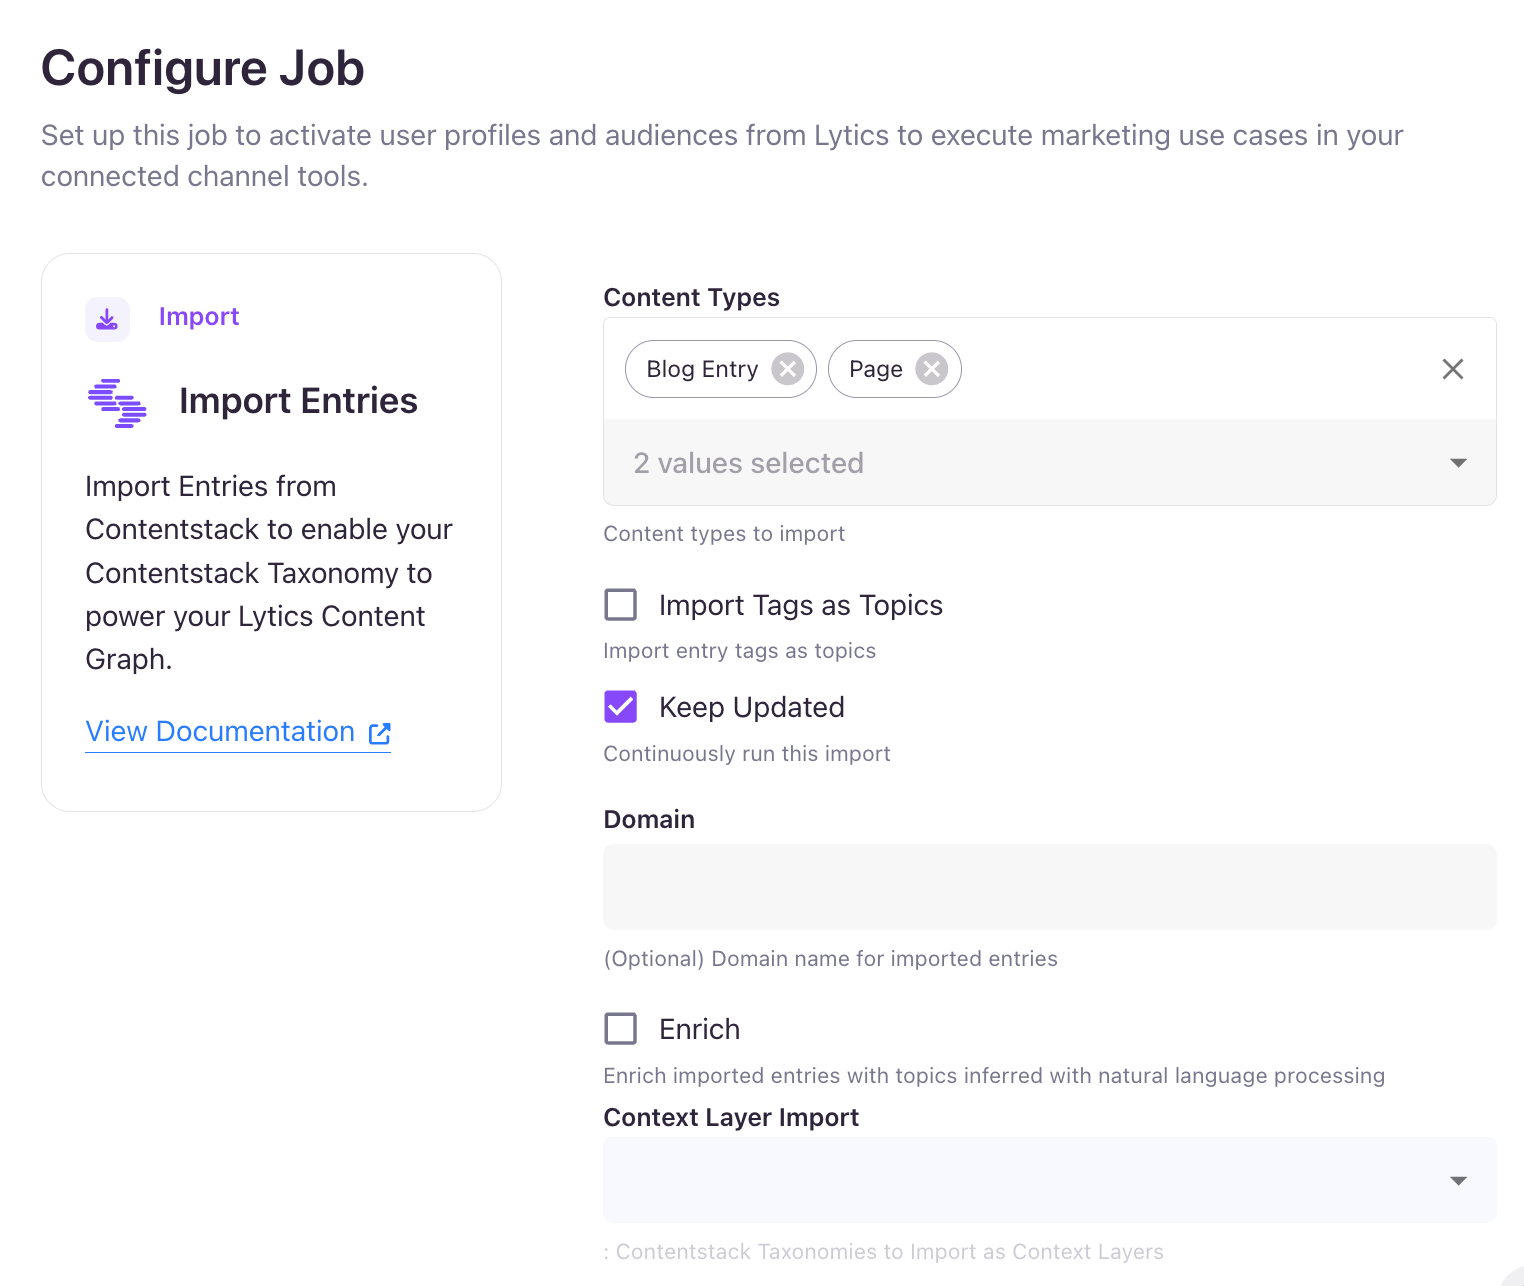
- Click the Complete button to finish the setup of your job. You will see a success message pop-up: Job saved successfully.
- To view the newly created job, go to Data Pipeline > Jobs.
This completes the setup for your Import Entries job.
Detailed job status are provided to understand better what is happening in the background during a job's lifecycle. These states will vary by job but include:
- Running: The job is actively running.
- Sleeping: The job is not actively running but is scheduled to run again after a given period. A job is sleeping either because the job runs on a periodic cadence with scheduled sleep in between job runs or the job has encountered an error and is sleeping before retrying the request.
- Failed: The job has encountered consecutive errors over 10 hours and is removed from running again. Check the logs to see if there are any fixable issues. Failed jobs can be resumed, which will schedule it to run again. Failed jobs will be automatically purged after 90 days.
- Paused: A user has paused the job. The work can be scheduled to run again by resuming the job. Paused jobs will be automatically purged after 90 days.
- Completed: The job has completed all its scheduled tasks and will not be rerun. These will be purged from the job history after 90 days.
More articles in "Using Data Activation Layer"
