Create New Page
Use Visual Builder to create and customize web pages without writing code. You can publish new content or expand your site structure in just a few clicks.
To create a new web page, log in to your Contentstack account, and perform the following steps:
- Navigate to your stack and select Visual Experience.
- Click Builder in the bottom pill menu.
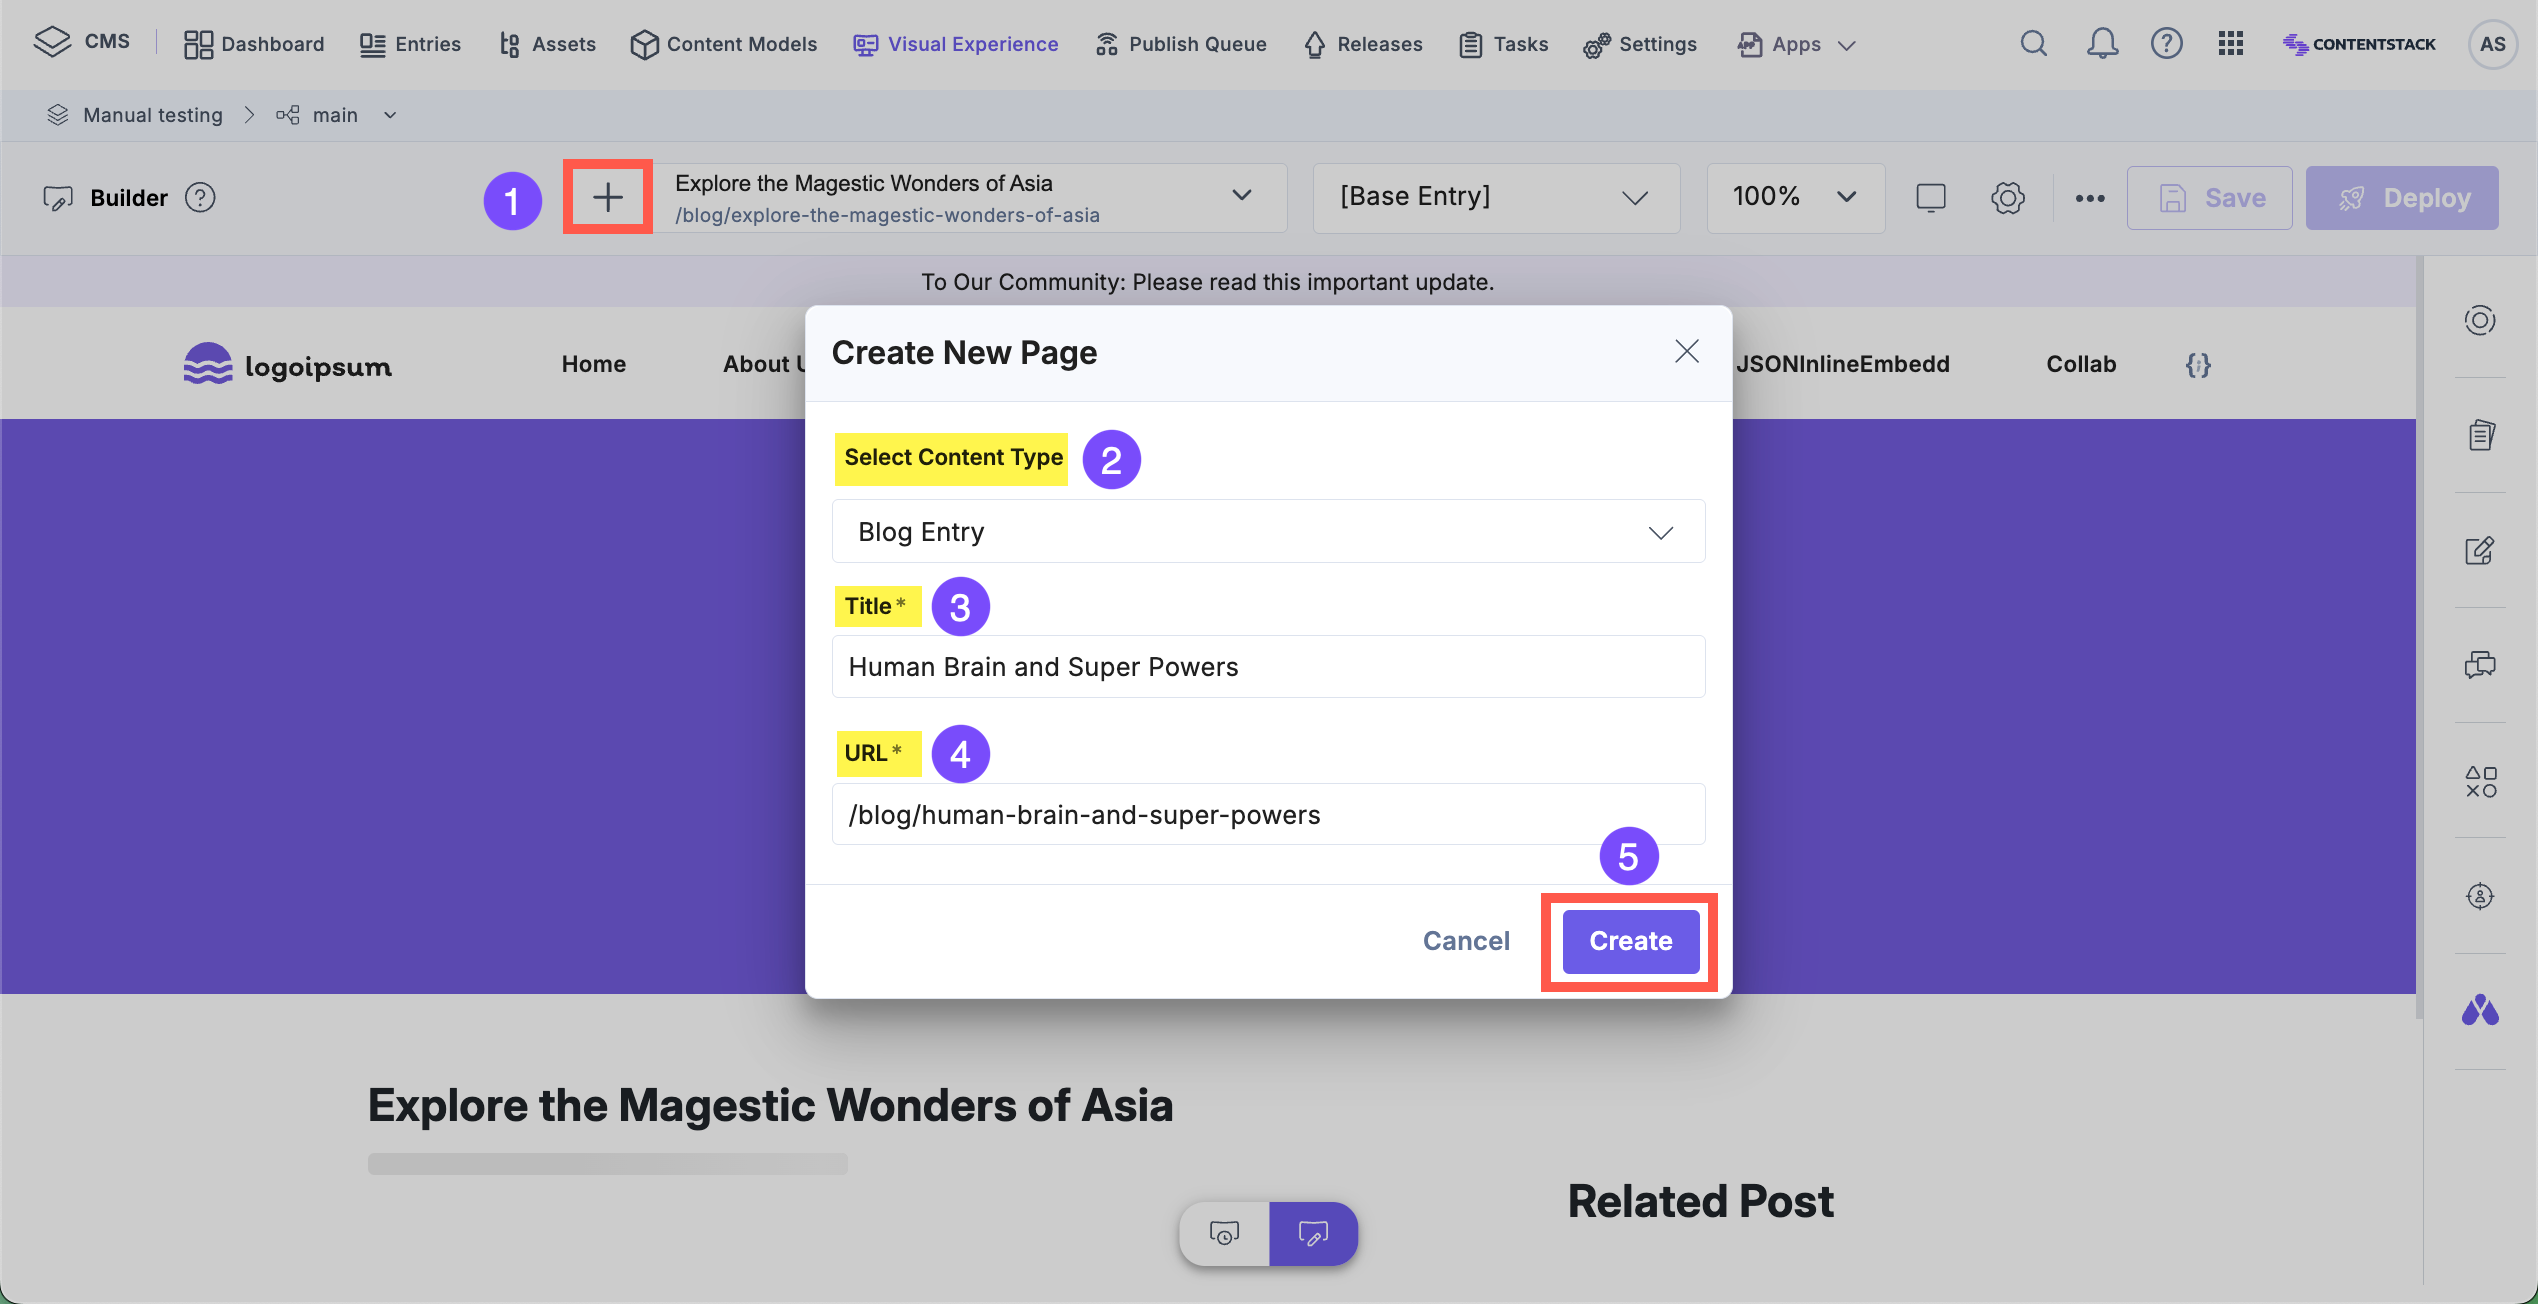
- In the URL bar, click the “+” icon.
- In the Create New Page modal, provide the following details:
- Select Content Type: Select a content type you want to use for the new page.
- Title: Enter the page title. This also serves as the entry title.
- URL: The system generates a URL based on the title. You can edit this URL if needed.
Tip: Use the dropdown in the URL bar to browse available content types. Then, click the “+” icon next to the one you want.
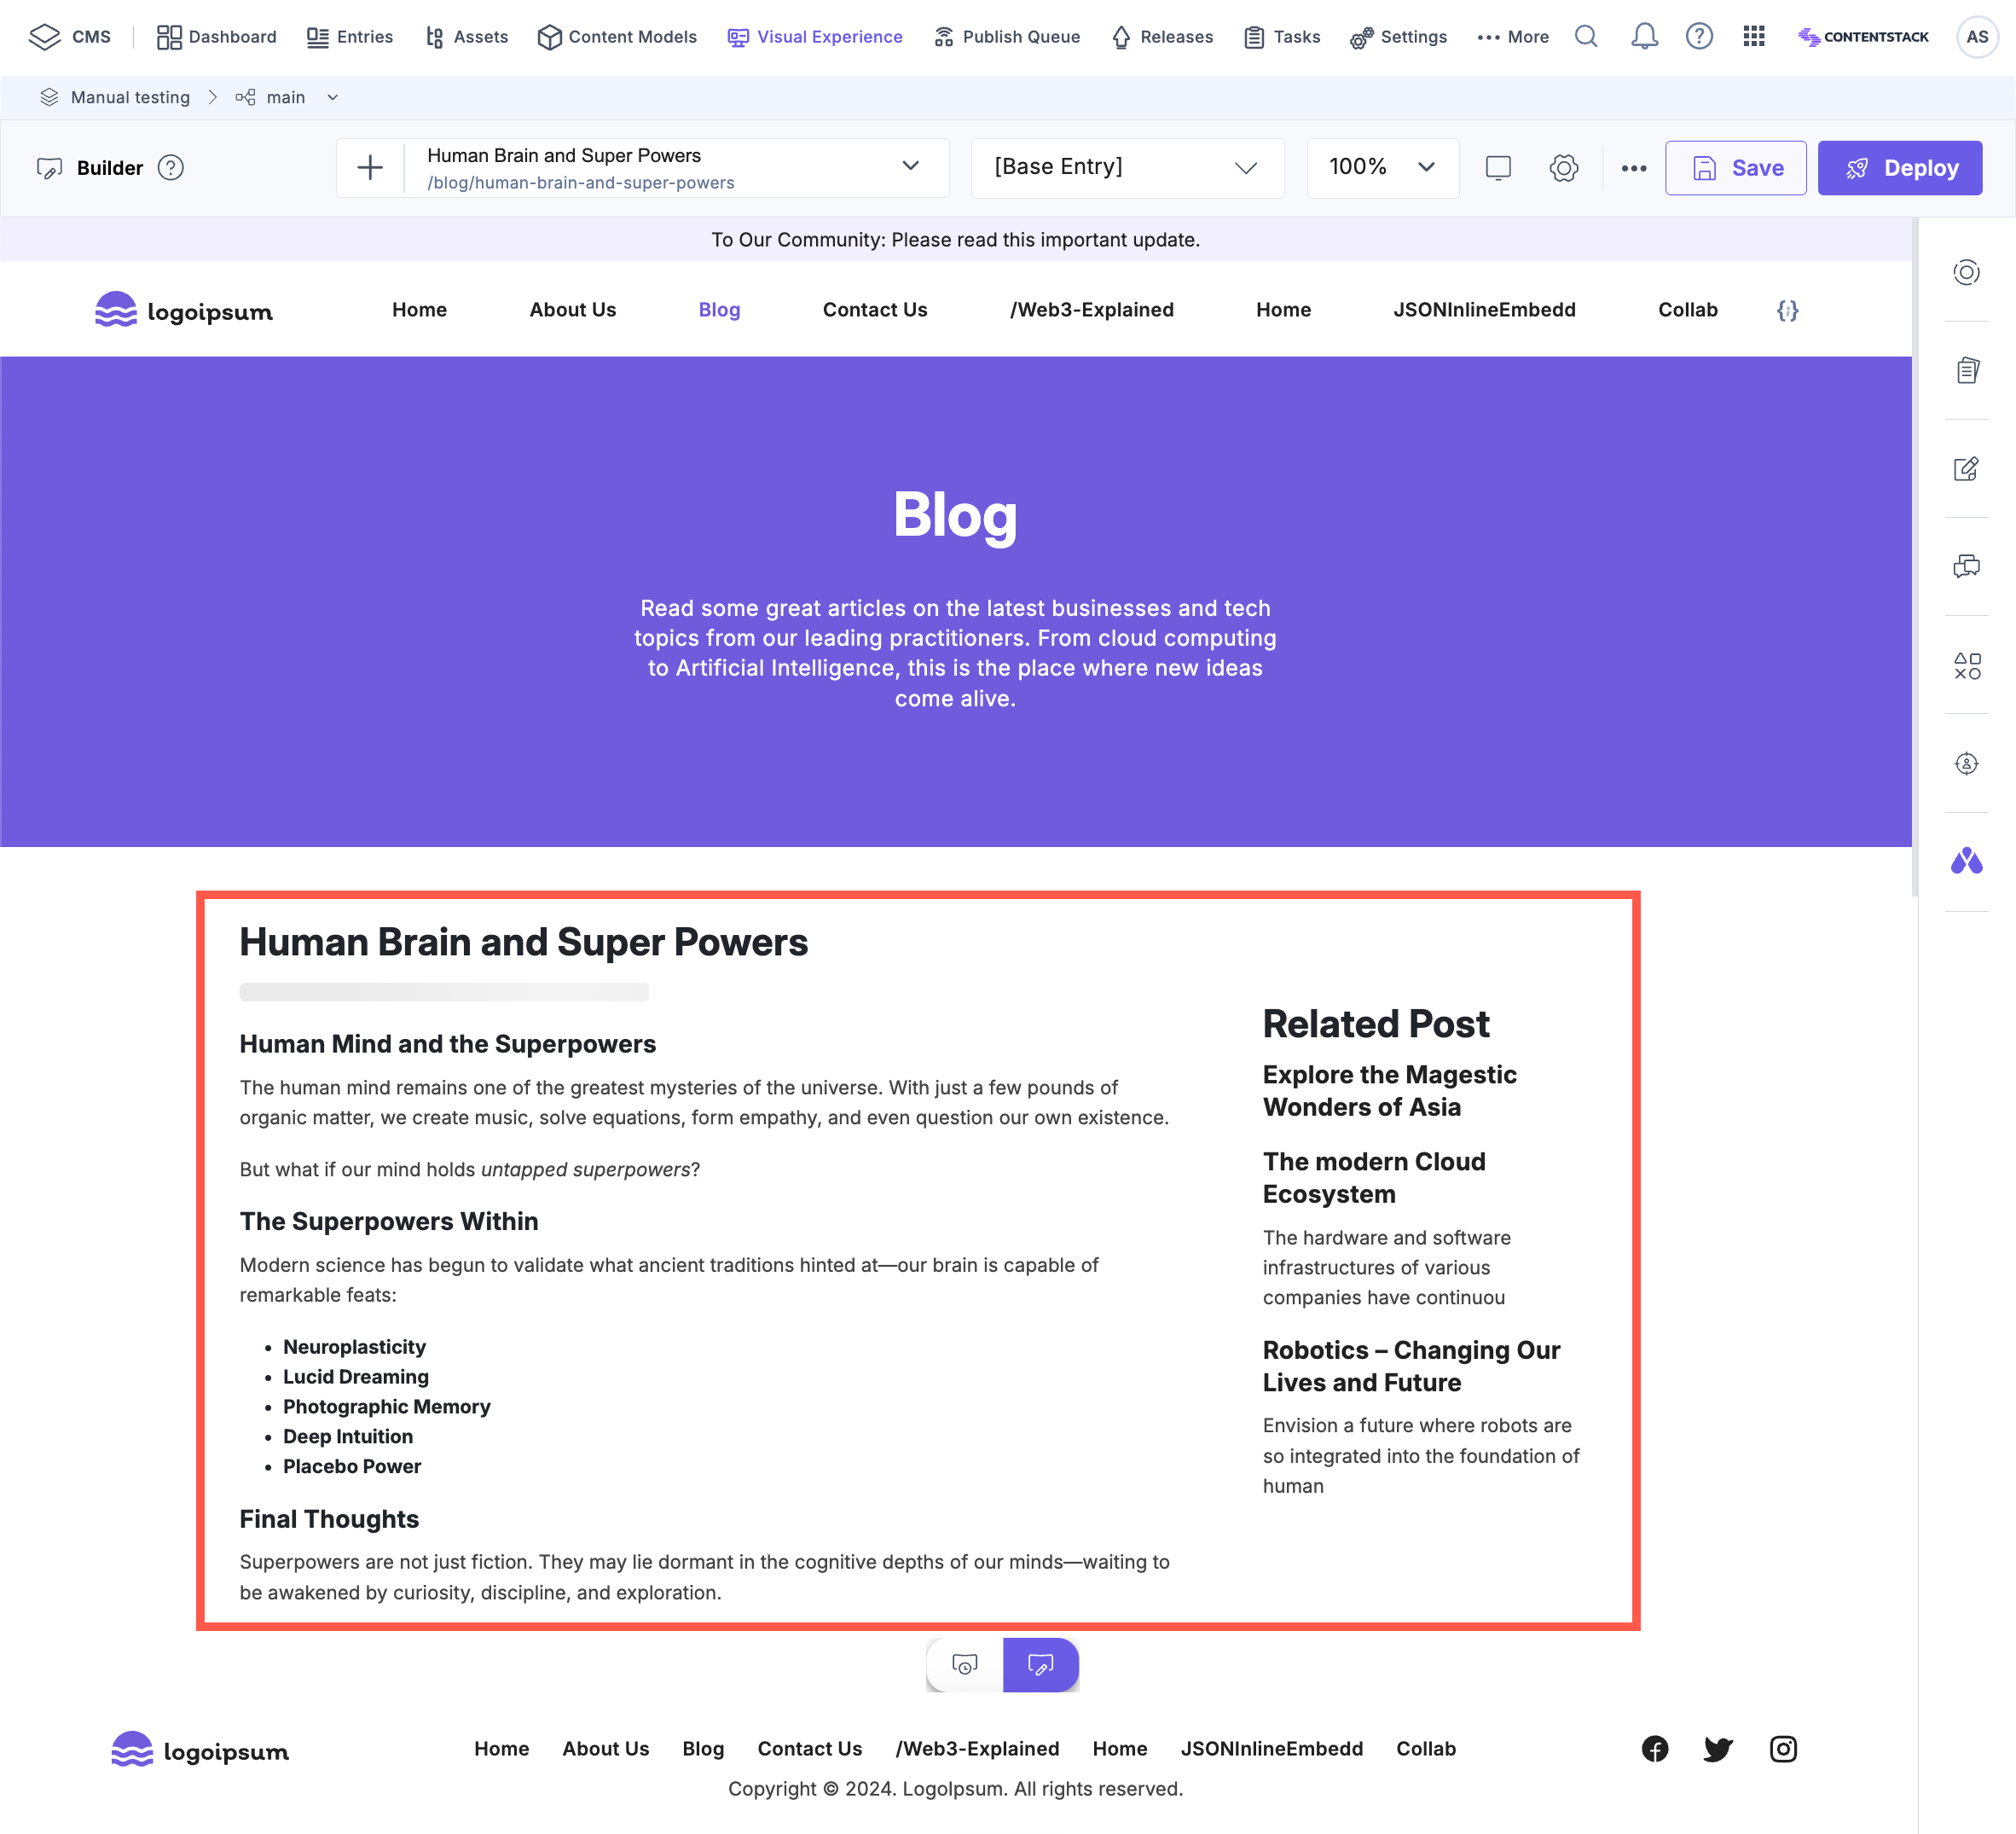
- Click the Create button to create the page. You will see the new URL in the URL bar.

- After creating the page, you can start adding components to build its structure by clicking the Components button.
Note: The available page components are based on the content model of the selected content type.
- When you click a page component (e.g., Hero Banner, FAQ Block), the right panel displays the settings and content fields for that component. Enter your content directly in the panel, and the page preview on the canvas updates in real time.

- Click Save in the top-right corner.
- In the Save Changes modal, confirm your changes by clicking Save again.
By following these steps, you successfully create a fully structured web page, ready for review, publishing, and seamless integration into your site’s navigation.
