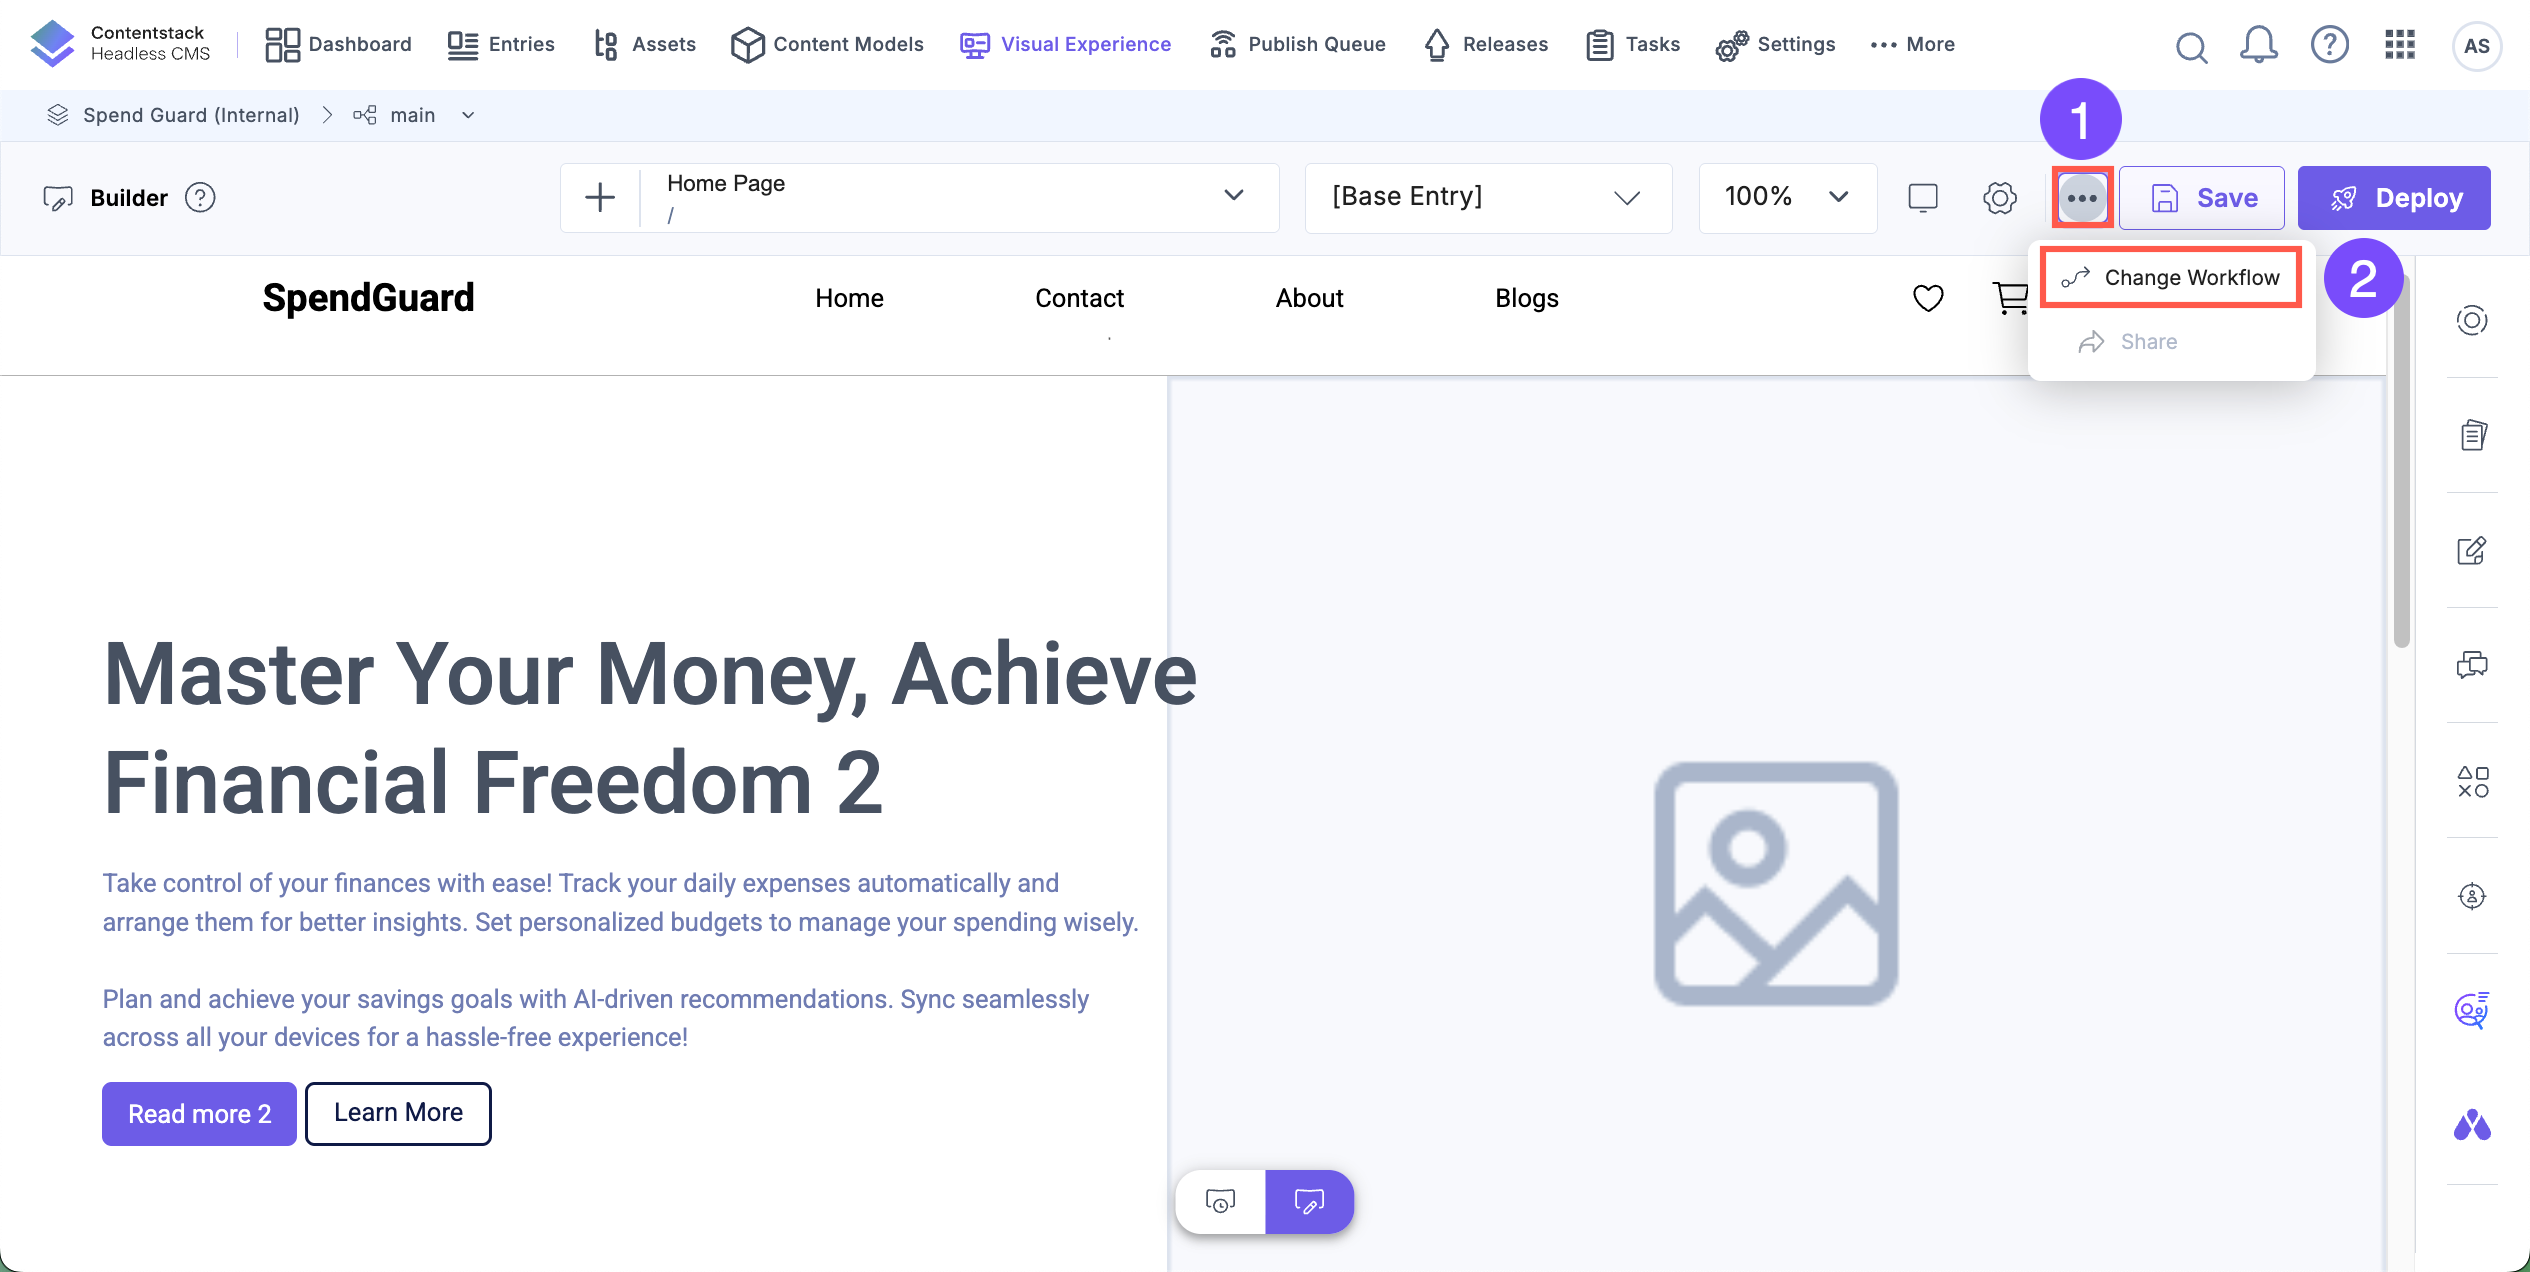
Change Workflow
Visual Builder allows you to change the workflow of a web page directly within the page editing interface. This feature streamlines task assignment, progress tracking, and team collaboration without switching interfaces.
To change the workflow of a web page using Visual Builder, log in to your Contentstack account and perform the following steps:
- Navigate to your stack and select Visual Experience.
- Click Builder in the bottom pill menu.
- Use the URL bar to open the page for which you want to update the workflow.
- Click the “horizontal ellipses” icon and select Change Workflow.

- In the Change Workflow Details modal, perform the following steps:
- Select one or more entries and click Next.
- Choose the appropriate Workflow Stage.
- Optionally, set the due date using the Date Picker tool.
- Assign the stage using one or both of the following dropdowns:
- User(s): Assigns the stage to selected individual users.
- Role(s): Assigns the stage to all users associated with the selected roles.
Tip: The assigned workflow appears in the user’s Tasks section.
- Check Notify via email to send email notifications to the assignees.
- Optionally, provide any additional information or instructions in the Add comment field.
- Click Update Workflow to apply your changes.
The selected entries are updated with the new workflow.
Note: Workflow stages can be updated in bulk only if all selected entries share the same workflow and current stage.
