Bulk Unpublish Entries
Unpublishing multiple entries at once simplifies bulk content removal and streamlines release management.
To bulk unpublish entries, log in to your Contentstack account, and perform the following steps:
- Go to your stack and click the "Entries" icon in the left navigation panel. You can also use the shortcut key “E” (for both Windows and Mac OS users).
- Use the checkboxes to select the entries you want to unpublish.
- After selecting the entries, click the Unpublish option in the floating panel that appears.

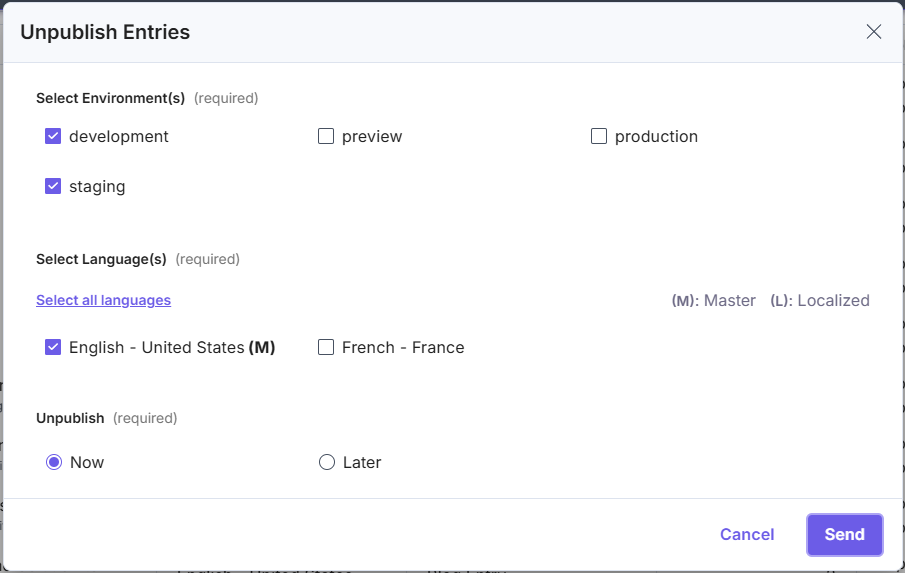
- In the Unpublish Entries modal:
- Select Environment(s): Select the environment(s) where the entries must be unpublished.
- Select Language(s): Select the locale(s) in which you want the entries unpublished. If localized content exists, it will be selected by default.
- Unpublish: Select whether to unpublish the entries immediately (Now) or at a scheduled time (Later).

- Finally, click Send to unpublish the selected entries.
- You can unpublish up to 100 entries in 10 languages across 10 environments at a time..
- When scheduling bulk unpublishing, the date cannot exceed 12 months from the current date.
