Release Preview App Installation Guide
Note: The Release Preview app in Marketplace is now deprecated and no longer supported. We encourage you to use the Contentstack Timeline feature.
The Release Preview app displays the release date and time in a calendar format. It also shows other release details, such as entries or assets that are added to a release with their specific titles, content types, and versions within your Contentstack environment. With the Release Preview app, you can preview your website prior to a scheduled release and compare the changes scheduled for your stack in the upcoming releases.
Contentstack Marketplace lets you integrate the Release Preview app directly into your headless CMS. You can easily use this app to view the upcoming releases of your stack. It displays all scheduled and unscheduled releases to preview the release dates and their scheduled timings on the Release Preview app calendar. It also includes a timeline view of all releases that shows newly added, updated, and deleted entries and assets.
Prerequisites
- Contentstack account
- Access to the Contentstack Organization/Stack as the Owner/Admin
This step-by-step guide explains how to configure and use the Release Preview app within your stack.
Steps for Execution
- Install Release Preview in Contentstack Marketplace
- Use Release Preview within your Stack
- Configure Release Preview Plugin
- Configure Compare Release Preview Setup
-
Install Release Preview in Contentstack Marketplace
Follow the steps below to install the Release Preview app in Contentstack.
- Log in to your Contentstack account.
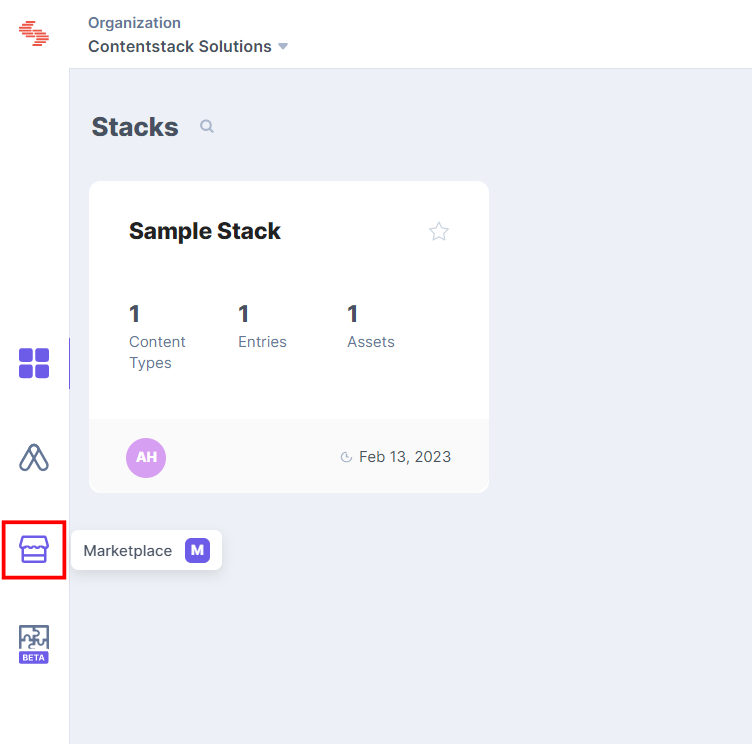
- In the left-hand side primary navigation, click the Marketplace icon to go to the Marketplace.
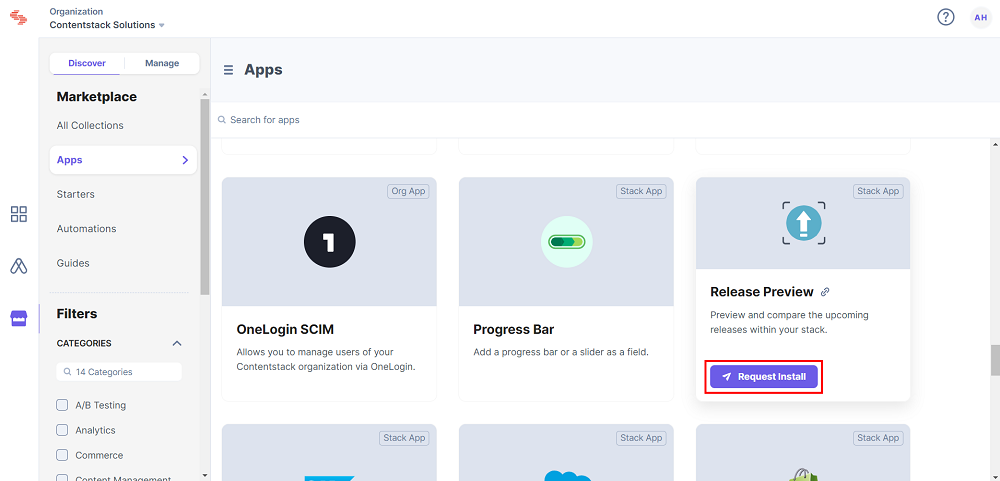
- Click Apps in the left panel.
- Within the Marketplace, you can see all the available apps. Hover over the Release Preview app and click Install App.
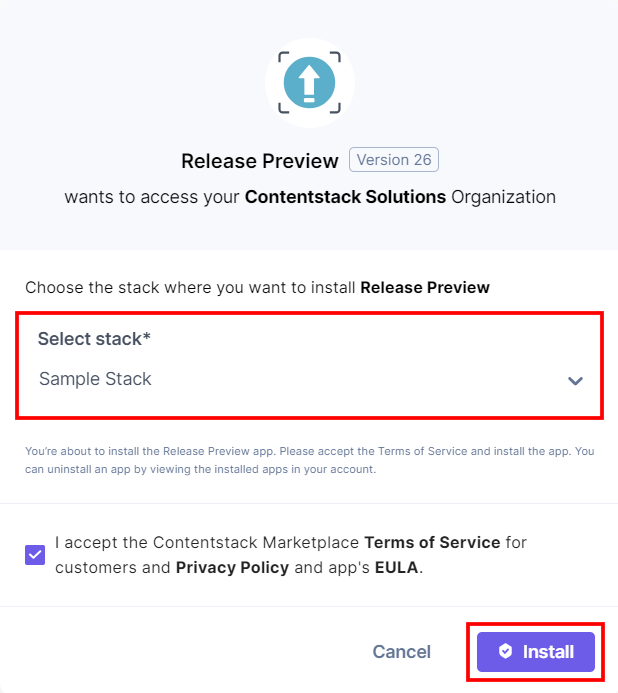
- In the popup window, select the stack where you want to install the Release Preview app and click the Install button.
- On the UI Locations tab, you can see the predefined app locations. You can use the toggle button corresponding to each UI location to enable or disable it based on your requirements.
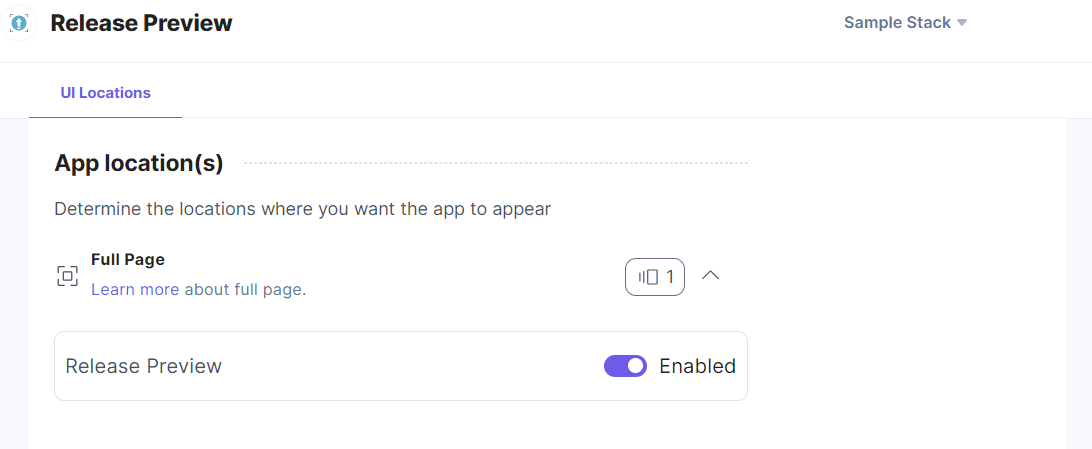
Note: No additional configuration is required to use the Release Preview app.
-
Use Release Preview within your Stack
To use the Release Preview application in your stack, follow the steps given below:
- Log in to your Contentstack account.
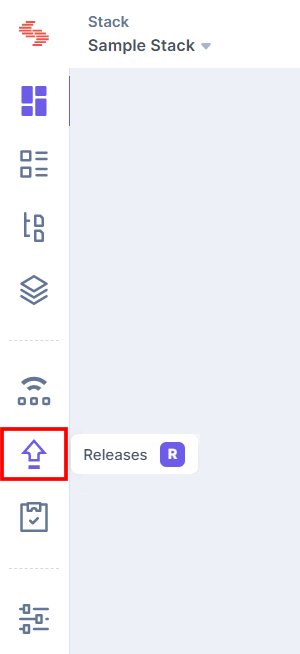
- In the left-hand side primary navigation, you will find the Releases icon (as shown below). Click the icon to go to the Releases.
- Within the Releases, you will be able to add a new release by clicking the + New Release button.

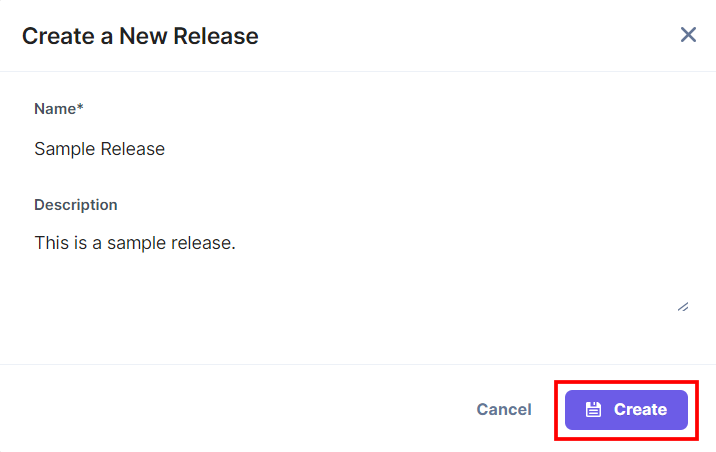
- Create a new release, enter the details, and click the Create button.
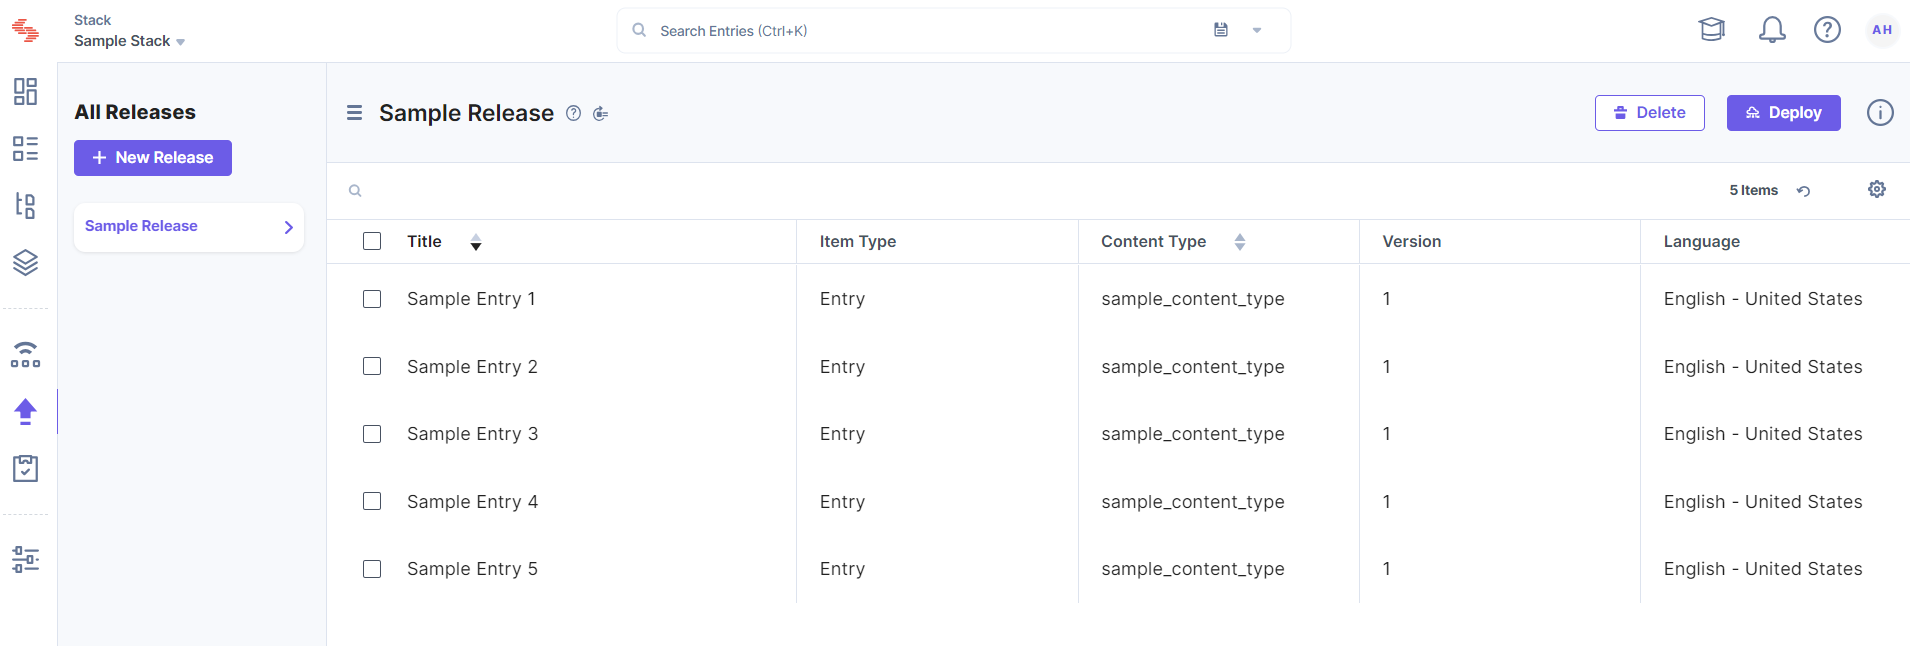
- Add entries to the release for bulk publishing.
- To schedule and lock the release for publishing, click the Deploy button.
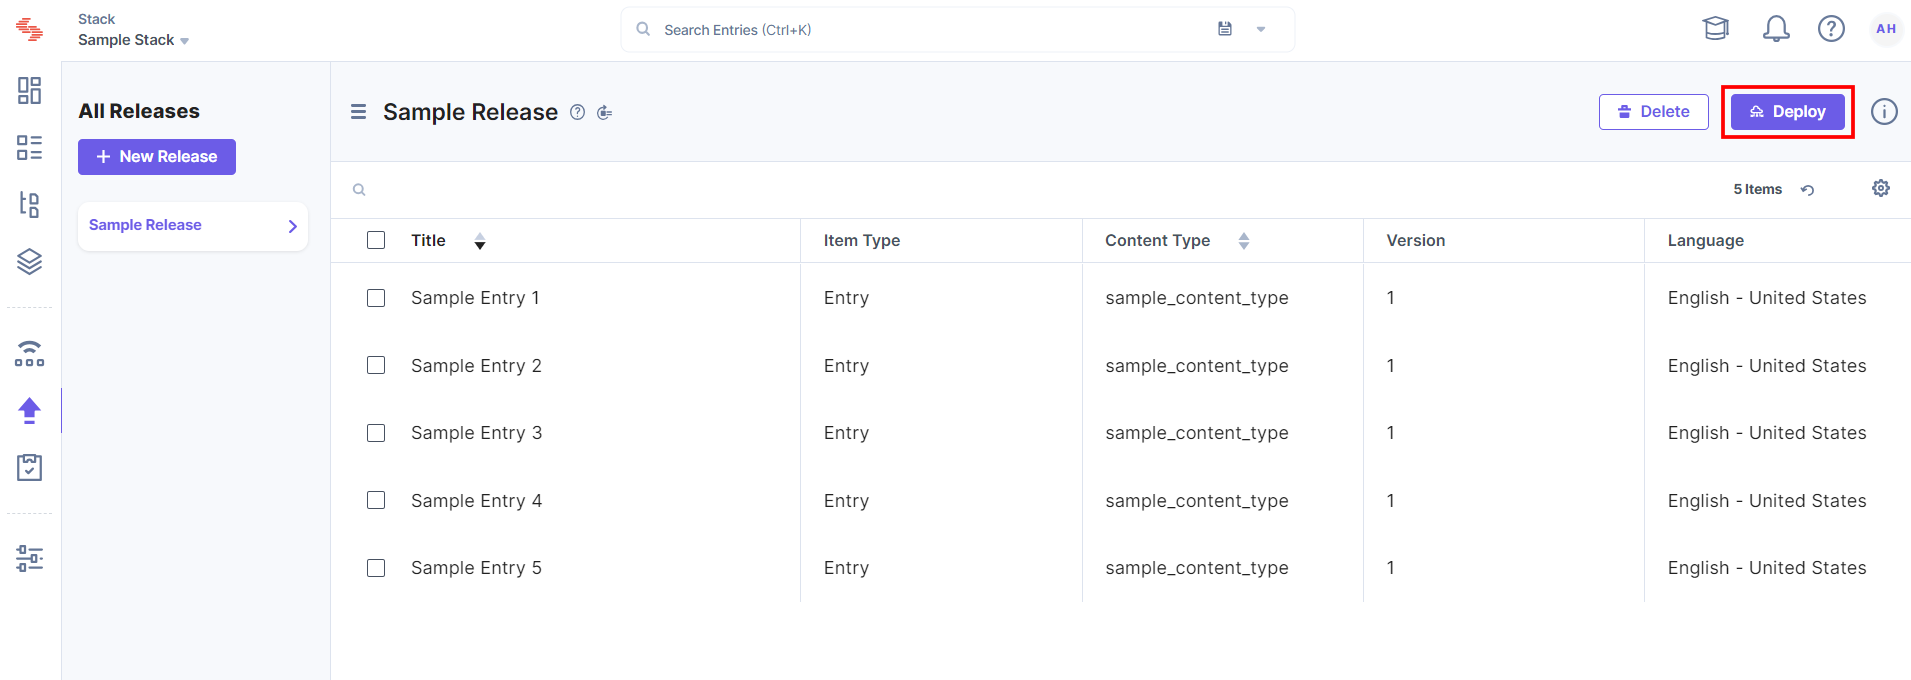
Select the environment(s), then select Later, choose the release date and time, and then click the Deploy button.
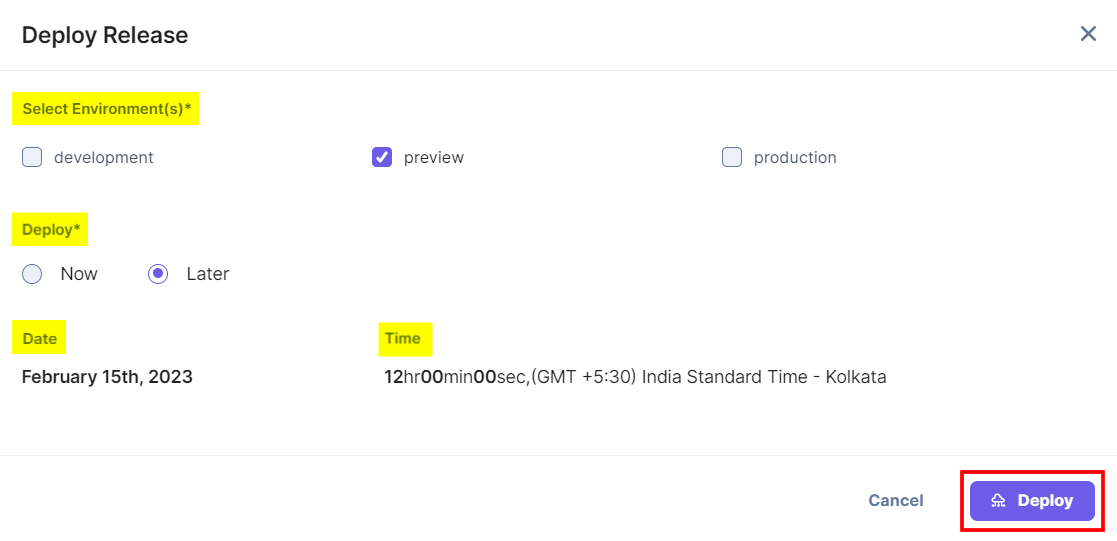
Note: If the release date is not confirmed, you can use the Release Preview app to quickly set a tentative date and time.
The release is now locked. You cannot add, update or delete any entry or asset from the locked release.
Release Preview Calendar
- Now go to the stack dashboard. In the left-hand side primary navigation, you will find the Release Preview app icon (as shown below).
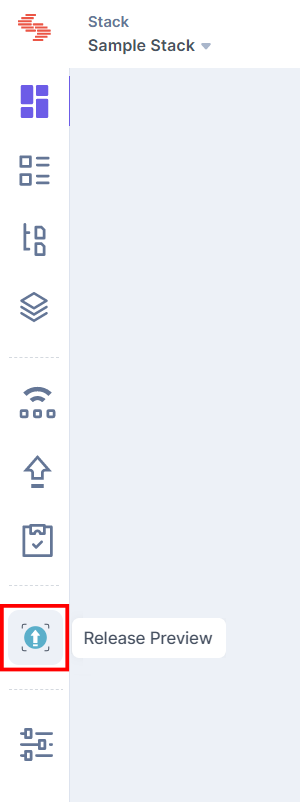
Note: Release Preview is a Full Page Location app. For more information, refer to the Full Page Location documentation.
- Click the app icon to view the Release Preview app within your CMS.
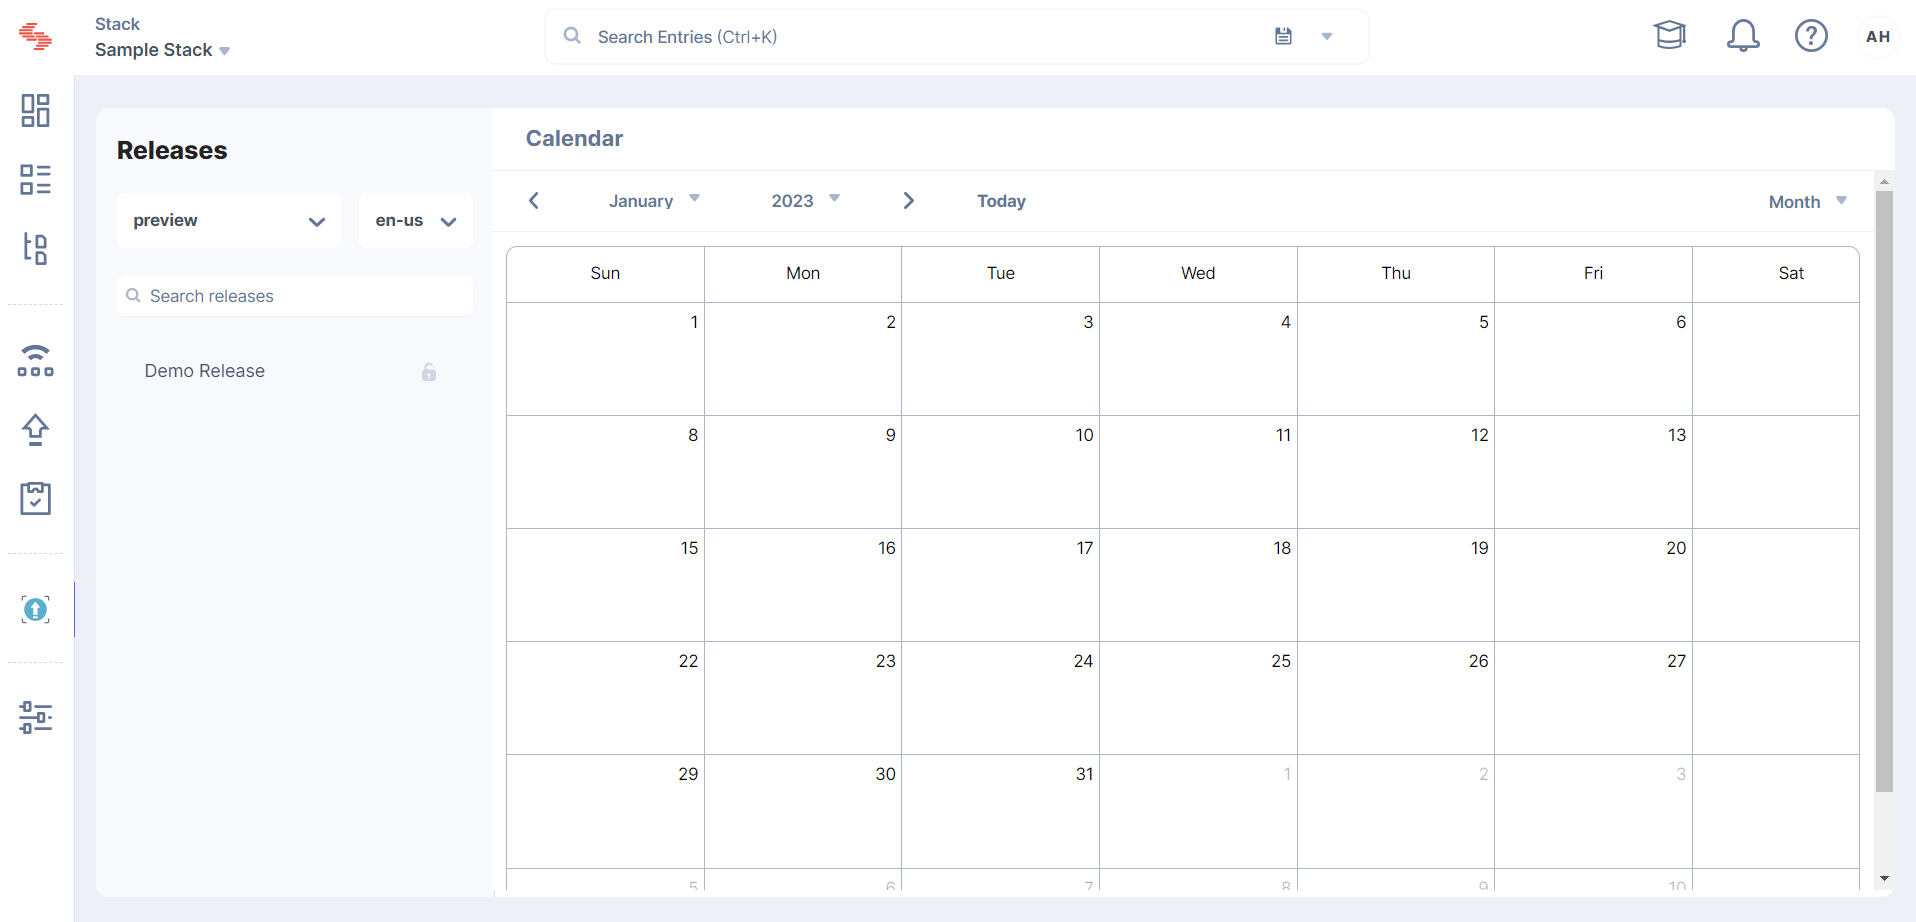
- The Release Preview Dashboard will show a list of all the scheduled (locked), tentative scheduled, and unscheduled releases in the left side panel and display all the scheduled (locked) and tentatively scheduled releases in the calendar view.
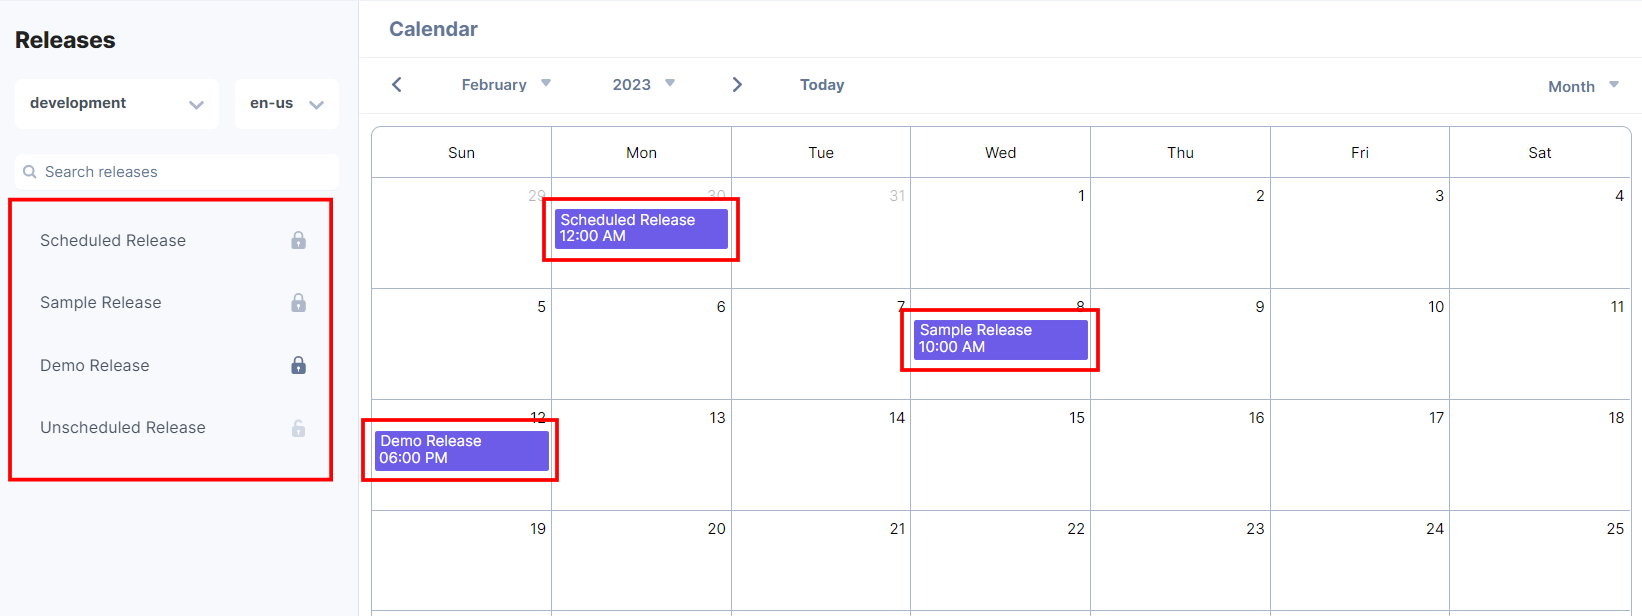
Also, all the scheduled publishing events will be displayed in the calendar.
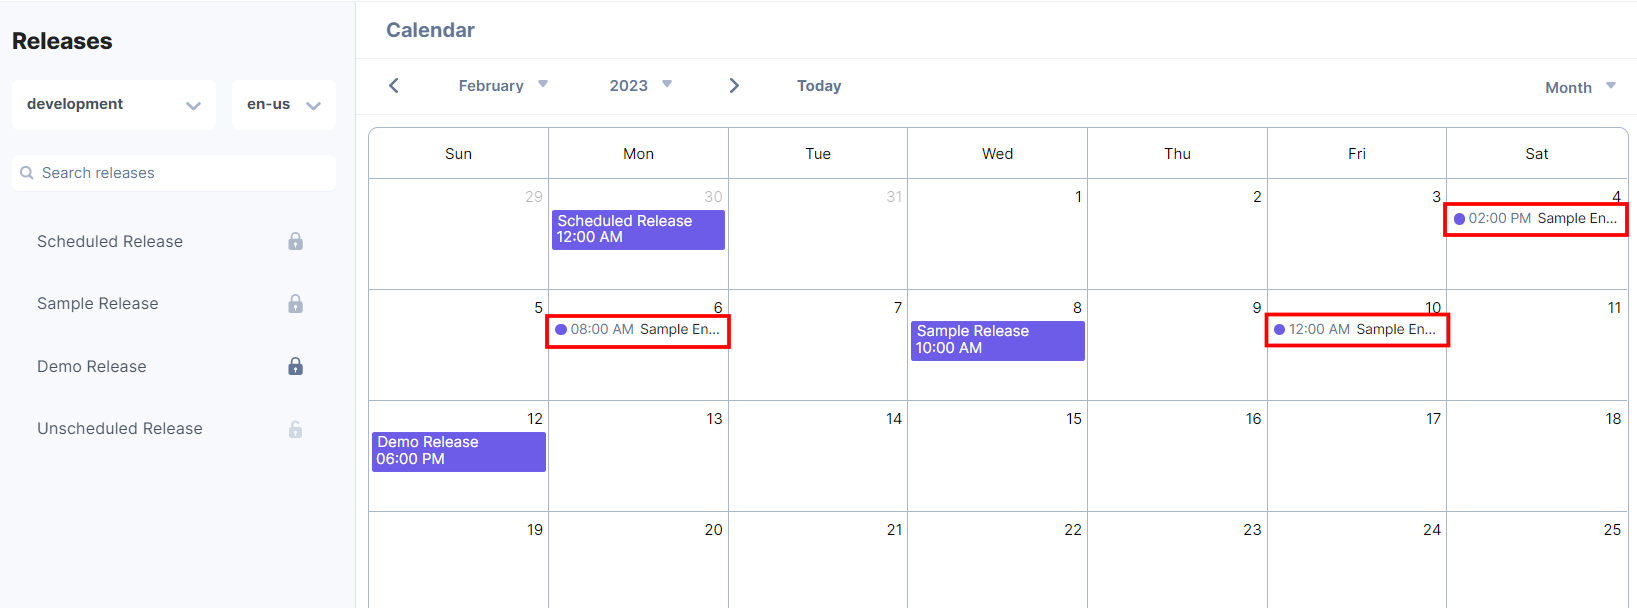
By default, the format to view the Release Preview Calendar is set to Month.
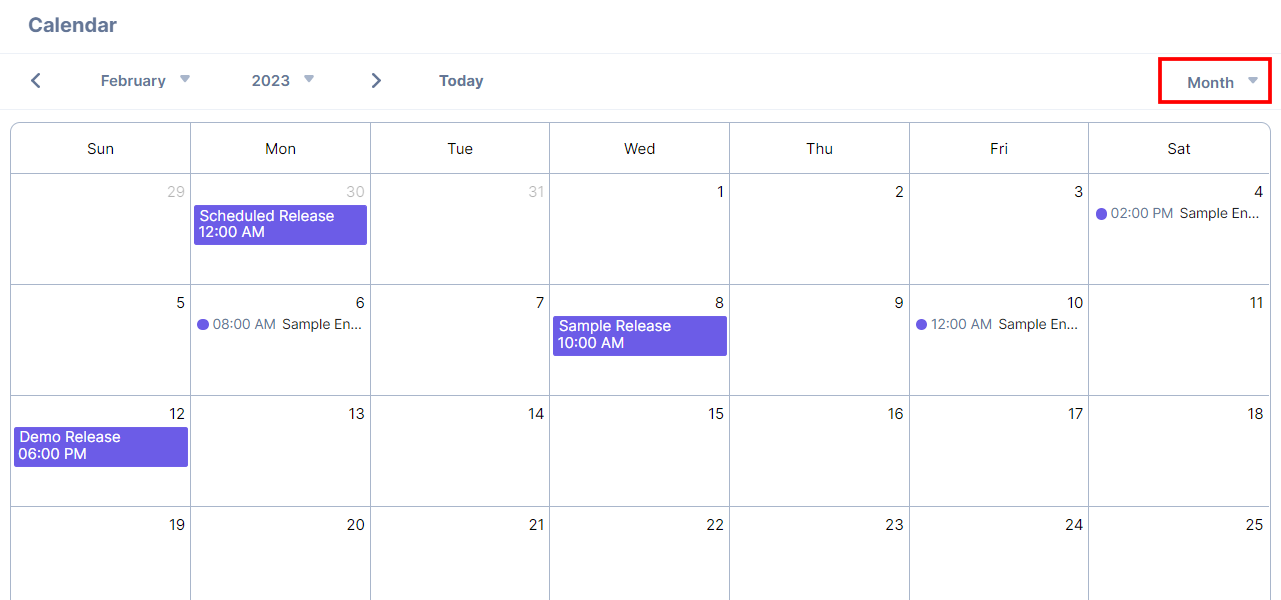
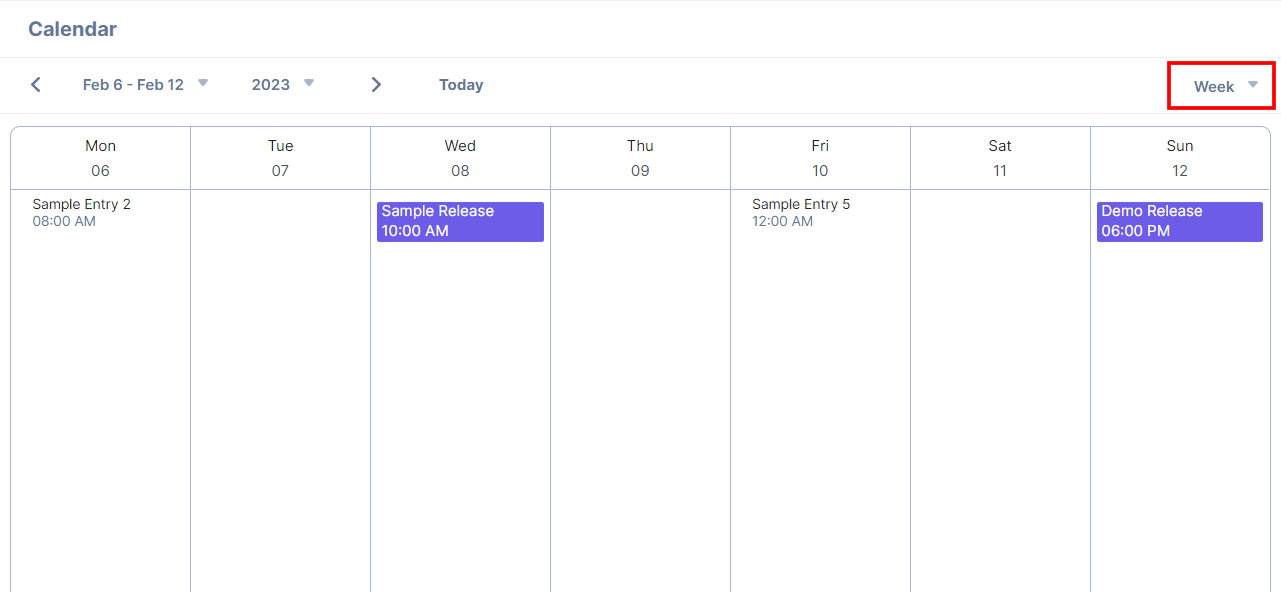
You can click the top-right dropdown in the Release Preview app and select the Week option to view the calendar in the week format.
- If you click any scheduled or locked release from the Release Preview app calendar, it redirects you to the website preview of that release.
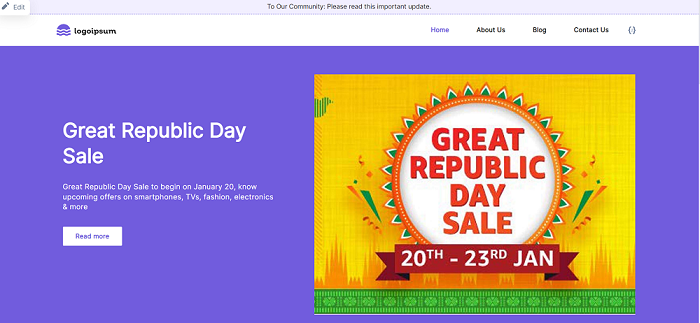
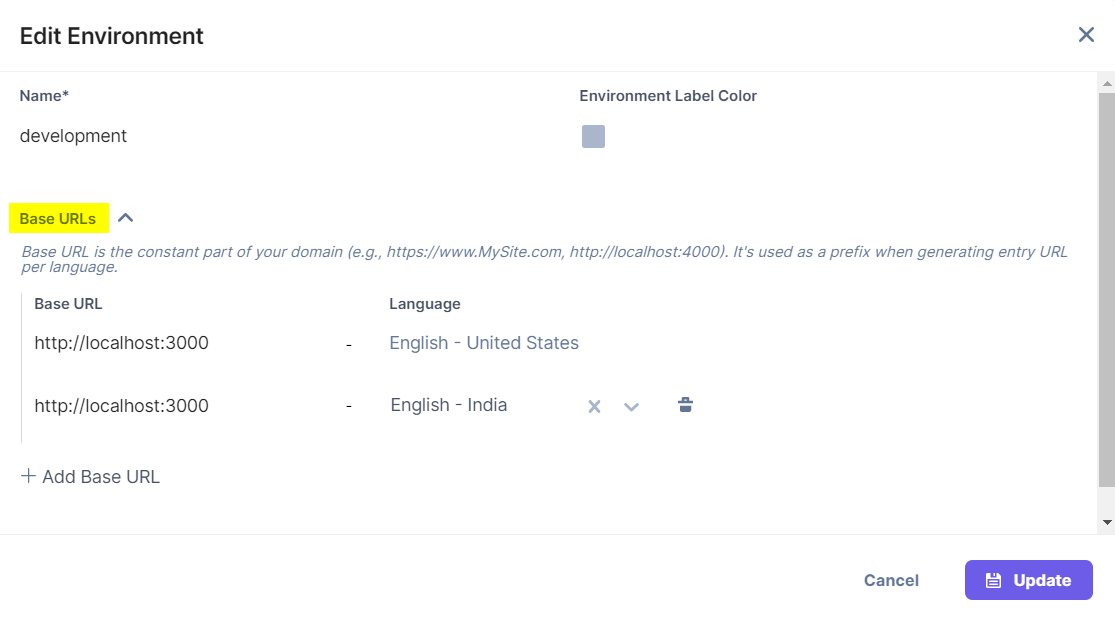
To preview the website, you must configure the Base URL and select the corresponding Language in the Environment settings of your stack.
Release Preview Timeline
To view the Release Preview timeline, click the release name in the left panel of the Release Preview app.- The Release Preview timeline will show the release details, which include the entries and assets added to the release for publishing to the specified environment and locale.
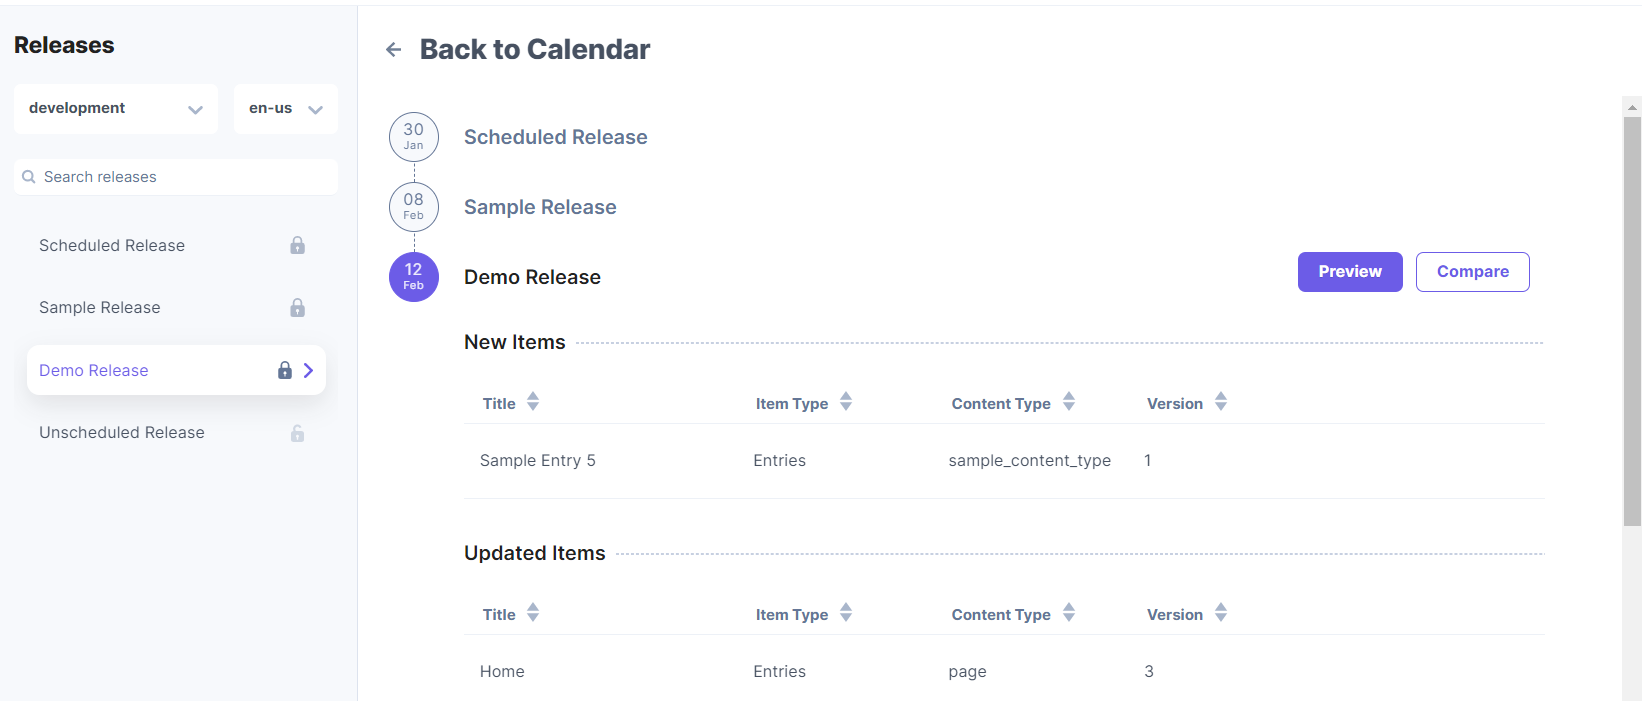
Note: The timeline shows the releases according to their scheduled publish dates.
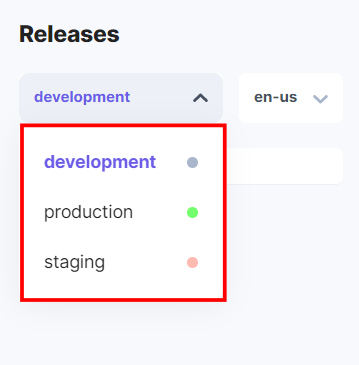
Upcoming releases are filtered using the following filters:- Environment Filter: You can view the upcoming releases based on the Environment selected. This environment is already set at the time of deploying a release or while setting the tentative date and time for the unscheduled releases.
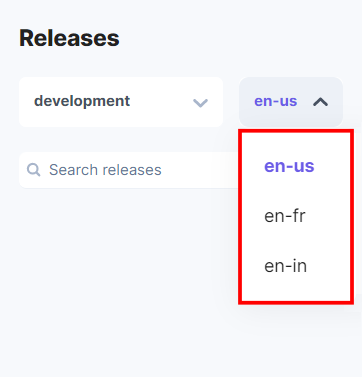
- Locale Filter: According to the selected Environment and the corresponding Base URL, the Locale dropdown shows the content languages to preview the respective releases.
- Environment Filter: You can view the upcoming releases based on the Environment selected. This environment is already set at the time of deploying a release or while setting the tentative date and time for the unscheduled releases.
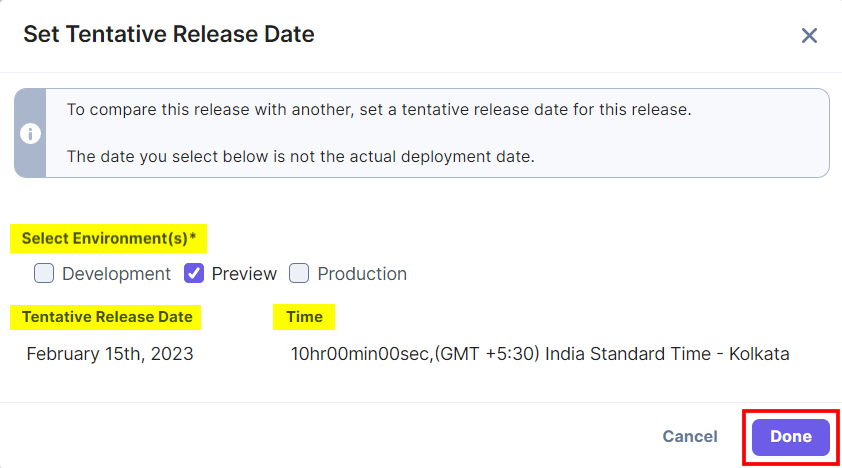
- You can set the tentative date and time for the unscheduled releases for publishing by clicking the unscheduled release name in the Release Preview app. In the modal, select the Environment(s), choose the Tentative Release Date and Time, and then click Done.
The Locked releases are represented with a dark gray lock icon, the Soft-locked releases are represented with a light gray lock icon, and the Unscheduled releases are represented with a light gray open lock icon.
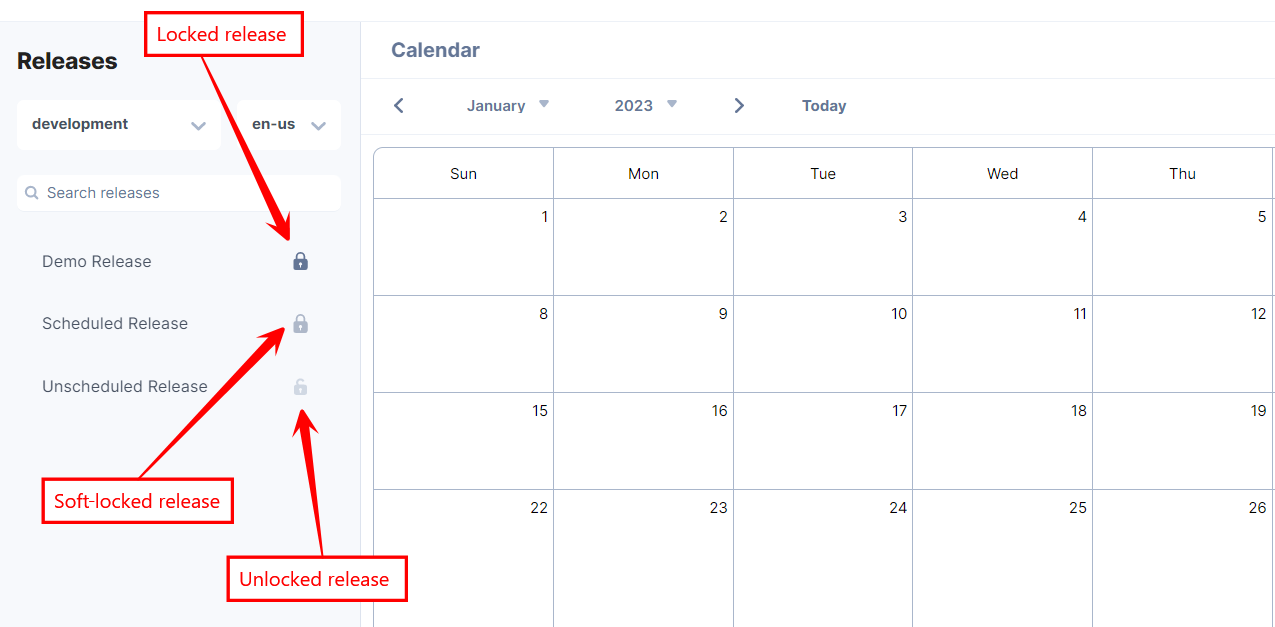
Note: You can modify only the soft-locked and unscheduled releases and not the locked ones.
- The Contentstack Release Preview app allows you to view the release details, preview the website, and compare the website changes as well as the individual content changes within the Release Preview timeline.
The release details include New Items (content saved to publish for the first time) and Updated Items (content that is already published). The title, item type (Entries or Assets), content type, and version is provided for each item.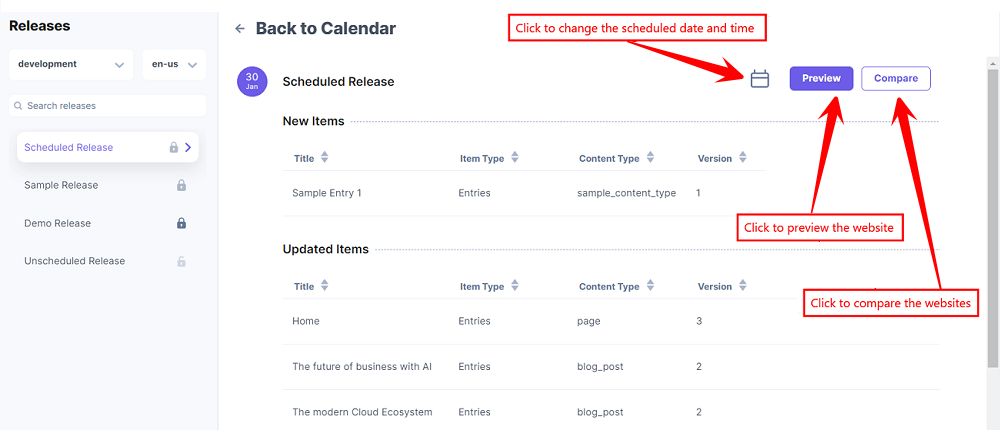
- To change the date and time of the soft-locked release, click the Change date icon, and then a pop-up appears. Select the Date and Time (optional), and click the Done button to modify the release date and time.

Note: For locked releases, the Change Date button is hidden.
- Click the Preview button to preview the website with the upcoming release changes.

- Click the Compare button to compare the current and upcoming release websites.
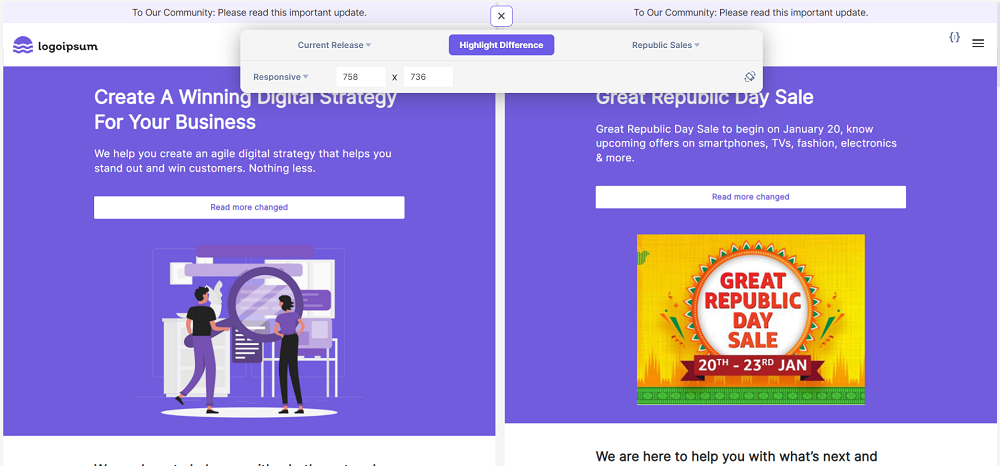
Click the Highlight Differences button to view the modified content.
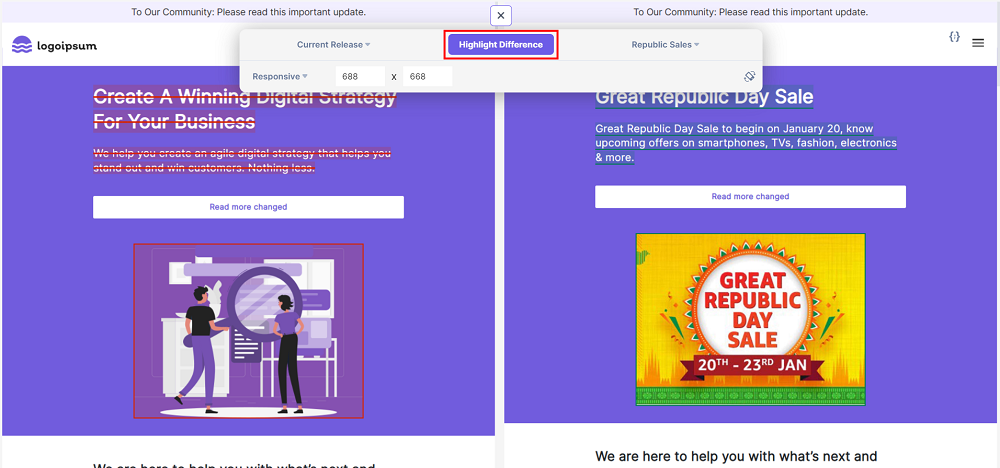
You can compare and view the releases in responsive mode. Select a view option from the dropdown list to view the screen in different sizes and orientations. By default, it is set to Responsive.
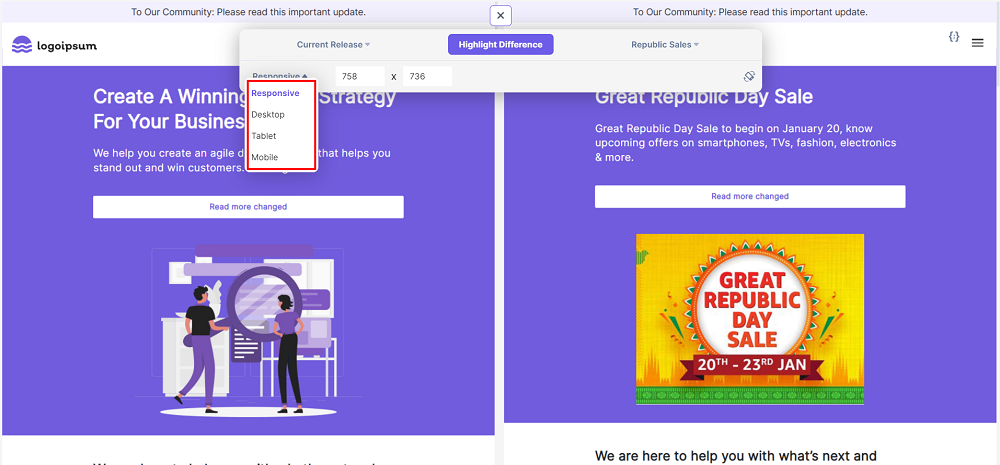
Note: In the Responsive view option, you can customize the width and height of the screen. For the Desktop, Tablet, and Mobile view options, the dimensions have already been set in the Release Preview app.
In the right-hand side of the panel, you can see the Rotate Screen icon. It switches the screen from portrait to landscape mode and vice versa.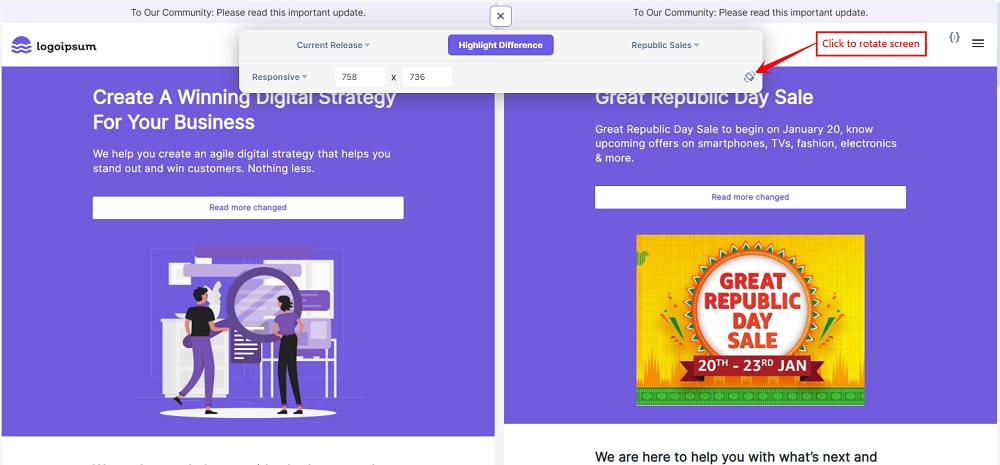
- Additionally, you can compare the entry versions in the Updated Items section. You can also copy the URL of the entries.
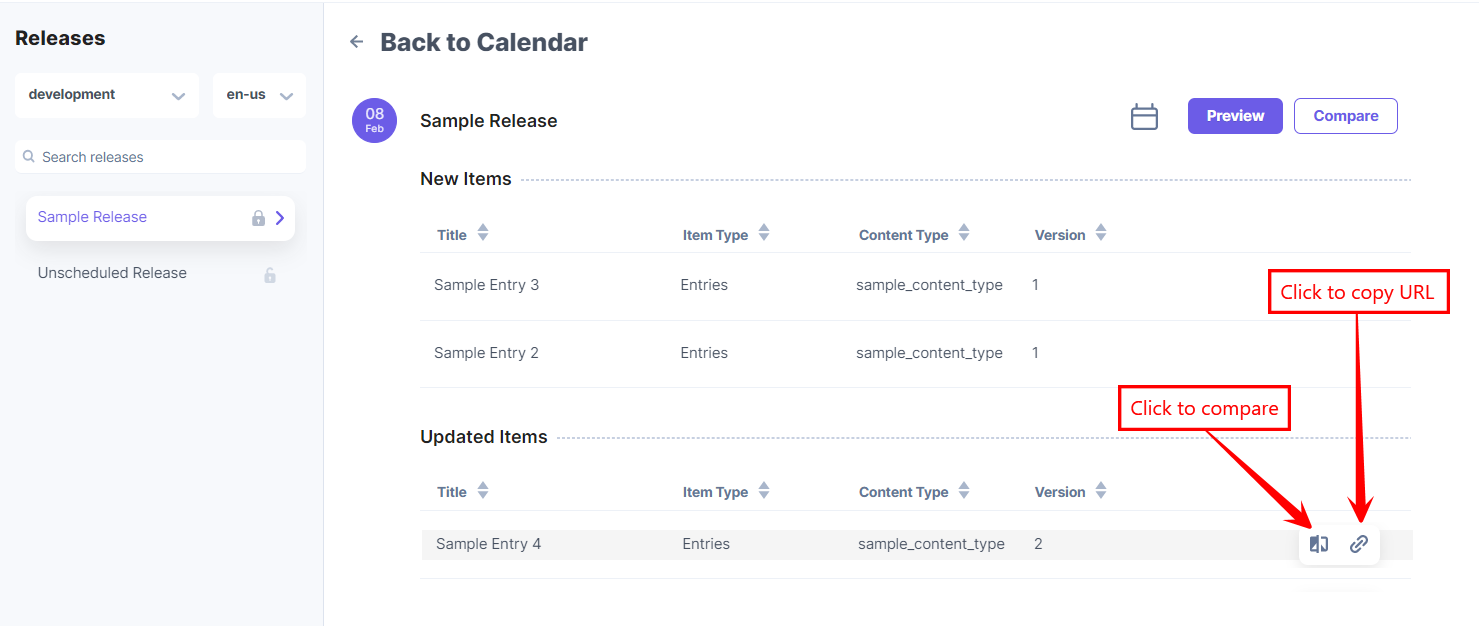
- Entries can be compared with their different release versions, and the differences will be highlighted in red (deletions) and green (additions) color. Click Done to close the comparison window.
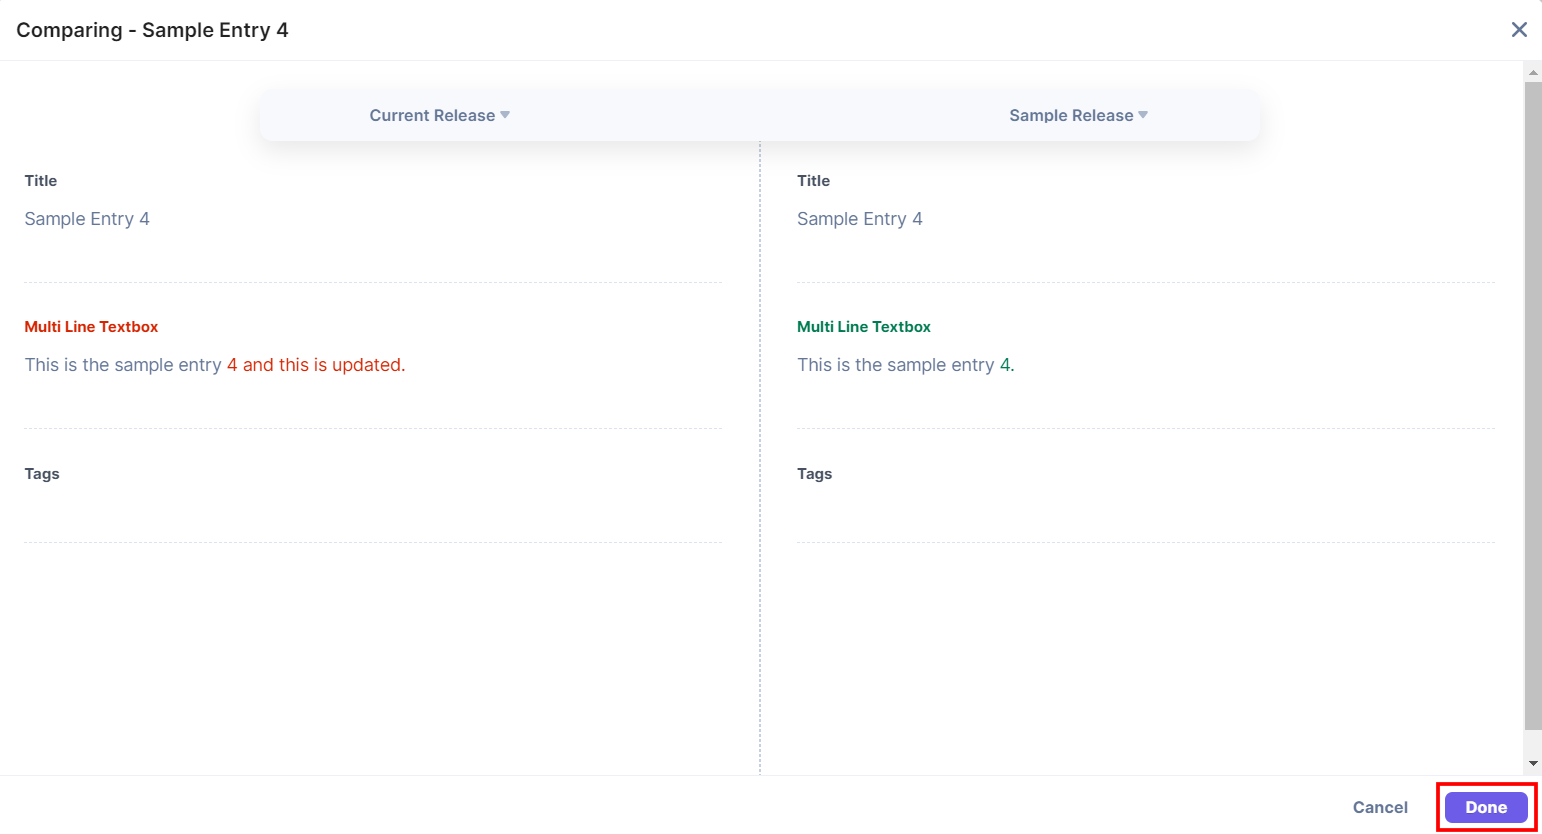
Note: The compare feature does not support the Assets Item Type.
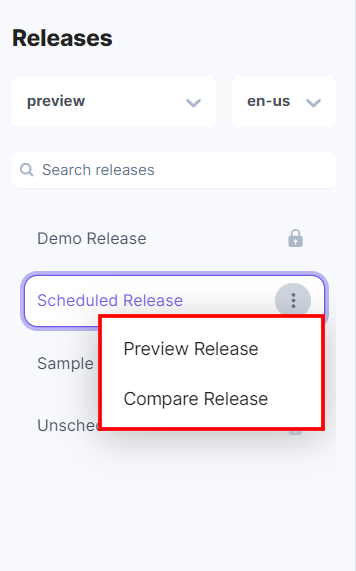
- You can also preview and compare the changes by clicking the three ellipses on the release name in the list of releases.
-
Configure Release Preview Plugin
An additional Release Preview Plugin setup needs to be configured to preview the website and compare the existing website with the upcoming release website.You have a detailed step-by-step guide on how to set up Release Preview for your stack using two set up methods:
Note: The JavaScript Delivery SDK supports plugins like the Release Preview Plugin from version 3.16.0.
-
Client-side Rendering (CSR)
Client-side rendering (CSR) is the technique where developers render their content directly to a web browser using JavaScript. This section explains in detail how to set up Release Preview for your Client-side Rendering websites.- Install the Release Preview Middleware library:
The Release Preview Middleware library primarily has two functions:- To show the website content based on the release id. It uses Contentstack’s SDK to fetch details and process the response to preview the release-specific content.
- To compare and highlight the content differences.
- Using script tag: To import the Release Preview Middleware using the script tag of the HTML file, add the following code:
<script src="https://unpkg.com/@contentstack/delivery-plugin-release-preview/dist/index.js"></script> - Using npm: Alternatively, you can install the Release Preview Middleware package via npm using the following command:
npm install @contentstack/delivery-plugin-release-preview
- Store the Release Preview config in a session:
You can create a utility function that makes the Release Preview config received in the query params persistent on page navigation.// utils.ts export const getReleasePreviewSession = (searchParams: URLSearchParams) => { const release_session_key = 'release_preview_session'; const tentativeReleases = searchParams.get('tentativeReleases'); const release_id = searchParams.get('release_preview_id'); const params = { enabled: true, release_id, tentativeReleases: tentativeReleases && JSON.parse(decodeURIComponent(tentativeReleases)), } const releaseSessionInfo = sessionStorage.getItem(release_session_key); if(release_id || !releaseSessionInfo) { sessionStorage.setItem(release_session_key, JSON.stringify(params)); return params; } return JSON.parse(releaseSessionInfo); } - Create and use the Release Preview plugin:
Create and add the Release Preview plugin to the Contentstack.Stack() method of Contentstack's Delivery SDK.// sdk.ts import * as contentstack from "contentstack"; import { releaseReplaceAlgorithm, releaseReplacePreReq } from "@contentstack/delivery-plugin-release-preview"; class ReleasePreviewPlugin { onRequest (stack, request) { releaseReplacePreReq(stack, request); return request; } async onResponse(stack, request, response, data) { const _data = data['entries'] || data['assets'] || data['entry'] || data['asset']; await releaseReplaceAlgorithm(_data, stack); return data } } export const stack = contentstack.Stack({ /* YOUR CONFIG HERE */, live_preview: { /* YOUR LIVE PREVIEW CONFIG HERE */ /* NOTE: Release preview also relies on this config to work */ }, plugins: [ new ReleasePreviewPlugin() ] }); - Initialize the Release Preview:
We have used React.js for this example.
Use the ReleasePreview.init(stack, config) method from @contentstack/delivery-plugin-release-preview to initialize the Release Preview and pass the stack and config created in previous steps as parameters.// App.tsx import ReleasePreview from "@contentstack/delivery-plugin-release-preview"; import { useSearchParams } from "react-router-dom"; import { stack } from "./sdk"; import { getReleasePreviewSession } from "./utils"; function App() { const [isLoading, setLoading] = useState(true); const [searchParams] = useSearchParams(); useEffect(() => { (async () => { const release_preview_options = getReleasePreviewSession(searchParams); /* stack here is the created Contentstack Stack Instance */ await ReleasePreview.init(stack, release_preview_options); setLoading(false); })() }, []); return (isLoading ? null : /*YOUR COMPONENT HERE*/) }
- Install the Release Preview Middleware library:
-
Server-side Rendering (SSR)
Server-side rendering (SSR) is the technique where an application converts HTML files on a server (instead of a browser) into a rendered HTML client page. This section explains in detail how to set up Release Preview for the Server-side rendering websites.- Install the Release Preview Middleware library:
Install the Release Preview Middleware package via npm using the following command:npm install @contentstack/delivery-plugin-release-preview
- Store the Release Preview config in a session:
You can create a utility function that makes the Release Preview config received in the query params persistent on page navigation.// utils.js const release_session_key = 'release_preview_session'; export const getReleasePreviewSession = (req, res) => { const searchParams = req.query; const tentativeReleases = searchParams['tentativeReleases']; const release_id = searchParams['release_preview_id']; const params = { enabled: true, release_id, tentativeReleases: tentativeReleases && JSON.parse(decodeURIComponent(tentativeReleases)), } const releaseSessionInfo = req.session[release_session_key]; if(release_id || !releaseSessionInfo) { req.session[release_session_key] = JSON.stringify(params); return params; } return JSON.parse(releaseSessionInfo); } - Create and use the Release Preview plugin:
Create and add the Release Preview plugin to the Contentstack.Stack() method of Contentstack's Delivery SDK.// sdk.js const contentstack = require("contentstack"); const { releaseReplaceAlgorithm, releaseReplacePreReq } = require("@contentstack/delivery-plugin-release-preview"); class ReleasePreviewPlugin { onRequest (stack, request) { releaseReplacePreReq(stack, request); return request; } async onResponse(stack, request, response, data) { const _data = data['entries'] || data['assets'] || data['entry'] || data['asset']; await releaseReplaceAlgorithm(_data, stack); return data } } export const stack = contentstack.Stack({ /* YOUR CONFIG HERE */, live_preview: { /* YOUR LIVE PREVIEW CONFIG HERE */ /* NOTE: Release preview also relies on this config to work */ }, plugins: [ new ReleasePreviewPlugin() ] });Note: If you are using Live Preview 2.0, you need to pass the Management token in your Live Preview configuration.
- Initialize Release Preview Middleware:
Set up the Release Preview Middleware to process the response with release-specific content. Create config using the query params passed for release preview and pass as parameter to the ReleasePreview.init(stack, config) method from @contentstack/delivery-plugin-release-preview along with the stack instance created in the previous step.// app.js const { default: ReleasePreview } = require('@contentstack/delivery-plugin-release-preview'); const { stack } = require('./sdk'); const { getReleasePreviewSession } = require('./utils'); app.use(async (req, res, next) => { try { const release_preview_options = getReleasePreviewSession(req, res) await ReleasePreview.init(stack, release_preview_options); } catch(err) { console.error('error while setting release preview', err); } next(); })
- Install the Release Preview Middleware library:
-
-
Configure Compare Release Preview Setup
The Compare Utils SDK listens to compare requests from Release Preview App compare view. Therefore, this SDK needs to be executed on the client side. To install it, you can use npm or import it directly into your HTML page code.- Using npm:
import '@contentstack/delivery-plugin-release-preview/dist/compareUtils.browser.min.js' import '@contentstack/delivery-plugin-release-preview/dist/compareUtilsStyle.css' - Using HTML tag: To import the Release Preview Utils SDK JavaScript and CSS code, add the following lines in your HTML page:
<link rel="stylesheet" href="https://cdn.jsdelivr.net/npm/@contentstack/delivery-plugin-release-preview/dist/compareUtilsStyle.css" />
<script src="https://cdn.jsdelivr.net/npm/@contentstack/delivery-plugin-release-preview/dist/compareUtils.browser.min.js"></script>
- Using npm:
-
Note: You can use the Release Preview SDK plugin to preview and compare your website. Release preview compare relies on Live Preview edit tags to work.


.svg?format=pjpg&auto=webp)
.svg?format=pjpg&auto=webp)
.png?format=pjpg&auto=webp)


.png?format=pjpg&auto=webp)